![Cover image for Build React Native Fitness App #11: [Android] Firebase Google Login](https://media2.dev.to/dynamic/image/width=1000,height=420,fit=cover,gravity=auto,format=auto/https%3A%2F%2Fcdn-images-1.medium.com%2Fmax%2F1024%2F0%2AlOQI1BSNl5wDSHdi.png)
This tutorial is the eleventh chapter of the series build fitness tracker this app use for track workouts, diets, or health activities and analyze data and display suggestions. The ultimate goal is to create food and health recommendation using Machine learning. We start with creating an app that the user wants to use and connect to google health and apple heath for gathering everything to create the dataset that applies for train model later. I start with the ultimate goal. Still, we will begin to build a react native app and set up screen navigation with React navigation. inspired by React native template from instamobile
your can view the previous chapter here
we continue from the last section that success on integrating Google login in React Native on iOS this chapter. We stayed on the Android part is simple again because Android comes from Google, like Firebase, that integration is so many steps more than iOS.
in this tutorial, I use the real device for testing
a first important step is re-build
react-native link @react-native-community/google-signin --platforms=android
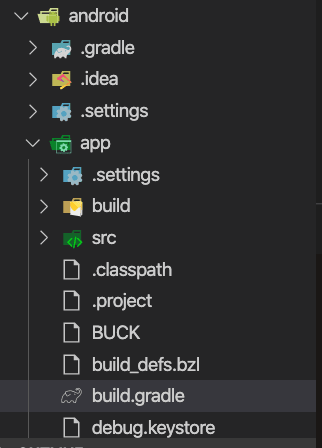
we assign the certificate to Firebase. First, we need to find a debug.keystore that use on our app
open android/app/build.gradleand find signingConfigs
signingConfigs {
       debug {
           storeFile file('debug.keystore')
           storePassword 'android'
           keyAlias 'androiddebugkey'
           keyPassword 'android'
       }
   }
you will see keystore data and keystore path that we use for getting a certificate
then use this command
keytool -list -v -alias androiddebugkey -keystore ./android/app/debug.keystore
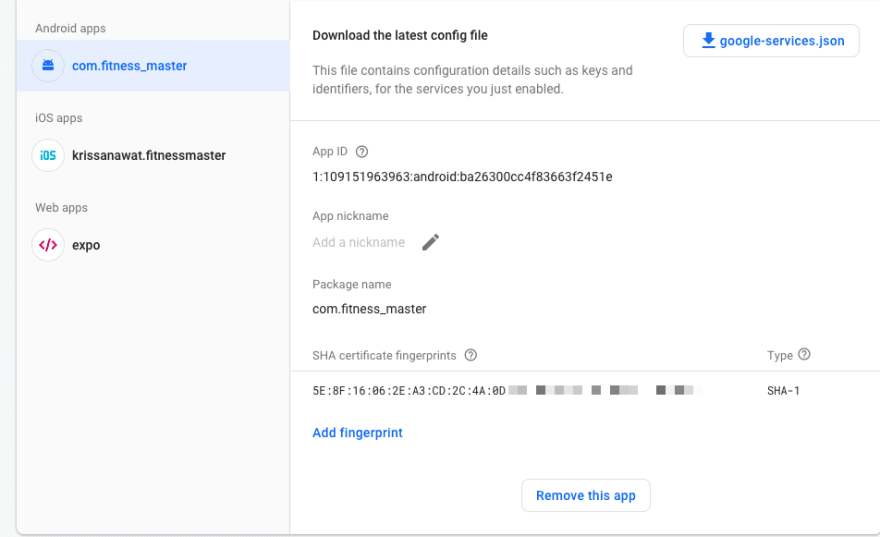
your will see SHA1 key

next, go to Firebase console -> setting -> general add SHA 1 Key as the screenshot below
now your can rerunreact-native run-androidand will see this error
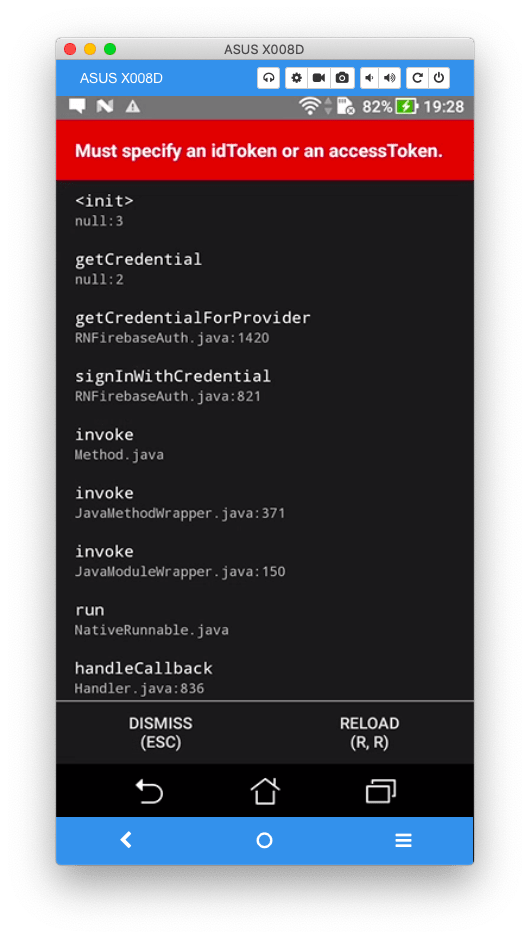
the solution is to assign webClientId to configured
await GoogleSignin.configure({
     webClientId:
       '109151963963-d1t7o0p.apps.googleusercontent.com',
   });
now your can log in properly

Conclusion
this tutorial is short and straightforward because we did for the most crucial step from previous for next chapter we are going to implement twitter login in iOS. just stay tune and folk.
Originally published at Kriss.

Top comments (0)