In this exercise we will start a basic ec2 server and host a small server on it.
Type AWS EC2 in the search console and go to the EC2 dashboard.

This will land you on EC2 dashboard from where you can see how many EC2 instances are running your keys etc.

Select Instances from the side bar it shows all EC2 instances you are running and click on launch instance.

-
This will take you to a list of available AWS instances there are four options
- My AMI: My AMI has AMI instances created by you and saved, Right now we have nothing saved here so this will be empty
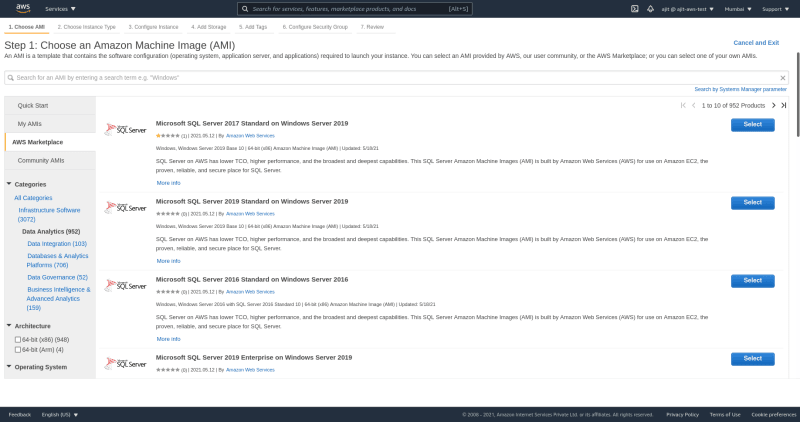
- AWS Marketplace: In AWS you can buy AWS instance with pre configured software's so that you don't have to set themselves like Wordpress, SQL, Ghost etc some of them are available free too

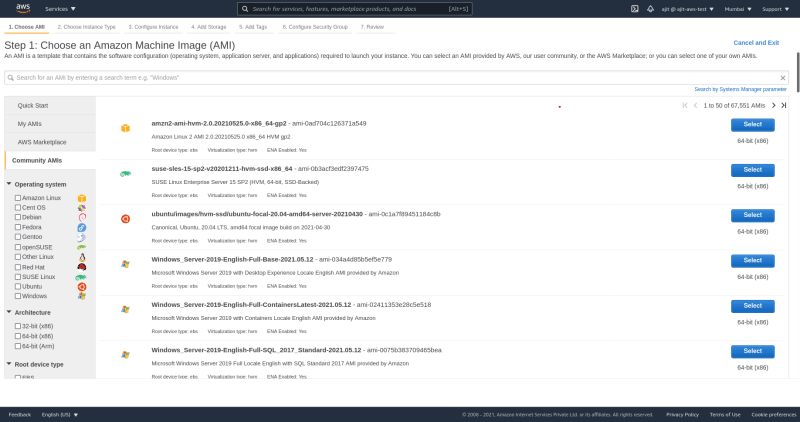
- Community AMI: These are all the instances given by the community for free
- Quick start: This is what we use these are minimal AWS instances which can be started very fast with basic OS. Select the one highlighted in the below image
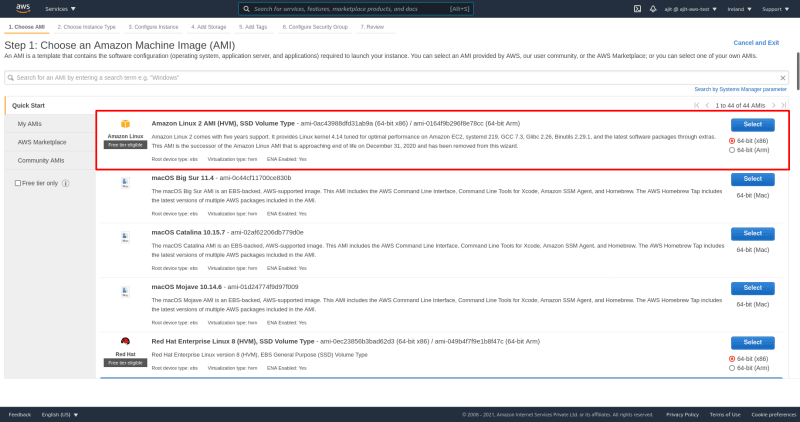
After that select the instance type like how may CPU, RAM, Storage, bandwidth we want for the purpose of this tutorial we select t2.micro because its available in the free tier as evident by the the Free tier available badge

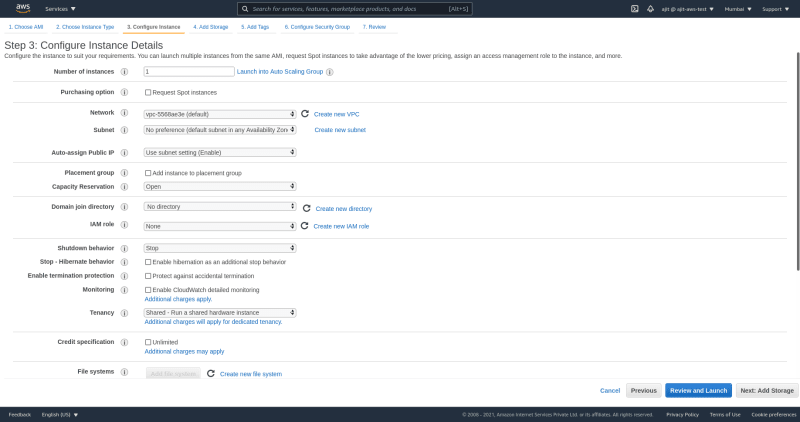
For the purpose of this tutorial we don't change anything in configure instance move to the bottom and in advances details paste the following script in it. These are the startup scripts which will run when we start our EC2 instance.
#!/bin/bash
# Use this for your user data (script from top to bottom)
# install httpd (Linux 2 version)
yum update -y
yum install -y httpd
systemctl start httpd
systemctl enable httpd
echo "<h1>Hello World from $(hostname -f)</h1>" > /var/www/html/index.html
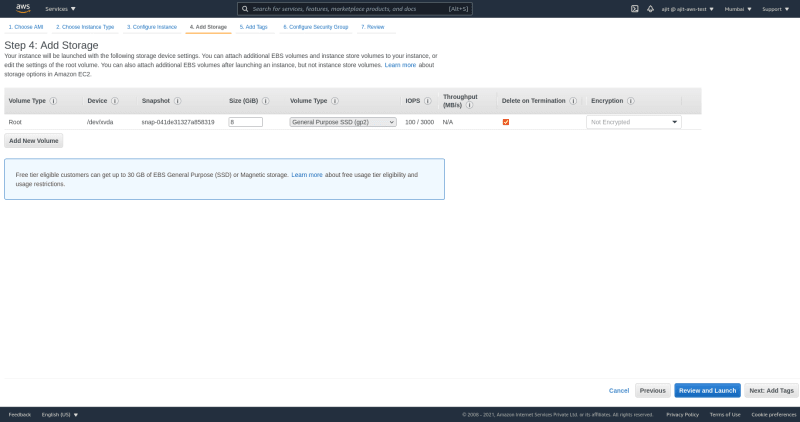
Now we configure storage all the default settings work just fine. In future we will have an additional series on storage so don't worry about it now.
We will add tags so that it is easier to identify and manage our instances like name, department, maintenance etc

Configure Security group in here we define how our EC2 instance can be accessed. In this tutorial add a new rule select HTTP from the type dropdown it will automatically allow everything via HTTP protocol its good here bit e can limit who can access our instance via HTTP and its not generally a good practice to give access to everyone via HTTP.

Now to the final step we review if everything is alright. Just have a quick glace that all settings are done correctly.

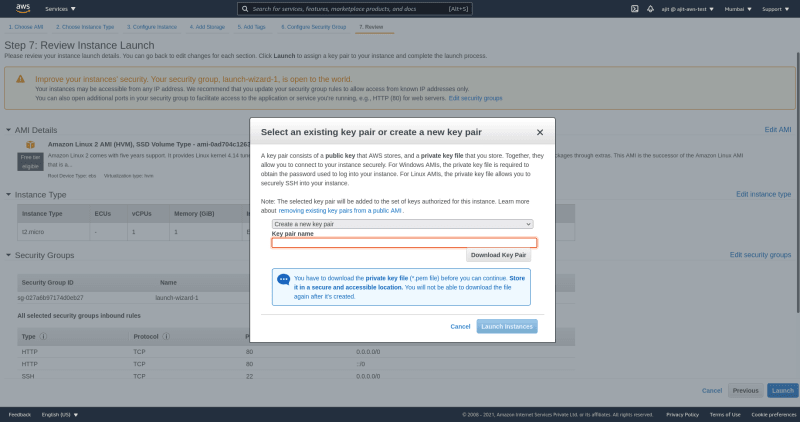
Lets launch now but before launch AWS asks for a key which you download and use to access via SSH Download and keep the key safe as it only can be downloaded once. You can also select a previous key if you have a key generated already.
Launch status page here you see a status of launched instance and some helpful resources to get you started. Click on view instances to go to the instances dahboard.

Now you can see your instance running. Select the instance you will see details at the bottom. On the right side of public IPv4 address there is open address button click on it.

For now the link won't work because the link has https remove https form the link and there will be a screen like below image. This http server was setup in our startup bash script above there we start a http apache server and return
echo "<h1>Hello World from $(hostname -f)</h1>" >with hostname that is what is displayed

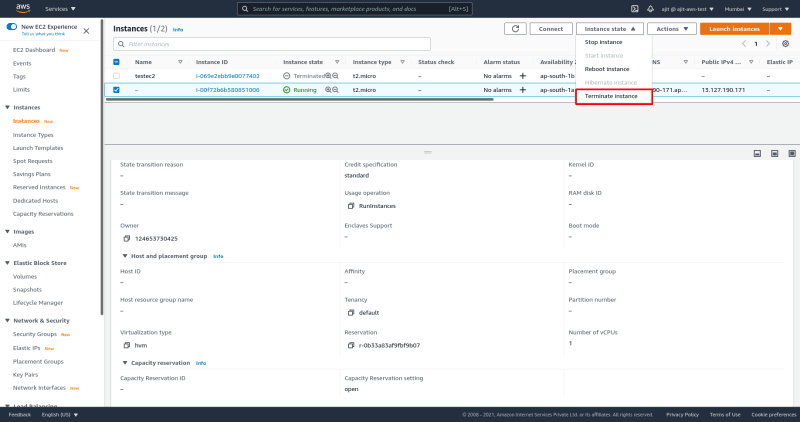
Finally if you want to follow along with this series you are done. For others running an EC2 instance costs money so you can terminate the instance by selecting the instance and form the instance state dropdown select terminate instance.
In the next part of the series we will SSH into out instance and see our files and learn how to access remote PC.




Top comments (0)