To create an ELB on AWS follow the steps below
Create two EC2 instances. To create EC2 instances follow this tutorial especially don't forget to put the startup script otherwise its very difficult to check if ELB is working. Setup the instances in different availability zones
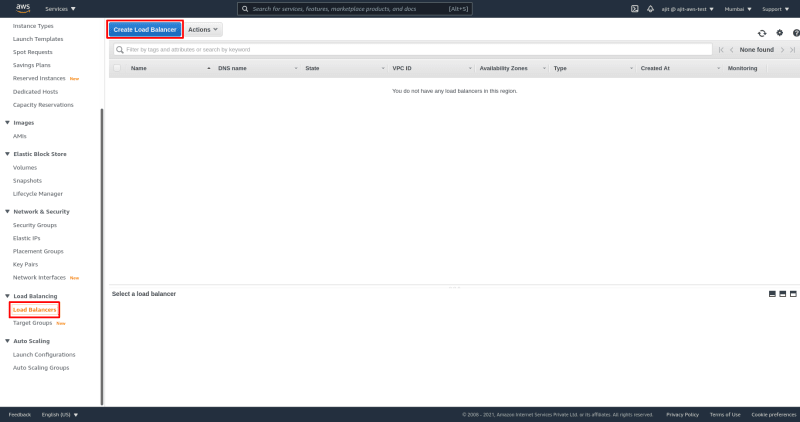
Go to load balancer option under load balancing. Click on Create Load Balancer
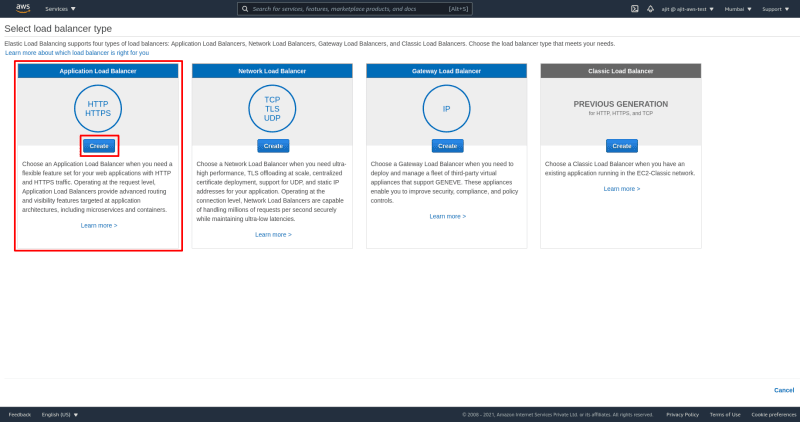
Select application load balancer. Setting up a network load balancer is a little complex and its not needed if you don't reach millions of requests. So for now we will learn only about setting up an application load balancer. Click on create.
Select a name for your load balancer. Select all availability zones so that we can connect two instances through load balancer in two different AZ. You can set the listened to HTTPS but it will require a certificate. For the purpose of this tutorial we will select a listener on http.
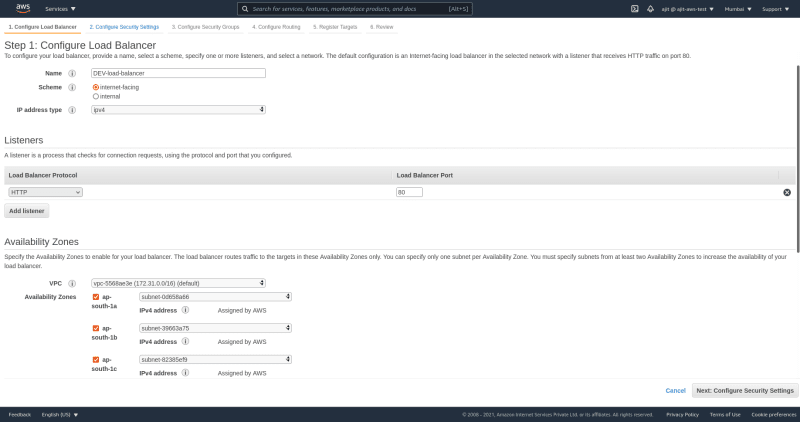
It will show that it is not secure but that's fine we don't need to worry this is not a prod application

If we select HTTPs the following screen will be shown where we have to setup the certificate. So, we select port 80 for now in this tutorial

Select the security group that we selected while creating these instances.

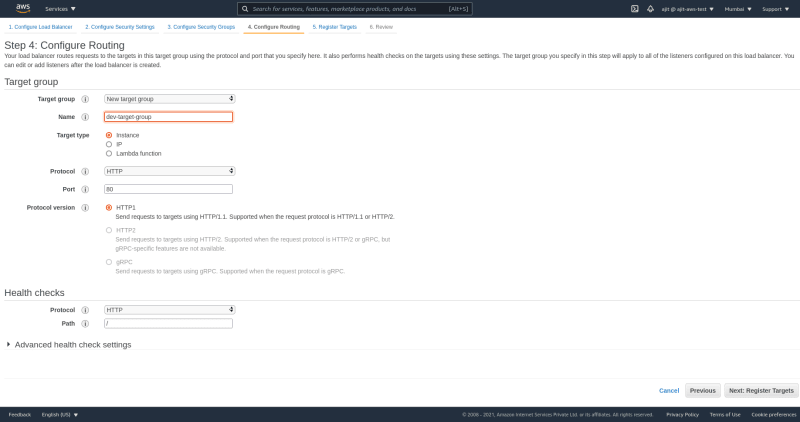
Now we configure our listener ports on EC2 and set it to a target group. A target group is a group of servers that this load balancer will target. If you don't have an existing target group select new. Then there are options on how do we ant to target based on IP instances etc. Select instance. Protocol is HTTP because we don't want to setup HTTPS certificate. Protocol is HTTP 1. And we are good to go.
We select the instances we want to add to our target groups. Select all the instances click add to registered
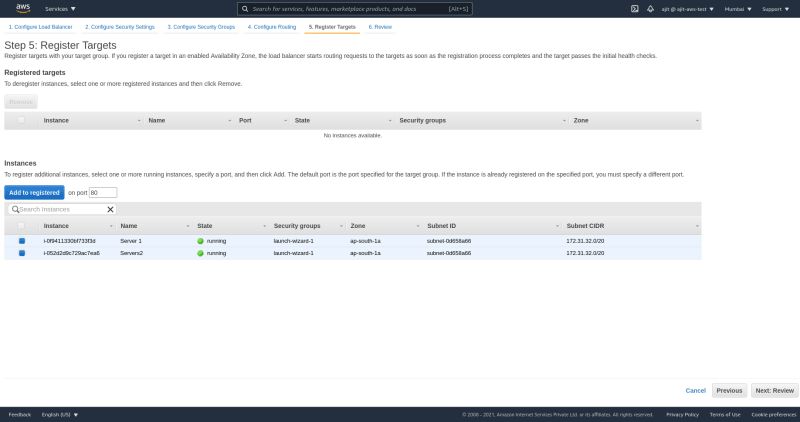
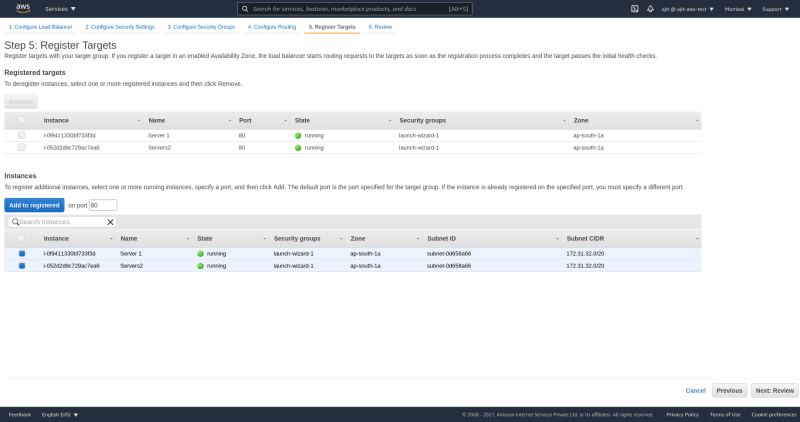
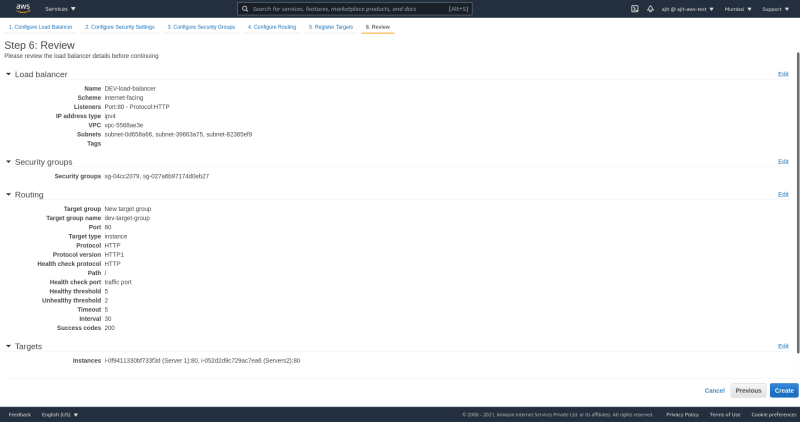
We are nearly done After clicking net review that everything is set correctly
Now we receive a welcome screen and our load balancer is created
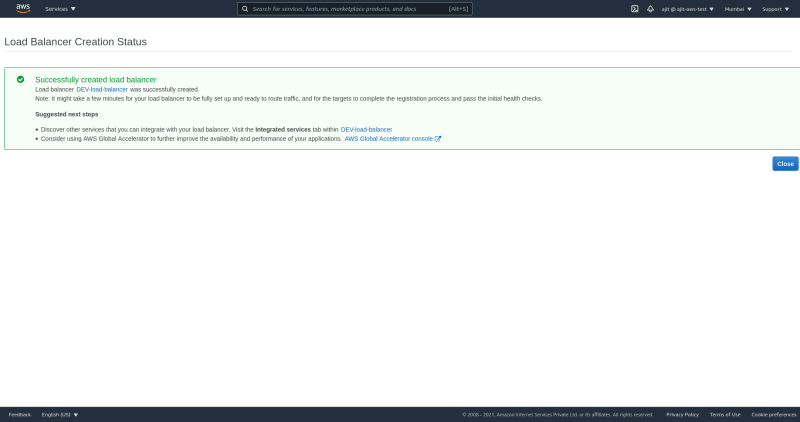
Wait for a few minutes until the load balancer is created
Select the load balancer and put the DNS name in the url bar once you hit enter it will show a IP but of you refresh it will load another IP showing that our load balancer is working

Cleanup
Once you are done with this delete the load balancer and the EC2 instances because they can cost you money but don't delete it if you're going to follow this series we're going to add auto scaling to EC2 instances. in the next hands on that require a ELB.
This is it. We have setup a load balancer next we will study how do we create an auto scaling target group in our load balancer.


Top comments (0)