In the previous tutorials, we used Meta Box and page builders to create a team members page. However, if you don’t use any of them or want to find another way to do it, this post is for you.
In this practice, we’re going to use a new method - using Meta Box only with MB Views.
This is the sample:

Video Version
Before Getting Started
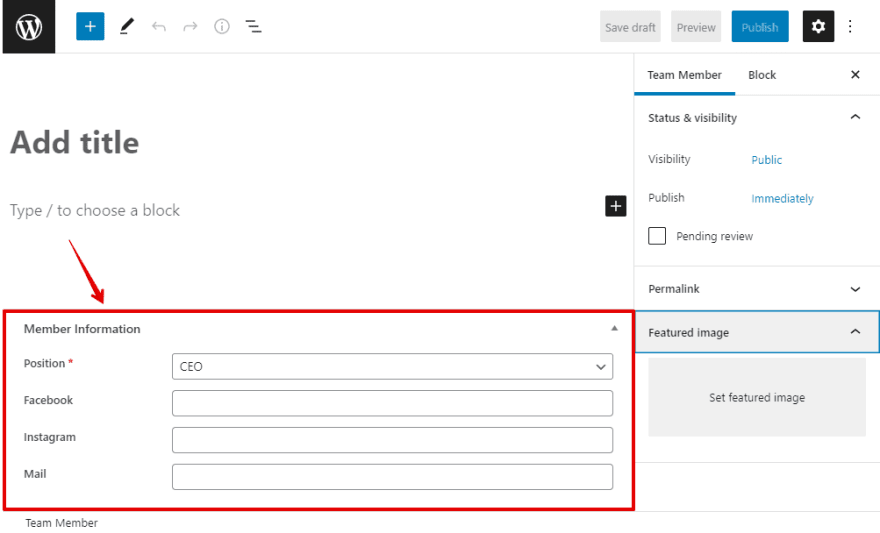
Similar to previous tutorials in this series, each member’s information will be preserved in a post and displayed as a name card. The member's name and avatar are the title and featured image of the post, respectively. Other information such as position, Facebook, Instagram, and Mail will be saved in custom fields.
To do it, we need Meta Box and its extensions:
- Meta Box core plugin: This is the framework to create custom fields and custom post types. It’s free and available on wordpress.org;
- MB Custom Post Type & Custom Taxonomies: It’s a free extension of Meta Box to create custom post types;
- Meta Box Builder: This Meta Box premium extension provides a UI in the back end to create custom fields easily;
- MB Views: it’s an extension of Meta Box to create WordPress templates without touching the theme’s file as well as any page builders. It also generates a shortcode so that you can display the templates anywhere you want.
Step 1: Create a New Post Type
We need to create a custom post type and custom fields for the post type. If you read previous posts in the series, just skip this step.
In the Admin Dashboard, go to Meta Box > Post Types, then create a new post type for the members.
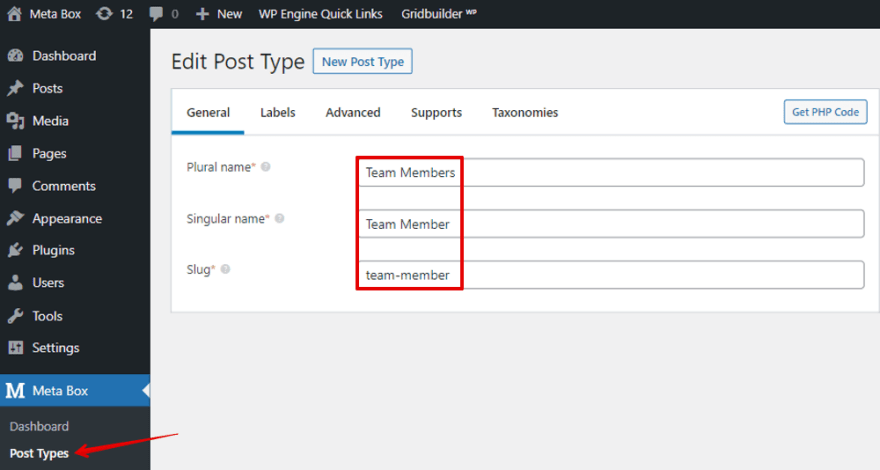
Publish and you will see a new menu in your dashboard.

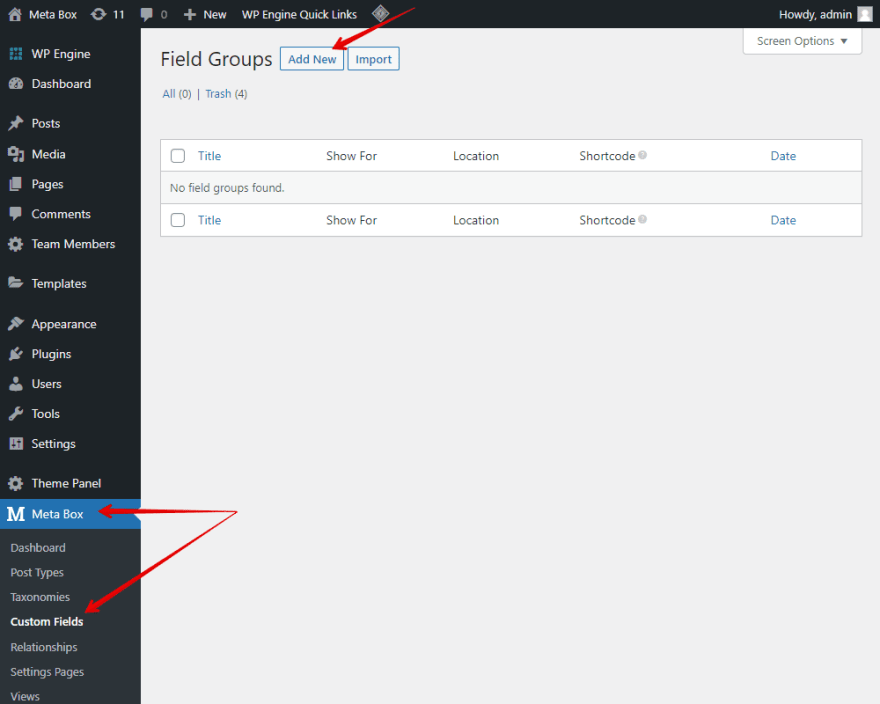
Step 2: Create Custom Fields for the Post Type
Let’s create custom fields for the position, Facebook, Instagram, and mail. Go to Meta Box > Custom Fields.
For the member’s information, I’ll create some following fields:
| Fields | Type | Note |
| Position | Select | To add some options for users to choose from instead of typing. |
| Facebook/Instagram/Mail | URL | To save the link of the social networks |
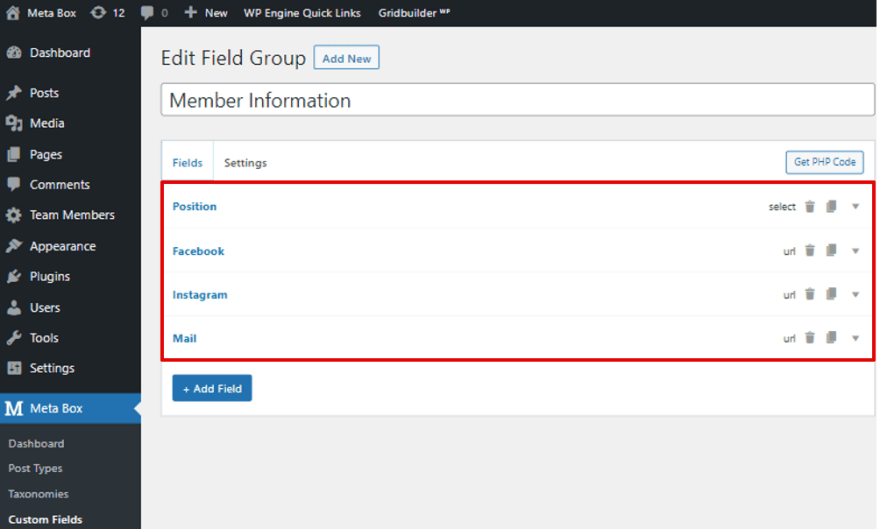
In the event that you want to add more information, just create additional fields as you go.
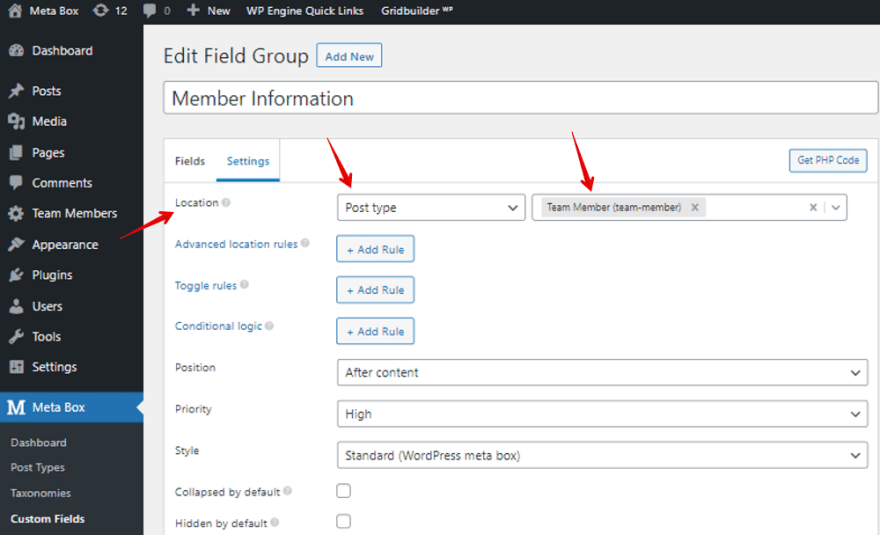
After creating all the fields, move to the Settings tab of the field group. In the Location section, choose the Post Type and select Team Member to apply these fields to this post type.
Now, you will see all the created fields when creating a new post in the Team Member post type. Add some member’s information for the test. We need them for the preview in the next step.
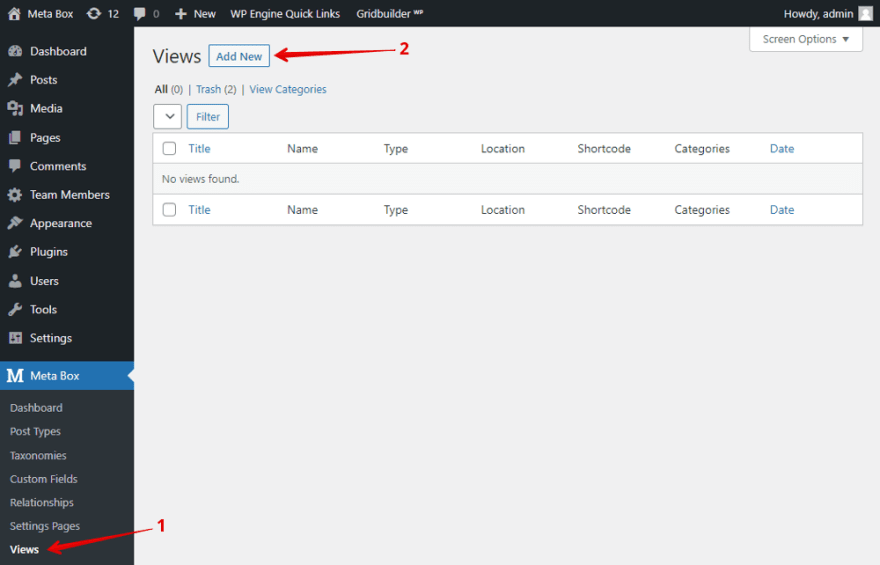
Step 3: Create a Template using MB Views
In the Admin Dashboard, go to Meta Box > Views > Add New to create a new template.
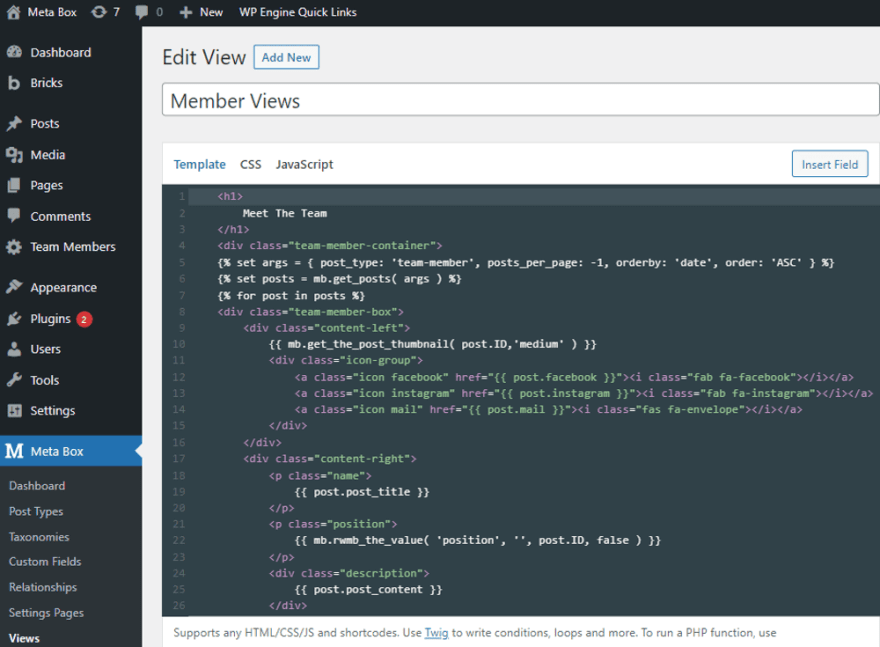
In the Template tab of the view, add some code:
{% set args = { post_type: 'team-member', posts_per_page: -1, orderby: 'date', order: 'ASC' } %}
{% set posts = mb.get_posts( args ) %}
{% for post in posts %}
    {{ mb.get_the_post_thumbnail( post.ID,'medium' ) }}
    {{ post.facebook }}{{ post.instagram }}{{ post.mail }}
    {{ post.post_title }}
    {{ post.post_content }}
    {{ mb.rwmb_the_value( 'position', '', post.ID, false ) }}
{% endfor %}

Let me explain about this code:
{% set args = { post_type: 'team-member', posts_per_page: -1, orderby: 'date', order: 'ASC' } %}
This code is used to declare the variable that obtained posts from the Team Member post type. The posts_per_page: -1 means that it will get all the posts and display them in one page. The orderby: 'date', order: 'ASC' are used to define the order of the posts.
{% set posts = mb.get_posts( args ) %}
This function is to get the posts data from the variable that was declared above.
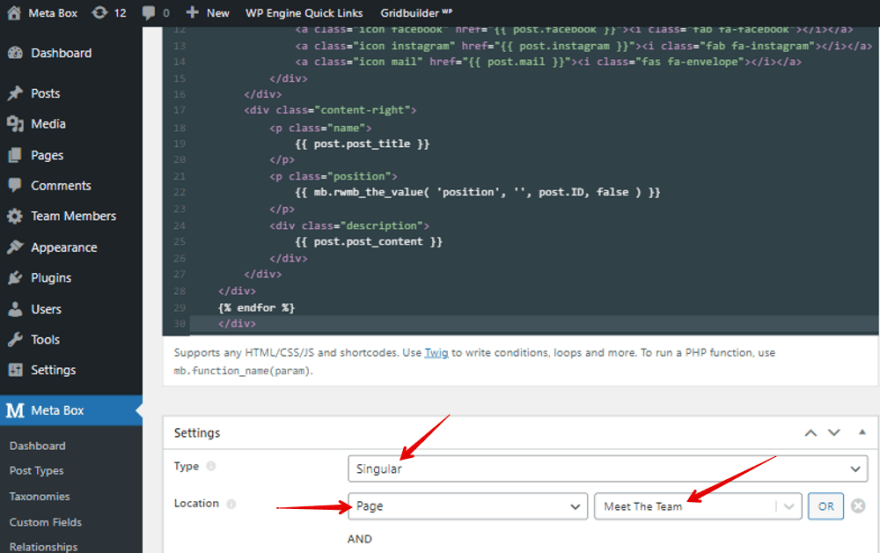
{% for post in posts %}
This is a loop to display all the posts in the Team Member post type.
{{ mb.get_the_post_thumbnail( post.ID,'medium' ) }}
This function is used to get the avatar of the member which is the featured image of the post.
{{ post.facebook }} | {{ post.instagram }} | {{ post.mail }} | {{ post.post_title }} | {{ post.post_content }}
This kind of function is used to get the data from the fields including both default fields of WordPress and custom fields. facebook, instagram, mail is the ID of the corresponding fields
For the position information, it is saved in a field in the type of Select with a special kind of data. So we use the following function to get its data.
<pre>{{ mb.rwmb_the_value( 'position', '', post.ID, false ) }}</pre>
The rwmb_the_value() is to get the label of the options in the Select field. In the event you want to get the value of the options, use this rwmb_meta()
To style the template, I used some Div classes and added them to the code.
You can refer to all the code here.
After adding code, move to the Settings section, set this template as the Singular type and choose Location as Page. Then, select Meet The Team page to apply this template to the page.
Go to the Meet The Team and you will see all the data has been displayed already.

Step 4: Style the Page
Still in the created template in the Views. Move to the CSS tab, then add some CSS code to style the page.
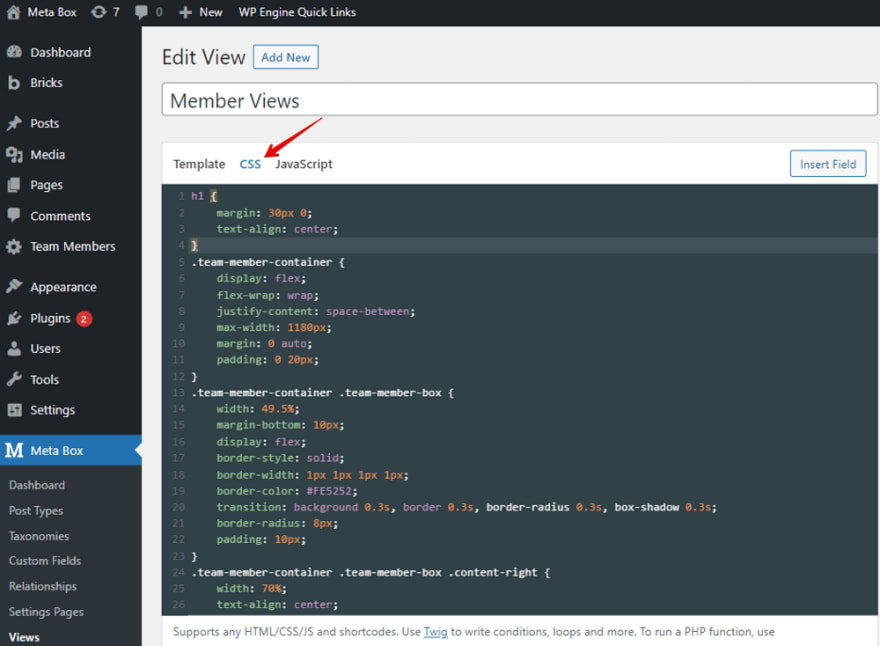
All the CSS code that I used is on Github. Refer to it for more details.
Update it and see the result on the frontend.
Last Words
We’ve gone through many methods to create a team members page. Hope that this series is helpful for you even if you are using page builders or not.
If you have any questions or ideas for any further tutorials, feel free to leave a comment. Good luck!

Top comments (0)