 To continue the series Create Team Members Page, we’re having this post to do it with Oxygen. We still use a custom post type instead of cloneable fields. Let’s see how!
In this practice, I also have the same sample of the page as the first tutorial in this series which uses Elementor.
Video Version
Before Getting Started
Before going deeply into this practice, there is something that we need to clarify.
As in the previous tutorial for Elementor, I also have name cards to include the members’ information. That information is saved in posts in a custom post type for the team members.
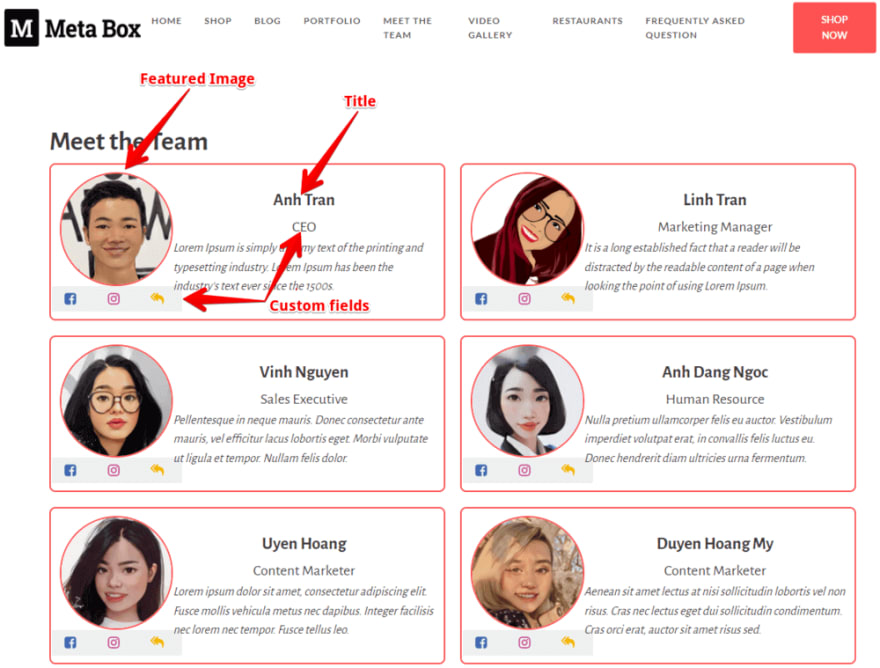
The member’s name and avatar are the title and featured image of the post. Other information such as position, links to Facebook, Instagram, and Mail will be saved in different custom fields.
In this practice, we need the Meta Box core plugin to have a framework that allows you to create custom fields to input members’ information. It’s free and available on wordpress.org. For advanced features, we also need some extensions of Meta Box as follows:
- MB Admin Columns: allows displaying custom fields in table columns in admin screens for all posts;
- MB Custom Post Types & Custom Taxonomies: to create custom post types;
- Meta Box Builder: has a UI on the back end to create custom fields easily.
The last one is Oxygen. You should use the 3.9 version or higher which has the native integration with Meta Box.
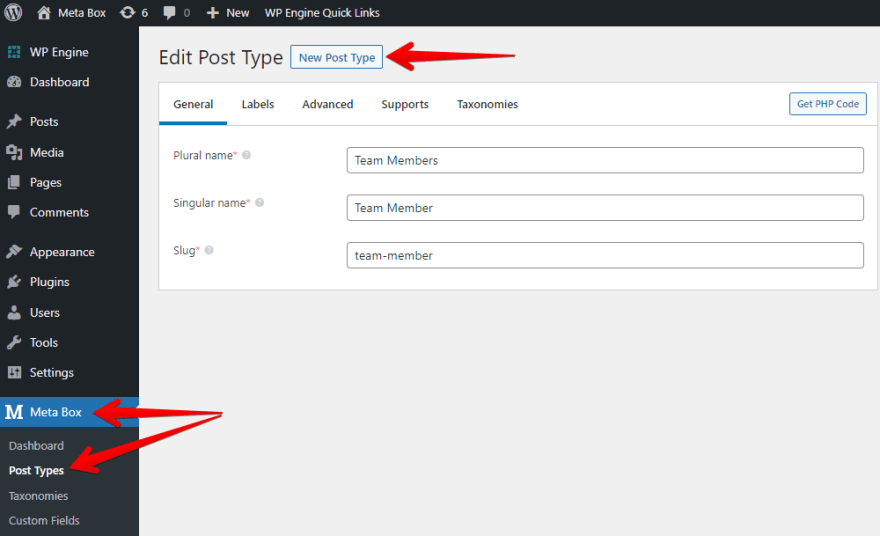
Step 1: Create a New Custom Post Type
Go to Meta Box > Post Types > New Post Type to create a new custom post type.
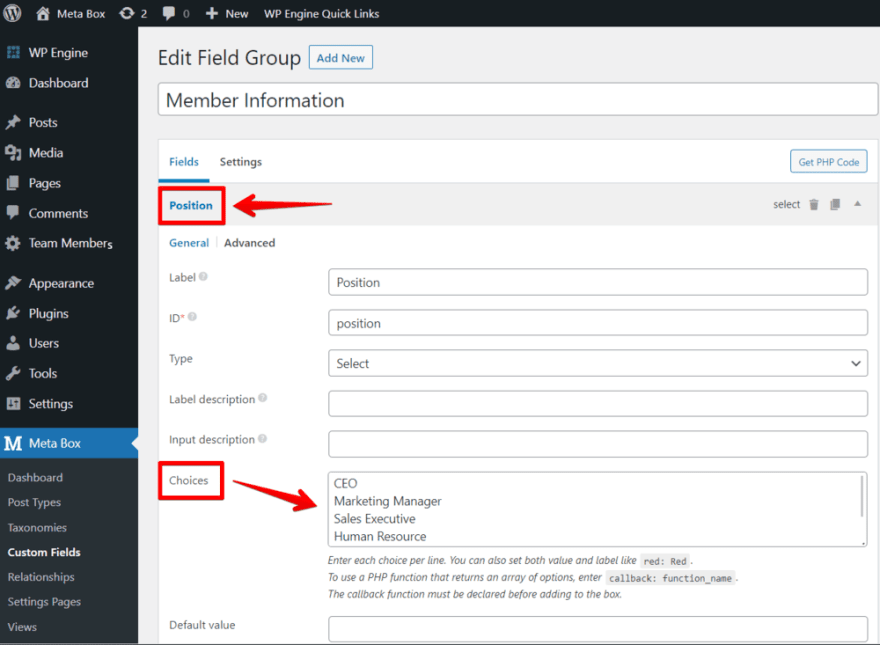
Step 2: Create Custom Fields
Move to Meta Box > Custom Fields > Add New.
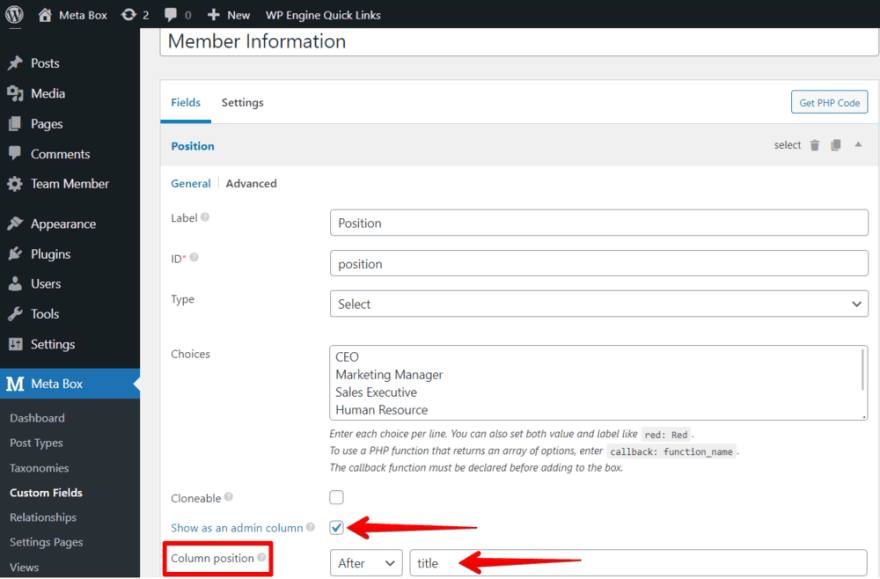
First, create a select field for the position information then fill in some options into the Choices box. You can fill in both value and label for the options or the label only as I did.
If you want to display the information about the members’ position in the admin columns, tick the option Show as an admin column in the Position field’s settings. To have this setting, you need the MB Admin Columns extension. Pay attention to the set the position for the column, you must choose a position. Otherwise, it can not be displayed anywhere.
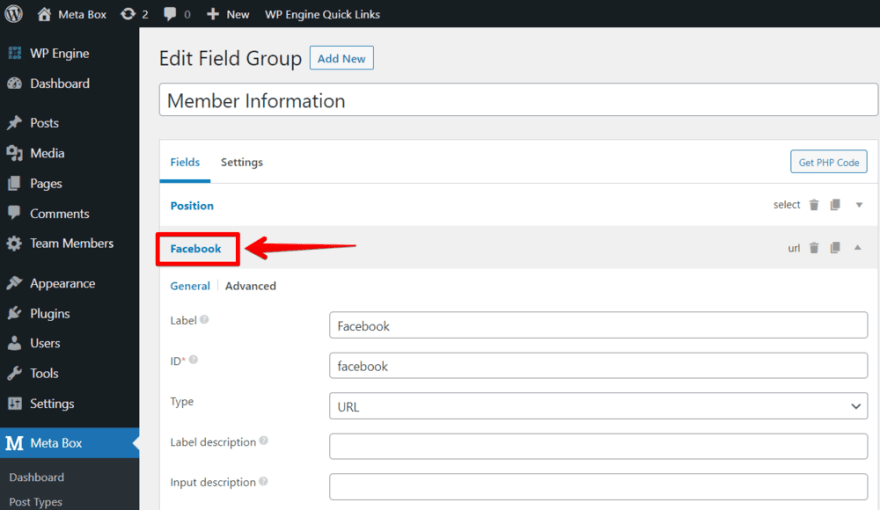
I create URL fields that allows users to fill in a link for the Facebook, Instagram, and mail information.
That’s all the custom fields I use to save the members’ information.
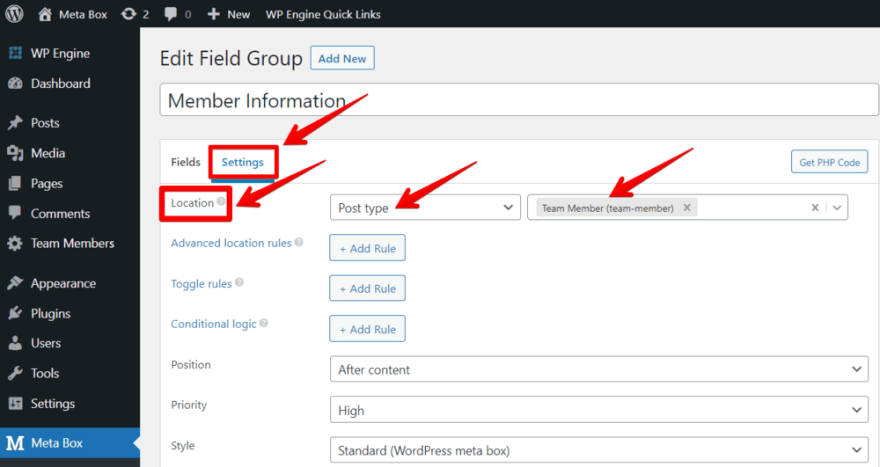
Now, move to the Settings tab > Location > choose Post Type as Team Member to apply these fields to this post type.
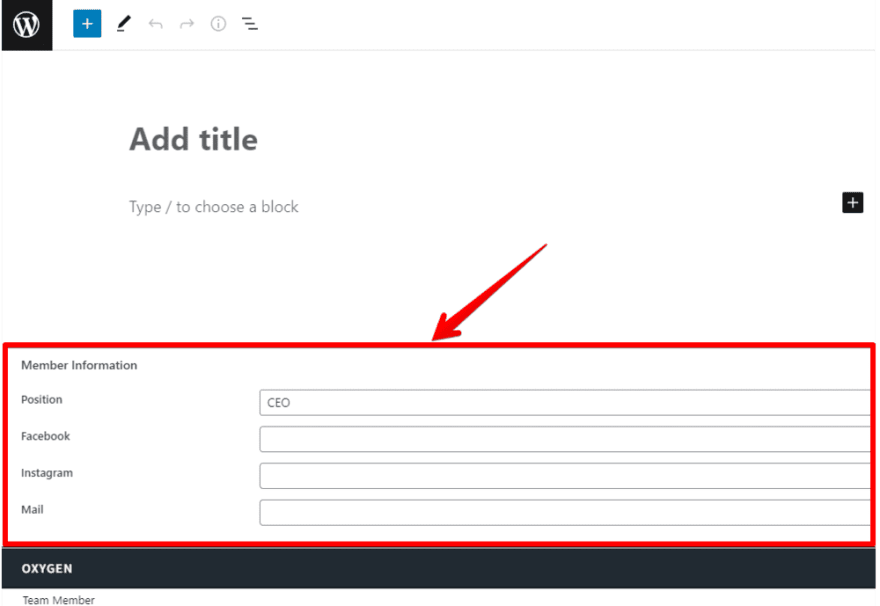
Back to the post editor, you will see the created custom fields.
Step 3: Create a Template for the Team Members Page
In the Oxygen, create a new template and choose inactive - Default Page to set it to inherit this style.
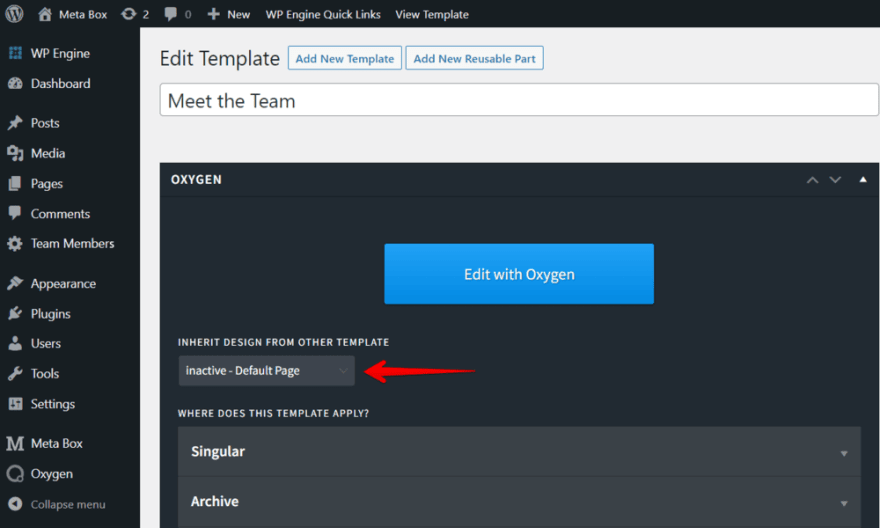
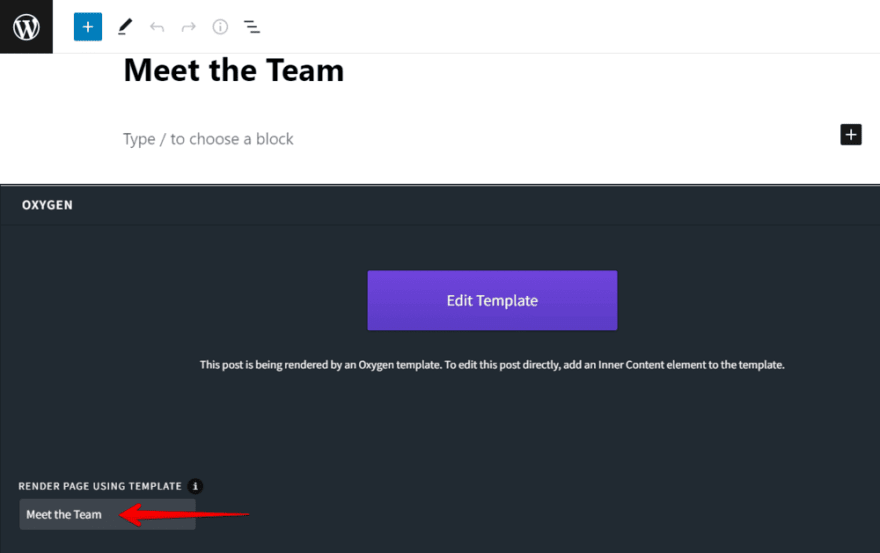
Next, create a new page for the team members and assign the created template to this page in the Render Page Using Template section.
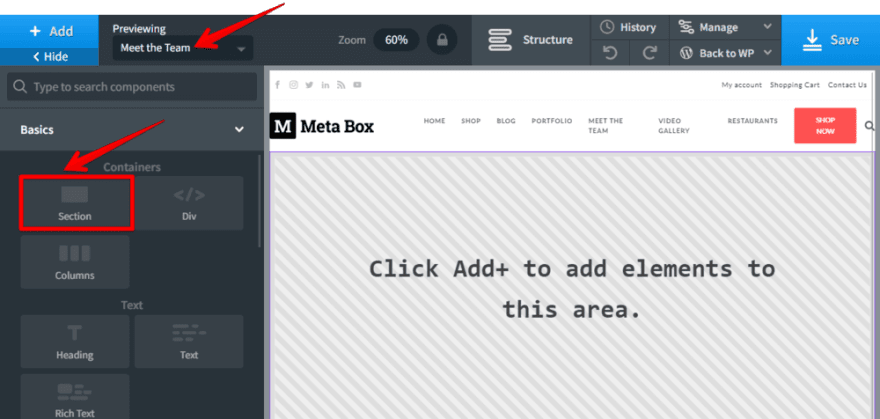
Let’s edit the template!
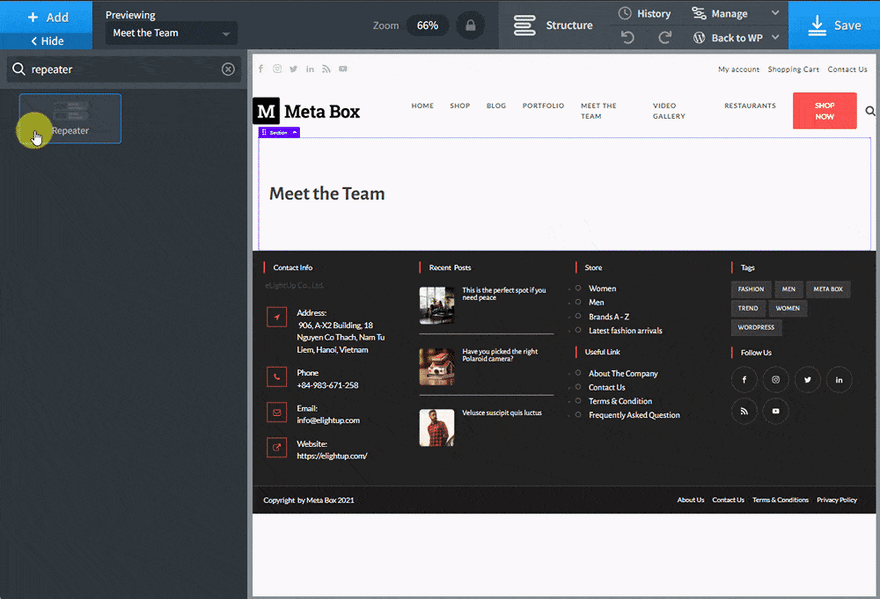
In the Previewing section, choose the page you want to see the preview. Then, select a Section component to contain all of the team members’ information.
To get the title of the page automatically, add the Heading component, then click Insert Data > Post > Title to connect this component with the title of the page.
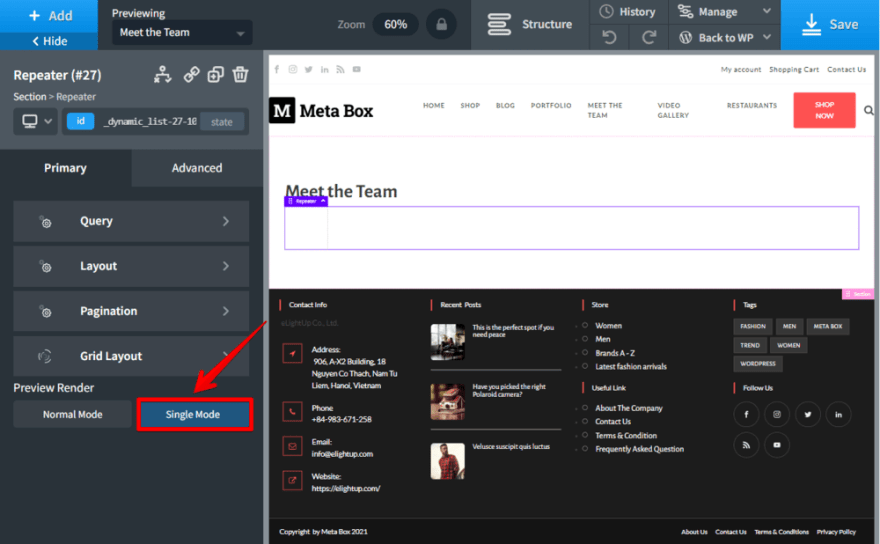
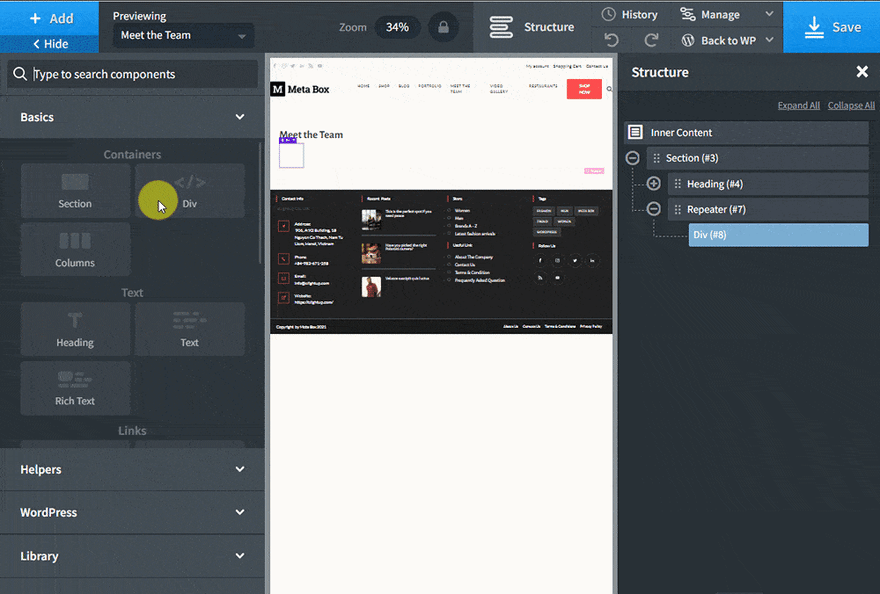
Next, add a Repeater component to get the data from all the posts that we use for our team members. To get the source of data, go to Query > Custom > Post Type and find the ID of the created post type for our team members.
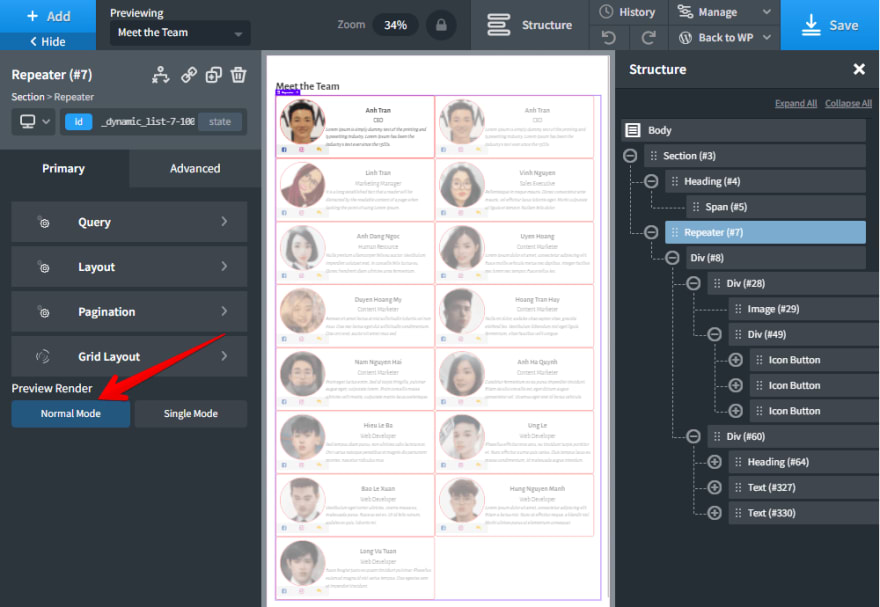
In the below image, there are many small boxes which are the number of posts that I have.
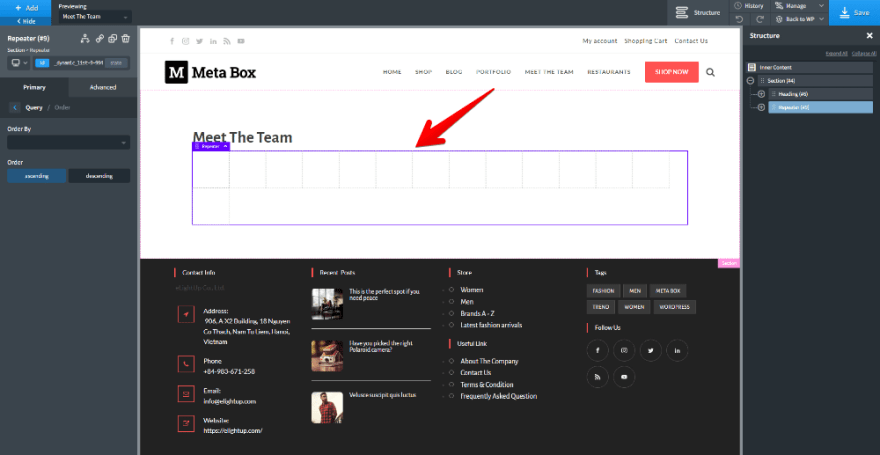
If you keep it, you will see the preview of all the posts in the next executions. But, it’ll be messed up. To avoid that, in the Preview Render section, choose Single Mode to see the preview of a post only.
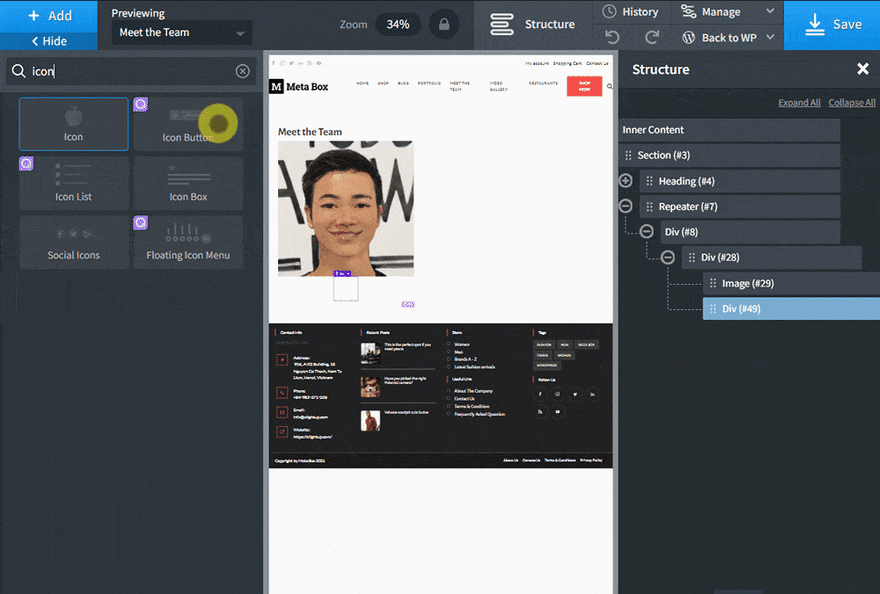
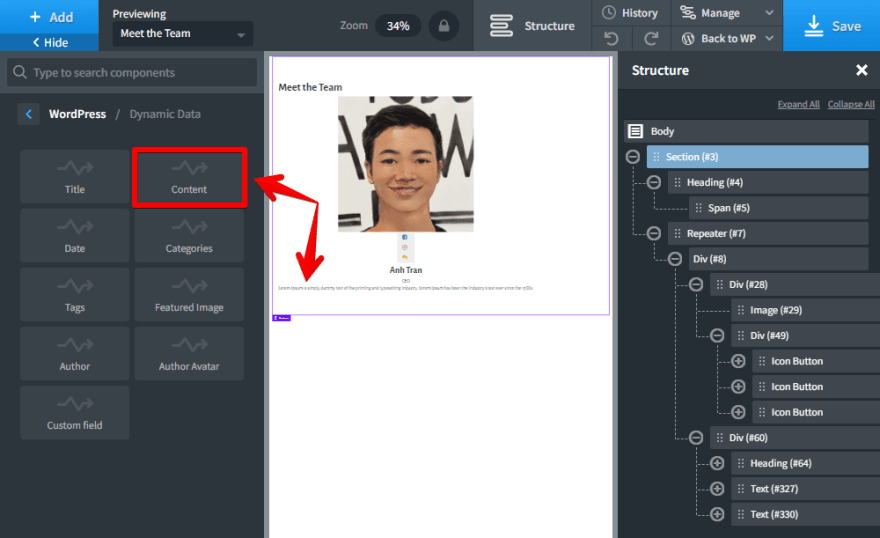
In this tutorial, each name card of a member has 2 columns. One is to display the image and social icons. Another one is to show the member information. I'll use two div tags to divide the content into 2 columns.
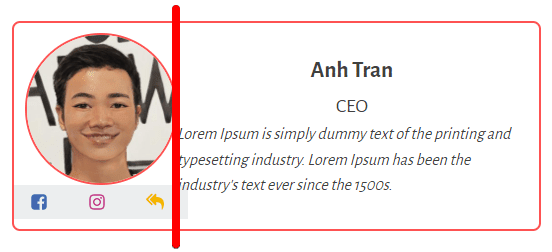
In the first div tag, add the Featured Image component to have the avatar saved as the post's featured image.
Next, create another div tag for all social icons in order to style them easier in the next step.
To create the social icons, choose the Icon Button component. You know that the social links are also saved in custom fields. So, to connect these icons to the data we need, go to data > Meta Box Field > choose the corresponding field.
Take the Facebook icon as an example:
Then, you can customize the Facebook icon as you want.
With the Instagram and mail icons, do likewise.
Now, let’s get the member’s information in the second column.
Choose the Title component for displaying the member's name since it is the post title.
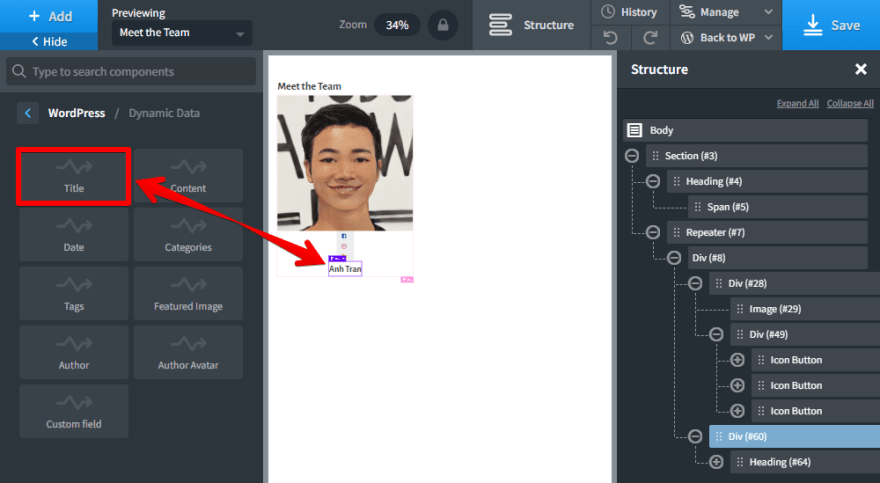
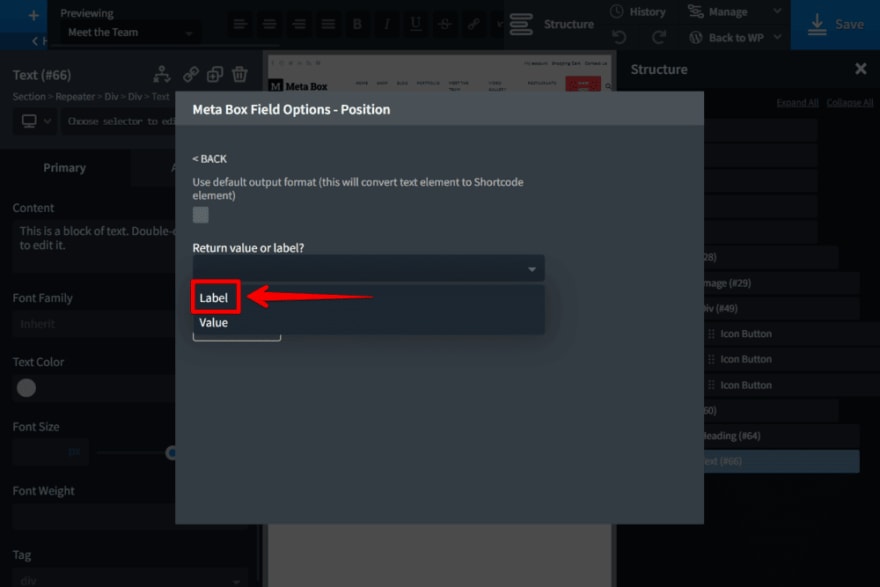
To get the member's position, add the Text component. Since the position of each member is also saved in a custom field, connect the text to the position field like the way we did with the social icons. After clicking the Insert Data button, choose Meta Box Field > Position.
Since the Position is a select field, the options in the choices box may have only labels as I set in step 2, or include both value and label as normal. In the template editing with Oxygen, when you get the position’s information, there are two options as well. And, I’ll choose the label.
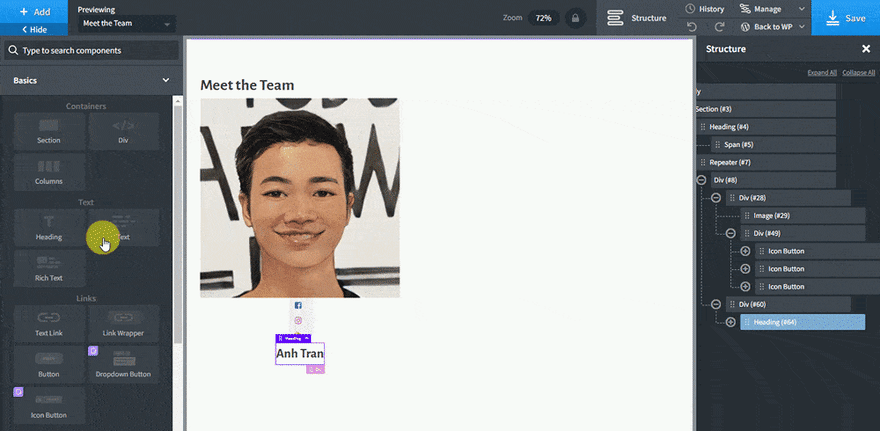
Finally, choose the Content component to get a short introduction of the member.
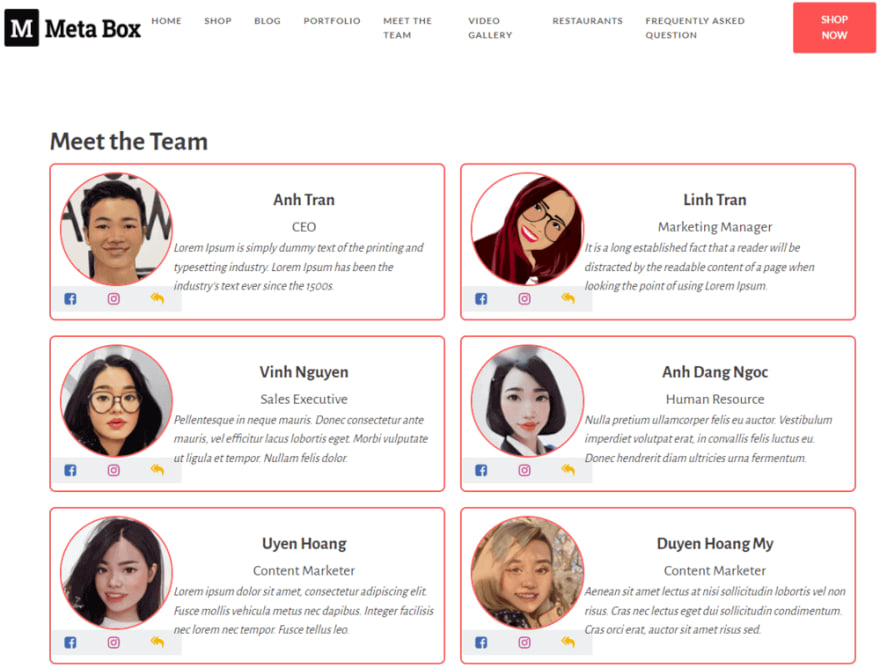
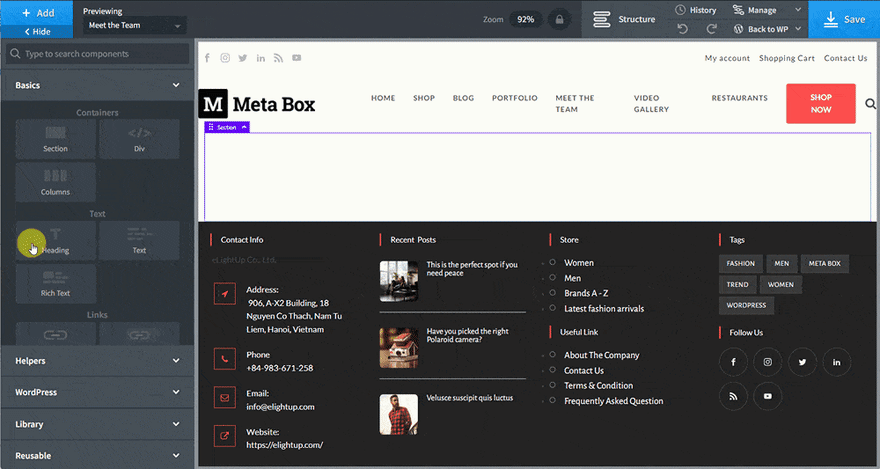
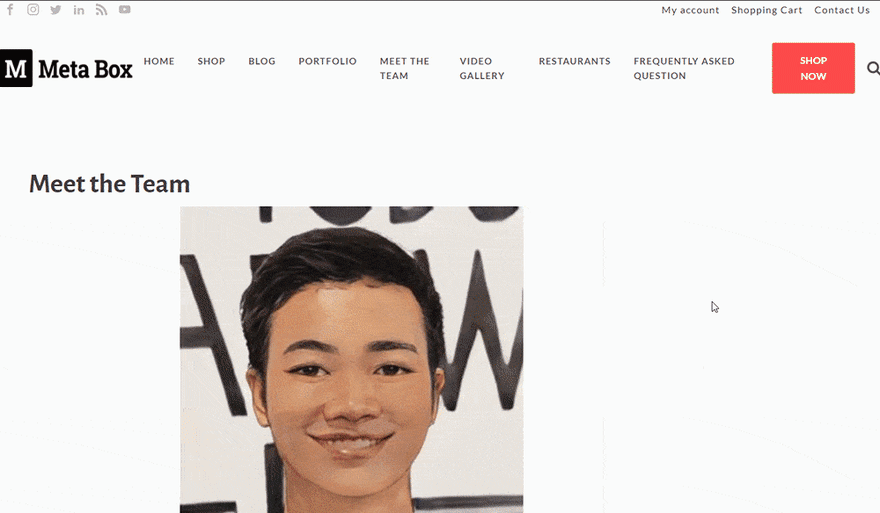
So, on the Meet the Team page, you can see all the information about the members.
Let’s style this page.
Step 4: Style the Team Members Page
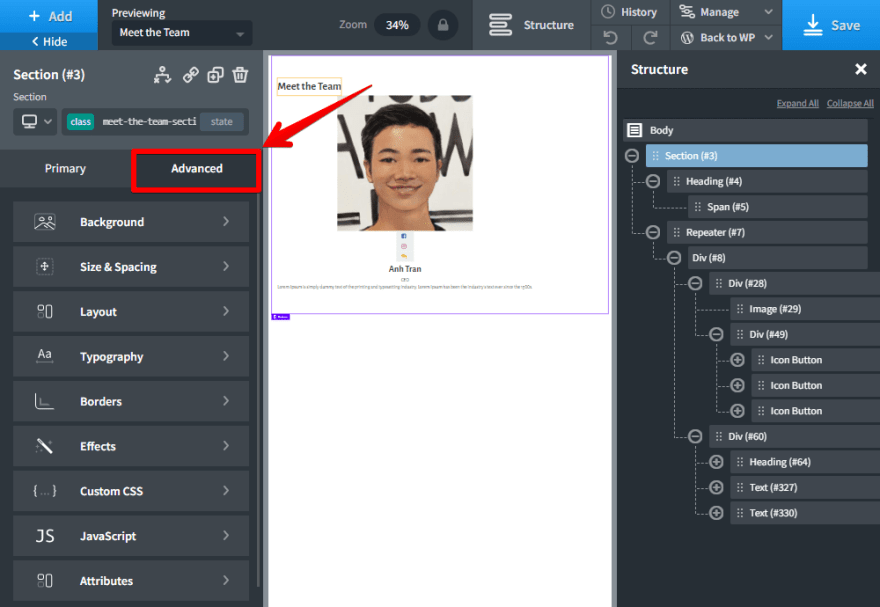
To style this page, you can choose each component and change the settings.
In the Advanced tab, there are a lot of choices so that you can style as you want.
After styling the components, to see all the posts, just enable the Preview Render section to the Normal Mode.
You see that all the boxes are stuck together. Therefore, I need to add some spacing between each box. Thus, go to the Grid layout section and click the Enable Grid button.
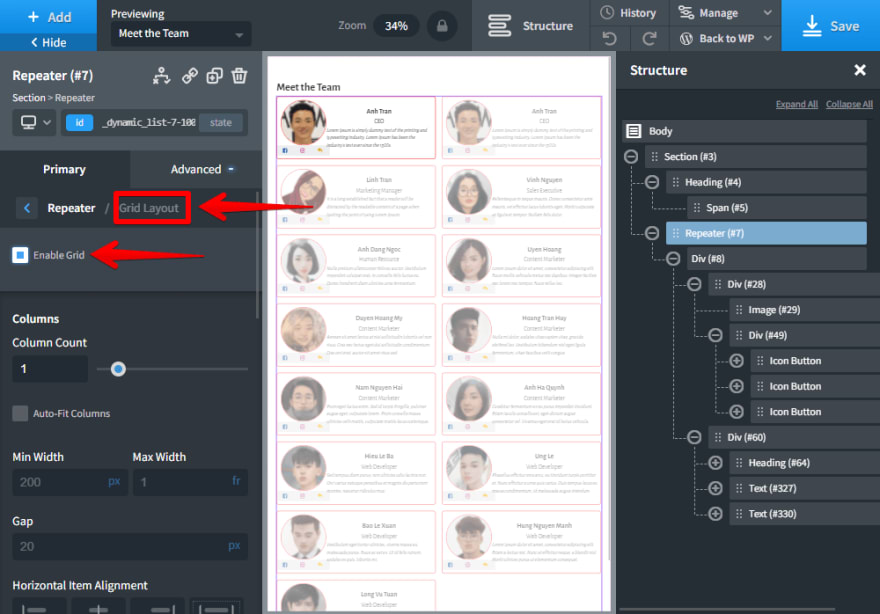
Now, the display of all the boxes is quite good. So I just keep it. If you want to change anything, just change settings in the left sidebar.
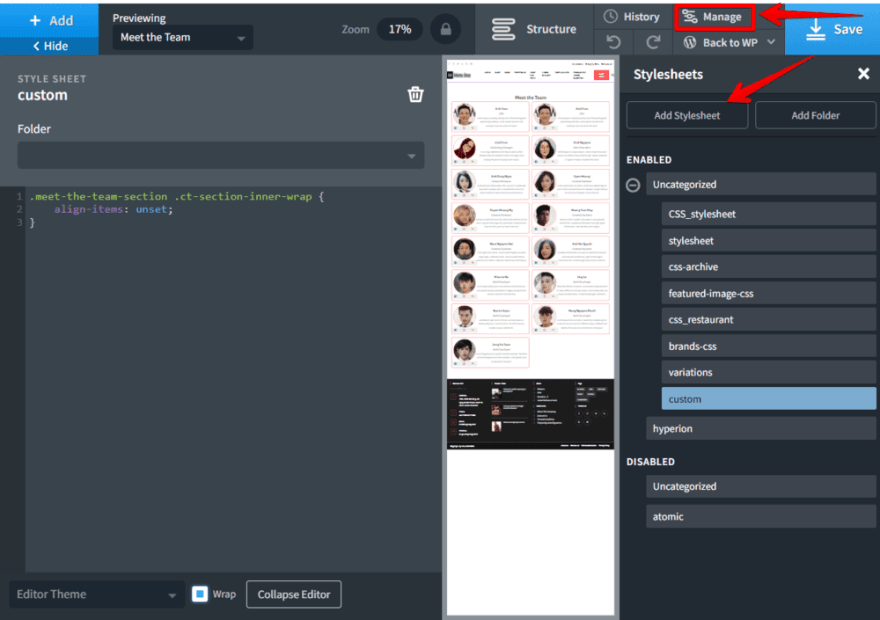
Finally, I want the title of the page in the center. I tried to style it with Oxygen but it didn’t work. Let’s try some CSS to make a change.
Go to Manage > Stylesheets > New Stylesheet, then add this code.
.meet-the-team-section .ct-section-inner-wrap {
    align-items: unset;
}
Let’s see the result!

Last Words
We’ve completed all the steps to create a team members page with Meta Box and Oxygen. Try it out and share the results in the comment section. If you use another page builder, keep track of our channel to see other tutorials.

Top comments (0)