
In this series, we’ve gone through some methods with different page builders to create a page. Today, we’ll introduce a way with another page builder - Bricks - to create a Team Members page. Let’s explore how it does!
Video Version
Before Getting Started
As in the previous tutorials in this series, we use the same demo for the page as follows.

Each member’s information will be saved in a post and also displayed as a name card on the page. Each one will have 2 columns with the border and icons for social contacts. All information about each member such as Position, Facebook, Instagram, and Mail will be saved in custom fields. Name and image of the member are the title and featured image of the post.
To have custom post types and custom fields for saving information, we need the Meta Box core plugin. It’s free and available on wordpress.org.
For more advanced features, we should use the following extensions. If you haven’t had them, you can install them individually or use the Meta Box AIO to have them all.
- MB Custom Post Type & Custom Taxonomies: to create custom post types for members.
- Meta Box Builder: to have an intuitive UI to create custom fields in the backend.
About the last one, we use Bricks for this practice, make sure that you’ve activated the Bricks theme.
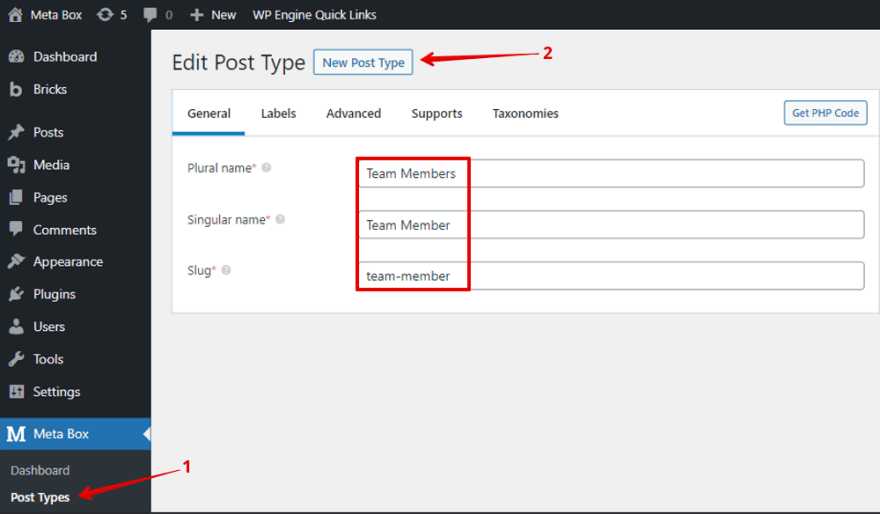
Step 1: Create a New Custom Post Type
Go to Meta Box > Post Types > New Post Type.
After publishing, you will see your new post type displayed on the admin dashboard.

In the event you want to find more details on how to create a custom post type and advanced settings for the post type. You can refer to this video for more information.
Step 2: Create Custom Fields for the Post Type
Let’s create custom fields to save extra members’ information. Go to Meta Box > Custom Fields > Add New.
For the member’s information, I’ll use the following types:
| Fields | Type | Note |
| Position | Select | To provide some options for users to choose instead of typing |
| Facebook / Instagram / Mail | URL | To save the link of the social profiles |

After finishing creating the fields, move to the Settings tab. In the Location section, select Post Types as Team Members to apply these fields to the post type.

Finally, go to the post editor, and you will see your created custom fields appear.

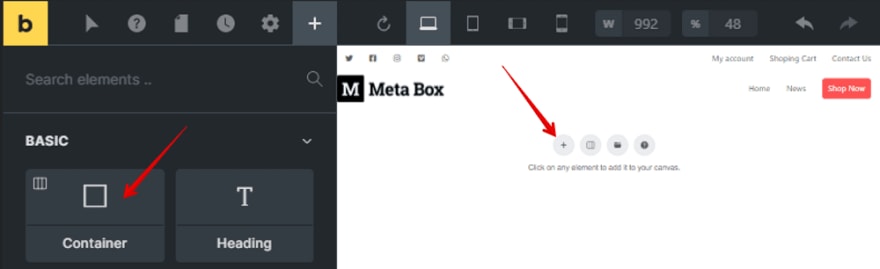
Step 3: Create a Team Members Page using Bricks
Move to Pages > Add New to create a new page. After updating, select Edit with Bricks.

First, add a new container element to cover all the team members’ information.
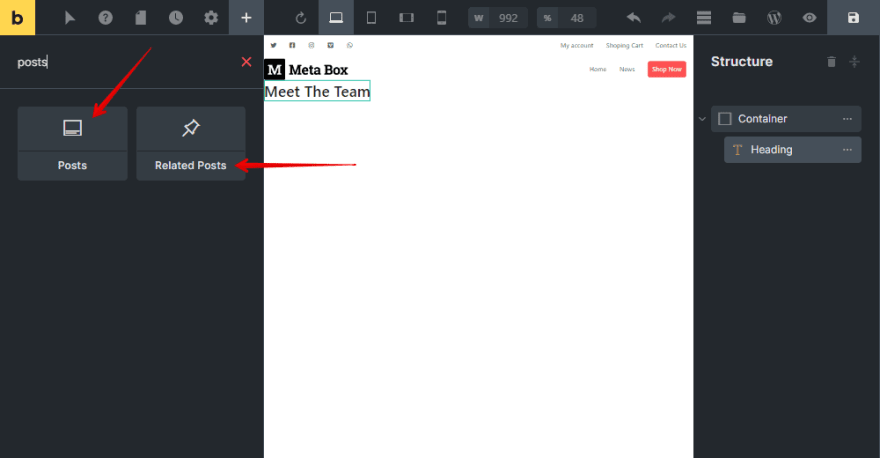
Then, add a Heading element to display the title of the page and fill in the name of the page on it.

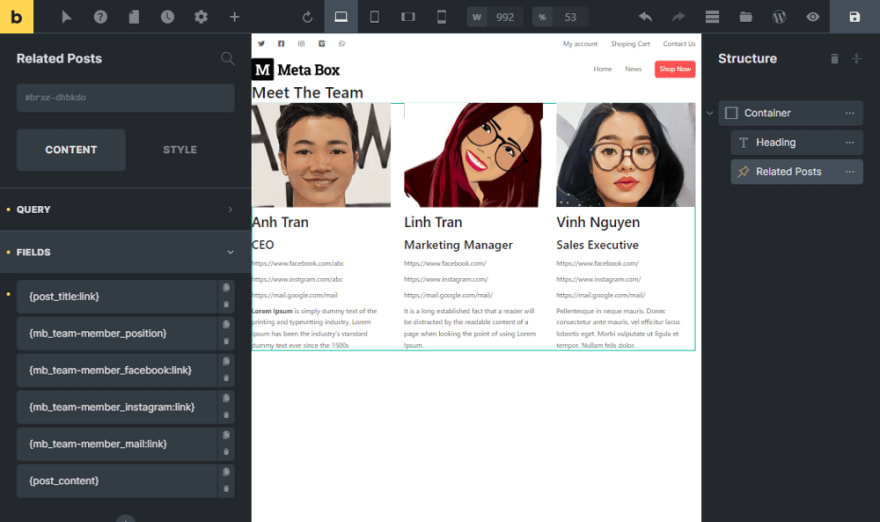
To get all the posts, we have the Posts element and Related Posts element. The Posts show posts along with filters and navigation, but the Related Posts does not. So I choose the Related Posts element.
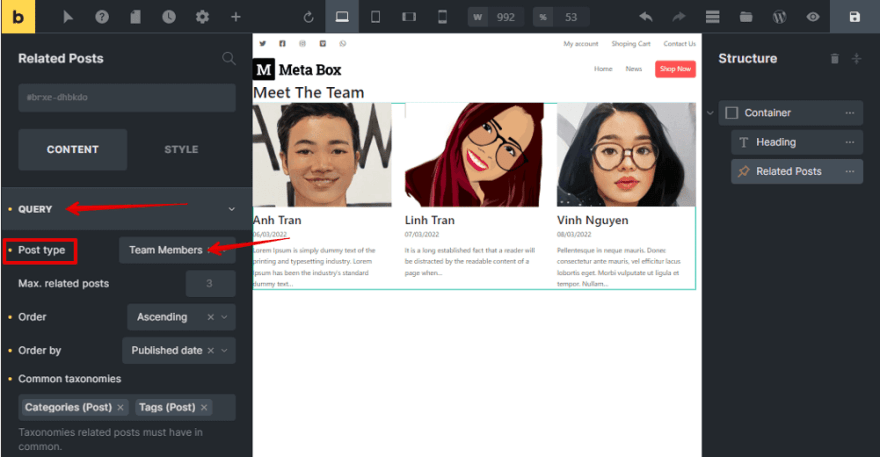
When adding the Related Post element, a list of blog posts will be displayed in default. Since we need the posts in the Team Member post type instead of blog posts, go to the Query section of the Related Posts element and change the post type to Team Member to get the wanted post.
To change the information that you want to display in each post, move to the Fields section. There is the Post Title, Published Date, and Post Excerpt in default. Remove the one you don’t want to display.

Next, add a new field and insert the dynamic data from the custom fields by clicking Add Item > Insert Dynamic Data and find the wanted fields. First, I choose the Position. Then, the position of each member will display in the preview immediately.

For other information like Facebook, Instagram, and Mail, simply do the same. Be noted that, when inserting dynamic data, it just displays them as text. To set them as URLs, you should add an attribute to these fields as below.

What’s more, the description of each member is the content of the post. So, we just need to add a Post Content field.
Now, all the information of the members has been obtained.
Let’s style the page in the next step.
However, because Bricks does not support adding classes for each element, you should use the HTML tag for styling. You can set elements in different levels of HTML tag such as: H1, H2, H3, div, p, … That will help a lot for SEO as well.

Step 4: Style the Page
Still in the page editor with Bricks, move to the Style section of each element to change the look of them.
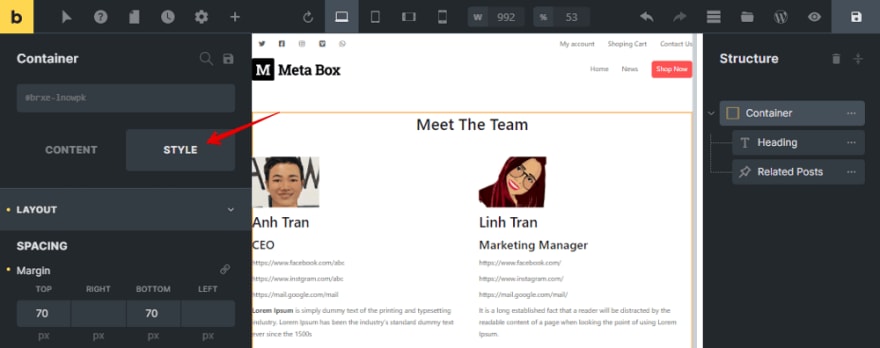
For more advanced styling, you may use some CSS codes as I did.

I placed all of the code on Github so you can look it up for further information.
Now, go to see the result on the frontend.
Last words
We’ve already finished creating a Team Members Page using Meta Box and Bricks. Let’s try it out and share the results in the comment section. Please keep track of our channel because we’ll be updating with more useful tutorials.

Top comments (0)