
Welcome to the brand new series. Here, we will create a clone of the popular streaming service https://www.twitch.tv/ using ReactJS.
This series have been inspired by “Modern React with Redux” series by Stephen Grider on udemy.
Let’s start with the setup now. We will have React code and streaming code also. So, create a folder streams. Inside it generate a new folder client for react by using create-react-app client.
 Initial Setup
Now, go inside that client directory and start your project by npm start. You will see the below screen after that.
 Started on localhost
Now, open your project(client directory) in VSCode and go inside src and delete everything.
 Delete everything
Now, in src create a file index.js and write the below basic React boilerplate.
import React from 'react';
import ReactDOM from 'react-dom';
import App from './components/App';

ReactDOM.render(<App />, document.querySelector('#root'));
Now, create a components directory inside src and in it create a file App.js
import React from 'react';

const App = () => {
    return (
        <div>App Rendered</div>
    );
}

export default App;
If now typo, we will see App Rendered on our localhost.
 App Rendered
We will be having different pages in our app, so we will use React-router in the project. So, go ahead and stop the running instance of localhost and type **npm install — save react-router-dom **in the terminal.
 npm install
Once, it is installed start you application by npm start. Next, we will create our different component files first. Inside components directory create streams directory and inside it create 5 files.
 Five Stream files
We will quickly add below boilerplate code to all five files. Add below to StreamCreate.js
import React from 'react';

const StreamCreate = () => {
  return (
    <div>
      StreamCreate
    </div>
  )
}

export default StreamCreate;
Add below to StreamDelete.js
import React from 'react';

const StreamDelete = () => {
  return (
    <div>
      StreamDelete
    </div>
  )
}

export default StreamDelete;
And similarly to other 3 files. Now, open App.js and import these 5 files and also three components BrowserRouter, Route, Link from react-router-dom. We are creating 5 different routes and wrapping them inside BrowserRouter.
import React from 'react';
import { BrowserRouter, Route } from 'react-router-dom';
import StreamCreate from './streams/StreamCreate';
import StreamEdit from './streams/StreamEdit';
import StreamDelete from './streams/StreamDelete';
import StreamList from './streams/StreamList';
import StreamShow from './streams/StreamShow';**

const App = () => {
    return (
        <div>
            <BrowserRouter>
             <div>
                <Route path="/" exact component={StreamList} />
                <Route path="/streams/create" exact component={StreamCreate} />
                <Route path="/streams/edit" exact component={StreamEdit} />
                <Route path="/streams/delete" exact component={StreamDelete} />
                <Route path="/streams/show" exact component={StreamShow} />
             </div>
            </BrowserRouter>
        </div>
    );
}

export default App;
Now, once check all the routes are local properly by going to them.
 Route Checking
We will now create our Header component. The header will be visible in all pages, which we visit. So, go ahead and create a Header.js file inside components directory.
We will use the Link tag from react-router-dom here. We are creating two links now— one for logo and other for All Stream. Both will take us to the root url.
import React from 'react';
import { Link } from 'react-router-dom';
import './Header.css';

const Header = () => {
    return (
        <div className="headerWrapper">
            <div className="headerTitle">
                <Link to="/">Stremer</Link>
            </div>
            <div className="otherLinks">
                <Link to="/">All Streams</Link>
            </div>
        </div>
    )
}

export default Header;
You might have notice that we gave some classNames to our divs. This is because we are going to style our header next. Create a Header.css file in the same directory. Now, write the below code in it. It’s a simple CSS with a Flexbox and some styling.
.headerWrapper{
    background: #ffc600 ;
    height: 5%;
    padding: 1%;
    display: flex;
    align-items: center;
    justify-content: space-between;
}

.headerTitle{
    font-size: 1.5rem;
    font-weight: bold;
    line-height: 1.25;
    color: #333333;
    text-shadow: 0px 4px 3px rgba(0,0,0,0.4),
                 0px 8px 13px rgba(0,0,0,0.1),
                 0px 18px 23px rgba(0,0,0,0.1);
}

.otherLinks {
    font-size: 16px;
    font-weight: bold;
    line-height: 1.25;
    color: #333333;
}
Now, include Header in our App.js as below.
import Header from './Header';

const App = () => {
    return (
        <div>
            <BrowserRouter>
                <div>
                    <Header />
                    <Route path="/" exact component={StreamList} />
                    <Route path="/streams/create" exact component={StreamCreate} />
                    <Route path="/streams/edit" exact component={StreamEdit} />
                    <Route path="/streams/delete" exact component={StreamDelete} />
                    <Route path="/streams/show" exact component={StreamShow} />
                </div>
            </BrowserRouter>
        </div>
    );
}

export default App;
Now, head over to localhost and you can see our beautiful Header completed.
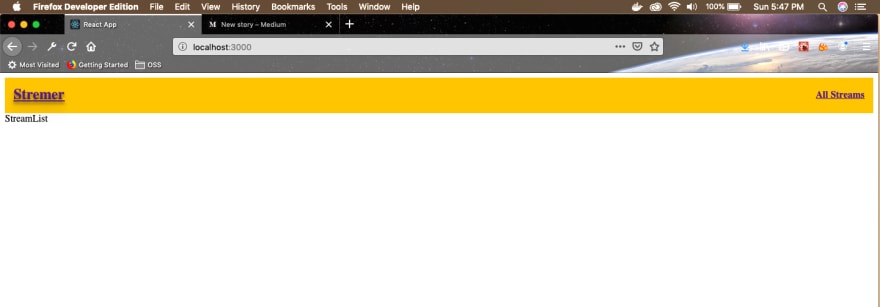 Beautiful Header
This concludes Part-1 of the series.


Top comments (0)