
Welcome, this tutorial guides you through building a Todo Graphql-powered API with Node.js and MongoDB.
Getting Started
What you will learn:
- Obtain a basic understanding of GraphQL principles
- Define a GraphQL schema that represents the structure of your data set
- Build an API with Apollo-Server that lets you execute queries against your schema
Requirements
This tutorial assumes that you are familiar with the command line and
JavaScript/ES6, and that you have a recent version of Node.js (8+) and npm || yarn installed.
Step 1: Create a new project
-
Create a directory for a new project and
cdinto it:
mkdir graphql-todo-server cd graphql-todo-server -
Initialize a new Node.js project with
yarnornpm:
yarn init --yes
Your project directory now contains a package.json file.
Step 2: Install dependencies
To run Apollo-Server, we need to install apollo-server, graphql. Also we need to install mongoose to connect to DB and create our model:
-
apollo-serveris the core library for Apollo Server itself, which helps you define the shape of your data and how to fetch it. -
graphqlis the library used to build a GraphQL schema and execute queries against it. -
mongooseprovides a straight-forward, schema-based solution to model your application data.
Run the following command to install these dependencies and save them in
your project's node_modules directory:
yarn install apollo-server graphql mongoose
Also, create the following for a better project structure:
touch index.js

mkdir graphql models
- index.js is our entry for our server
- graphql directory will hold our typeDef and resolvers
- model for our mongodb models
Step 3: Build a Schema
Every data graph uses a schema to define the types of data it includes.
first, we will create a file typeDefs.js which will hold our shcema inside our graphql directory
    cd graphql
    touch typeDefs.js
Now, the schema will look like this:
const { gql } = require("apollo-server");

module.exports = gql`
  type Todo {
    id: ID!
    body: String!
    created: String!
  }

  type Query {
    getTodos: [Todo]!
  }

  type Mutation {
    createTodo(body: String!): Todo!
    deleteTodo(todoId: ID!): String!
   }
`;
We are exporting our Schema to use it in index.js when creating our server, Our Todo is very simple:
The type Todo, defines our todo object's fields:
- id: every Todo will have a unique id that Mongogb will create for us.
- body: of type string for our todo text.
- created: will hold the date.
- The
!after each type means it can not be null
The Query type
our schema needs to define queries that clients can execute against the data graph.
The Mutation type
with the query, we can fetch the data, but not to modify it. our schema needs to define mutations to modify our data.
The gql tag
the gql tag is used to surround GraphQL operation and schema language (which are represented as Strings), and makes it easier to differentiate from ordinary strings.
Step 4: Create our Todo model
const { model, Schema } = require("mongoose");

const todoSchema = new Schema({
  body: String,
  created: String
});

module.exports = model("Todo", todoSchema);

// Note: the id will be generated automatically
Step 5: Define the resolvers
We've defined the shape of our data, but Apollo doesn't know how to fetch it. To fix this, we create a resolver.
First, we create the file in graphql
touch graphql/resolvers.js
Now, our resolvers will look like this:
// we need a Todo model in our mutations to modify the data.
const Todo = require('../models/Todo');

module.exports = {
  Query: {
    // here is the getTodos, that we defined in our typeDefs.
    // simply, using the Todo model to fetch all the todos with async/await
    // and return the result.
    async getTodos() {
      try {
        const todos = await Todo.find({}).sort({ created: -1 });
        return todos;
      } catch (err) {
        throw new Error(err);
      }
    }
  },

  Mutation: {
      async createTodo(_, { body }) {
    // destructure the body from our args.
    // create a new Todo, save and return that todo
    // created is the date.
      try {
        const newTodo = new Todo({
          body,
          created: new Date().toISOString()
        });
        const todo = await newTodo.save();
        return todo;
      } catch (err) {
        throw new Error(err);
      }
    },

    async deleteTodo(_, { todoId }) {
      // Find the todo by its Id and delete it.
      try {
        const todo = await Todo.findById(todoId);
        if (todo) {
            await todo.delete();
            return 'Todo deleted!';
        } else {
            return 'Todo does not exist'
        }
      } catch (err) {
        throw new Error(err);
      }
    }
  }
};
Again!, we exporting the resolvers to use it when creating the Apollo Server.
The resolver takes a couple of positional arguments (parent,args,context,info). for our app we need only the args, for more info, read Resolvers type signature.
Step 6: Create the Apollo Server
finally, We create our server and connect to the db.
const { ApolloServer } = require('apollo-server');
const mongoose = require('mongoose');

// The config file contains any project configuration
// MONGODB will be something like this "'mongodb://username:password@host:port/database?options...'", you can get your own from Mongodb.com.
// PORT: process.env.PORT || '5000', if no env variables.

const { MONGODB ,PORT } = require('./config');

const typeDefs = require('./graphql/typeDefs');
const resolvers = require('./graphql/resolvers');

const server = new ApolloServer({
  typeDefs,
  resolvers
});

mongoose
  .connect(MONGODB, {
    useUnifiedTopology: true,
    useNewUrlParser: true
  })
  .then(() => {
    console.log('MongoDB is connected ...');
    return server.listen({
      port: PORT
    });
  })
  .then(res => {
    console.log('Server running at ', res.url);
  });
Now, you can run your server by running this command.
node index.js
To re-run the server automatically when a file changes. you can install nodemon package globally. and then use it in your project.
npm install -g nodemon
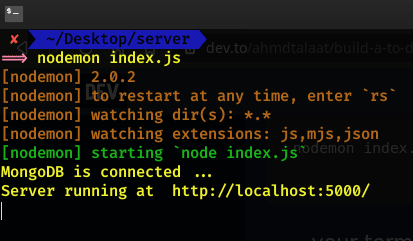
nodemon index.js
your terminal will be like this if no errors.
Tada, that's it, I hope you find it helpful and please comment below if you have any questions.
Have A Great Day!


Top comments (4)
I found this extremely helpful. Great explanation
Thanks, Usman, glad to know that
Amazing! For the first time I understood the GraphQL Basics. Thanks man. Greetings from Brazil.
Hello Matheus, happy to know that
Thanks