
Welcome, we will continue working on our Graphql to-do API, by setting up authorization for our app using JWT.
Getting Started
This tutorial will be focusing on:
- What is JWT and how to use it
- Hashing the password with bcryptjs
- How to control who can interact with the data
Step 1: Install dependencies
You'll need to install jsonwebtoken and bcryptjs by running the following in the terminal:
yarn add jsonwebtoken bcryptjs
or using npm
npm i jsonwebtoken bcryptjs
So, what are JSON Web Tokens and bcryptjs, and Why?
- JWT
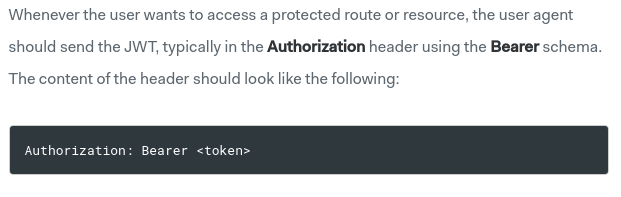
JSON Web Token (JWT) is a compact, URL-safe means of representing claims to be transferred between two parties. more info. passing jwt tokens will take this form
- bcryptjs
Is a way to hash the user info before hitting the DB. and why hashing? just a safety precaution.
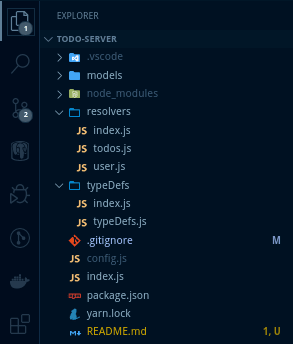
Step 2: Re-organize project structure
Our app is growing and we need a proper structure to avoid confusion.
So, we'll put resolvers and typeDefs both in separate folders and create an index.js in each one. then you can invoke them as Node modules. const resolvers = require('./resolvers').
index.js will look something like this
-
typeDefs/index.js
const typesDefs = require('./typeDefs');
module.exports = typesDefs;
-
resolvers/index.js
const todosResolvers = require('./todos');
const userResolvers = require('./user'); // Will create this file later.
module.exports = {
  Query: {
    ...todosResolvers.Query
  },
  Mutation: {
    ...todosResolvers.Mutation,
    ...userResolvers.Mutation
  }
};
Step 3: Create a User model
We need a new MongoDB collection for the users.
const { Schema, model } = require('mongoose');

const userSchema = new Schema({
  username: String,
  password: String,
  email: String,
  created: String
});

module.exports = model('User', userSchema);
And we need to update our Todo model as well.
const todoSchema = new Schema({
  text: String,
  created: String,
  username: String, // who created it
  user: {
    // referencing the User docutment
    type: Schema.Types.ObjectId,
    ref: 'users'
  }
});
Step 4: Create a Schema and resolvers for User
- we will update our typeDefs
const { gql } = require('apollo-server');

module.exports = gql`
  type Todo {
    id: ID!
    username: String! // new! add a username
    text: String!
    created: String!
  }
  // new! types of user data
  type User {
    id: ID!
    username: String!
    email: String!
    created: String!
    token: String!
  }
  // new! we use input instead of type
  // to pass the whole user info as an object
  input RegisterUserInput {
    username: String!
    password: String!
    confirmPassword: String!
    email: String!
  }
  type Query {
    getTodos: [Todo]
  }
  type Mutation {
    createTodo(text: String!): Todo!
    deleteTodo(todoId: ID!): String!
    // new! A user needs to be logged in before changing data.
    LoginUser(username: String!, password: String!): User!
    RegisterUser(user: RegisterUserInput!): User!
  }
`;
- update the ApolloServer parameters
Per the documentation: there are a number of ways to handle authentication of users. And we'll be using a token in an HTTP authorization header.
const server = new ApolloServer({
  typeDefs,
  resolvers,
  // a () => {} to build our context object.
  context: ({ req }) => {
    // get the authorization from the request headers
    // return a context obj with our token. if any!
    const auth = req.headers.authorization || '';
    return {
      auth
    };
  }
});
The context object is one that gets passed to every single resolver at every level, so we can access it anywhere in our schema code.
- create the user resolvers
In our case, We'll be creating two resolvers. Login & Register.
Register takes a userinput (username, pass,confirmPass, email) and returns the user info with a token.
But, First, We need import jsonwebtoken and bcrypt, So if the userinput is valid ( non-empty fields - some basic validation ), then hash the password, generate a token for that user.
const jwt = require('jsonwebtoken');
const bcrypt = require('bcryptjs');

const {
  UserInputError, // Throw an error if empty fields.
  AuthenticationError
} = require('apollo-server');

const User = require('../models/User');
// some string as a secret to generate toekns.
const { SECRET } = require('../config');

const getToken = ({ id, username, email }) =>
  jwt.sign(
    {
      id,
      username,
      email
    },
    SECRET,
    { expiresIn: '1d' }
  );

module.exports = {
  Mutation: {
    async LoginUser(_, { username, password }) {
      // validateLogin is a simple func that checks for empty fields
      // and return valid = false if any.
      const { errors, valid } = validateLogin(username, password);
      if (!valid) throw new UserInputError('Error', { errors });

      // check if that user already exists.
      const user = await User.findOne({ username });
      if (!user) throw new AuthenticationError('this user is not found!');

      const match = await bcrypt.compare(password, user.password);
      if (!match) throw new AuthenticationError('wrong password!');

      const token = getToken(user); // generate a token if no erros.
      return {
        id: user._id, // set an id
        ...user._doc, // spread the user info (email, created at, etc)
        token
      };
    },

    async RegisterUser(
      _,
      { user: { username, password, confirmPassword, email } }
    ) {
      const { errors, valid } = validateRegister(
        username,
        password,
        confirmPassword,
        email
      );
      if (!valid) throw new UserInputError('Error', { errors });

      const user = await User.findOne({ username });
      if (user) throw new ValidationError('This username is not valid!');

      password = await bcrypt.hash(password, 10); // hashing the password
      const newUser = new User({
        username,
        password,
        email,
        created: new Date().toISOString()
      });
      const res = await newUser.save();
      const token = getToken(res);

      return {
        id: res._id,
        ...res._doc,
        token
      };
    }
  }
};
Finally
Now, We'll update the todo resolvers (createTodo - deleteTodo), So We can control who can create and delete todos.
// Simply take an auth header and returns the user.
const getUser = async auth => {
  if (!auth) throw new AuthenticationError('you must be logged in!');

  const token = auth.split('Bearer ')[1];
  if (!token) throw new AuthenticationError('you should provide a token!');

  const user = await jwt.verify(token, SECRET, (err, decoded) => {
    if (err) throw new AuthenticationError('invalid token!');
    return decoded;
  });
  return user;
};


// The mutation takes 3 args (parent,args,context)
// in our case, we don't need parent
// destructure the todo text from args, and auth from context.
async createTodo(_, { text }, { auth }) {
      const user = await getUser(auth);
      if (user) {
        try {
          const newTodo = new Todo({
            user: user.id,
            username: user.username,
            text,
            created: new Date().toISOString()
          });
          const todo = await newTodo.save();
          return todo;
        } catch (err) {
          throw new Error(err);
        }
      }
    },
    async deleteTodo(_, { todoId }, { auth }) {
      const user = await getUser(auth);
      try {
        const todo = await Todo.findById(todoId);
        if (todo) {
          if (todo.username === user.username) await todo.delete();
          else
            throw new AuthenticationError(
              `you're not allowed to delete this todo!!`
            );
        } else throw new Error('todo is not found');
        return 'Todo deleted!';
      } catch (err) {
        throw new Error(err);
      }
    }
  }
That's it, I hope you find it easy and simple. If you have any questions, please let me know.
The cover image is from undraw.co.


Top comments (5)
UserInput --> RegisterUserInput
const match = bcrypt.compare(password, user.password); --> const match = await bcrypt.compare(password, user.password);
Otherwise you always get a token :)
Good tutorial, tnx.
thank you
Without realtime updates on your todo app, this thing isn't complete. Add the subscription part!
nice, will do soon
This helped me a lot JazakAllah.