Nowadays we can develop and test applications in a browser. You can spring up cloud-based dev environments that run in the browser with zero local configuration. And once you're up and running, you can share your application with others with a few clicks. It's quicker and easier to set up the application by using container technology. This means that we don't have to set up a development environment, and it's easy to share the application with others by just sharing the URL.
Thanks to the community’s hard work, Stripe’s accept-a-payment code sample now runs in GitHub Codespaces.
You can now run our example application in your browser through Codespace, meaning you don't have to download the application onto your local machine.

In this article, I'll demonstrate how you can use Codespaces to run this Stripe sample application in your browser.
Requirements
You'll need an active GitHub account to use Codespaces and a test Stripe account to use this sample.
GitHub Codespaces has a free usage tier for personal accounts, but if you're part of a GitHub Organization or an Enterprise account. You should check the Codespaces pricing.
Launch the first container
You can launch the Stripe example application from this GitHub repository in just a few simple clicks.
From the repository’s main page, click the “Code” button in the top right corner to open the dropdown menu:

Change the tab to “Codespaces,” and click the “Create Codespace on main” button.

Click the “Create Codespace on main” button and GitHub Codespace will launch the application project in a container. A new tab will open to show the in-browser editor to edit the application.

Run the application in Codespace
In the browser editor, we can open the application files and run bash commands in the provided terminal environment.

Let’s configure the application to use our own Stripe API key.
Note: for this post, we’ll be using Node.js, but you can use any of the supported back-end languages.
For the next step you’ll need your Stripe API keys, which you can find in the Stripe Dashboard on the “Developers” page.

Back in the dev environment, type the following command in the terminal to copy the environmental variables example file:
cp payment-element/.env.example payment-element/node/.env
Open the newly created .env file in the editor and configure these API keys:
STRIPE_PUBLISHABLE_KEY=pk_test_123...
STRIPE_SECRET_KEY=sk_test_123...
Back in your terminal cd into the server side demo application directory and install the dependencies with npm.
npm install
After that, we can start the demo application:
npm start
Codespace will show a pop-up message to open the application in a new tab.
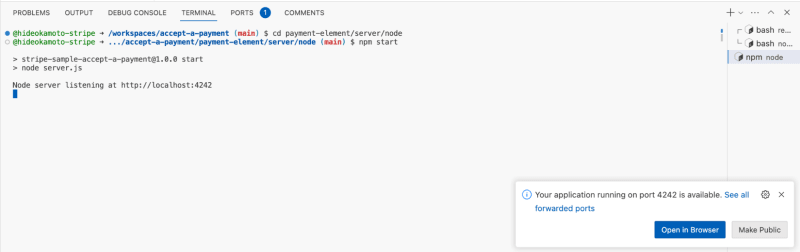
After clicking the “open in browser” button, we can see the demo application in the browser.

And that’s it! We have a working sample and development environment working in the browser.
Tips: How to retrieve the preview URL
We can find the running preview URLs in the “PORTS” tab:

Modify the application in the browser
Codespaces makes it easy to modify our code straight from the browser. For example, let's think about changing the style of the payment form to support dark mode.
Open the payment-element/client/html/index.js file and edit the stripe.elements() function:
-  const elements = stripe.elements({ clientSecret });
+  const elements = stripe.elements({
+    clientSecret,
+    locale: 'en',
+    appearance: {
+      theme: 'night'
+    }
+  });
The above will set the locale to English and instruct the Payment Element to use the predefined “night” theme.
In this example, the application (payment-element/server/node) needs to restart to reflect changes. So press the “Ctrl” key and “C” key on the terminal to stop the “npm start” command and re-run the “npm start” command.
The appearance of the checkout form will have changed to use the “night” theme:

If you're interested in learning more about customizing the payment form, you can read up more about the Appearance API.
Running multiple applications
The above demonstrates how to run the sample frontend on Codespaces, but what if you want the fullstack picture? Luckily, it’s possible to run both the frontend and backend of the sample with Codespaces with just a little configuration.
Click the “Split Terminal button” on the terminal section to launch a new terminal tab.

Click the new terminal tab to prepare the client-side application.

Now move into the client-side application directory. Let’s go to payment-elements/client/react-cra to test the React application.
cd ../../client/react-cra/
Install the dependencies by running the install command:
npm install
and start the React application.
npm start
Open the new window to access the preview URL of the React application.

Each preview application is connected in a container on Codespace, so we don't have to update the code to fetch or connect to another application. Plus, we can keep using the “localhost” domain within our environment to see the fullstack app.
Share the demo publicly
The preview URL is kept private, meaning that unauthorized or logged-out users will be redirected to the sign-in page.

If you want to share the demo application, we can make the container public by following a few steps.
Access the “PORT” tab and right-click the application you want to publish.

Open the “Port Visibility” submenu, and select “Public.” Now anyone with the URL can access the application.

You can check the ‘Visibility’ status of the application by reviewing the “PORT” tab.

Stop and terminate the Codespace container
GitHub Codespaces has a free tier, but it's not unlimited usage. Be sure to terminate the container when it’s no longer needed.
You can see your existing containers from the Codespaces dashboard:

Click the “...” button on each container to show the context menu where you can delete the Codespace to stop it.

You can also manage the Codespace from the repository page itself:

Conclusion
In this post, we learned how to launch the accept-a-payment Stripe sample development environment in a browser using GitHub Codespaces.
If you're interested in how to support Codespaces in your application, you can learn about it from the official GitHub documentation.
The stripe-samples repository includes various languages and use cases. For example, you can choose to use Stripe Checkout instead of the Payment Element.
About the author

Hidetaka Okamoto is a developer advocate at Stripe, where he works on writing, coding, and teaching how to integrate online payments. He has organized several community conferences, including WordCamp Kyoto 2017 and JP_Stripes Connect 2019, the first Stripe user conference in Japan. He lives in Hyogo, Japan with his family and two cats.
Stay connected
You can also stay up-to-date with Stripe developer updates on the following platforms:
- 📣 Follow @StripeDev and our team on Twitter.
- 📺 Subscribe to our YouTube channel.
- 💬 Join the official Discord server.
- 📧 Sign up for the Developer Digest.


Top comments (2)
If you are looking for a guide that walks you through how to get one-time payments and sell fixed-price subscriptions and provides an example of a well-working integration with Stripe, look at our demo techtolia.com/Stripe/New/
With this powerful combination, you can rapidly prototype and evaluate Stripe's functionality in a sandbox environment without the need for complex local setups.
Tiger exchange 247
Some comments have been hidden by the post's author - find out more