
Now that we've successfully executed our first classic editor pipeline in the previous part, we're diving into the third part of the pipeline series—' Exploring YAML Pipeline in Azure DevOps.' In this blog, we'll delve into the intricacies of writing YAML pipelines in Azure DevOps, exploring the syntax and the practical aspects associated with it. Get ready to understand the power and flexibility YAML brings to your CI/CD pipelines in Azure DevOps!
=================================================================
*Note: *
When you are doing practical work, don't delete anything because our Azure DevOps series relies on continuity between each part. Ensure that you are not cleaning your workspace. Additionally, don't worry about charges, as our account is on a free trial. We are covering beginners or basic Azure DevOps, so our project is not large. If a bill is generated, it will not go higher. For some knowledge, you can budget or be ready to invest some money.
=================================================================
-> So, let's get started.
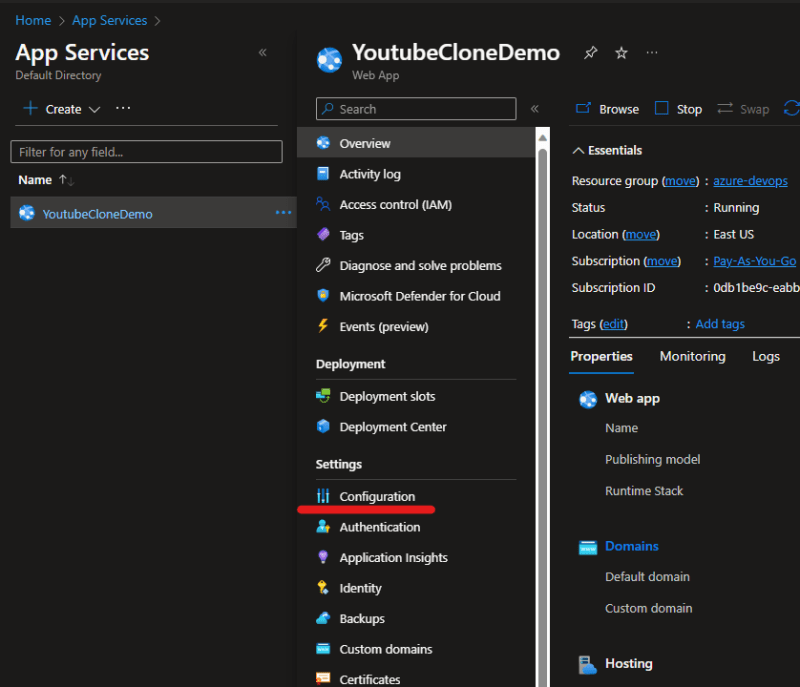
-> Now, navigate to the Azure portal and access the Azure Web App. By default, Azure App Service enables local cache, but we need to disable it by configuring the environment variable. Head to the 'Configuration' tab in your app service and make the necessary adjustments.
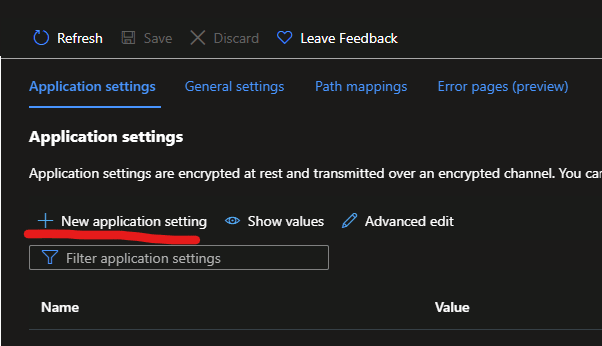
-> In the 'Application settings' section, which represents environment variables, click on it. Provide the necessary 'Name' and 'Value,' and once entered, click 'OK.' This step is crucial for configuring environment variables in your application.
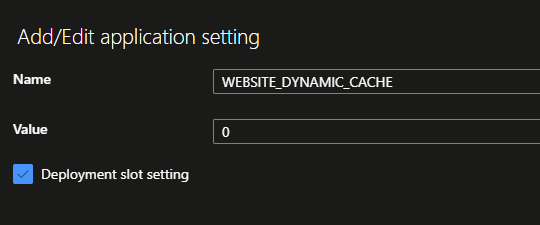
-> Repeat the process to create another environment variable, and with that, the configuration is complete.


-> Click on 'Save' to apply the changes, and then proceed to the next step.
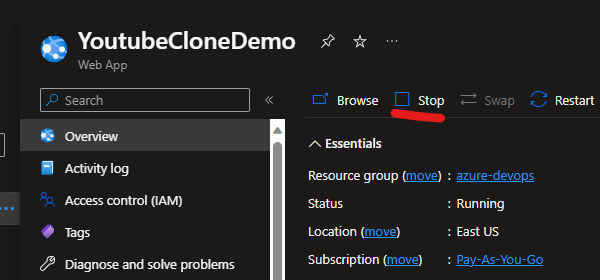
-> After making these changes, navigate to the 'Overview' section, stop the application, and then start it again to reflect the modifications.
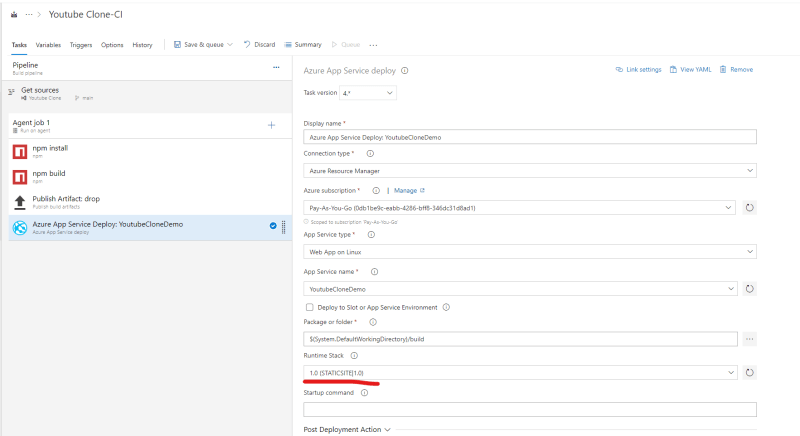
-> Navigate to the pipeline, click on 'Edit,' and in the 'Azure App Service Deploy' task, change the 'Runtime Stack' to 'StaticSite' since our website is static. After making this adjustment, click on 'Save & Queue.'
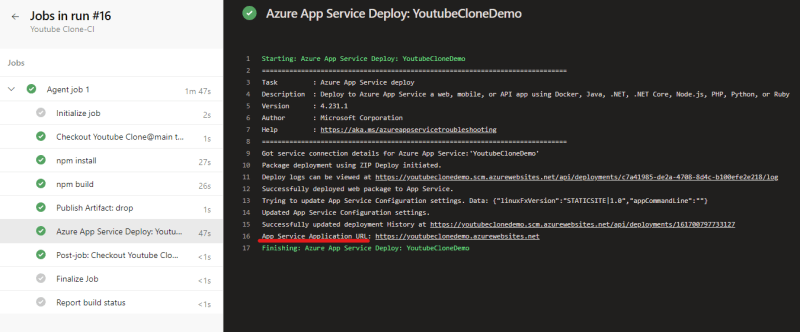
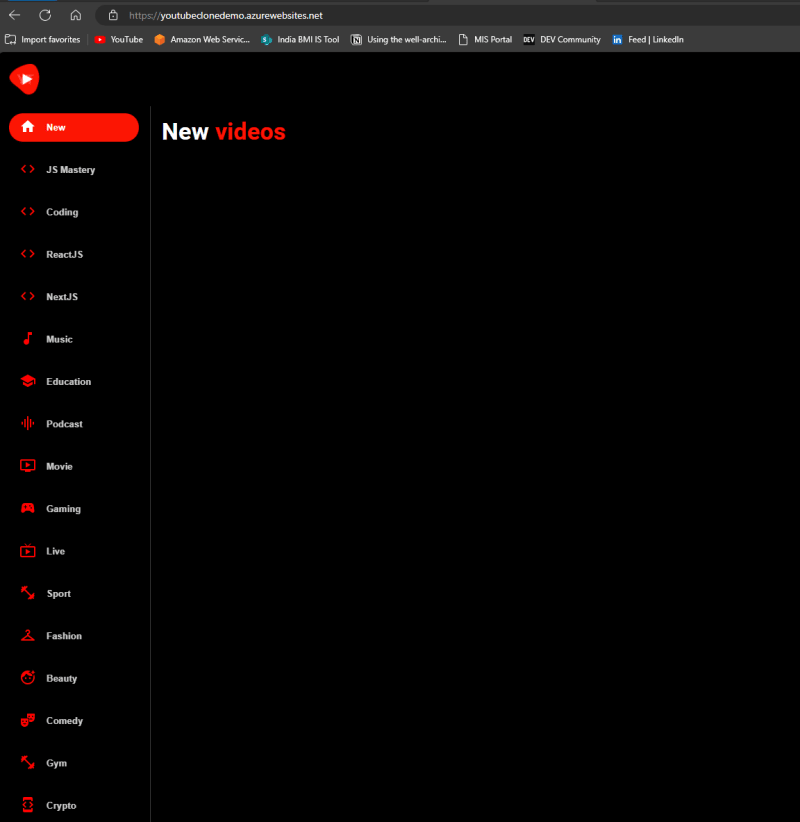
-> Navigate to the 'Azure App Service Deploy' stage, scroll down, and click on 'Application URL.' You should see our 'Youtube Clone Application' – note that the video may not load due to some issues on my end, but you can verify it on your side.
-> We've explored the Classic Pipeline Editor, and now it's time to delve into the 'YAML Pipeline.'
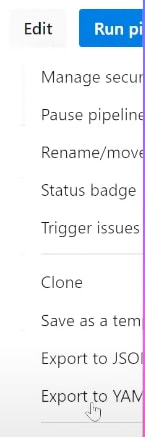
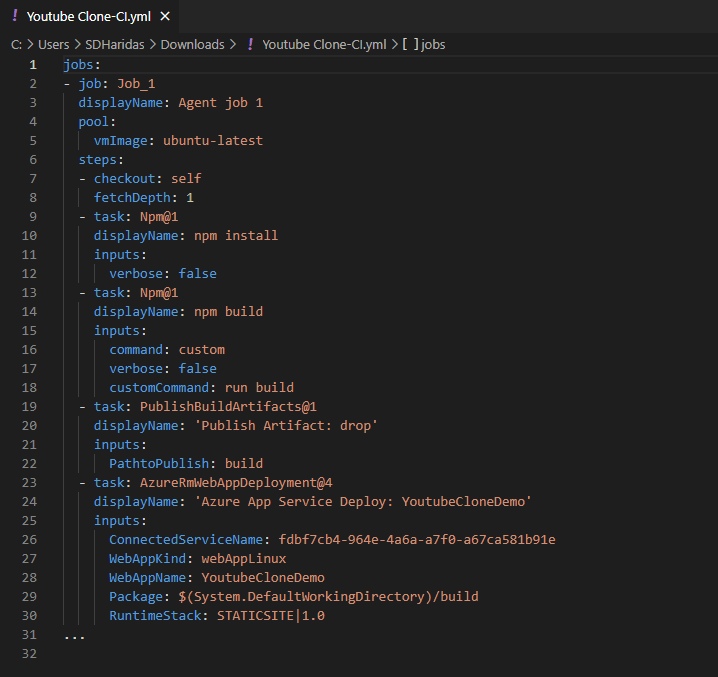
-> Navigate to the pipeline, click on the three dots, and at the bottom, choose 'Export to YAML' to generate the YAML code.
-> This is one method to create a pipeline, but it's not a best practice. It's not recommended to create a classic editor pipeline first and then generate the pipeline from it.
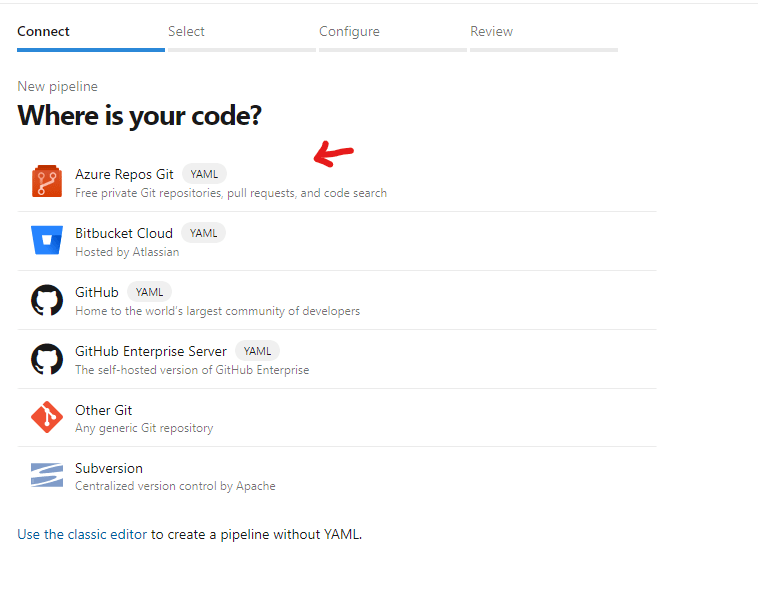
-> So, now let's explore other steps to create a pipeline or YAML pipeline. Go back to the pipeline, click on 'New Pipeline,' and select 'Azure Repos Git.'
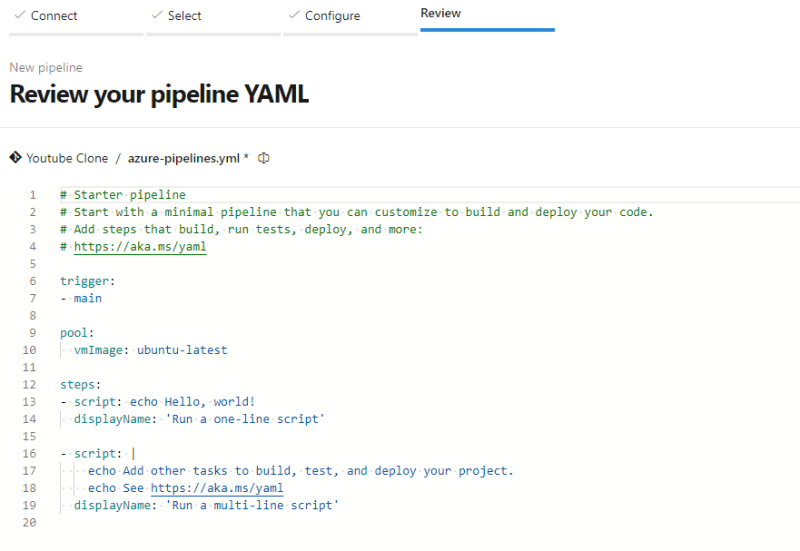
-> Then click on 'Starter Pipeline,' and it will create a basic pipeline for you.

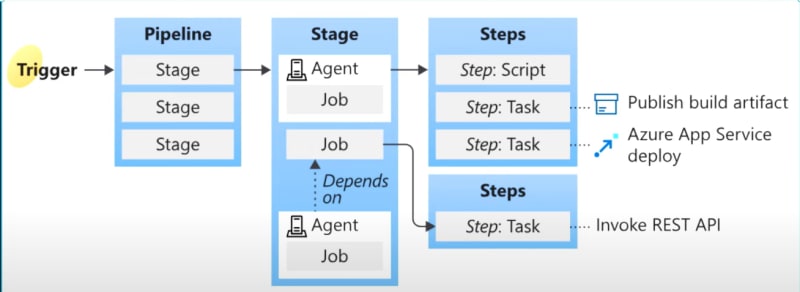
-> Below are Pipeline structure for any tool
-> Copy the YAML pipeline below. You can also get assistance from the "Show assistant" feature, which will help automatically add tasks or steps in YAML; you just need to make the selection.
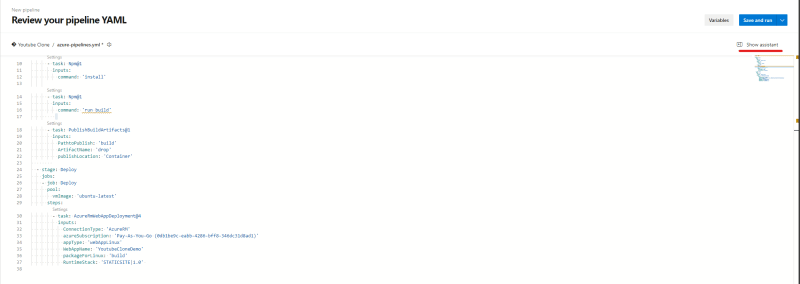
trigger:
- main

stages:
- stage: Build
  jobs:
  - job: Build
    pool:
      vmImage: 'ubuntu-latest'
    steps:
    - task: Npm@1
      inputs:
        command: 'install'
    - task: Npm@1
      inputs:
        command: 'custom'
        customCommand: 'run build'


    - task: PublishBuildArtifacts@1
      inputs:
        PathtoPublish: 'build'
        ArtifactName: 'drop'
        publishLocation: 'Container'

- stage: Deploy
  jobs:
  - job: Deploy
    pool:
      vmImage: 'ubuntu-latest'
    steps:
    - task: DownloadBuildArtifacts@1
      inputs:
        buildType: 'current'
        downloadType: 'single'
        artifactName: 'drop'
        downloadPath: '$(System.ArtifactsDirectory)'
    - task: AzureRmWebAppDeployment@4
      inputs:
        ConnectionType: 'AzureRM'
        azureSubscription: 'Pay-As-You-Go (0db1be9c-eabb-4286-bff8-346dc31d8ad1)'
        appType: 'webAppLinux'
        WebAppName: 'YoutubeCloneDemo'
        packageForLinux: '$(System.ArtifactsDirectory)/drop'
        RuntimeStack: 'STATICSITE|1.0'
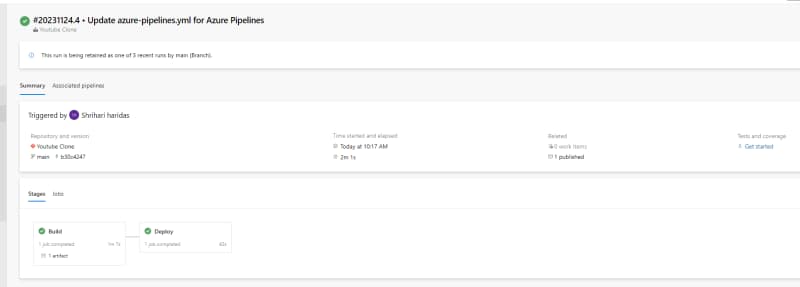
-> Then click on “Save & Run.” Your pipeline will start, and it will be deployed successfully.
=================================================================
Summary:
In the 3rd part of our pipeline series, we delved into the realm of YAML pipelines in Azure DevOps. We explored the process of writing YAML code to define our pipeline, covering essential concepts such as jobs, stages, steps, tasks, and variables. By understanding the structure of a YAML pipeline, we gained insights into how to configure and customize our CI/CD workflows efficiently. This exploration marked a crucial step in transitioning from the classic editor to embracing the power and flexibility offered by YAML pipelines in Azure DevOps. Stay tuned for the next part as we continue to unravel the intricacies of Azure DevOps pipelines.
=================================================================
If you have any doubts, questions, or recommendations, feel free to drop a comment. Follow me for updates and happy learning! :)

Top comments (0)