
Welcome to our Azure DevOps series! In this journey, we'll embark on a comprehensive exploration of Azure DevOps, a powerful platform designed to streamline the software development lifecycle. To kick off, we'll delve into the heart of project management with Azure DevOps Boards. Our first installment,' Demystifying Azure DevOps Boards: An In-Depth Overview', breaks down into two parts:
Part 1: "Understanding Work Items, Boards, and Backlog in Azure DevOps"
Get ready to gain a deep understanding of the fundamental elements that drive efficient project management on Azure DevOps.
Part 2: "Efficient Sprint Planning and Powerful Queries in Azure DevOps Boards"
Explore advanced techniques for sprint planning and harness the full potential of queries to enhance your project's agility and productivity.
Whether you're new to Azure DevOps or looking to refine your skills, join us for a hands-on journey where theory meets practical application. Let's dive into the world of Azure DevOps together! 🚀"
=================================================================
*Note: *
When you are doing practical work, don't delete anything because our Azure DevOps series relies on continuity between each part. Ensure that you are not cleaning your workspace. Additionally, don't worry about charges, as our account is on a free trial. We are covering beginners or basic Azure DevOps, so our project is not large. If a bill is generated, it will hardly exceed 100.
=================================================================
-> Go to the Azure Portal and navigate to "Azure DevOps Service."

-> Then choose your organization

-> Then create a 'New Project.' Choose the 'Basic' option, not 'Agile.'

-> Then you will see the default dashboard

-> Next, click on 'Boards' to view the default Kanban boards on Azure. Then, click on 'New Item' and add some tasks, assigning them to yourself. Click 'Save.' Additionally, you can provide a description for each task and utilize the discussion option to talk about task-related matters. Don't forget to add tags for easy understanding and searching. As seen below, there is a priority section to define the task's priority, and you can set start and end dates. All of these options are under 'Epic.' Remember, in 'Issues,' some options may not be readily available.

-> Also, if you notice on the left-hand side, there are dropdowns for 'Epic' and 'Issues.' 'Issues' and 'Tasks' are used to track work, while 'Epics' are used to group work under larger scenarios.

-> You can drag and drop the assigned work depending on their status. In 'Issues,' if you click on 'Add Task,' you can create tasks under that issue by clicking on it. The hierarchy is parent and child tasks. Also, if a task has been completed, you cannot move it to the next section, such as 'Done,' directly. Instead, you need to move the parent task so that the child task is also moved into that section. If you open the task, you can select the 'Activity Type' as Deployment or Design, depending on the model you choose when configuring the project.

-> To generate dummy data, open the following link and click on 'Sign In.' Choose your Azure account.

-> Accept or grant permission to the project window and proceed to the next page.

-> Next, choose a template and select the 1st option, 'Parts Unlimited.' Then, click on 'Select Template,' give the project a name as you prefer, and finally, click on 'Create Project.


-> Here, you will see the progress of your creation. If you encounter any errors during the creation process, you can ignore them.

-> Go to the 'Azure DevOps' dashboard again, refresh the page, and you will see our project imported. Remember, we are using a free trial account for this.
-> After clicking on 'Parts Unlimited,' which is our imported project...

-> Then, in the bottom right corner, you will see the 'Project Settings' option, where we can make some changes. Click on it.
![]()
-> In the 'Teams' option, click on 'New Team,' give a name to the team, and create the team.


-> Next, click on the new team, and go to the 'Iterations and Area Path' option.

-> Then, go to 'Iterations,' scroll down, and select 'Iteration' as 'Sprint1.' This ensures that the team we created in the last step is also using the same sprint as other teams. Finally, click on 'Save.

-> Next, go to 'Overview,' and in the 'Dashboard' option, you will see the overall project status, including various metrics.


-> In the same dashboard, in the right-bottom corner, click on 'New Work Item.' Give a name for that item and click on 'Create.' The work item is an 'Epic' for demonstration purposes.

-> After hitting the 'Create' button, a page will open where you can make changes. Modify the area, and iteration, and add a feature sprint if necessary. Keep the other settings as they are.

-> Now, go to 'Boards,' and under 'Work Items,' you will see that your 'work item' has been created.

-> After that, click on that work item to create some child work items. Open it, and on the bottom-left side, you will see the 'Add link' option. Choose 'New' in that option.

-> Select the work item type as 'Feature,' give a name to that child process, and save it. You can see the child link as well.


-> Next, go to 'Boards,' then in 'My Teams Boards,' select 'PUL-Web Boards.

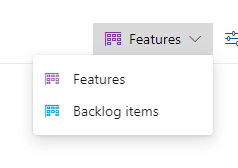
-> Then, select the type 'Features,' and you will see our items.

-> Now, let's create a 'Product Item Backlog.' Click on the three dots beside the 'Work Item.' You will see an option for 'Add Product Backlog Item.' Click on it and then add the item.

-> Now, you can go to the 'Backlog Item' menu, and you will see your backlog there. You can move items to 'New,' 'Approved,' 'Done,' and also assign them to a developer.

-> Now, if you click on 'View as Backlog,' you can also create tasks from here. Click on the '+' option, add a task, and save it. You will see the child task is added.


-> If you click on that child task, you will see properties, remaining work, and activity. Choose the activity as 'development,' set the remaining work to 2, and save it.


Until now, in Part 1, we have covered how to create a project, set up a Kanban dashboard, and explore boards. On boards, we looked at backlogs and work items. I hope it's clear up to this point. In the upcoming Part 2, we will delve into sprints and queries in Azure DevOps.
==============================================================
Conclusion:
-> Kanban Dashboard:
The Kanban Dashboard in Azure DevOps provides a visual
representation of work items and their flow through various
stages, offering real-time insights into the status of tasks
and projects.
-> Boards:
Boards in Azure DevOps are collaborative spaces that help
teams visualize and manage their work using customizable
boards, providing a structured way to track and move work
items through different stages of development.
-> Work Items:
Work Items in Azure DevOps represent tasks, features, or
issues throughout the development lifecycle, capturing
essential information such as priority, status, and assigned
team members.
-> Backlog:
The Backlog in Azure DevOps is a prioritized list of work
items, including user stories, features, and tasks, serving
as a dynamic plan that guides the team's development efforts.
==============================================================
If you have any doubts, questions, or recommendations, feel free to drop a comment. Follow me for updates and happy learning! :)

Top comments (0)