
In our first blog, we explored the foundational elements of Azure DevOps Boards, delving into the significance of work items, the dynamic nature of boards, and the strategic role of the backlog. If you missed it, catch up on the basics before we move on to the next phase of our Azure Boards journey!
Building on our foundational knowledge, today's blog guides you through the intricacies of efficient sprint planning and leveraging powerful queries in Azure DevOps Boards. With this, we conclude the exploration of our first Azure DevOps service. Stay tuned as we venture into more aspects of Azure DevOps! 🚀
=================================================================
*Note: *
When you are doing practical work, don't delete anything because our Azure DevOps series relies on continuity between each part. Ensure that you are not cleaning your workspace. Additionally, don't worry about charges, as our account is on a free trial. We are covering beginners or basic Azure DevOps, so our project is not large. If a bill is generated, it will hardly exceed 100.
=================================================================
-> So, let's get started. Open the Azure Portal, navigate to Azure DevOps services, and access the ongoing project that we're actively working on.
-> Let's add another task.
-> Up to this point, we've covered the overview section. Now, in 'Boards,' we've explored Work Items, Boards, and Backlogs. Let's continue our exploration by delving into 'Sprints.

-> Navigate to 'Sprints,' open it, and you will encounter the dashboard displaying the sprints. To view the details, go to the filter option and select 'Work Details
![]()

-> You will see 'Sprint1,' but there's no dashboard here. This is because it is the default sprint set for me, and as a result, I am unable to see other sprints.

-> If you select any other team from the dropdown, you will see the sprints and their dashboard. However, for the custom team 'PUL-WEB,' you need to enable the setting to access it.

-> To enable the setting, open 'Team Configuration' from the bottom-left bar.
![]()
-> Inside 'Team Configuration' under 'Areas,' you will notice 'PUL-Web.' Click on the three dots next to the name and select 'Includes Sub Areas.'

-> Next, navigate to the 'Iteration' option. Here, you will observe that we've only added 'Sprint 1.' Let's proceed to add other iterations as well.


-> Go back to 'Sprint,' refresh it, and you will now see 'Sprints' on the right side. You will also find collective work details there.

-> This is due to our addition of 2 story points and 2 hours for those two tasks.


-> If you wish to modify your availability or set your week off, you can manage these settings by clicking on the 'Capacity' option. This adjustment will impact the team planning, and consequently, your 'Taskboard' will reflect these changes, including the 5 days off for Diwali vacations.

-> Now, if you go back to the 'Taskboard,' you will notice the updated time and work hours. This is because we added 1 hour per day, totaling 10 hours for the next two weeks.

-> Now, if you change the task duration, it will impact everything, including capacity planning, as the task will require additional time. Additionally, since I'm going on vacation, it means I won't have enough time to complete the task.

-> So, to address this, we can move that particular task to a future sprint. Simply right-click on the task and choose the option 'Move to Iteration.

-> We can also customize the view. Click on the 'Settings' button in the right-hand side corner, then navigate to 'Styles,' to add a styling rule. The rule's name is 'Development,' with the color set to green. The rule criteria are: when the activity is equal to development, the color will change to green. Save the changes.


-> Let's explore how to customize the Kanban board. Click on the 'Boards' option on the left, then access the settings. Navigate to 'Styles,' name it 'High Priority,' set the color to red, and define the rule as priority equal to 1. Save the changes. If you don't have a P1 issue, you can create one for demonstration purposes.


-> We can make further customizations. Go to settings again, navigate to 'Tag Color,' add a tag color for the tag 'data' with the color set to yellow. Then, go to 'Test' and save the changes.

-> Next, go to any task, add the tag name as 'data,' and save it. You will observe the updates reflecting the customized tag color


-> Proceed to settings again, then select 'Columns.' Add one more column named 'QA Approved.' Set a WIP (work in progress) limit to 1, and save the changes.

-> If I add more than one task in the 'QA Approved' column, it will display in red, indicating that it exceeds the set limit.

-> Go back to settings once again, navigate to 'Columns,' go to 'QA Approved,' and split that column into 'Doing' and 'Done.


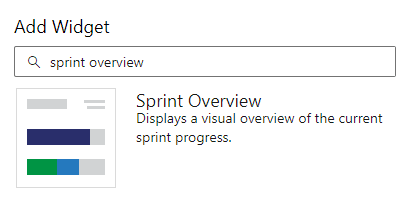
-> Now, let's customize the dashboard. Go to 'Dashboards,' click on the 'Overview' dropdown, and select 'New Dashboard.' Provide a name and save it.


-> Since we don't have any widgets yet, let's add them. Follow the picture below to import the dashboard.


-> Now, let's navigate back to 'Boards' and then to 'Queries.' Click on 'New Queries' as we create some custom queries.
![]()

-> Let's assume you need the work item type to be equal to 'Task.' For the area path, select 'PUL-WEB' and then click 'Save Query.' Provide a name to the query, and run it. Additionally, you can create charts for the query to visualize the data in a graphical form.


![]()


==============================================================
Conclusion:
-> Sprints:
Sprints in Azure DevOps are time-boxed iterations during which teams work on a set of user stories and tasks. They provide a structured framework for planning, executing, and reviewing work within a specified timeframe.
-> Queries:
Queries in Azure DevOps allow users to define custom searches to filter and retrieve specific work items or data. They are powerful tools for managing and organizing work, providing flexibility in accessing information based on user-defined criteria.
==============================================================
Up until now, we've covered the first service in Azure DevOps in two parts, exploring Boards, Sprints, Queries, and Backlog. I've provided step-by-step guidance, and practical demonstrations, and created related items to illustrate their purpose.
What's next? In the upcoming blog, we'll dive into Azure Repositories, a critical aspect of version control. This blog will be divided into two parts, covering the basics of Git, push and pull commands, and demonstrating how to utilize Azure Repos from both the command line and the GUI in code editors. Stay tuned for more learning!
If you have any doubts, questions, or recommendations, feel free to drop a comment. Follow me for updates and happy learning! :)

Top comments (0)