In a previous article we covered how to allow users with non-superuser access to reset their password with an automated email sent upon user input. However, the email was in plain text and lacked the HTML appearance many have come to associate with branded emails.
In this article, we will cover the basics of emailing HTML code, how to create a HTML email template, and the changes needed to send the HTML and plain text email to users' inboxes.
Initial HTML email template setup
As you may have guessed, HTML email templates are formatted in HTML code and can contain all of the basic HTML elements like<!DOCTYPE html>,<html>,<body>,<style>and so on.
But you should think of the template as a completely independent page on your website. It should not include or extend any other templates.
DOCTYPE
First, we need to add a document type to the top of the document so the browser can render the HTML elements correctly.
Some email clients like Yahoo, Gmail, and Outlook strip away the doctype, but it is still a good idea to format your email template with the basic HTML elements so it can adequately cover the clients that don't strip code.
<!DOCTYPE html PUBLIC "-//W3C//DTD XHTML 1.0 Transitional//EN" "http://www.w3.org/TR/xhtml1/DTD/xhtml1-transitional.dtd">
As you may have noticed, we are using the XHTML 1.0 Transitional that contains all of the HTML documents and attributes. The main difference between XHTML and regular HTML5 is that the former requires you to code <html>, <head>, and <body> tags while the latter can work without them.
You could opt to use the regular <!DOCTYPE html> or HTML5 document type, but XHTML is better suited to interpret poor HTML coding, like missing closing tags, on smaller devices.
But generally speaking, there are only subtle differences between the document types and both work fine for email templates.
html element
<!DOCTYPE html PUBLIC "-//W3C//DTD XHTML 1.0 Transitional//EN" "http://www.w3.org/TR/xhtml1/DTD/xhtml1-transitional.dtd">
<html xmlns="http://www.w3.org/1999/xhtml">
</html>
The next thing to add is the element. If your are using XHTML, you will need to specify the xmlns. However it is optional when using HTML5.
head element
<!DOCTYPE html PUBLIC "-//W3C//DTD XHTML 1.0 Transitional//EN" "http://www.w3.org/TR/xhtml1/DTD/xhtml1-transitional.dtd">
<html xmlns="http://www.w3.org/1999/xhtml">
    <head>
        <meta http-equiv="Content-Type" content="text/html; charset=UTF-8" />
        <title>HTML email template</title>
        <meta name="viewport" content="width=device-width, initial-scale=1.0"/>
    </head>
</html>
Then you can go ahead and add the <head> element and have the necessary meta tags that provide the character set and the viewport metadata.
Coding the HTML email template
Now let's move on to the body of the HTML email template. Most HTML templates use the <table> element rather than <div> to separate content.
Why?
Compatibility.
Web clients like Chrome and Safari use different web-based engines that display emails differently depending on the browser's engine. In particular, Microsoft Outlook has extreme difficulty rendering division elements. But if you really want to use division elements you can use ghost tables.
Tables in the body element
<!DOCTYPE html PUBLIC "-//W3C//DTD XHTML 1.0 Transitional//EN" "http://www.w3.org/TR/xhtml1/DTD/xhtml1-transitional.dtd">
<html xmlns="http://www.w3.org/1999/xhtml">
    <head>
        <meta http-equiv="Content-Type" content="text/html; charset=UTF-8" />
        <title>HTML email template</title>
        <meta name="viewport" content="width=device-width, initial-scale=1.0"/>
    </head>
    <body>
        <table>
            <tr>
                <td align="center">

                <!--Your email code goes here-->

                </td>
            </tr>
        </table>
    </body>
</html>
Now add a <body> element with a table element nested within it. Then you can add the table rows, <tr>, and table data or cells, <td>. You can chose to add as many table rows and cells as you need for your email.
Ghost tables in the body element
<!DOCTYPE html PUBLIC "-//W3C//DTD XHTML 1.0 Transitional//EN" "http://www.w3.org/TR/xhtml1/DTD/xhtml1-transitional.dtd">
<html xmlns="http://www.w3.org/1999/xhtml">
    <head>
        <meta http-equiv="Content-Type" content="text/html; charset=UTF-8" />
        <title>HTML email template</title>
        <meta name="viewport" content="width=device-width, initial-scale=1.0"/>
    </head>
    <body>
        <!--[if true]>
            <table>
                <tr>
                    <td align="center">
        <![endif]-->

        <div>
            <!--Your email code goes here-->
        </div>

        <!--[if true]>
                    </td>
                </tr>
            </table>
        <![endif]-->

    </body>
</html>
If you really don't want to use tables, you can always add ghost tables to your <div> elements. Ghost tables are essentially only created for Microsoft Outlook compatibility, given that other web clients don't seem to have as much issue with division elements.
To use ghost tables, all you need to do is wrap the <table>, <tr>, and <td> opening and closing tags in the comment <!--[if true]> <![endif]-->. Then you can code with division elements as if the ghost tables weren't even there.
Add a preview text to the body element
<!DOCTYPE html PUBLIC "-//W3C//DTD XHTML 1.0 Transitional//EN" "http://www.w3.org/TR/xhtml1/DTD/xhtml1-transitional.dtd">
<html xmlns="http://www.w3.org/1999/xhtml">
    <head>
        <meta http-equiv="Content-Type" content="text/html; charset=UTF-8" />
        <title>HTML email template</title>
        <meta name="viewport" content="width=device-width, initial-scale=1.0"/>
    </head>
    <body>
        <div class="preheader" style="display: none; max-height: 0; overflow: hidden;">
        This is where you add the preview text for the email...
        </div>


        <table>
            <tr>
                <td  align="center">

                <!--Your email code goes here-->

                </td>
            </tr>
        </table>
    </body>
</html>
If you look at your email inbox you've probably noticed that every email has a Subject line and then a little bit of preview text from the email. Well, this text can be customized to display any text of your choosing.
To add your own preview text, you can create a custom class named preheader that is then hidden within the <body> element. That way, the email client is able to read in this information and display it as the preview text, but keep it from appearing in the actual template.
Add white space after the preview text
<!DOCTYPE html PUBLIC "-//W3C//DTD XHTML 1.0 Transitional//EN" "http://www.w3.org/TR/xhtml1/DTD/xhtml1-transitional.dtd">
<html xmlns="http://www.w3.org/1999/xhtml">
<head>
<meta http-equiv="Content-Type" content="text/html; charset=UTF-8" />
<title>HTML email template</title>
<meta name="viewport" content="width=device-width, initial-scale=1.0"/>
</head>
<body>
<div class="preheader" style="mso-element-wrap:no-wrap-beside;line-height:0; display: none;max-height: 0; overflow: hidden;">
This is where you add the preview text for the email...
</div>
<div style="display: none; width: 0px; height: 0px; max-height: 0px; overflow: hidden;">
‌ ‌ ‌ ‌ ‌ ‌ ‌ ‌ ‌ ‌ ‌ ‌ ‌ ‌ ‌ ‌ ‌ ‌ ‌ ‌ ‌ ‌ ‌ ‌ ‌ ‌ ‌ ‌ ‌ ‌ ‌ ‌ ‌ ‌ ‌ ‌ ‌ ‌ ‌ ‌ ‌ ‌ ‌ ‌ ‌ ‌ ‌ ‌ ‌ ‌ ‌ ‌ ‌ ‌ ‌ ‌ ‌ ‌ ‌ ‌ ‌ ‌ ‌ ‌ ‌ ‌ ‌ ‌ ‌ ‌ ‌ ‌ ‌ ‌ ‌ ‌ ‌ ‌ ‌ ‌ ‌ ‌ ‌ ‌ ‌ ‌ ‌ ‌ ‌ ‌ ‌ ‌ ‌ ‌ ‌ ‌ ‌ ‌ ‌ ‌ ‌ ‌ ‌ ‌ ‌ ‌ ‌ ‌ ‌ ‌ ‌ ‌ ‌ ‌ ‌ ‌ ‌ ‌
</div>
<table>
<tr>
<td align="center">
<!--Your email code goes here-->
</td>
</tr>
</table>
</body>
</html>
Then to guarantee that only the preview text shows rather than the start of the text in the email template, you can add white space after the preview text so the email doesn't use any of the other text within the template.
Style your HTML email template
The easiest way to style your HTML email template is with either a HTML style element or inline CSS. Placing the CSS within the document insures that the email will render the styling correctly and quickly.
Inline CSS
<!DOCTYPE html PUBLIC "-//W3C//DTD XHTML 1.0 Transitional//EN" "http://www.w3.org/TR/xhtml1/DTD/xhtml1-transitional.dtd">
<html xmlns="http://www.w3.org/1999/xhtml">
    <head>
        <meta http-equiv="Content-Type" content="text/html; charset=UTF-8" />
        <title>HTML email template</title>
        <meta name="viewport" content="width=device-width, initial-scale=1.0"/>
    </head>
    <body>
        <table>
            <tr style="font-size:12px; color:#f1f1f1">
                <td  align="center">

                <!--Your email code goes here-->

                </td>
            </tr>
        </table>
    </body>
</html>
You can choose to do inline CSS and add a style attribute with CSS declarations directly to the opening tag of the division element.
style element
<!DOCTYPE html PUBLIC "-//W3C//DTD XHTML 1.0 Transitional//EN" "http://www.w3.org/TR/xhtml1/DTD/xhtml1-transitional.dtd">
<html xmlns="http://www.w3.org/1999/xhtml">
    <head>
        <meta http-equiv="Content-Type" content="text/html; charset=UTF-8" />
        <title>HTML email template</title>
        <meta name="viewport" content="width=device-width, initial-scale=1.0"/>
    </head>
    <style>
        .tr{
            font-size:12px;
            color:#f1f1f1
         }
    </style>
    <body>
        <table>
            <tr>
                <td  align="center">

                <!--Your email code goes here-->

                </td>
            </tr>
        </table>
    </body>
</html>
Or you can choose to add an entire style HTML element that specifies the CSS declarations. It is really more of a personal choice; both work well.
Use media queries for mobile compatibility
In order to have a responsive email template that is compatible with most screen sizes, you need to add media queries to the document. Media queries allow CSS declarations to be adjusted according to a minimum and maximum screen width.
<style>
   @media only (min-width:300px) and (max-width:600px) {
            .td {font-size:10px !important;}
        }
</style>
You can set a media query in a <style> tag and specify the widths of your choice. You can use the developer tools offered by your browser to view your email in different viewpoints.
Adding an HTML email template to your Django project
We will be basing our HTML email template on an existing plain text email we created in the article Reset User Passwords in Django. Please refer to this article before trying to complete the remaining steps.
Make a password reset HTML email template
#env > mysite > main > templates > main > password > (New File) password_reset_email.html

<!DOCTYPE html PUBLIC "-//W3C//DTD XHTML 1.0 Transitional//EN" "http://www.w3.org/TR/xhtml1/DTD/xhtml1-transitional.dtd">
<html xmlns="http://www.w3.org/1999/xhtml">
  <head>
    <title>HTML email template</title>
    <meta name="viewport" content="width = 375, initial-scale = -1">
  </head>

  <body style="background-color: #ffffff; font-size: 16px;">
    <center>
      <table align="center" border="0" cellpadding="0" cellspacing="0" style="height:100%; width:600px;">
          <!-- BEGIN EMAIL -->
          <tr>
            <td align="center" bgcolor="#ffffff" style="padding:30px">
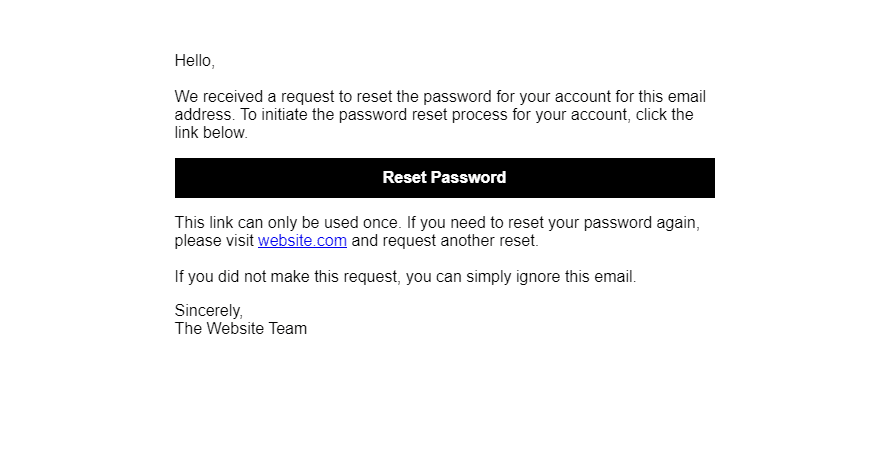
               <p style="text-align:left">Hello,<br><br> We received a request to reset the password for your account for this email address. To initiate the password reset process for your account, click the link below.
              </p>
              <p>
                <a target="_blank" style="text-decoration:none; background-color: black; border: black 1px solid; color: #fff; padding:10px 10px; display:block;" href="{{ protocol }}://{{ domain }}{% url 'password_reset_confirm' uidb64=uid token=token %}">
                  <strong>Reset Password</strong></a>
              </p>
              <p style="text-align:left">This link can only be used once. If you need to reset your password again, please visit <a href="{{ protocol }}://{{domain}}">website.com</a> and request another reset.<br><br>If you did not make this request, you can simply ignore this email.</p>
              <p style="text-align:left">
              Sincerely,<br>The Website Team
              </p>
            </td>
          </tr>
        </tbody>
      </table>
    </center>
  </body>
</html>
Add a very basic HTML email template to our existing password folder. We are using all of the existing text from the plain text email password_reset_email.html.
If you open the HTML document directly in your browser you should see this template.
Configure the view function to send both the plain text and HTML email template
#env > mysite > main > views.py

from django.shortcuts import render, redirect
from django.core.mail import send_mail, BadHeaderError
from django.http import HttpResponse
from django.contrib import messages
from django.contrib.auth.forms import PasswordResetForm
from django.contrib.auth.models import User
from django.template.loader import render_to_string
from django.db.models.query_utils import Q
from django.utils.http import urlsafe_base64_encode
from django.contrib.auth.tokens import default_token_generator
from django.utils.encoding import force_bytes
from django.core.mail import EmailMultiAlternatives
from django import template

def password_reset_request(request):
    if request.method == "POST":
        password_reset_form = PasswordResetForm(request.POST)
        if password_reset_form.is_valid():
            data = password_reset_form.cleaned_data['email']
            associated_users = User.objects.filter(Q(email=data)|Q(username=data))
            if associated_users.exists():
                for user in associated_users:
                    subject = "Password Reset Requested"
                    plaintext = template.loader.get_template('main/password/password_reset_email.txt')
                    htmltemp = template.loader.get_template('main/password/password_reset_email.html')
                    c = {
                    "email":user.email,
                    'domain':'127.0.0.1:8000',
                    'site_name': 'Website',
                    "uid": urlsafe_base64_encode(force_bytes(user.pk)).decode(),
                    "user": user,
                    'token': default_token_generator.make_token(user),
                    'protocol': 'http',
                    }
                    text_content = plaintext.render(c)
                    html_content = htmltemp.render(c)
                    try:
                        msg = EmailMultiAlternatives(subject, text_content, 'Website <admin@example.com>', [user.email], headers = {'Reply-To': 'admin@example.com'})
                        msg.attach_alternative(html_content, "text/html")
                        msg.send()
                    except BadHeaderError:
                        return HttpResponse('Invalid header found.')
                    messages.info(request, "Password reset instructions have been sent to the email address entered.")
                    return redirect ("main:homepage")
    password_reset_form = PasswordResetForm()
    return render(request=request, template_name="main/password/password_reset.html", context={"password_reset_form":password_reset_form}
The last thing we need to do in the project before testing the email is update the existing view function for the password reset request. You will need to import EmailMultiAlternatives and template at the top of the page, then define a plaintext and a htmltemp and add the appropriate code written above to properly format and send the email.
Test the HTML email template in Django
You can then test your email by sending it to the terminal or CLI.
MIME-Version: 1.0
Subject: Password Reset Requested
From: Website <admin@example.com>
To: admin@example.com
Date: Tue, 16 Jun 2020 22:39:51 -0000
Message-ID: <0000000000000>
Reply-To: admin@example.com

-----------------------------------------------------------------------
Content-Type: text/plain; charset="utf-8"
MIME-Version: 1.0
Content-Transfer-Encoding: 7bit


Hello,

We received a request to reset the password for your account for this email address. To initiate the password reset process for your account, click the link below.

http://127.0.0.1:8000/reset/<uid>/<token>/

This link can only be used once. If you need to reset your password again, please visit http://127.0.0.1:8000 and request another reset.

If you did not make this request, you can simply ignore this email.

Sincerely,
The Website Team

-----------------------------------------------------------------------

Content-Type: text/html; charset="utf-8"
MIME-Version: 1.0
Content-Transfer-Encoding: 7bit

<!DOCTYPE html PUBLIC "-//W3C//DTD XHTML 1.0 Transitional//EN" "http://www.w3.org/TR/xhtml1/DTD/xhtml1-transitional.dtd">
<html xmlns="http://www.w3.org/1999/xhtml">
  <head>
    <title>HTML email template</title>
    <meta name="viewport" content="width = 375, initial-scale = -1">
  </head>

  <body style="background-color: #ffffff; font-size: 16px;">
    <center>
      <table align="center" border="0" cellpadding="0" cellspacing="0" style="height:100%; width:600px;">
          <!-- BEGIN EMAIL -->
          <tr>
            <td align="center" bgcolor="#ffffff" style="padding:30px">
               <p style="text-align:left">Hello,<br><br> We received a request to reset the password for your account for this email address. To initiate the password reset process for your account, click the link below.
              </p>
              <p>
                <a target="_blank" style="text-decoration:none; background-color: black; border: black 1px solid; color: #fff; padding:10px 10px; display:block;" href="http://127.0.0.1:8000/reset/<uid>/<token>/">
                  <strong>Reset Password</strong></a>
              </p>
              <p style="text-align:left">This link can only be used once. If you need to reset your password again, please visit <a href="http://127.0.0.1:8000">website.com</a> and request another reset.<br><br>If you did not make this request, you can simply ignore this email.</p>
              <p style="text-align:left">
              Sincerely,<br>The Website Team
              </p>
            </td>
          </tr>
        </tbody>
      </table>
    </center>
  </body>
</html>

-----------------------------------------------------------------------
When sent, the terminal will display both the plain text and HTML email template, meaning both are being set correctly. If you look at the links in the email, those will work if you copy and paste the unique URLs in the browser.
Test the HTML email template in an inbox
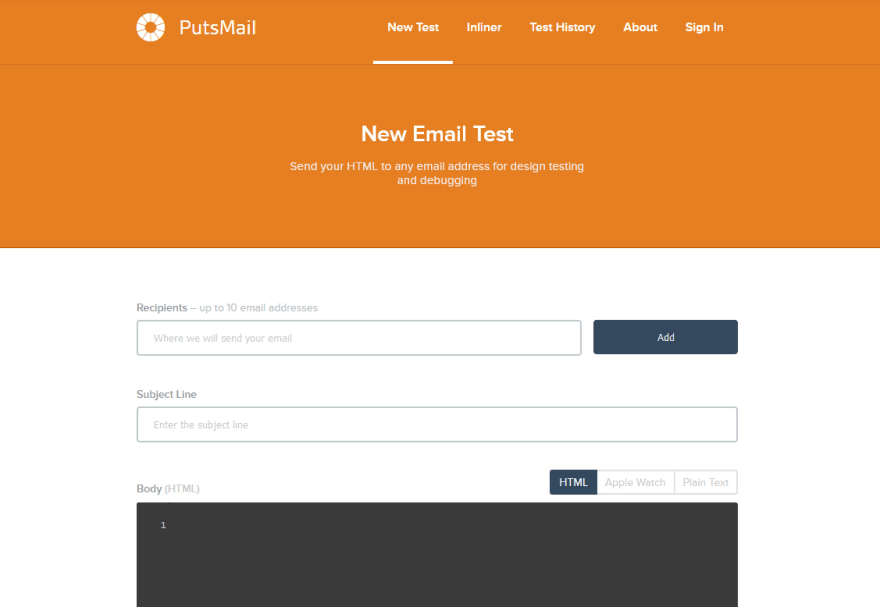
Now if you would like to test your email and see how it delivers in an inbox use PutsMail, a Litmus service that allows you to send a test email to yourself or any other recipient before using a real email backend service.
Keep in mind that the links will not work when testing this email given that it is independent of your Django project.
Already-made HTML email templates
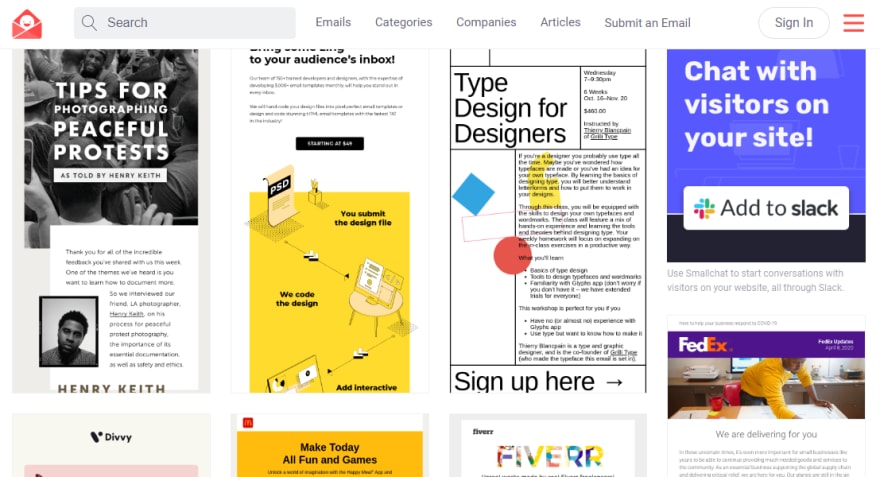
After reading this article you may be saying to yourself "This is way too much work, forget it". Well, luckily enough there are plenty of already-made HTML email templates with accessible code. Check out the links below for some design and code inspiration.
Litmus Newsletter with ghost tables
Material Design Email template
Originally published at https://www.ordinarycoders.com.


Top comments (0)