How to Develop a Serverless App with OpenFaaS and Okteto
OpenFaaS (Functions as a Service) is a framework for building serverless functions with Docker and Kubernetes.
OpenFaaS simplifies your application by helping you package your application logic in discrete packages that react to web events. Instead of having to deploy tens of pods to keep your application running at scale, OpenFaaS scales your functions automatically and independently based on web events and metrics.
On this blog post we'll show you how to deploy your own instance of OpenFaaS, launch your first function and how to develop it. Then we'll show you how you can use the Okteto CLI to accelerate your serverless development even more.
Deploy OpenFaaS in Okteto Cloud
If you already have your own installation of OpenFaaS, feel free to skip to the next step.
For this post, we'll deploy OpenFaaS into Okteto Cloud. Okteto Cloud is a self-service, multi-tenant Kubernetes cluster optimized for team collaboration and Cloud Native development.
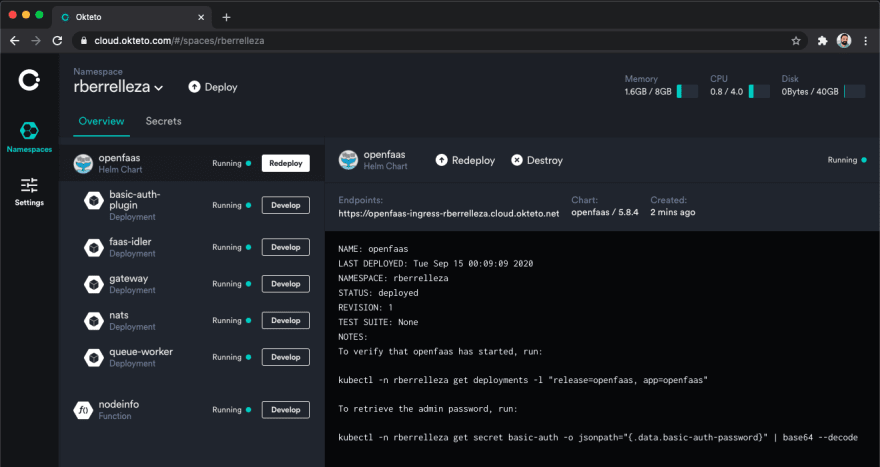
Log in to Okteto Cloud and click on the Deploy button. Switch the deploy method to Deploy from Helm Chart, select OpenFaaS, pick a password, and click deploy. Your OpenFaaS instance will be up and running in a matter of seconds.
OpenFaaS includes a web gateway as part of the deployment, which can be used to see your functions, create new ones, and to invoke them. Okteto Cloud automatically created an ingress for your OpenFaaS gateway. Open Okteto Cloud in your browser and click on the gateway URL to access it.
When opening the gateway the first time you will be prompted for credentials. The user is admin and the password will be the content of the Password field you provided in the deployment dialog (it defaults to Password123!).
Install the OpenFaaS CLI
We need the OpenFaaS CLI available locally to deploy a function. If you are in Mac or Linux, run the command below to install it:
$ curl -sL cli.openfaas.com | sudo sh
On Windows download the latest faas-cli.exe from the releases page and place it somewhere in you $PATH.
Validate that it was installed correctly by opening a terminal and running:
$ faas-cli help
$ faas-cli version
To access the OpenFaaS gateway from the CLI, you need to export the $OPENFAAS_URL and $OPENFAAS_PASSWORD environment variables (you can get your gateway's URL from Okteto Cloud's) and login using the faas-cli login command:
export OPENFAAS_URL=$OPENFAAS_GATEWAY_URL
export OPENFAAS_PASSWORD="Password123!"
$ echo $OPENFAAS_PASSWORD | faas-cli login -u admin --password-stdin

Calling the OpenFaaS server to validate the credentials...
credentials saved for admin https://gateway-rberrelleza.cloud.okteto.net
Deploy your first function
Now that we have our instance of OpenFaaS, it’s time to deploy our first function.
OpenFaaS supports pretty much any programming language, but since I'm a huge golang fan, we'll use that for this post. Use the faas-cli new command to create all the necessary files.
$ faas-cli new -lang go gohash
...
  ___                   _____           ____
 / _ \ _ __   ___ _ __ |  ___|_ _  __ _/ ___|
| | | | '_ \ / _ \ '_ \| |_ / _` |/ _` \___ \
| |_| | |_) |  __/ | | |  _| (_| | (_| |___) |
 \___/| .__/ \___|_| |_|_|  \__,_|\__,_|____/
      |_|Function created in folder: gohash
Stack file written: gohash.yml
...
We now have a folder called gohash with a file called handler.go, this is the main code of our function. We also have a file called gohash.yml with the function metadata, and a folder called template with the different function templates available.
Open gohash.yml with your favorite text editor and put your Docker Hub account into the image: section. i.e. image: okteto/gohash:latest.
Then, run the faas-cli up command to build, push and deploy your function.
The faas-cli up command uses your local Docker client to build and push the images. It requires you to be logged to Docker Hub or a similar registry.
$ faas-cli up -f gohash.yml
[0] > Building gohash.
...
[0] < Building gohash done.
[0] worker done.

[0] > Pushing gohash [ramiro/gohash:latest].
...
[0] < Pushing gohash [ramiro/gohash:latest] done.
[0] worker done.

Deploying: gohash.

Deployed. 202 Accepted.
URL: https://gateway-openfaas-rberrelleza.cloud.okteto.net/function/gohash
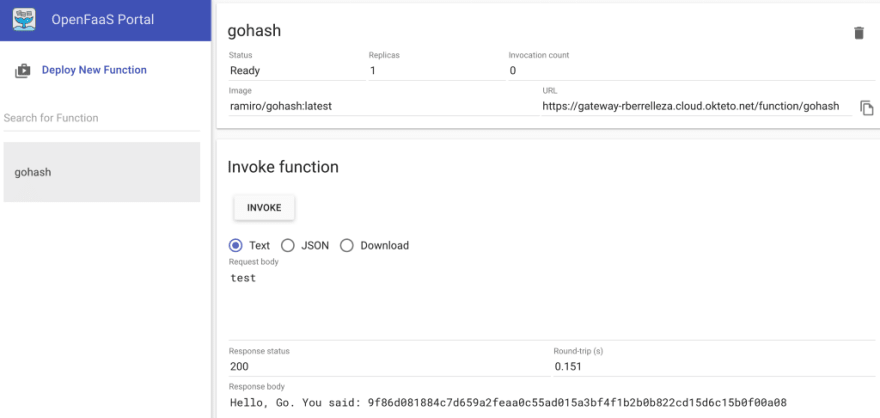
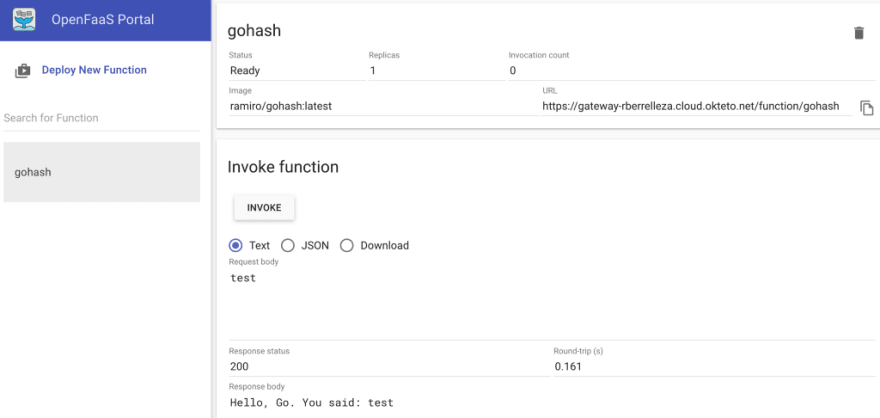
Once your function has been deployed, we'll use the gateway's UI to invoke it. Open the gateway in your browser, click on the gohashon the left, type testas the Request body, and click the _Invoke _button.
Develop your function
Once our function is up and running, let's add a simple feature. Instead of just echoing back the input, we'll calculate the checksum of the string and return that instead.
Open gohash/handler.go with your favorite editor, and update it:
Save the file, and build , push and deploy your function with the faas-cli up command.
$ faas-cli up -f gohash.yml
...
...
Deployed. 202 Accepted.
URL: https://gateway-rberrelleza.cloud.okteto.net/function/gohash
Wait 30 seconds, go back to the gateway's UI and invoke the function again to verify your code change:

You'll need to edit the handler.go file and run faas-cli up every time you want to deploy a new change.
Develop your function, Cloud Native style
OpenFaaS offers you a great experience when building functions (way better and AWS Lambda and GCP's Cloud Functions, in my opinion), but having to build, push and redeploy every time you want to change a line of code adds a lot of friction to my inner loop.
What if instead of building, pushing and deploying, we take advantage of Okteto and develop our function directly in the cluster, Cloud Native style?
Okteto uses a manifest to know how to build and deploy your development environment. Create an file called gohash/okteto.yml, with the following content:
name: go-dev
image: okteto/openfaas:golang
mountpath: /go/src/handler/function
command: ["bash"]
securityContext:
 fsGroup: 100
services:
 - name: gohash
 mountpath: /home/app/src
 environment:
 - fprocess=src/handler
Go to your terminal, navigate to the gohash folder and run the okteto up command to start your remote development environment:
$ cd gohash
$ okteto up

Deployment 'go-dev' doesn't exist. Do you want to create a new one? [y/n]: y
 ✓ Persistent volume provisioned
 ✓ Files synchronized
 ✓ Okteto Environment activated
 Namespace: rberrelleza
 Name: go-dev

Welcome to your development environment. Happy coding!
okteto>
Build and install the binary in your remote environment:
okteto> go install
If you want to use go build instead, call it like this:
go build -o /go/src/handler/functionfor OpenFaaS to pick it up the changes.
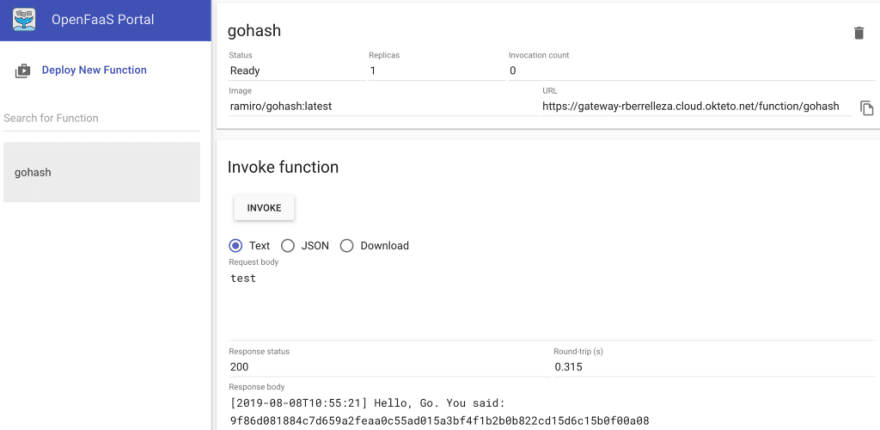
Go back to the browser, and test the function again:

Now, let's implement a second feature: We'll include a timestamp in the response. Open gohash/handler.go.go with your favorite editor and update it:
Save your file, go back to your terminal, and build your function again.
okteto> go install
Go back to your browser, and test your function again:

Our change made it to the function! How did this happen? With Okteto your changes were automatically applied to the remote containers as soon as you saved them. This way you can execute native go builds, leveraging golang's caches and incremental builds to see your changes in seconds. No commit, build, push or redeploy required 💪!
Once you're done developing, run okteto down to return everything to the previous state.
Whoa, how does it works?
When you run okteto up, Okteto enables what we call development mode. Development Mode is what enables you to test your changes directly in the cluster, instead of having to build, push and redeploy.
After running okteto up the following events happen:
- Okteto creates a persistent volume on Okteto Cloud.
- A bi-directional synchronization service is started between your local machine and the persistent volume.
- Okteto launches your development environment, using the image you defined in your okteto.yml, with your persistent volume mounted. The deployment will use the image defined in your manifest. In this case, we are using
okteto/openfaas:golang, an image that has all the tools you need to develop golang-based functions already preinstalled. - Okteto relaunches all the deployments defined in the services section of your manifest (in this case, your function). The deployment is slightly modified to have your persistent volume mounted in
mountpath, and the environment variablefprocessinjected. - A shell was opened into your development environment.

Every time you change a file (e.g when you add the timestamp code), the code is synchronized between your machine and your remote environment. And every time you compile your go binary, the updated version is available both in your development environment and in your function's deployment (since they both share the same volume).
This is the 'magic' that allows you to validate your changes directly in the cluster, no commit, build, push or redeploy required. Join us on slack to talk more about Okteto's features, architecture, and use cases!
Conclusions
We just built and deployed our first function in OpenFaaS in minutes.
OpenFaaS makes it simple to turn anything into a serverless function that runs on Linux or Windows through Kubernetes. Learn more about OpenFaaS here.
And then, we used Okteto to show you the advantages of developing directly in Kubernetes while keeping the same developer experience than working on a local machine. By developing directly in the cluster you not only gain speed, you also avoid the burden of having to keep Kubernetes and OpenFaaS running in your local machine.
Working on the Cloud is always better. You don’t work on your spreadsheets and listen to media files locally, do you? Stop dealing with local environments and become a Cloud Native Developer today!
Interested in boosting your team's Kubernetes development workflows? Contact us to start running Okteto Enterprise in your own infrastructure today.


Top comments (1)
I'd love to know your workflow for working on multiple functions simultaneously. I'm usually working on 3 or 4 at once.