Welcome to part-6 of the series. In previous part we got our result back from twilio. Now, it’s time to store the result so that we can use it in the next part. Update the login-form.js file, with a props storeToken and then save the jwt in it.
Next, we will update index.js to have a new state token and pass the props storeToken in LoginForm.
We are using ternary logic to display the form if user is not logged in or else for the time been Has Token text.
Time to test our code in http://localhost:8000/. On opening we will get the Login form.
On giving a name and clicking on Join Video Chat, we will be taken to below screen.
Next, we will create the Video component. Create a new file video.js inside the components folder. Here, we are using useEffect hook which will fire when the token changes. The token comes as a props and is used to connect to a room, using the twilio-video inbuilt method.
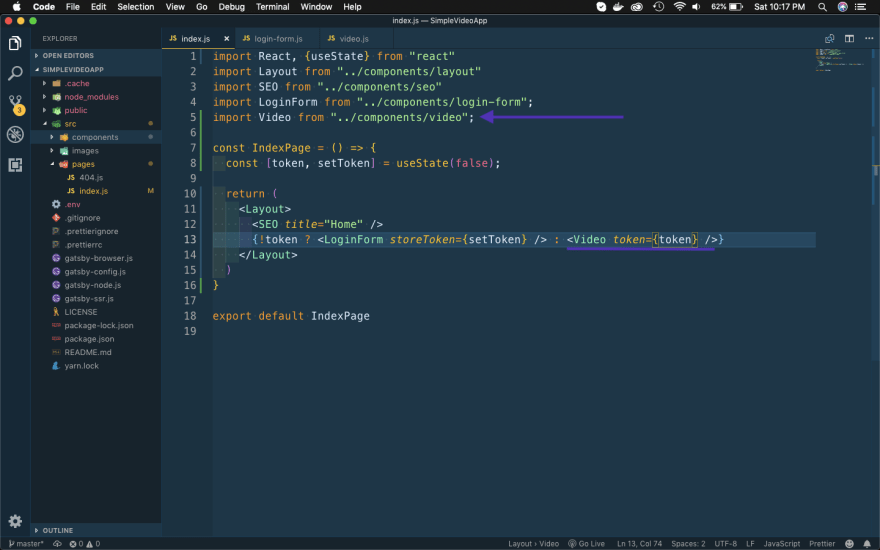
Next, let’s use this component in index.js when the user is authenticated.
We will again login in our web-app, by giving a Display Name and clicking on Join Video Chat button.
It will open the pop-up to ask for permission to use video and audio. We need to click on Allow.
It will successfully log us in and show Video.
This completes part-6 of the series.
You can also find the code for this project in this github link.


Top comments (2)
Hi, any idea on how to conne5 to the video chatroom with python?
Hi Clem,
I don't do much python programming, but found this useful link twilio.com/blog/2016/02/ios-and-we...
Thanks,
Nabendu