

Welcome to part-6 of the series. As in the previous two parts, i will make one more firefox extensions to help us in this covid-19 crisis situation.
This firefox extension is India specific. One of the best source to track covid-19 situation in India, is the **Covid-19 Tracker **site https://www.covid19india.org/
 Covid-19 Tracker
This extension will have the same code structure as the extension, which i created in part-5. It will also show this site in tab on clicking on the button.
This extension will be called Covid-19 India Tracker. So, go ahead and create a folder CovidIndiaTracker and inside it another folder icons. Inside that folder place three icons. You can get them from the github link at the end of this post.
I am getting these awesome free icons from this site https://www.flaticon.com/ and the icons in this extension by this Icons made by this author.
 icons
icons
Now, create a file manifest.json inside the folder CovidIndiaTracker and put the below content in it. It will be similar to our earlier extension and on clicking the icon we will open an html file main.html
 manifest.json
Next, create a file main.html inside the folder CovidIndiaTracker and put the below content in it.
In this file the main part is the iframe tag, which will load the Covid-19 India tracker site by default. There are no button, so it’s a simple html file.
 main.html
Let’s also add the style by creating a file main.css inside the folder CovidIndiaTracker and put the below content in it.
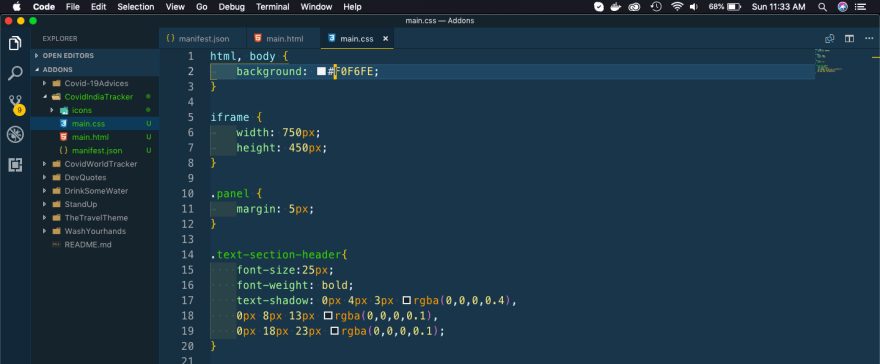 main.css
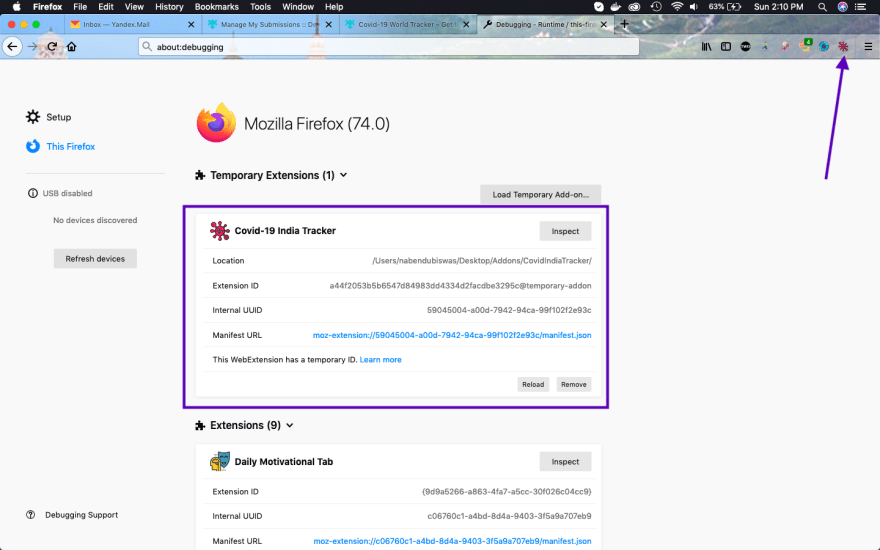
Let’s test it first on our local environment, before publishing to mozilla addon site. In the web browser goto about:debugging#/runtime/this-firefox to check how our extension is working.
 debugger
After going to the above url click on Load Temporary Add-on.. button. It will open the pop-up window to select the file. In that select the manifest.json file for this extension.
 debugger
Now, the extension will be loaded temporarily to test.
 Testing
On clicking the icon, we can see our extension working properly.
 Working
It is working perfectly, so it’s time to publish it in the mozilla addon store. I will show the procedure this time.
We need to go to our folder, where all of code and other files are and select all of them, and click on Compress.
 Compress
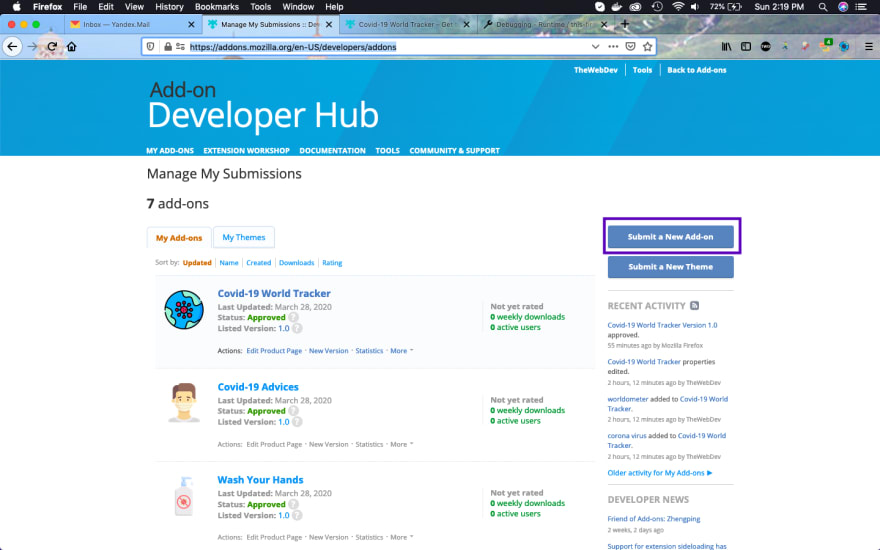
It was compresses as Archives.zip, which i had changed to CovidIndiaTracker.zip. Now, time to goto the addon submission page at https://addons.mozilla.org/en-US/developers/addons
 Submit
After clicking on Submit a New Add-on button on the above screen, we will be taken to below screen. Once you click on Continue, it will take to the next screen
 Submit
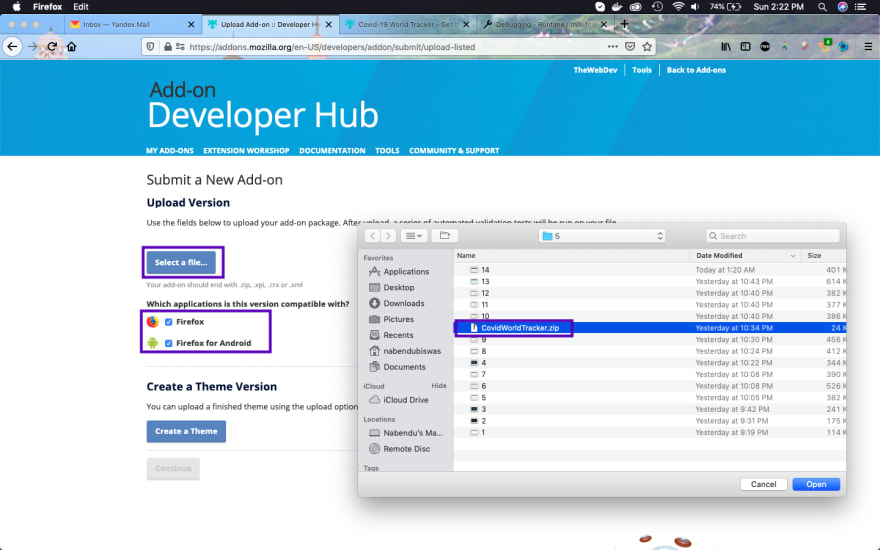
In this screen first select both the checkboxes to submit on both Firefox and Firefox for Android. After that click on Select a file… button and it will, open the explorer to select the file. Select the zip file we had created some steps back and then click on Open button.
 Upload
On uploading, it was error free but contained 3 warning. I can go froward with the warning, but wanted to check them. So, i clicked on See full validation report link
 Completed
It will open the warning in a new tab. These warnings are due to some hidden not necessary files created by MacOS. I can close this tab and live with them.
 Warning
On clicking on the Continue button in the previous screen, we will get the below screen. Here select No in radio button and then Continue button.
 No
No
After that in the next page, we need to fill some information about the addon.
 Info
Info
And then some more information and click on Submit Version button.
 More info
Click on the Manage Listing button in this screen.
 Manage Listing
We need to add icon and screenshot of our addon, so once we click on Edit button next to the Images.
 Images
You will get the below to add both.
 Icon and screenshot
Upload the icon from the icons folder in your project and upload a nice screenshot from the testing.
It will now show as below. Click on the Save Changes button.
 Uploaded
I also need to add some tags. So, i had clicked on the Edit next to Additional Details section and filled the tags. After that click on the Save Changes button.
 tags
tags
Now, we are done so click on the MY ADD-ONS link on the menu.
 My addon
It will take us back to the page from where we had started. We can see our Addon is in Awaiting Review phase.
 Awaiting Review
This complete part-6 of the series. You can find the code for the same in my github account here.


Top comments (0)