![Cover image for Build React Native WordPress App [Expo way] #12 : Categories List](https://media2.dev.to/dynamic/image/width=1000,height=420,fit=cover,gravity=auto,format=auto/https%3A%2F%2Fcdn-images-1.medium.com%2Fmax%2F1024%2F0%2AJrZn_yqcplXggaQz.png)
we will continue on the previous chapter that we finish on fetching categories data from Wordpress API this chapter we will create a screen for display post by categories is simple to screen again we will use code from Home screen for initializing
Create a new screen
Create a new screen name CategoriesList.js in screens folder

then, we just import all necessary component
import React from 'react';
import { View, FlatList, TouchableOpacity } from 'react-native';
import { Card, Title, Paragraph } from 'react-native-paper';
import moment from 'moment';
import HTML from 'react-native-htmlview';
export default class CategorieList extends React.Component {
    constructor(props) {
        super(props);

        this.state = {
            post: [],
        };
    }
}
post-state use for keep post data , moment for display datetime and react-native html-view for render HTML
then we register new screen on Navigator.js by create stack navigation for Categories
function CategorieStack() {
    return (
        <Stack.Navigator>
            <Stack.Screen name="Categories" component={Categories} />
            <Stack.Screen name="CategorieList" component={CategorieList} />
        </Stack.Navigator>
    );
}
then change screen component in Tab navigation
<Tab.Screen name="Categorie" component={CategorieStack} />
Fetching Post
next, we want to fetch post by categories id that pass from Categories Screen
componentDidMount() {
   this.fetchPost();
 }

 async fetchPost() {
   let categorie\_id = this.props.route.params?.categorie\_id
   const response = await fetch(
     `https://kriss.io/wp-json/wp/v2/posts?categories=${categorie_id}`,
   );
   const posts = await response.json();
   this.setState({posts});
 }
in react-navigation version 5 GetParam function will be deprecated and new params will add we use new method get parameter then pass to fetch function then we use componentDidMount call function
next, we create post item again but now your will see repetition code the FlatList item use for display post item will use for every screen now we can separate to component
import React, { Component } from 'react'
import { ActivityIndicator, View, FlatList, TouchableOpacity } from 'react-native'
import {
    Avatar,
    Card,
    Title,
    Paragraph,
    List,
    Headline,
} from 'react-native-paper';
import HTMLRender from 'react-native-htmlview'
import ImageLoad from 'react-native-image-placeholder';
import moment from 'moment'
export default ({ item, navigation }) => {

    return (
        <View>
            <TouchableOpacity
                onPress={() =>
                    navigation.navigate('SinglePost', {
                        post\_id: item.id,
                    })
                }>
                <Card
                    style={{
                        shadowOffset: { width: 5, height: 5 },
                        width: '90%',
                        borderRadius: 12,
                        alignSelf: 'center',
                        marginBottom: 10,
                    }}>
                    <Card.Content>
                        <Title>{item.title.rendered}</Title>
                        <Paragraph>Published on {moment(item.date).fromNow()}</Paragraph>
                    </Card.Content>
                    <ImageLoad
                        style={{ width: '100%', height: 300 }}
                        loadingStyle={{ size: 'large', color: 'blue' }}
                        source={{ uri: item.jetpack\_featured\_media\_url }}
                    />
                    <Card.Content>

                        <HTMLRender value={item.excerpt.rendered} />

                    </Card.Content>
                </Card>
            </TouchableOpacity>
        </View>
    )

}
we create a functional component that receives item and navigation object from a parent component for parent component we import component like that
first import component
import ContentCard from '../components/ContentCard.js'
then using in FlatList like that
renderItem={({ item }) => (
   <ContentCard item={item} navigation={this.props.navigation} />
)}
your will see Home screen work fine again
for CategorieList screen we import ContentCard component again
let categorie\_name = this.props.route.params?.categorie\_name
       return (
           <View>
               <Title style={{ marginLeft: 30 }} >{categorie\_name}</Title>
               <FlatList
                   data={this.state.posts}
                   renderItem={({ item }) => (
                       <ContentCard item={item} navigation={this.props.navigation} />
                   )}
                   keyExtractor={(item, index) => index.toString()}
               />
           </View>
       );
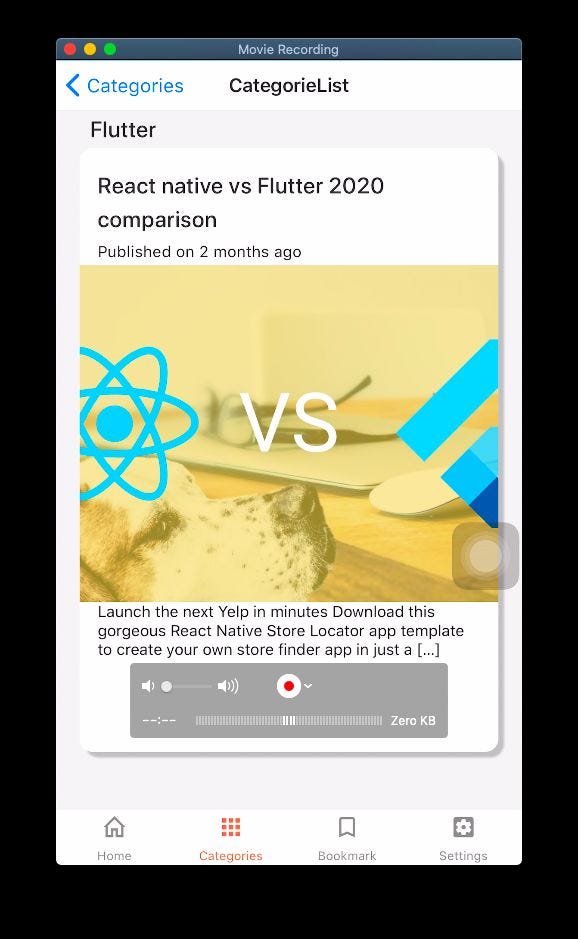
now we saw a post by categories
Conclusion
In this chapter we learn how to fetching post by categories . also separate FlatList item to component for the next chapter we will set up Firebase ,Formik,Yup for store message on realtime databse
Author note
This series intends to show how I build an app to serve content from my WordPress blog by using react-native. Since we successfully build an app on the React Native CLI path., for the next step, we try to develop this app again but using Expo. We will discover the Expo ecosystem that makes our lives comfortable and help us avoid dealing with Native modules to learn how to deal with WordPress APIs. Here, the most prominent features talked about in the book are the dark theme, offline mode, infinite scroll, in-app purchase, and many more. You can discover much more in this series. this inspiration to do this tutorial series came from the React Native Templates from instamobile
Originally published at [_Kriss](https://kriss.io/build-react-native-wordpress-app-expo-way-12-categories-list/)._


Top comments (0)