I said previously that I wouldn’t use Gatsby Cloud’s free tier for hosting the “live preview” instance of a Gatsby site coupled with Sanity CMS because I didn’t find its usage quotas generous enough for handing over to a content author.

Gatsby Cloud live previews for Sanity-based sites
Katie ・ Jul 21 ・ 9 min read
Today I’ll show you how to deploy a Gatsby site in “develop” mode to Heroku so that you can host a lovely real-time live preview site at https://preview.yoursite.com.
Files
Pick a folder on your hard drive that will serve as your local copy of all the Gatsby-related files you need to put into your git repository on GitHub.
I chose C:\example\mysite_gatsby.
To make this Gatsby site, I started with the files from my “Gatsby minimum viable Sanity template” tutorial.

Gatsby Minimum Viable Build with Sanity CMS
Katie ・ Jul 9 ・ 8 min read
I added 3 files (/Procfile, /app.json, & /static.json) and changed 1 (package.json) to support hosting on Heroku.
The file structure is as follows:
.
├── src
│ └── templates
│ └── xyzzy.js
├── Procfile
├── app.json
├── gatsby-config.js
├── gatsby-node.js
├── package.json
└── static.json
All I did to package.json was delete the lines of code representing the "scripts" object (Procfile handles server instructions instead).
I won’t go into detail about the 3 Heroku-specific files, because the work I did is so simple:
- The single line of content in Procfile is from Andreas Keller’s blog post “Custom Live Preview for Gatsby Sites with Heroku.
-
Procfiletells Heroku how to behave when requested to puthttps://YOUR_APP_NAME.herokuapp.comonto the internet.
-
- app.json and static.json are copied and pasted straight out of the official Gatsby documentation “Deploying to Heroku.”
I uploaded the these files into a GitHub repository under the username gatsbyclouddemo, for continuity with my last post on the subject.
Prerequisites
If you’re just jumping in now, you’ll need a running Sanity project that matches the repository I’m demonstrating.
Go back to “Sanity CMS minimum viable build” to make one, taking a moment to write down your project ID, API token, etc.

Sanity CMS Minimum Viable Build
Katie ・ Jul 9 ・ 13 min read
Heroku
Set up Heroku
Sign up for a free Heroku account if you don’t have one and log into Heroku.
Go to https://dashboard.heroku.com/apps and click “ Create new app.”
Give your app a name (you can’t have gatsbysanitydemo – I took it) and click “ Create app.”
Under the Deploy tab, in the Deployment method section of the page, click GitHub as a way to deploy your Gatsby site to Heroku and click Connect to GitHub.
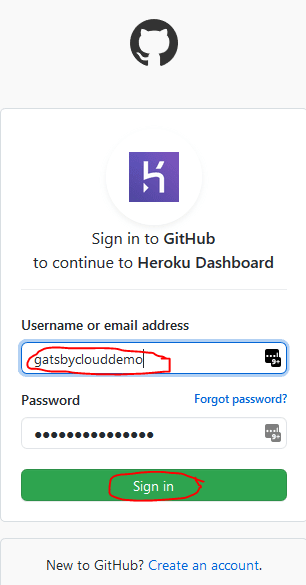
Log into GitHub with the account where you’ve stored the code for your Gatsby site.
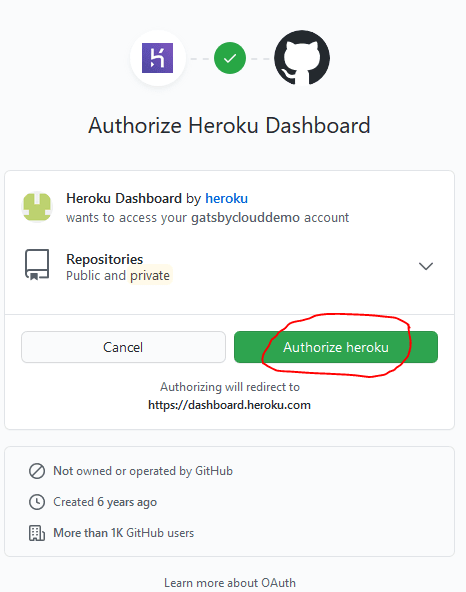
Give Heroku full permissions to your GitHub account.
I don’t normally like to give software this level of permission in my GitHub account, and there are alternative ways to get info from GitHub to Heroku that give Heroku a little less control over your GitHub account, but they’d be too tangential to cover right now.
Under the Deploy tab, in the Connect to GitHub section of the page, click Search without typing anything into the search prompt.
Click Connect next to the name of the repository that contains the code for your Gatsby site.
Click Enable Automatic Deploys.
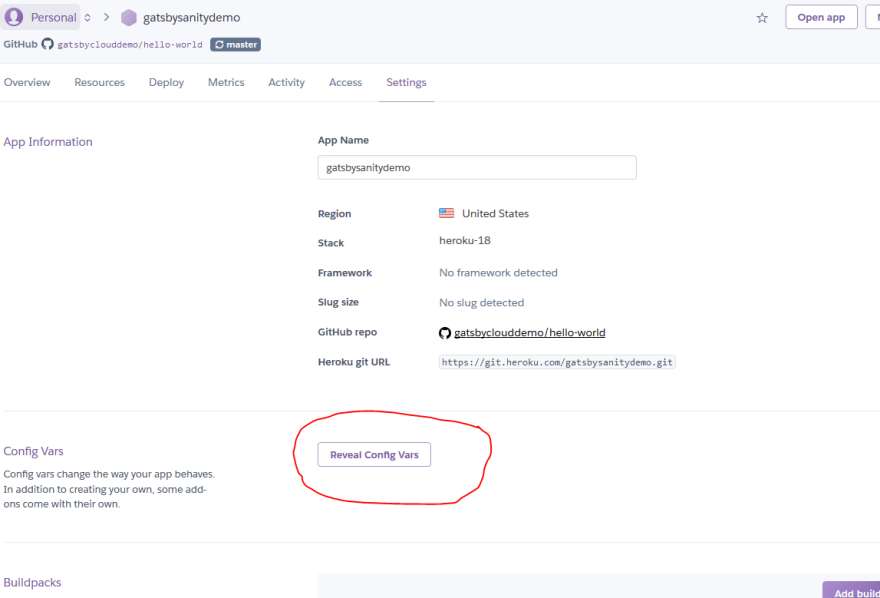
Click the Settings tab toward the top of Heroku and, in the Config Vars section, click Reveal Config Vars.
Add key-value pairs as follows:
-
NODE_ENV=development -
SANITY_PROJECT_ID= (your Sanity project’s ID) -
SANITY_DATASET= (your Sanity project’s dataset’s name) -
SANITY_READ_TOKEN= (whatever API token you set up in Sanity for your project’s dataset) -
SANITY_WATCH_MODE=true -
SANITY_OVERLAY_DRAFTS=true -
ENABLE_GATSBY_REFRESH_ENDPOINT=true
Force Heroku to build your site
I hadn’t yet committed my changes from the previous version of my Gatsby site to GitHub when I reached this point of taking screenshots, so I triggered a Heroku build simply by pushing my altered and new files from my computer to my GitHub repository.
If you need to force a manual Heroku site build from your GitHub repository, go back to Heroku’s Deploy tab and scroll to the bottom of the page. There should be a button.
Heroku confirms that my site built:
And sure enough, I’m live at https://gatsbysanitydemo.herokuapp.com with the last data I’d entered in to Sanity (doodling around on July 31st).
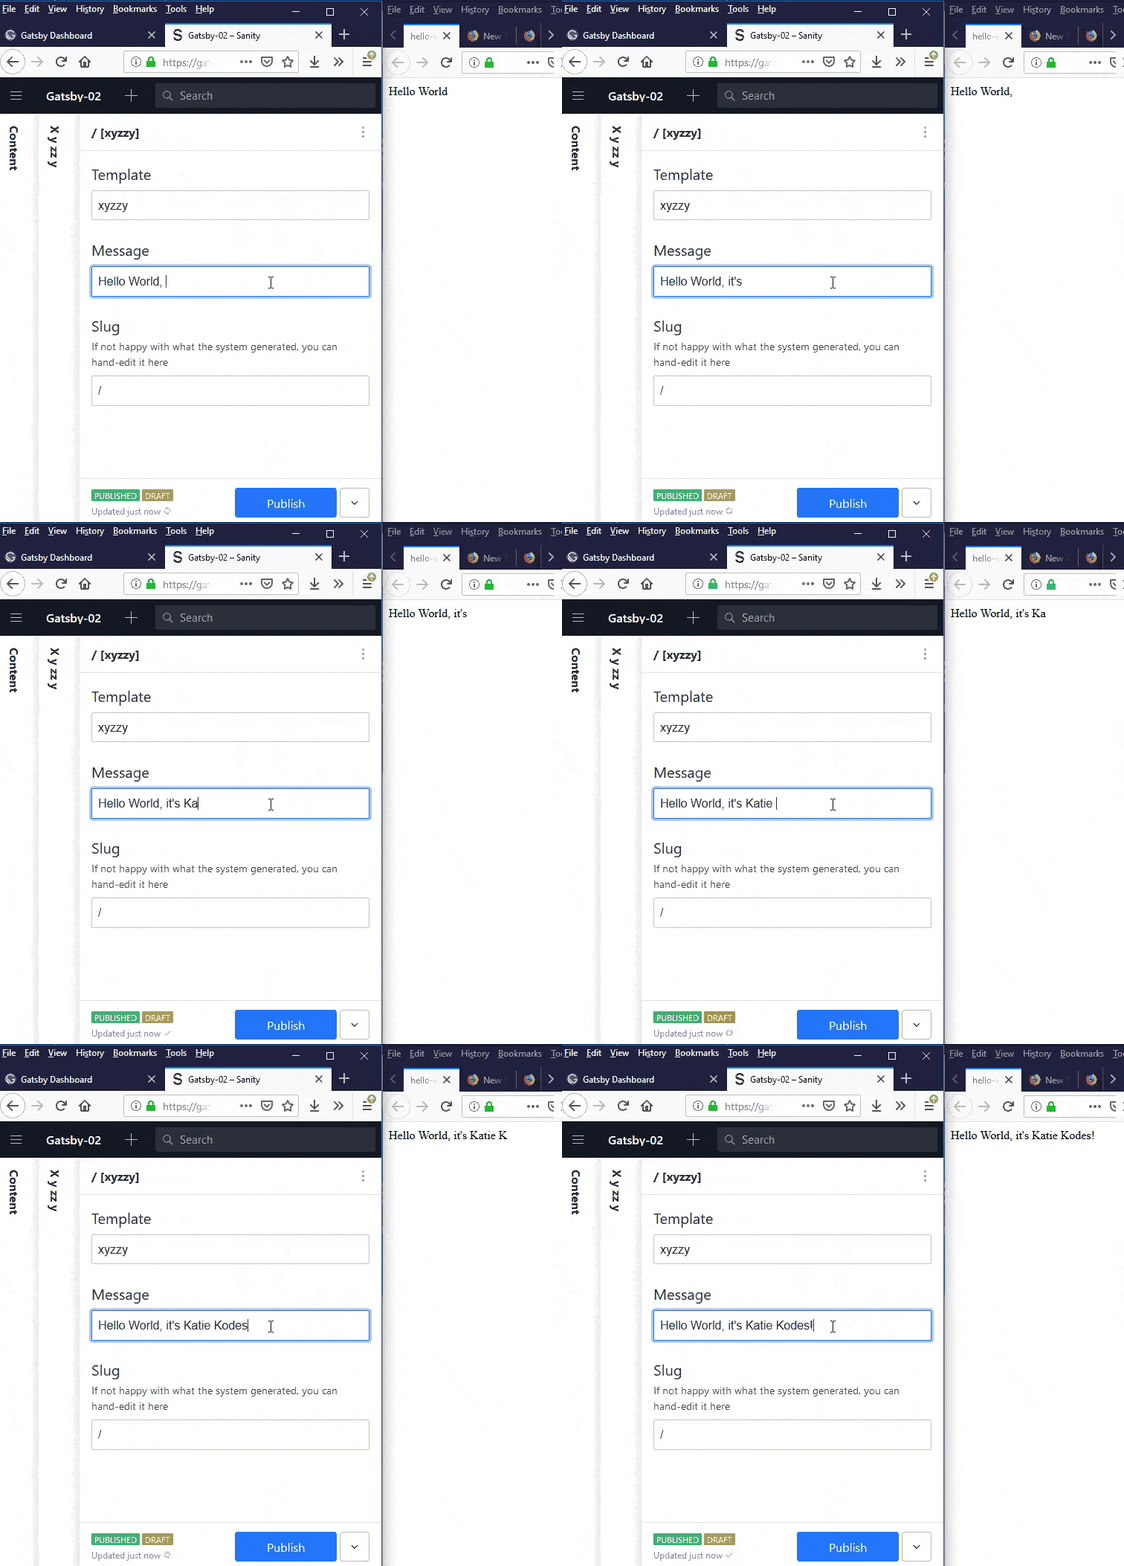
Now I’ll put two web browsers side-by-side, one logged into “Sanity Studio” where I edit my data, and the other displaying https://gatsbysanitydemo.herokuapp.com.
I didn’t make any fresh animated GIFs for you this time, so you’ll just have to trust me when I say that data showed up as I typed.
First, I changed my hand-typed timestamp to something more current.
The changes showed up live, while I typed.
Hooray! 🎉
Tidy up a Gatsby-Sanity bug
In fact, even after I hit Publish , the changes stick.
That’s a bit surprising – I’ve had problems with involuntary content rollbacks when using Gatsby and Sanity together for a live preview.
I don’t trust it.
Let me try again.
Here we go. Upon publishing the 40 change, my content reverted to ending with 33.
Luckily, I have a fix for that.
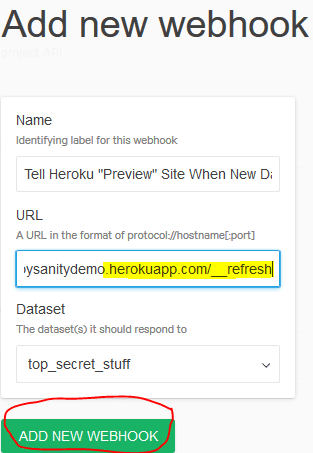
Log into https://manage.sanity.io/, find your project, go to the Settings tab, click API in the left nav, and click Add New Webhook at the bottom of the page.
Give your new webhook a URL of https://APP_NAME.herokuapp.com/__refresh (replacing APP_NAME with your Heroku app’s name, of course) and click Add New Webhook.
Setting the ENABLE_GATSBY_REFRESH_ENDPOINT endpoint to true is what made Gatsby create this magic /__refresh web page as part of the site.
I wish it were a bit more … secret.
This seems like a decent way to get your Heroku app DoSed by a teenager who thinks he’s being funny.
If you have suggestions in the comments about how to make Gatsby rebuild without having such an obvious webhook endpoint, I’m all ears!
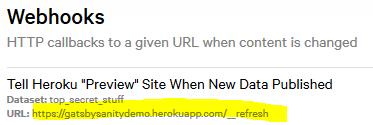
The new webhook should appear in your Sanity management console.
Now you have to do one more thing – at least until Sanity fixes a bug.
Go into your Sanity Studio and add a piece of draft content with no template and no slug (such content will be ignored by the particular gatsby-node.js I wrote) and, in the message, type a note to yourself reminding yourself not to delete it.
For some reason, you need a draft “alive” in Sanity for “publish” webhook-based builds to avoid “reverting” to old content.
Now go back and make a change to your actual home page in Sanity and click Publish.
It should stick!
Hooray! 🎉
The only catch is that if Heroku falls asleep while you have content in “draft” status, and then you wake it up, and then you revert changes in Sanity Studio, Gatsby doesn’t seem to recognize that as either a “draft” or a “publication” and doesn’t update the page accordingly.
You may have to play around a bit, re-typing things and forcing fresh “publishes,” if this happens to you.
Need geek proof?
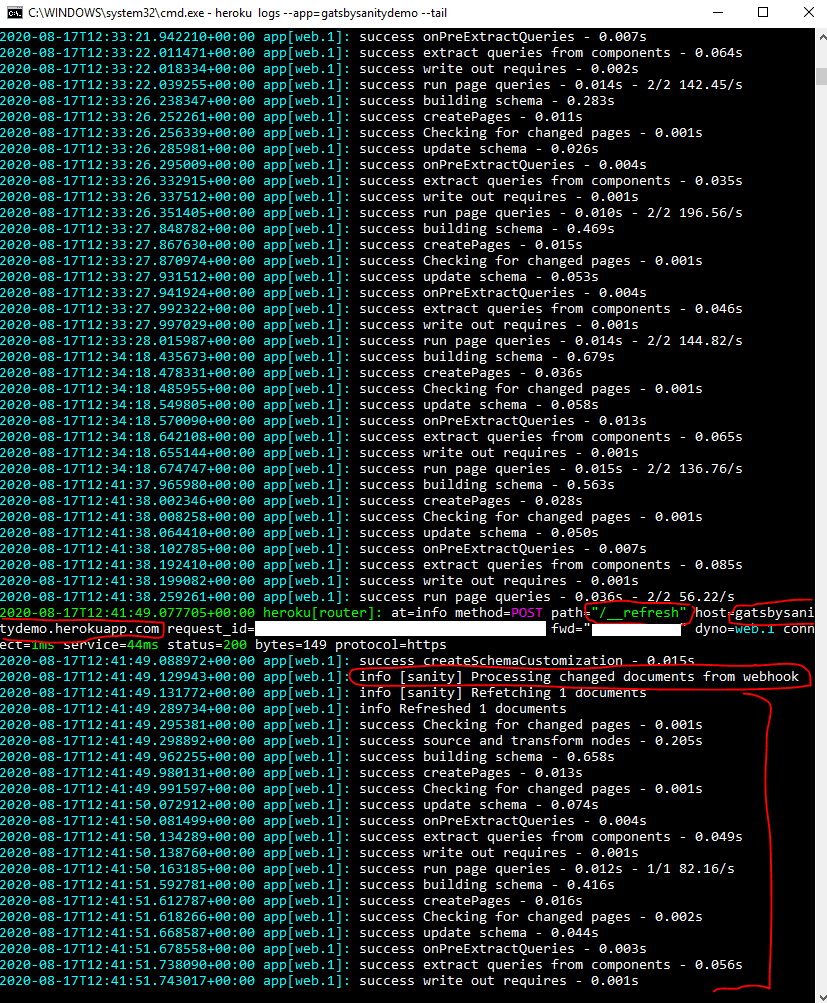
If you really want proof that the 41 change stuck in response to Gatsby recognizing a webhook call to /__refresh, you can install Heroku’s command-line interface tool on your computer and use it to read the server logs of your web site.
Once you have it installed, run heroku login and use your web browser to authenticate yourself to the CLI tool.
Then type heroku logs app=APP_NAME --tail, replacing APP_NAME with the name of your Heroku app.
Confirm that Heroku indicates it received a POST HTTP request to https://APP_NAME.herokuapp.com/__refresh and that Gatsby/Sanity reacted by processing changed documents from webhook.
When you’re done, you can exit with Ctrl+C if you’re on Windows and confirming that you’d like to terminate the “batch job.”
It’s now safe to close your command prompt.
Considerations
Wake-up
Heroku will put https://APP_NAME.herokuapp.com to sleep 30 minutes after its last use if you’re on the free plan.
If your site’s non-technical content author tries to visit it, watches the page take a minute to load, and finally sees an error, Heroku was probably just waking up!
Gatsby builds aren’t known for their speed, so Heroku probably couldn’t roll out of bed quickly enough to answer the phone.
Tell content authors to reload the page after they receive this message and see if it helps.
As long as they’re visiting the preview site frequently enough that your app doesn’t get deleted off Heroku, reloading the page should work.
- Q: Afraid your content authors won’t visit frequently enough to keep the site from being deleted?
- A: Consider a weekly or nightly “cron job” running on a free server in the cloud to visit your preview site in the author’s place.
Use your own domain
I promised you a lovely site at https://preview.yoursite.com.
Unfortunately, I’m going to leave it up to you to research “custom domains” so you can force Heroku to use preview.yoursite.com as a substitute for APP_NAME.herokuapp.com
I don’t feel like giving Heroku my credit card number and getting “verified” for the sake of a tutorial.
Alternatively, if you’re okay with content authors’ web browsers being redirected to https://APP_NAME.herokuapp.com and just want to give them an easy-to-remember starting point, you can probably just set up a redirect with your DNS provider and never tell Heroku about preview.yoursite.com.
Keep out unwanted visitors
Simeon Griggs makes an excellent point at “Roll your own Gatsby live preview for Sanity” that you might want to further play with your Gatsby site’s codebase so that when in “develop” mode, it includes instructions that search engines should ignore it.
Maybe you also want to password-protect this whole site.
I haven’t tried, but a search for “password protect heroku app” had some interesting results.
(Don’t forget to let your content-publication Sanity webhook server and your “cron job” server into the site, not just your human content authors.)
Takeaways
I hope you were able to use this tutorial, combined with my previous ones, to stand up a working Gatsby live preview on Heroku.
The architecture should be similar for other static site generators whose non-production modes have some way of constantly fetching data from a “drafts” API endpoint within your CMS and updating the page in response, not just Gatsby.
- (On a related note, although seemingly not leveraging a general-purpose Node.js server host like Heroku, it looks like Jérôme Pott just wrote “How to handle content previews from Sanity in Nuxt” yesterday.)

How to handle content previews from Sanity in Nuxt
Jérôme Pott ・ Aug 16 ・ 7 min read
Similarly, the idea of hosting a non-production static site generator on Heroku as a “live preview” should work for other API-based content management systems with “draft” API endpoints, not just Sanity (although Sanity might be a little special in literally updating its endpoint content with each letter you type).












Top comments (0)