Recap: a directory only needs two small files in it for the Gatsby static website generator to turn it into a functioning index.html with a body of <div>Hello world!</div>, and it only needs five or six to use an index.md file as the source of the “Hello World” text.
Now, instead of pulling Hello World from a file within my project, I’ll make Gatsby’s build process download it from a 3rd-party API attached to a great little content management system called Sanity.
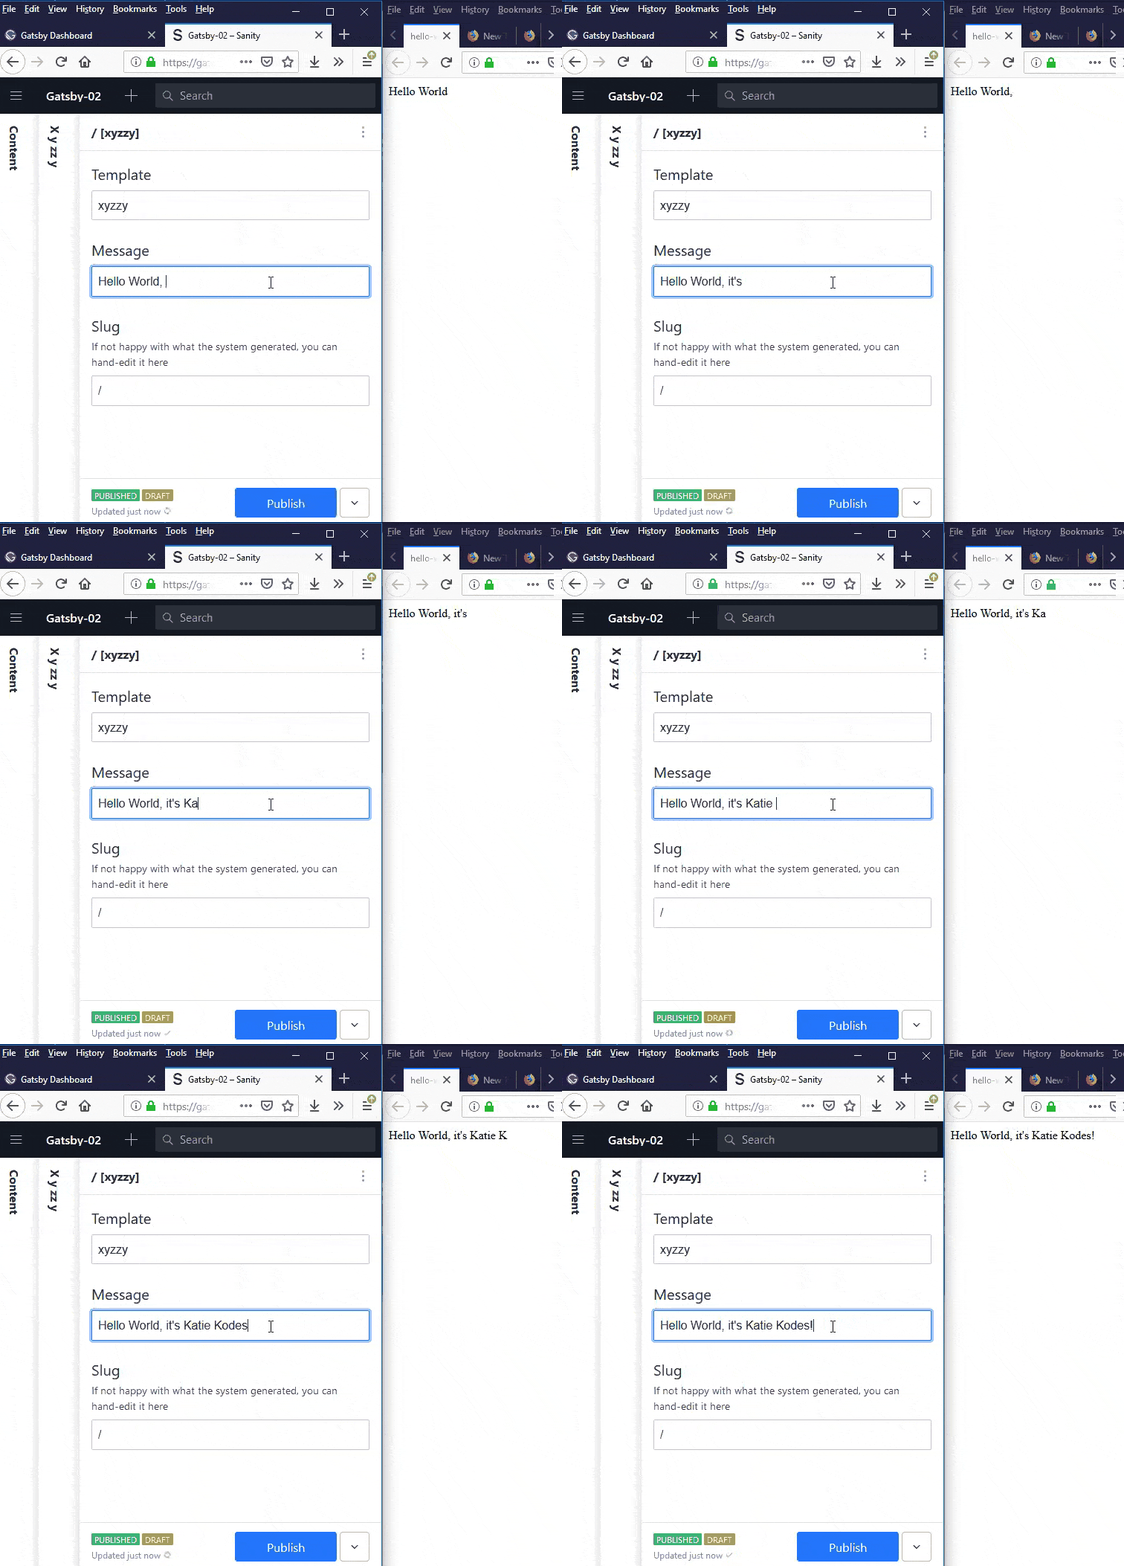
Properly configured, Sanity looks beautiful for non-technical content editors, and paired with Gatsby Cloud’s “preview” sites, content authors can literally watch a preview of their site change as they type – all while getting the performance and security benefits of a static production web site.
Desired output
I’m still just shooting for some variation on this HTML for the contents of index.html:
<html>
    <head></head>
    <body>
        <div>Hello World</div>
    </body>
</html>
Sanity CMS
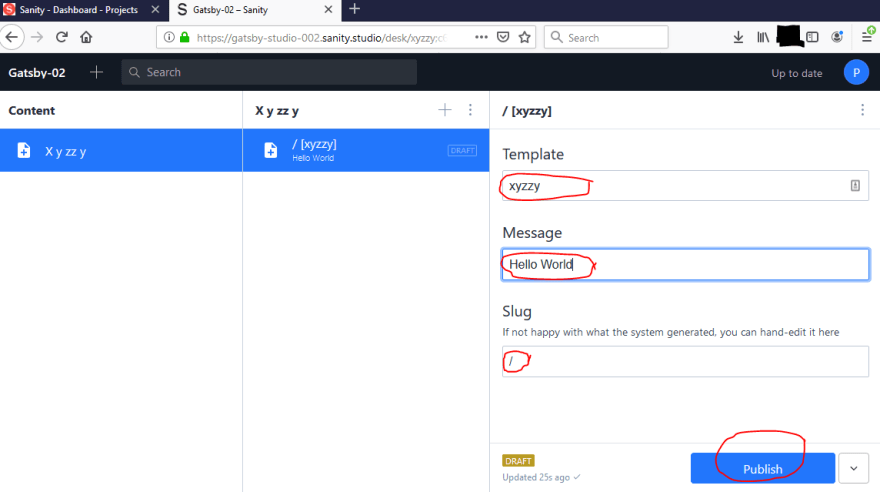
In my previous post, Sanity CMS Minimum Viable Build, I set up a lovely content management system that looks like this for a content author:
Sanity generates output something like this over an API that a Gatsby plugin can connect to as a data source:
{
    "message":"Hello World",
    "slug":{
        "current":"/"
    },
    "template":"xyzzy"
}
Files
Pick a folder on your hard drive that will serve as your local copy of all the Gatsby-related files you need to put into your git repository on GitHub.
I chose C:\example\mysite_gatsby.
Fill this folder with the following 4 files, which you can see an example of on GitHub here.
.
├── src
│ └── templates
│ └── xyzzy.js
├── gatsby-config.js
├── gatsby-node.js
└── package.json
/package.json
As in the rest of this series I have to specify that certain Node packages like React and like Gatsby itself are essential to building the static site. I’ll also specify one Gatsby plugin called gatsby-source-sanity that I’ll need:
You, of course, don’t need to set your name, description, version, etc. the same as I set mine.
{
    "name" : "netlify-gatsby-test-05",
    "description" : "Does this really work?",
    "version" : "0.0.5",
    "scripts" : {
        "develop": "gatsby develop",
        "start": "npm run develop",
        "build": "gatsby build",
        "serve": "gatsby serve"
    },
    "dependencies" : {
        "gatsby": ">=2.22.15",
        "gatsby-source-sanity": ">=6.0.1",
        "react": ">=16.12.0",
        "react-dom": ">=16.12.0"
    }
}
/gatsby-config.js
I need to “activate” the Gatsby plugin gatsby-source-sanity with a file called gatsby-config.js:
module.exports = {
    plugins: [
        {
            resolve: "gatsby-source-sanity",
            options: {
                projectId: "your-sanity-project-id",
                dataset: "your-sanity-dataset-name",
                ...(process.env.SANITY_READ_TOKEN && { token: process.env.SANITY_READ_TOKEN }),
                ...(process.env.SANITY_WATCH_MODE && process.env.SANITY_READ_TOKEN && { watchMode: process.env.SANITY_WATCH_MODE }),
                ...(process.env.SANITY_OVERLAY_DRAFTS && process.env.SANITY_READ_TOKEN && { overlayDrafts: process.env.SANITY_OVERLAY_DRAFTS }),
            }
        }
    ]
};
In the options part of this code…
- Replace
your-sanity-project-idin this code with your actual Sanity project ID.- ([Mine]https://katiekodes.com/sanity-minimum-viable-build/#look-around-the-project){:target=”\_blank”} starts with a “z” and ends with an “m”).
- Replace
your-sanity-dataset-namewith your actual Sanity project’s dataset’s name.-
(Mine is
top_secret_stuff).
-
(Mine is
In case you’re curious, the ...( some-boolean-condition && some-javascript-object) syntax is a nifty ES6 trick for setting properties of a JavaScript object only under certain conditions.
I’m using it to make sure I only set the token, watchMode, and overlayDrafts properties of the options object if certain “environment variables” are set in my host environment (e.g. Netlify or Gatsby Cloud).
Otherwise, this configuration file treats the options object as only having projectId and dataSet properties.
/src/templates/xyzzy.js
I'm using a standalone Xyzzy React component as a "template" for rendering my home page, just like in my "minimum viable" Markdown-based Gatsby project.
I'll dynamically fetch the text "Hello World" from /src/pages/index.md as a detail of pageContext called pageContext.message (or, if I had been using classes, this.props.pageContext.message).
Note that the "message" property of pageContext doesn't exist yet. I'll soon write code in a file called gastby-node.js that makes Gatsby include message in pageContext.
For now, trust that {pageContext.message} is the equivalent of Hello World -- I'll use gatsby-node.js next to get it from Sanity into pageContext.
import React from "react"

export default function Xyzzy({ pageContext }) {
  return (
    <div>
      {pageContext.message}
    </div>
  )
}
Note: If you've followed the Markdown-based variation of this project, you might notice that I flipped from using
{pageContext.frontmatter.message}to{pageContext.message}.
Gatsby React Minimum Viable Markdown Template / Component
Katie ・ Jun 18 ・ 9 min read
#webdev #gatsby #jamstack #tutorialThat's a quirk of the way my data flows out of various plugins for fetching data available for Gatsby to turn into pages.
I won't cover how to do it, but if I'd built up a massive theme of templates and components using Markdown and referring to
pageContext.frontmatter.message, it might have been nice to write clever code ingatsby-node.jsthat put a meaninglessfrontmatterproperty in betweenpageContextandmessagewhen switching to Sanity, just to avoid re-writing all my templates.On the other hand, there are probably better ways to write Gatsby templates and queries for page data and templates so as to avoid this problem in the first place! Remember, I'm new around here. :)
/gatsby-node.js
Last but not least, we have the file that teaches Gatsby how to put everything together: gatsby-node.js.
const path = require(`path`)

exports.createPages = async ({ graphql, getNode, actions }) => {
  const { createPage } = actions
  const queryResult = await graphql(`
    query {
      allSanityXyzzy(filter: {slug: {current: {ne: null}}}) {
          edges {
            node {
              template,
              message,
              slug {
                current
              }
            }
          }
      }
    }
  `)
  nodes = queryResult.data.allSanityXyzzy.edges
  nodes.forEach(({ node }) => {
    createPage({
      path: node.slug.current,
      component: path.resolve(`./src/templates/${node.template}.js`),
      context: {
        message: node.message,
      },
    })
  })
};
No onCreateNode override
In this case, we don’t need to override onCreateNode(). We can do everything in our override of createPages().
Overriding createPages
Earlier, I said that I would need to teach Gatsby to pass details queried from Sanity’s API to to xyzzy.js as a frontmatter sub-property of a Gatsby concept called pageContext.
I do this and more by overriding Gatsby’s definition of a Gatsby function called createPages() within a file called gatsby-node.js placed in the root directory of my folder structure.
The first thing I do is tell Gatsby to make a GraphQL query against its entire self-inventory of stuff it knows about and likes to call “nodes” (not to be confused with Node for which Gatsby is a package), filtering to only return the ones that seem to be “SanityXyzzy” data points _(that is, pieces of data that into Sanity Studio as X y zz y-typed data objects, and save the resulting JavaScript object into a variable I decided to call queryResult.
Comparing this code to gastby-node.js for my Markdown-based “Hello World”, you might notice that I literally just have to switch from looking for allMarkdownRemark to allSanityXyzzy.
Three cheers for smart developers writing Gatsby and its plugin ecosystem so we don’t have to think about why this works like magic!
The part of queryResult that I’m interested in is an array of “node” objects accessible through queryResult.data.allSanityXyzzy.edges – I’ll set that array aside into a variabled called nodes.
(In my case, there’s only one object in the nodes array: the one whose message I set to Hello World over in Sanity Studio.)
For each loop over a node in nodes, I’ll call a Gatsby function actions.createPage().
- I’ll check what the
node’s value forslug.currentis and tell Gatsby to make the web page it renders available athttps://mysite.com/that-valueby settingpathin the JavaScript object I passcreatePage()tonode.slug.current. - I’ll also check what the
node’s value fortemplateis and concatenate it with other data to indicate a file path in my folder structure where Gatsby can find the definition of the React component that I’d like to use for transforming the Markdown-formatted file into HTML on my actual web site. In the case of my one piece of data currently living in Sanity CMS, there’s a property oftemplate: xyzzy, and so settingcomponenttopath.resolve(./src/templates/$xyzzy.js)will ensure that it is associated withxyzzy.js. - Finally, I will say that I’d like the
node’s value formessageto be passed along toxyzzy.jsas part ofpageContextby including it in thecontextproperty of the JavaScript object I passcreatePage().contextitself takes a JavaScript object as a value, into which I put just one key-value pair:messageas the key, andnode.messageas the value.
Output
Once you deploy these 4 files to a web host capable of building Gatsby sites, such as Netlify or Gatsby Cloud, you’re up and running with your new Gatsby site that pulls its data from Sanity.io.
The resulting page has the following HTML:
<!DOCTYPE html>
<html>
    <head>
        <meta charSet="utf-8"/>
        <meta http-equiv="x-ua-compatible" content="ie=edge"/>
        <meta name="viewport" content="width=device-width, initial-scale=1, shrink-to-fit=no"/>
        <meta name="generator" content="Gatsby 2.23.22"/>
        <link rel="preconnect" href="https://cdn.sanity.io"/>
        <link as="script" rel="preload" href="/webpack-runtime-10d6e7496dd877f2a9f4.js"/>
        <link as="script" rel="preload" href="/framework-a4af6e22a78404f2df50.js"/>
        <link as="script" rel="preload" href="/app-226d7b506f85242e4ac8.js"/>
        <link as="script" rel="preload" href="/component---src-templates-xyzzy-js-96de865fb39f9d696611.js"/>
        <link as="fetch" rel="preload" href="/page-data/index/page-data.json" crossorigin="anonymous"/>
        <link as="fetch" rel="preload" href="/page-data/app-data.json" crossorigin="anonymous"/>
    </head>
    <body>
        <div id="___gatsby">
            <div style="outline:none" tabindex="-1" id="gatsby-focus-wrapper">
                <div>Hello World</div>
            </div>
            <div id="gatsby-announcer" style="position:absolute;top:0;width:1px;height:1px;padding:0;overflow:hidden;clip:rect(0, 0, 0, 0);white-space:nowrap;border:0" aria-live="assertive" aria-atomic="true"></div>
        </div>
        <script id="gatsby-script-loader">/*<![CDATA[*/window.pagePath="/";/*]]>*/</script><script id="gatsby-chunk-mapping">/*<![CDATA[*/window.___chunkMapping={"app":["/app-226d7b506f85242e4ac8.js"],"component---src-templates-xyzzy-js":["/component---src-templates-xyzzy-js-96de865fb39f9d696611.js"]};/*]]>*/</script><script src="/component---src-templates-xyzzy-js-96de865fb39f9d696611.js" async=""></script><script src="/app-226d7b506f85242e4ac8.js" async=""></script><script src="/framework-a4af6e22a78404f2df50.js" async=""></script><script src="/webpack-runtime-10d6e7496dd877f2a9f4.js" async=""></script>
    </body>
</html>
Next steps
The output’s not the fun part, though: stay tuned, because setting up a content editor with as-you-type site previewing is where we’re headed next.


Top comments (0)