
Unlike good’ol software, working with hardware means dealing with actual physical stuff. You’ll need components, boards, tools that you’ll actually use with your very own hands. Isn’t that cool as a change?
There are many basic electronics kits out there, but they tend to be either incomplete or expensive, with components that you won't be using on your first projects. Instead, it can be a better idea to create your own budget inventor's kit, with the essentials you'll need to get started without spending too much money.
This post will walk you through a list of suggested items for putting together a basic electronics kit, with a maximum budget of $ 150.00, including a soldering iron and a digital multimeter.
At the end of this post, you'll find the TL;DR list of all suggested items with links and prices as reference**.
**These are not affiliated links. They're just for reference, as some items might not be available for shipping to your country.
Single-Board Microcontroller
To put some brains in your creations, you’re gonna need a microcontroller. Instead of working directly with microcontrollers thou, it's better to start with a microcontroller board. These are typically easier to work with, both physically as well as at software level.
The most popular prototyping platform nowadays is Arduino. It's not just a board; it's a complete open source prototyping platform, including a dedicated IDE and custom C++ libraries to facilitate programming for those boards.

Because Arduino is both open source and open hardware, you can find cheap variations of Arduino in all shapes and sizes. You can also create your own Arduino version with custom components and libraries.
Raspberry boards are also a great way to start prototyping. Different from Arduino boards, Raspberry boards are actually a whole computer in a small board, with an I/O pin head where you can connect components. It runs Linux (Raspbian), so you'll be working in a much higher level - which is good if you're already experienced with web development, for instance.

Good news is: you can get a Raspberry board with WiFi support for less than $ 15.00. This is cheaper than most Arduinos! The Raspberry Pi Zero W (pictured above) is a tiny Raspberry with HDMI output, microUSB for power and a dedicated microUSB for input (keyboard / mouse). Naturally, there are other versions with more resources, but the Zero is pretty good for testing the platform and making simple IOT devices.
I'd strongly recommend you to get one Arduino and one Raspberry (Pi Zero W). Even though Raspberry's are pretty fun to play with, you're working at OS level and this might have a significant impact on your project's reliability and performance. Additionally, going low level is a great way to learn how computers work underneath.
Breadboard and Jumper Wires
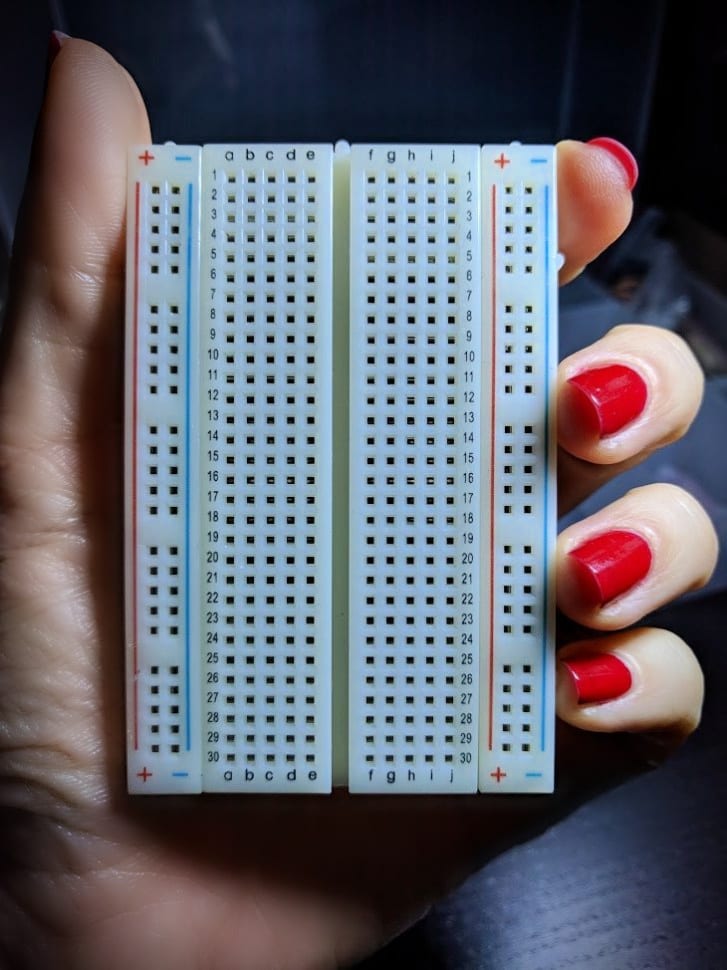
The breadboard is your best friend when prototyping a project. It’s a real must-have! It allows you to create circuits without the need for soldering. Really handy, and it comes in a variety of sizes. Even though the half-size and 1/4 sized breadboards are really cute and work well for small projects, you should have at least one full-size breadboard. The one from the photo is a half-size breadboard.
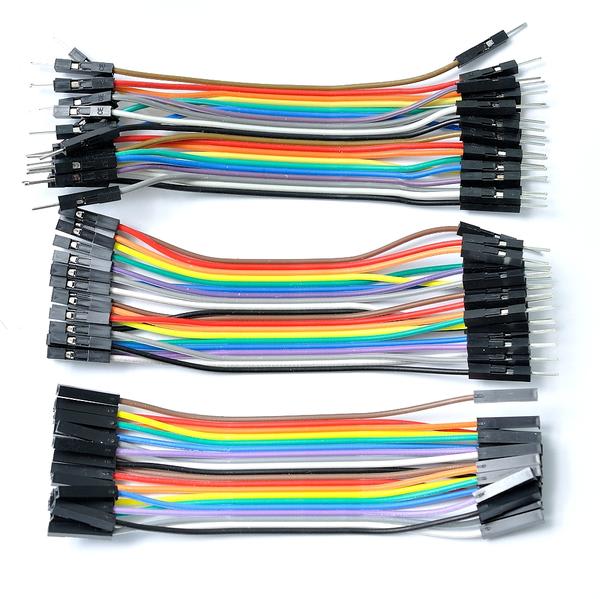
Jumper wires are pieces of wire specially made for connecting components to the breadboard. They have different colors (to help differentiating between components on the board) and male or female terminations. It's good to have a mix of male-male, female-female and female-male jumper wires.
Basic Components

There’s a bunch of basic components you should have at hand in case you need (and you will). LEDS, resistors from different values, buttons, and other stuff you might find interesting! To keep it to a minimum, here's what I suggest:
- Regular LEDs
- RGB LEDs
- Resistors Kit
- Push buttons
- Buzzer
Soldering Iron and Accessories

Soldering irons come in a variety of versions and prices. The “stations” that have temperature control (like the one in the photo above) are usually a good choice, but there are more budget-friendly versions that work just as fine for hobbyists like us.

A Solder Sucker is also important for when you make a mess when soldering, or simply if you want to “undo” solder joints.

Last, but not least, you’ll need solder. There are mainly two types of solder, one with lead in its composition, and a lead-free version. Although lead-free can seem like an obvious choice, the option with lead is popular because it's usually easier to work with, and a lot cheaper.
Because you won't be doing loads of soldering every day, it's totally fine to work with the lead version - just make sure you're not breathing the vapors directly - keep open windows and/or a fan nearby.
Multimeter

The multimeter is the most basic debug tool for digital electronics. It can save you HOURS of suffering when things are going south. I’m definitely not an experienced user, but it has saved me after some very poor soldering I’ve done. This page from LadyAda explains how to use a multimeter and how to choose one to buy.
TL;DR Shopping List
Here is the full list of items discussed in this post, with links for reference:
- Arduino Uno R3 or Arduino Micro with headers (my favorite): ~ $ 20.00
- Raspberry Pi Zero W basic kit ~ $ 25.00
- Breadboard Kit with Jumper Wires ~ $ 12.00
- Regular LED pack ~ $ 10.00
- RGB LED pack ~ $ 6.00
- Resistors pack ~ $ 10.00
- Push buttons pack ~ $ 6.00
- Piezo Buzzer ~ $ 6.00
- Soldering Kit (includes iron, stand, solder, solder sucker and more) ~ $ 22.00
- Solder Wire ~ $ 6.00
- Digital Multimeter ~ $ 20.00
Total Investment: ~ $ 143.00
What do you think? What would you include in this kit? Share your thoughts!
In the next post from this series, we'll have a look at basic soldering.

Top comments (2)
Thanks for the story!
One thing I would point out is that it might be more cost effective and easier to purchase one of the many kits available on Amazon that contain lots of different components and sensors along with an Arduino compatible controller board. This is what I did when I first started working with the Arduino, and it was really nice to have a bunch of different parts to experiment with!
I now have several boxes of various types of parts and lots of different types of micro-controller boards. My favorite is the Nano compatible boards because they are very small and inexpensive and easy to incorporate into my final projects.
I would run out of ideas after the LED blinks.