Last time we made our commands more flexible and improved the structure of our code for better readability and scalability. This time we will turn our simple bot into a bot factory, allowing us to use it to spawn multiple bots with different configs, using the well-established Factory and Revealing Module design patterns.

Things you should know for this part include scope and closure of Javascript functions as well as es6 basics (const, let and fat arrow functions)
Transformation
As I said, we will transform our previous code into a factory function. This means that we will rely more on parameters and configuration given when using the factory rather than when setting it up. So, first of all, let's clean up a bit. We're going to throw out a lot of our old code.

Then we will wrap all of our remaining code in our factory function and call it createBot but if we were to simply return the bot object, which we used until now, this would mean that everything within this function will be bundled together and publicly available. We don't want that, do we?
To make sure we control what is visible and accessible from the outside, we won't return the bot object itself but only the functions that need to be usable. In our case right now this is only the bot.load() function. Thanks to the closure, the bot object will still be there and remember all that we need for our bot to run but access is limited to what we pass to the return function. This is often referred to as the Reveal Module Pattern.
Add a return {} to the createBot function and only define one attribute as start() that will call the load function.

The last thing to add now is the module.export with our createBot function.

You might have noticed that I did not use the correct indentation here. To show you a better screenshot, I simply kept the indentation (even though I wrapped the code in a function) so that the diff would show exactly what I changed in each line.
I will correct this before we move on.
Adjustments
As we will get our config handed in from now on, we need to make a few minor adjustments. First of all, we need to rewrite our bot.load() function as follows.
The new load() will expect a config object with mandatory (token) and optional (name, prefix and later other) attributes and attempt to merge them with our configSchema in loadConfig(). Our old code will be passed into loadConfig() as a callback here.
    // Load the bot
    bot.load = function load(config) {
        // Set up some properties
        this.config = {}

        // Load config, load modules, and login
        this.loadConfig(config, () => {
            this.log('Loading commands...')
            Object.keys(botCommands).forEach(key => {
                this.commands.set(botCommands[key].name, botCommands[key])
            })
            this.log('Connecting...')
            this.client.login(this.config.token)
        })
    }
In loadConfig() we will check if our initial config is there and contains a token. If either check fails, we will throw an error. Otherwise, we will merge the initial config with our configSchema and attach it to our bot before we execute the callback code.
    // little helper to keep the code clean
    const has = (obj, prop) => Object.prototype.hasOwnProperty.call(obj, prop)

    bot.loadConfig = function loadConfig(config, callback) {
        this.log('Loading config...')
        try {
            if (!config || !has(config, 'token')) {
                throw Error('Config or token are missing.')
            }
            this.config = {
                ...configSchema,
                ...config,
            }
            callback()
        } catch (err) {
            this.log(`Error loading config: ${err.message}`)
            this.log('Please fix the config error and retry.')
        }
    }
We need to make a small adjustment to grab our prefix from the new config and then we're done here.

With our factory in place, it's time to add the bots. For this part to work properly, you would need to head over to my first instalment of this series and create a second bot via developers portal but you might as well just make an array of 1 bot and go with it.
Create a new index.js at the root of the project. This is where we will import our factory, load our .env variables containing our tokens and add the configs for our bots. Without an array of bots to start, this would be the way to start a single bot with the factory.
// File: index.js
require('dotenv').config()
const BotFactory = require('./src/index')

const { TOKEN } = process.env

const abe = BotFactory.createBot({
    token: TOKEN,
    name: 'AllBotsEqual',
    prefix: '!',
})

abe.start()
If you have only one bot, it's super easy to start it. Create the bot using the factory with your config and run the start() that is publicly available.
You are done!
If you want to define a group of bots to run from your project, you can simply do so in the config file.
// File: index.js
require('dotenv').config()
const config = require('./config.json')
const BotFactory = require('./src/index')

const { bots } = config

bots.forEach(botConfig => {
    const { name, token, prefix} = botConfig
    const bot = BotFactory.createBot({
        token: process.env[token],
        name,
        prefix,
    })

    bot.start()
})
If you name your tokens in your .env file accordingly, you can map them in your config file like this.
{
  "bots": [
    {
      "name": "AllBotsEqual",
      "token": "TOKEN_ABE",
      "prefix": "!"
    },
    {
      "name": "Scout",
      "token": "TOKEN_SCOUT",
      "prefix": "$"
    }
  ]
}
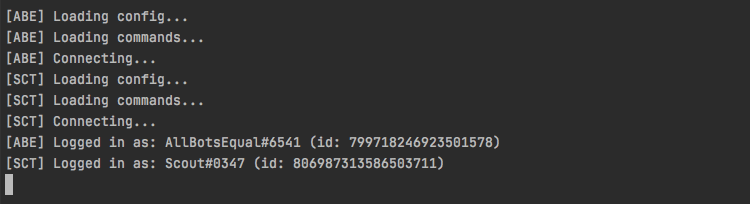
Running our new index.js file will now start as many bots as you have entered in your config file.

If you have given them different prefixes, you can now interact with them as if they were fully independent bots. Should you use the same prefix for both bots, both would react to the same command.

With one final adjustment to our package.json to switch to the new index.js file we are now done and can spawn as many bots as we like (and have registered with Discord)-

One word of advice though.
If you are running bots on your own server, this way of creating multiple bots is ok. If you plan on hosting this bot on many servers to be used by many people, grouping more than one bot together is not advisable because it can lead to performance issues.
In that case, it would be better to reuse the code for the factory (for example by submitting it to and loading/importing it from npm).
Bonus
You might have noticed that our new console log for multiple bots does not tell us which loading message belongs to which bot. To amend this, I've made another minor adjustment to add a short tag to those messages.
Link to the finished code / tag v0.0.3 on GitHub
Wrapping up
We've turned our bot code into a bot factory and used well-proven and time-tested design patterns along the way.
Next time I will guide you through the process of writing a scaleable and self-updating help command as well as adding our first user management/administration commands to make the bot a bit more useful.

Top comments (0)