
In the last lesson, we took some theories about animation, therefore, today we're going to make our hands dirty, learn by doing. BUT, Hold on.
We need to understand important concepts of animation before jumping into the code, bring your own coffee and focus with me POR FAVOR.
In our life, if you have a glass of water and feel thirsty, what organism in your body would you use to drink water, of course, you would use your hand which in turn is part of the arm to hold a glass of water, naturally, you would not use your ear 😅😅.
We're not in Physiology classes on the human body. Do not panic.

Hence, The object is your arm, and the property is your hand, the initial state of your hand was close to you, then you moved your arm and specifically the property of your hand to the final state to hold a glass of water and drink it.
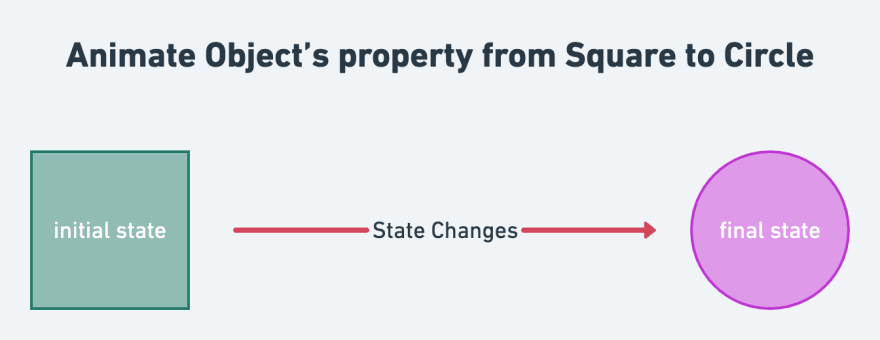
Animation works like this, we need to know the object whose state we want to change, and specify the property of the object we want to animate, such as opacity or color properties.
To jump into the code, you should know that there are two types of animations:
Code-based animations: animations implemented via code, such as animate the size of this object, scale, position, opacity, color, and rotation angle.
Drawing-based animations: these animations look like someone drew them, usually done using Custom Painter. Custom Painter.
Drawing-based animations are advanced animations, so don't worry, we'll learn them until we've mastered code-base animations and most of the time developers use external packages of this type of animation, like Lottiefiles or GIFs.
Therefore, our focus will be on Code-based animations which in turn has two types:
Implicit animations: programmed and designed within pre-existing constraints, like an Electric Car, we're out of control for this kind of animation.
Explicit animations: this is the opposite of implicit animations, we're more control, we can make any kind of animation in your imagination. You are the driver here, not the Tesla Car.
I know these definitions mean nothing to you now but it's the heart of animation if you understand it, you're halfway to animating anything. At the end of this lesson, I will explain the difference between implicit and explicit animation in more detail.
I'm going to explain the Implicit animations, the Explicit animations will be in PART 3 of this series, all right.
Implicit Animation
Let's get started,
If you visit the Flutter docs you'll find some built-in animations, all widgets that start with Animated... such as AnimatedOpacity are implicit animations, except for AnimatedBuilder we will use it for explicit animations. Other animations like ScaleTransition are explicit animations as well, which we'll talk more about in the next lesson.
Now, open Visual Studio Code or Android Studio, and create a new project, after that, create a StatefulWidget because the animation depends on the state that changes over time, then create the object we want to animate, the object is a Container.
class _HomeScreenState extends State<HomeScreen> {
  @override
  Widget build(BuildContext context) {
    return Scaffold(
      body: Center(
        child: Column(
          mainAxisAlignment: MainAxisAlignment.center,
          children: [
            Container(
              width: 140,
              height: 140,
              decoration: BoxDecoration(
                color: Colors.green,
                borderRadius: BorderRadius.zero,
              ),
            ),
          ],
        ),
      ),
    );
  }
}
Before continue, there are four steps to follow to animate an object in Flutter, they are the dancing rhythm of animation, these steps only apply to the implicit animations.
1. Create a state variable for the object's property.
In our case, we want to animate the Color and Border Radius property, therefore, we'll define the initial state of those properties.
 Color rectColor = Colors.green;
 double rectRadius = 0;
2. Add the state variable to the properties we want to animate.
To the color and borderRadius parameters.
 Container(
    width: 140,
    height: 140,
    decoration: BoxDecoration(
    color: rectColor,
    borderRadius: BorderRadius.circular(rectRadius),
   ),
 ),
3. Define how we trigger the animation using user interaction.
By onTap, onDrag, initState() method when loading the screen the first time, even when the user scrolls in our app. something can run out of our animation.
We'll use a button to trigger our animation, therefore, we'll define the final state of our properties, Color and Borde Radius.
Column(
       mainAxisAlignment: MainAxisAlignment.center,
       children: [
        Container(
            width: 140,
            height: 140,
            decoration: BoxDecoration(
              color: rectColor,
              borderRadius: BorderRadius.circular(rectRadius),
            ),
          ),
          SizedBox(
            height: 140,
          ),
          ElevatedButton(
            child: const Text(
              'Animate the Box',
              style: TextStyle(fontSize: 20),
            ),
            style: ElevatedButton.styleFrom(
              padding:
                const EdgeInsets.symmetric(horizontal: 30, vertical: 20),
                primary: Colors.blueAccent,
            ),
            onPressed: () {
                setState(() {
                // Here
                rectColor = Colors.pink;
                rectRadius = 50;
                });
           },
          ),
        ],
   ),
Our design will be like this:

If you click the button to trigger the animation, you'll notice that the state of the object will immediately change from 0 to 50 without any smooth animation. It's boring for your eyes, it's not realistic, in our life, things don't move like that, I'm right.
Therefore we will need to add one of the built-in animations to ask Flutter,
Please change the state of the object properties from square to circle in a smooth manner.
So, the fourth step is:
4- Add one of the built-in animations to the widget.
In our case, we'll use AnimatedContainer class. therefore, replace the Container with it.
AnimatedContainer(
    width: 140,
    height: 140,
    decoration: BoxDecoration(
    color: rectColor,
    borderRadius: BorderRadius.circular(rectRadius),
   ),
 ),
The AnimatedContainer needs a required argument, it is duration. But what is this? Why do we need it?
- Duration parameter: the length of the animation. In other words, how long will the animation take from its initial state to its final state?.
The duration parameter is the type of Duration class, and you'll always use milliseconds or seconds argument. Therefore, our code will look like this.
AnimatedContainer(
    width: 140,
    height: 140,
    duration: Duration(seconds: 1),
    decoration: BoxDecoration(
    color: rectColor,
    borderRadius: BorderRadius.circular(rectRadius),
   ),
 ),
Now, build your app and run the animation, you'll get a smooth animation, the states gradually change from the initial state to the final state, and Flutter automatically computes and renders the animation, that's what I mean by state changes over time. Your eyes can see changes that happen gradually rather than immediately.

The second parameter we need to know is the curve.
- Curve: the speed of the animation. In other words, how does the animation move?. Does it move at a constant speed, or whether it starts out slow and speeds up? or what?.
The curve parameter is the type of Curve class. By default, the curve has a constant speed, it's linear, what we mean by that. Open in a new tab Flutter docs, you'll find many types of speeds. Those who use a lot in animation are:
linear: animation at a constant speed.

easeIn: animation starts slowly and ends at a quick speed.
easeOut: animation starts quickly and ends at a slow speed ( the opposite of easeIn ).

easeInOut: animation starts slowly, speeds up, and then ends at a slow speed.

Therefore, our code will look like this.
AnimatedContainer(
    width: 140,
    height: 140,
    curve: Curves.easeIn,
    duration: Duration(seconds: 1),
    decoration: BoxDecoration(
    color: rectColor,
    borderRadius: BorderRadius.circular(rectRadius),
   ),
 ),
I'm sure you're a little confused between duration and curve.
You might think that if we had a quick-speed animation, our animation would finish before the time we set. NO, the time is fixed, and depending on the type of speed we chose, the animation speed will be evenly distributed during that time.
Perfect, if we want to delay one animation from another, I mean the Border Radius will start first and after a second the color will be animated. We can implement it using Future.delayed constructor. Try it like this:
ElevatedButton(
          child: const Text(
             'Animate the Box',
             style: TextStyle(fontSize: 20),
           ),
           style: ElevatedButton.styleFrom(
             padding: const EdgeInsets.symmetric(horizontal: 30, vertical: 20),
             primary: Colors.blueAccent,
           ),
           onPressed: () {
             setState(() {
               rectRadius = 50;
             });
             Future.delayed(const Duration(seconds: 1), () {
               setState(() {
                 rectColor = Colors.pink;
               });
             });
           },
        ),
The result:

The problem
So far, there is nothing wrong with this approach, our animation starts from the initial state to the final state, without any problem.
The question is what if we want to reverse our animation to bring it back from its final state to its initial state?.
One solution is to use the ternary operator syntax, and we'll use it in the ElevatedButton. So, our code will look like this.
Column(
       mainAxisAlignment: MainAxisAlignment.center,
       children: [
        AnimatedContainer(
           width: 140,
           height: 140,
           curve: Curves.easeIn,
           duration: Duration(seconds: 1),
           decoration: BoxDecoration(
             color: rectColor,
             borderRadius: BorderRadius.circular(rectRadius),
           ),
         ),
         SizedBox(
           height: 140,
         ),
         ElevatedButton(
           child: const Text(
             'Animate the Box',
             style: TextStyle(fontSize: 20),
           ),
           style: ElevatedButton.styleFrom(
             padding:
               const EdgeInsets.symmetric(horizontal: 30, vertical: 20),
               primary: Colors.blueAccent,
           ),
           onPressed: () {
               setState(() {
               // I removed the Future.delayed constructor

               // The ternary operator
               rectColor = rectColor == Colors.green ? Colors.pink : Colors.green;
               rectRadius = rectRadius == 0 ? 50 : 0;
               });
           },
          ),
        ],
   ),
We'll get this result, on the first press, our object or container, animating from its initial state to its final state, to bring it back to its initial state we need to press again. Excellent.
Another question. What if we want to animate several properties, and we want to delay all of them. We'll get a chain of Future.delayed constructors, so it's not clean code, and it can also glitch during this process.
The last question. What if we want our animation to be repeated forever?. Unfortunately, we don't have a solution for this.
Now, do you see the problems we're having with implicit animations?. It is not a good solution for complex animations.
Here, where explicit animations shine through, it answers all the questions we have in mind, even with the ability to pause the animation in the middle of changes and resume later, it's absolutely amazing.
In nutshell, only use implicit animation in simple animation, animation that will run once from the initial state to the final state.
And of course, feel free to play with other built-in animations, if you understand today's lesson you'll find it easy for you. Because, to be honest with you I want to focus more on explicit animation, which will make us have a solid knowledge of animation.
Summary
This is how the animation behaves in our app is not a magical thing, all the animation we see in our life we can implement via code, but only if we understand how the animation changes from its initial state to its final state. In the next lesson, we'll continue our journey and dig deeper into the explicit animations.

Top comments (0)