
To continue the series about creating a product page, we have a new way to do it using MB Views only. It's a Meta Box's extension. If you are using a theme without any page builders or just using only Gutenberg, this tutorial will work.
As in the previous part of this series, I also take a detailed page about car rental as an example.
Video Version
Before Getting Started
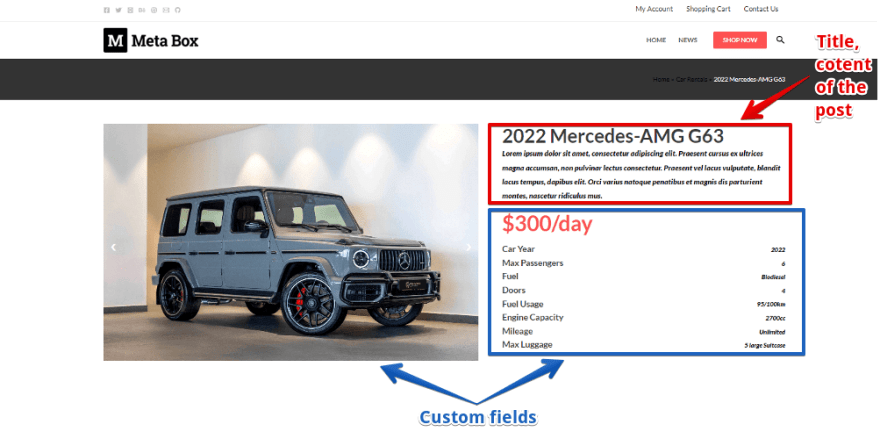
The product is a kind of custom post type. In this case, each car for rent will be a post in that post type. The product's name and its descriptions are the title and content of the post. We'll need some extra information about the cars such as price, image gallery, type of fuel, etc. So, we use custom fields to save that data.
To create custom post types and custom fields, we use the Meta Box core plugin. It's free and available on wordpress.org.
For more advanced features, we also need some Meta Box extensions. You can use Meta Box AIO or install the following extensions individually:
- MB Custom Post Type: to create custom post types;
- Meta Box Builder: to have a UI on the back end to create custom fields easily;
- MB Views: to create a template for the product page without touching the theme file.
Step 1: Create a New Custom Post Type
Go to Meta Box > Post Types > New Post Type to create a new custom post type.

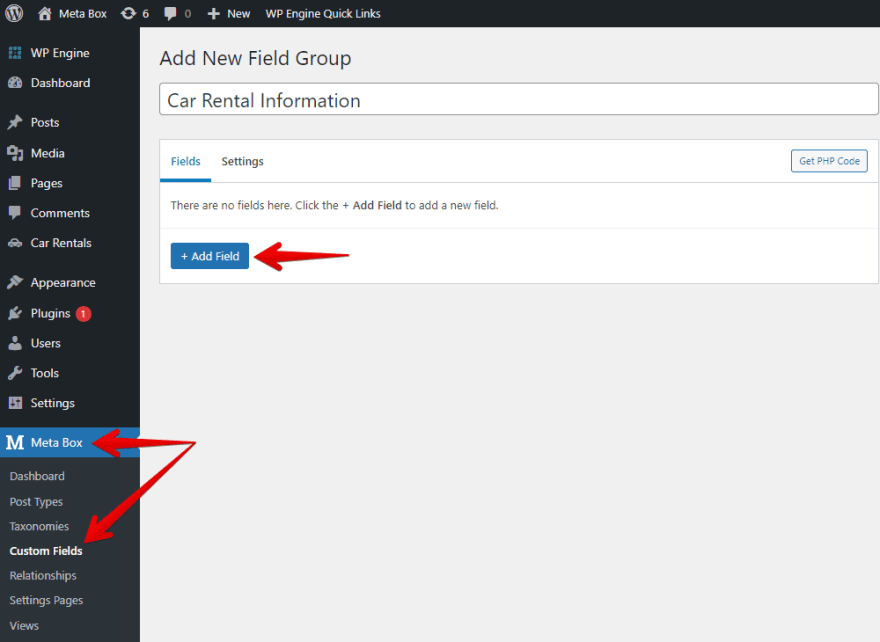
Step 2: Create Custom Fields
Go to Meta Box > Custom Fields, then create fields as you want.
In this tutorial, I just take a typical example of car rental with some common fields. They are all very simple and don't require any particular setting. Here are the fields that I created.
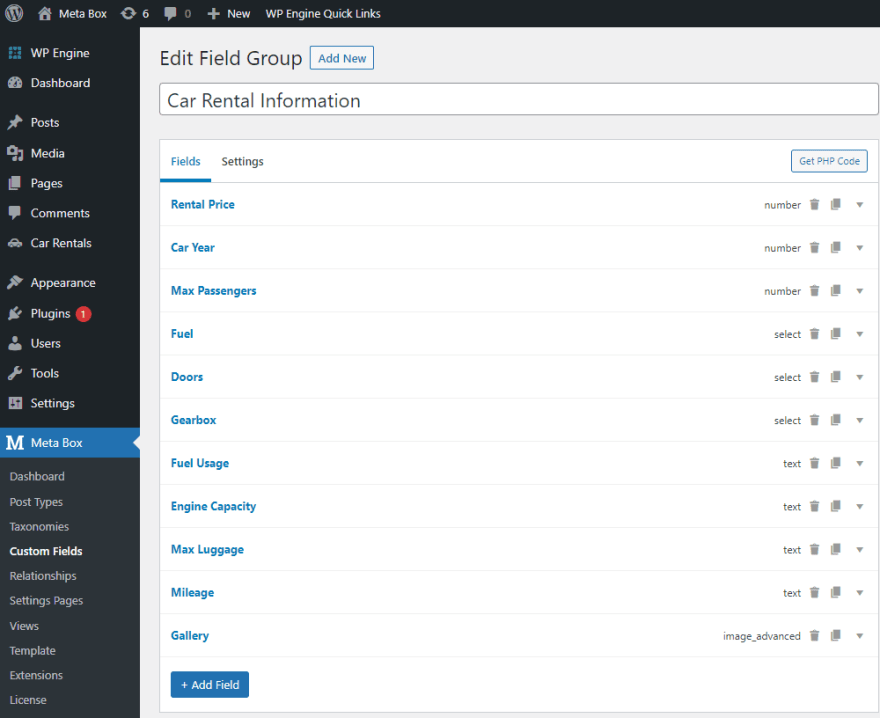
Next, move to the Settings tab > Location > choose Post Type as Car Rental to apply these fields to this post type.
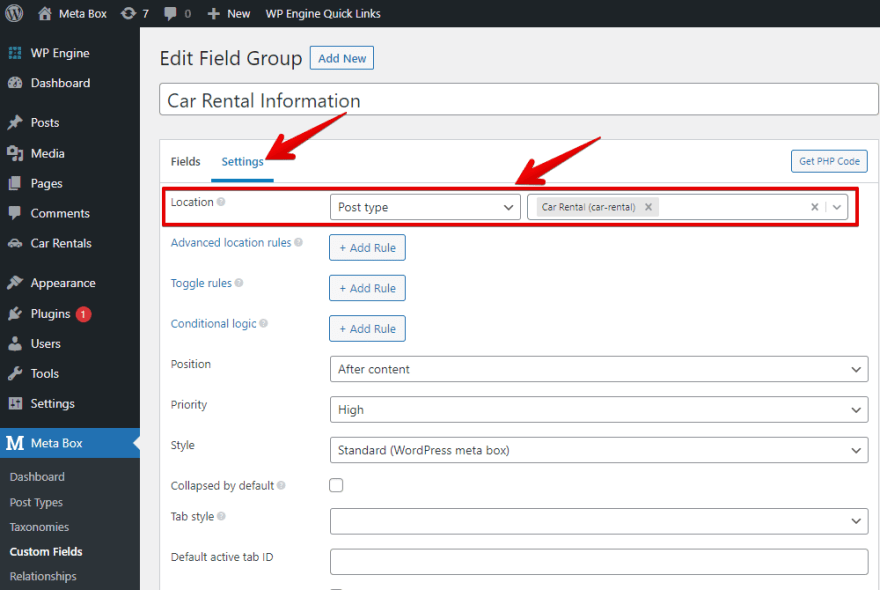
In the post editor, you will see all of the newly created custom fields.

Step 3: Create a Template
To display the product's details, you normally have to go to the theme's files to add code or use a page builder. However, you have another way with the MB Views extension to create templates without touching the theme's files.
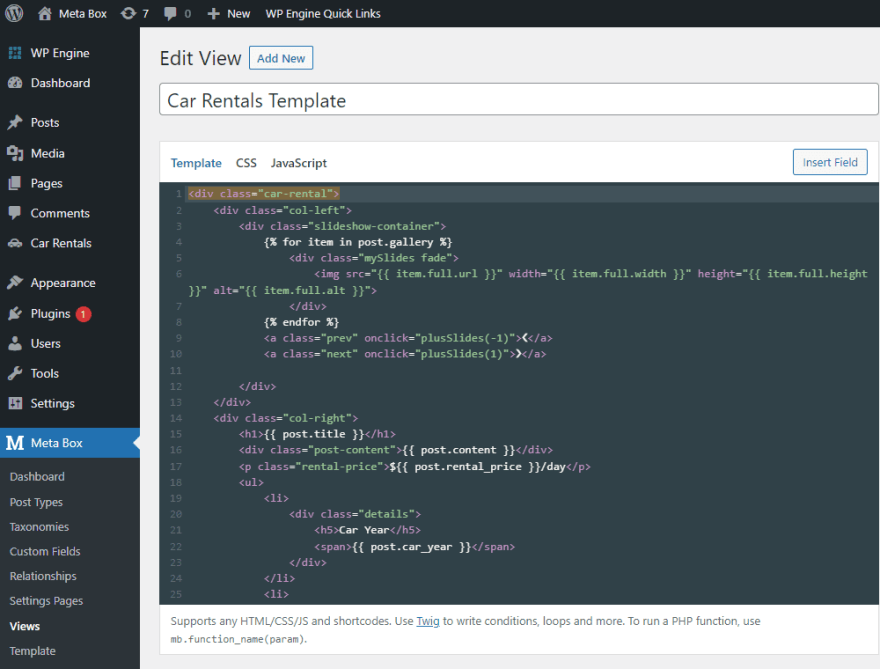
Go to Meta Box > Views to create a new template. Instead of typing code into the box in the Template tab, you can insert fields to get their data.
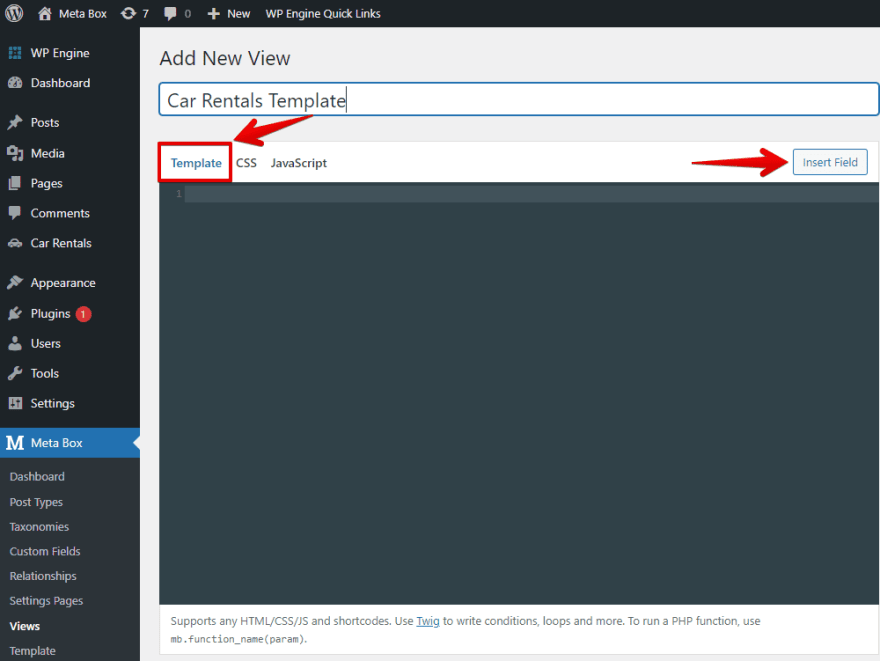
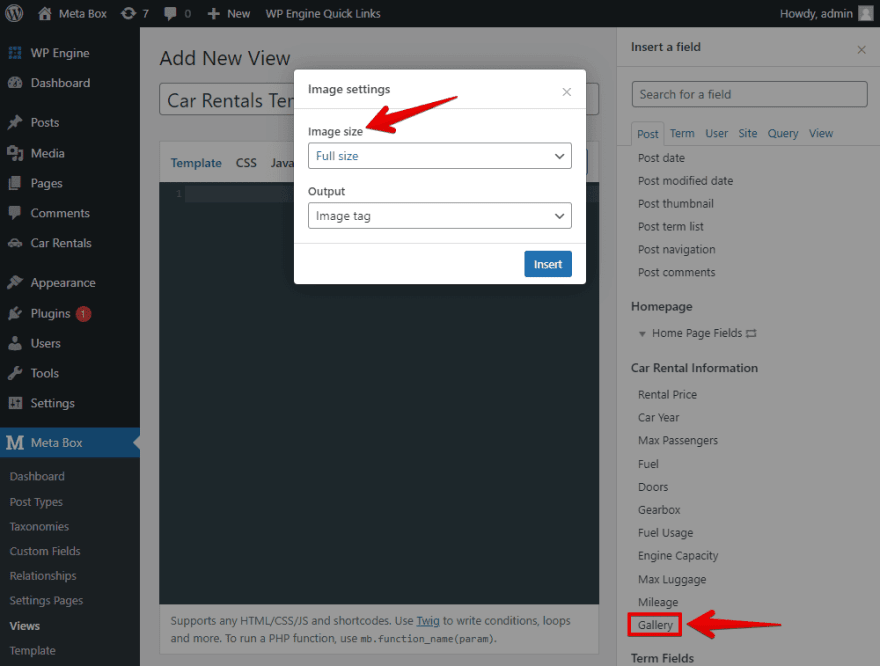
Just click the Insert Field button and choose which one you want.
First, I'll create a slider with many product images, so insert the Gallery field and choose an image size for it.
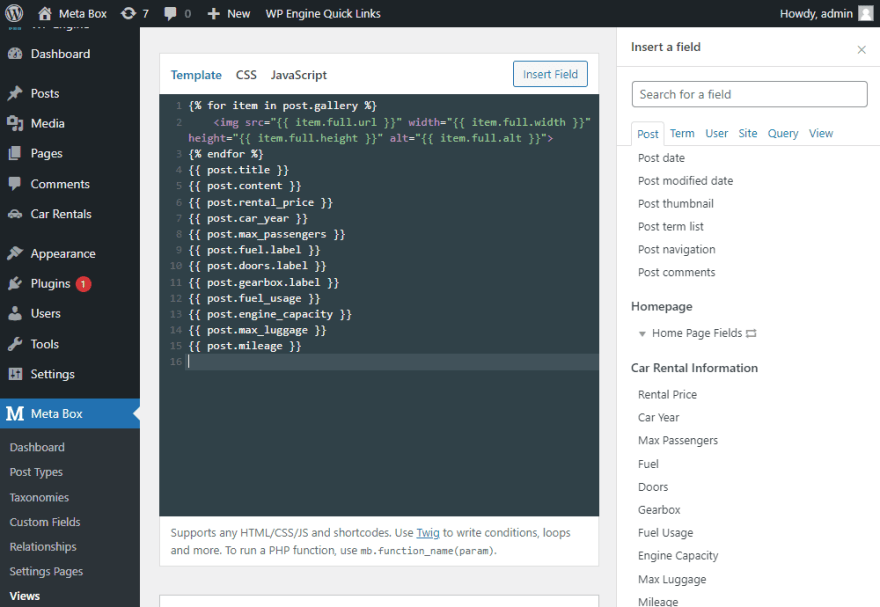
Next, insert the product name and its description. They are the default fields of WordPress.
In terms of the fuel, door, and gearbox information, because they are select fields, you'll have a setting where you can choose the output of the options as Value or Label.

Moving on, I'll insert the remaining fields as usual.
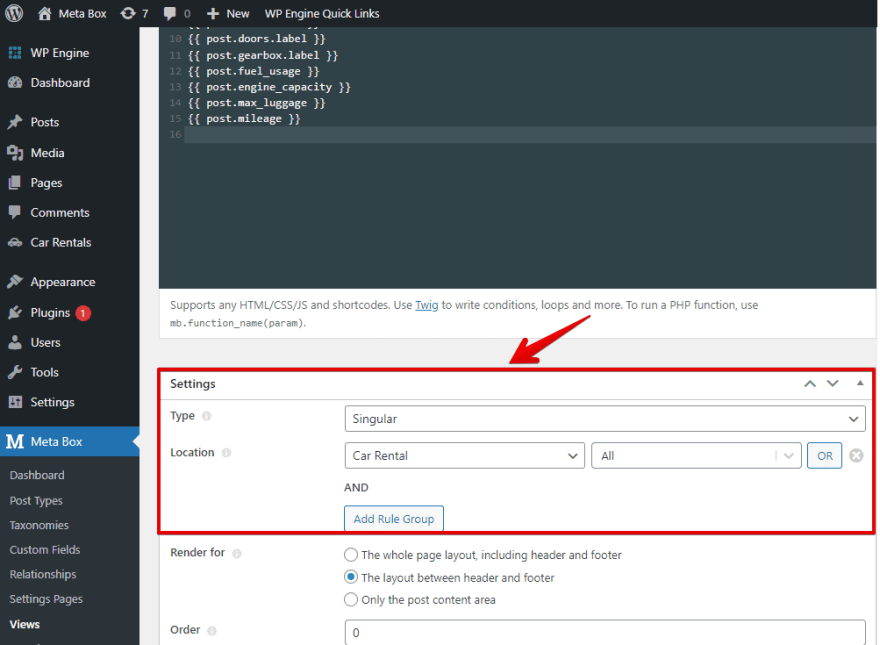
In the Settings section of the view, set the Type section as Singular to assign this template to a single post page. Then, add a rule in the Location section to apply it to the Car Rental page only.
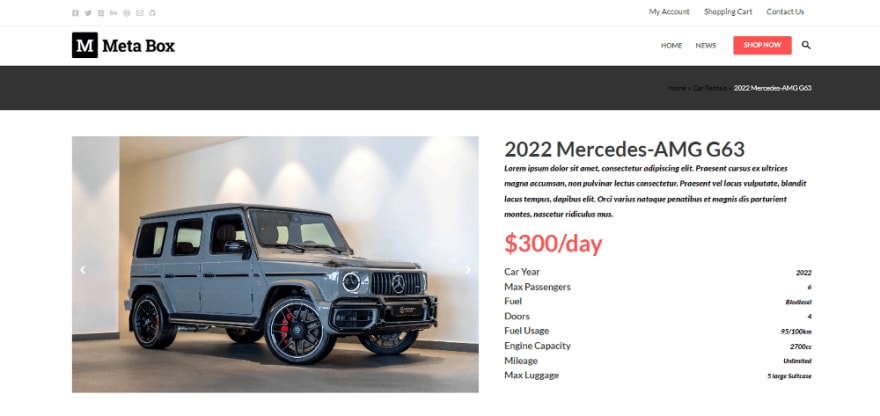
Now, go to the product page, all the product information is displayed already.

It is so messy now. We'll need some JS and CSS to make it more beautiful with a better layout.
Step 4: Style the Page
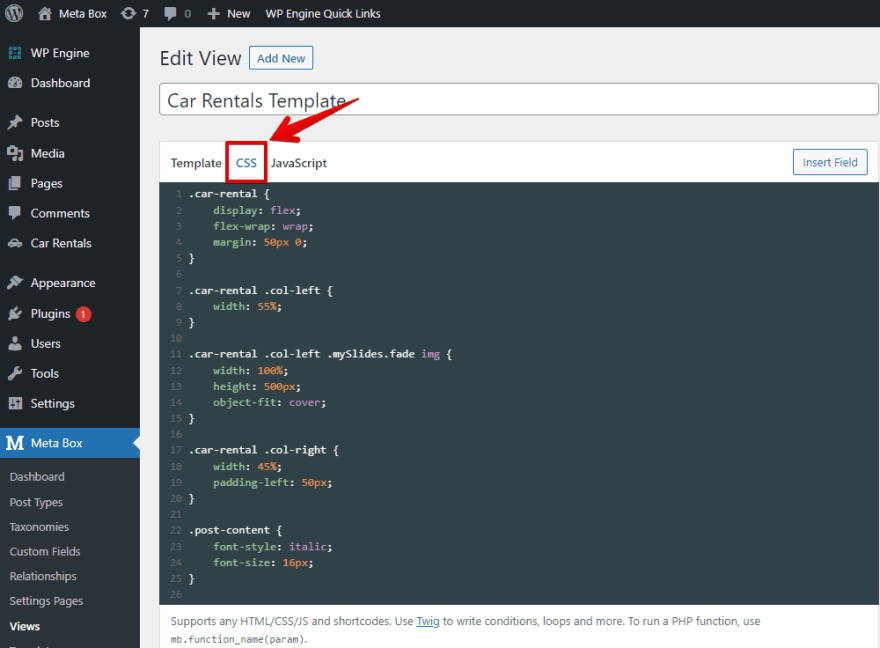
Before styling, let's add some div tags to separate the page into different sections for easier styling.
Next, go to the CSS tab, add some code.
Also add some code in the JavaScript tab. This is to create a slider for the gallery.
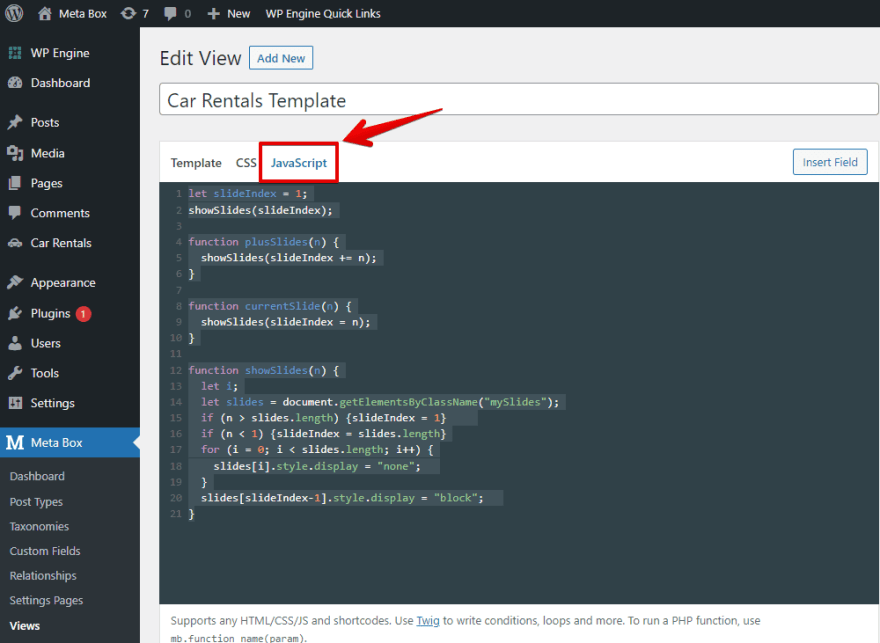
All of these codes are available on Github, you can refer to it.
After updating the template, you'll see the new look of the page on the frontend.
Last Words
Hopefully, all the following steps above could 'help you a hand' in creating an advanced product page. In case, you plan to build your own product page using other page builders besides Gutenberg, there are some interesting options for you here. Keep track and send us your ideas if you wish for more tutorials. Good fortune!

Top comments (0)