
In the previous part of the series “How to display the Latest Products section in different ways”, we learned how to do it with Meta Box and Gutenberg. As promised, we’re showing you another method that uses Meta Box and a page builder. Today, I choose Elementor.
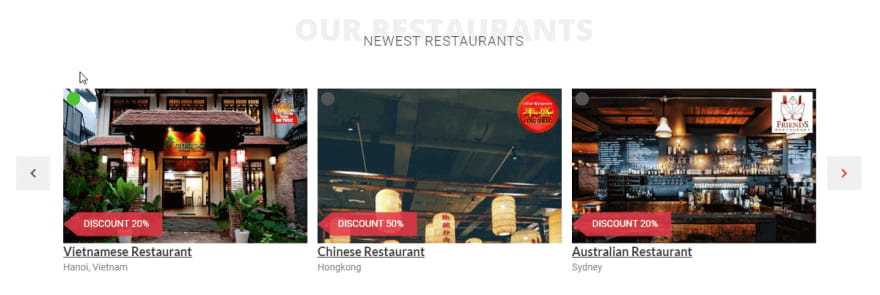
I’m also going to create this section with the posts in time order: the latest products first, then the older ones. It will look like this:
Now, let’s start!
Before Getting Started
To do it, we need Elementor first. Here I use Elementor Pro which has integration with Meta Box. You also need other tools as follows:
- Elementor Custom Skin: It provides the Loop template to display the listing of posts.
- Meta Box core plugin: This is the framework to create custom fields and custom post types. It’s free on wordpress.org, so you can download it directly.
- MB Custom Post Type & Custom Taxonomies: This is a useful extension of Meta Box. It helps you to create new custom post types. You also can download it free on wordpress.org.
- Meta Box Builder: This premium extension of Meta Box provides a UI in the back end to create and configure custom fields without using code.
- Meta Box - Elementor integrator. This extension allows you to get data from custom fields created by the Meta Box plugin in the templates of Elementor.
FYI, here I use Ocean WP theme which is compatible with Elementor. Otherwise, you can choose any other ones which are compatible with Elementor as well.
Video Version
Step 1: Create a New Custom Post Type
Go to Meta Box > Post Types > New Post Type.

After publishing it, a new menu appears.

Step 2: Create Custom Fields for The Custom Post Type
Go to Meta Box > Custom Fields > Add New. Meta Box Builder provides a UI in the back end to create custom fields without using code. But you also can code by yourself or use code generated by Online Generator.

I just need to fill in the Label and ID for fields. It is quite easy, but you should choose a simple ID to remember easily. Because you will need them in the next steps.
Meta Box supports over 50 field types, so you can choose any type of them for your own case. Here are the fields that I chose.
| Field Type | Name | ID |
| Text | Address | address |
| Single Image | Logo | logo |
| Select | Status | status |
| Checkbox List | Voucher | voucher |
For the Status and Voucher fields, I added the options in the Choices section like this:
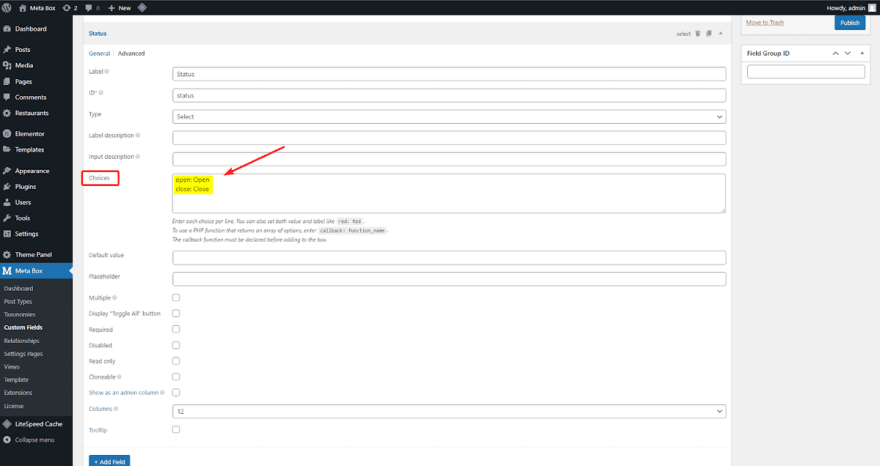 Add options to the Status field
 Add options to the Voucher field
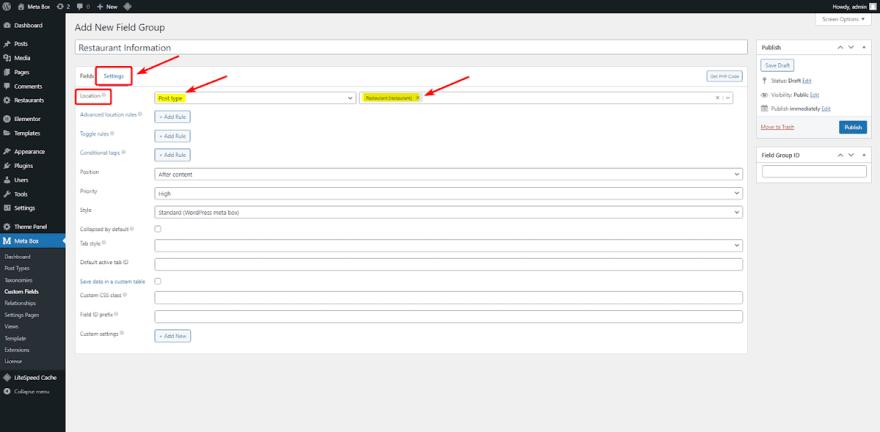
After creating all the fields, move to the Settings tab. In the Location section, choose the Post Types as Restaurant to apply these fields to it.
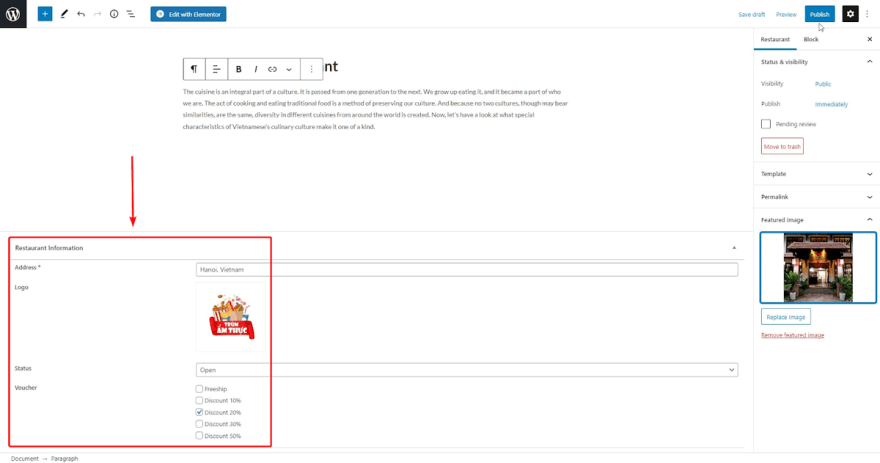
Now, go to the post editor in Restaurant post type, you will see the fields and can enter information into them.
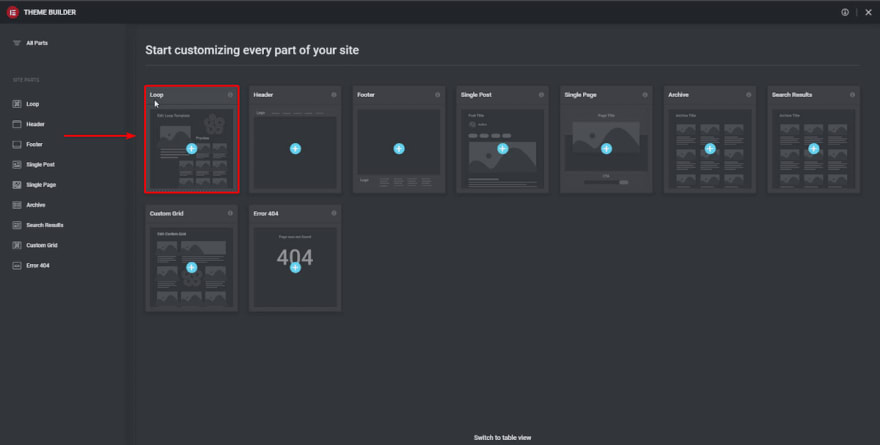
Step 3: Create a New Template
Go to Templates > Theme Builder.

We will have a list of products, so we should choose the template as a loop. This option is available when you have Elementor Custom Skin.
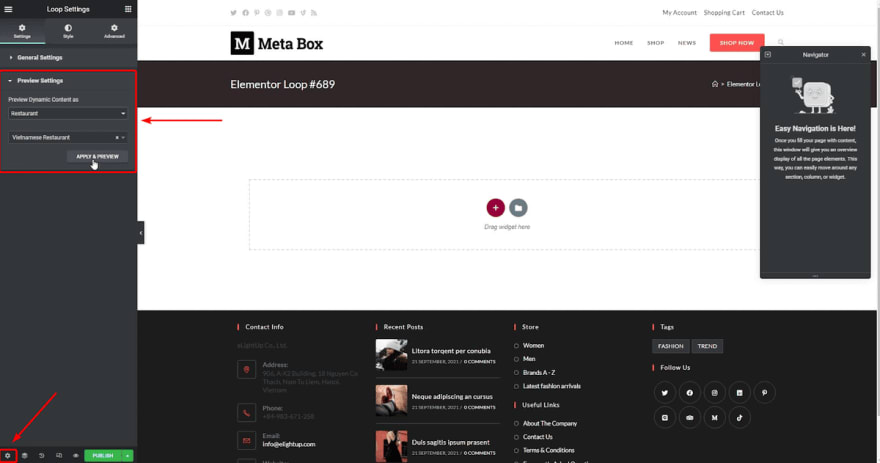
To have the live preview, you can choose any post of the post type that you want in the Settings tab.
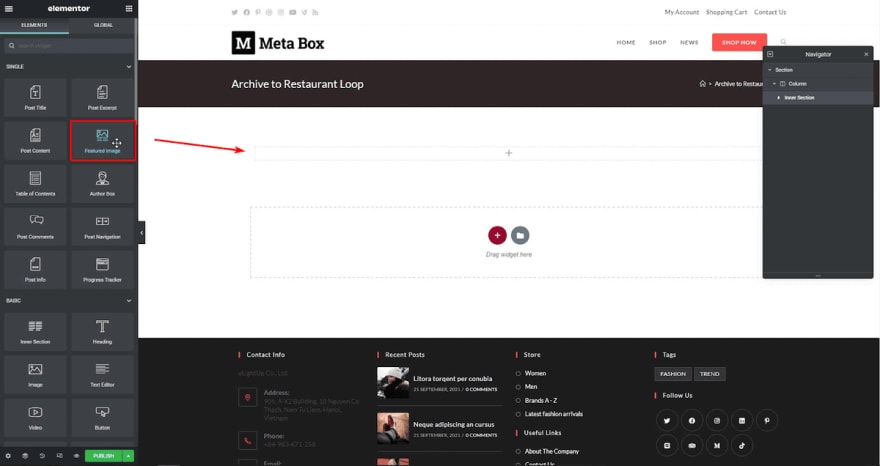
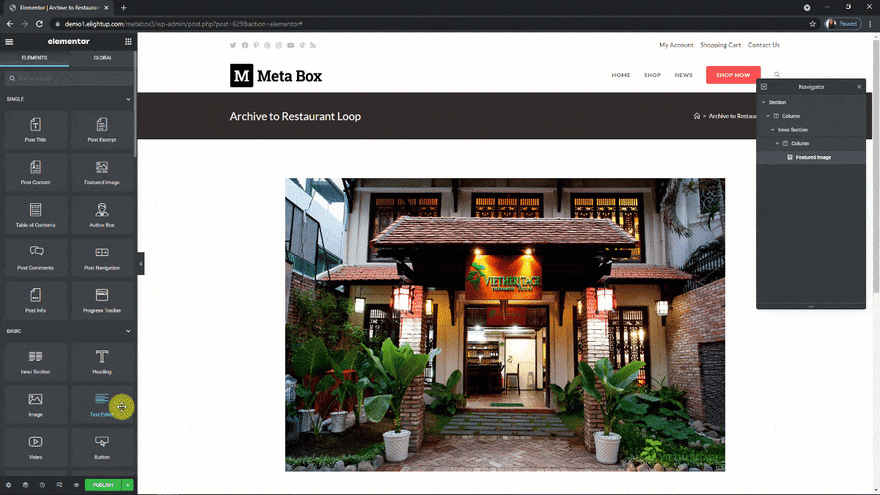
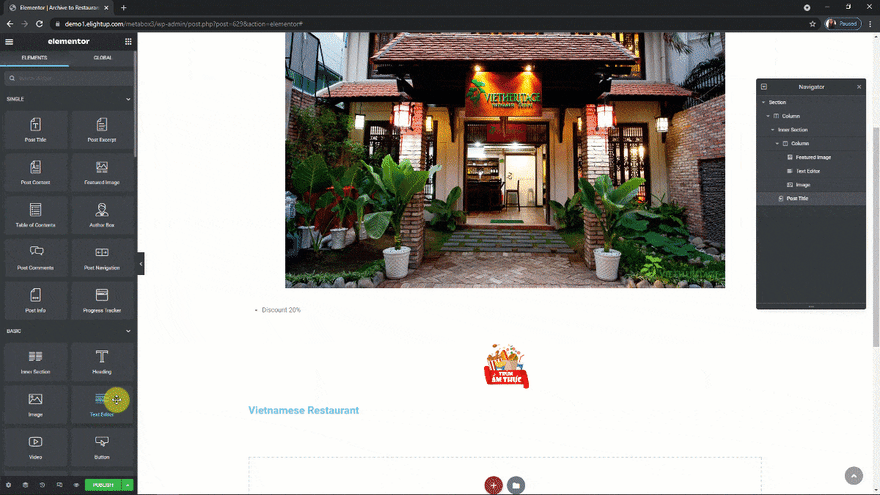
Firstly, I add an Inner Section to group some elements that I want to style at once as the featured image, logo, and voucher.

It has 2 columns inside so I’ll remove one.

Next, I add the Featured Image widget into the Inner Section.
Then, to get the value of the Voucher field, add a Text Editor element and link it to the field following what I’m doing in the below picture.
 Click on the Dynamic Tags icon > choose Meta Box Field option in the Post section > choose the field you want.
And then, the value that you input to the corresponding field will display in the preview.
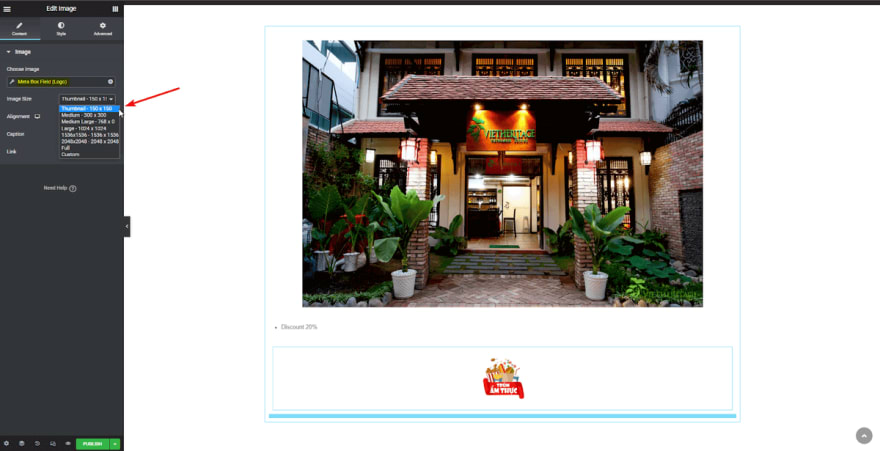
For the Logo, just add an Image widget, and choose the source from a Meta Box field as well.

Here I set the logo size as Thumbnail to scale down the image.
Moving on, out of the Inner Section, I add a Post Title widget and link it to the Post URL.

The Address of the restaurant also will be got from the value of the custom fields in the same way with the Voucher. So, add a Text Editor and link it to the Address field.
When users hover over the featured image of the restaurant, I want a text as View Detail display, so I add a Heading widget here. I also rename the Title to View Detail and link it to the Post URL.

The last one, the Status is the same as the Voucher, so do likewise and link it to the Status field.

Step 4: Add a Section for the Latest Products on the Homepage
Now, I will add the list of the latest restaurants to this position on the homepage. It is a list of posts, so I drag the Post widget to here.

Because I have the Elementor Custom Skin plugin, I have an option to set the skin as Custom.

Then, select the Default Template as the template which we have just created.
Next, in the Query section, choose the source as the post type of your products.

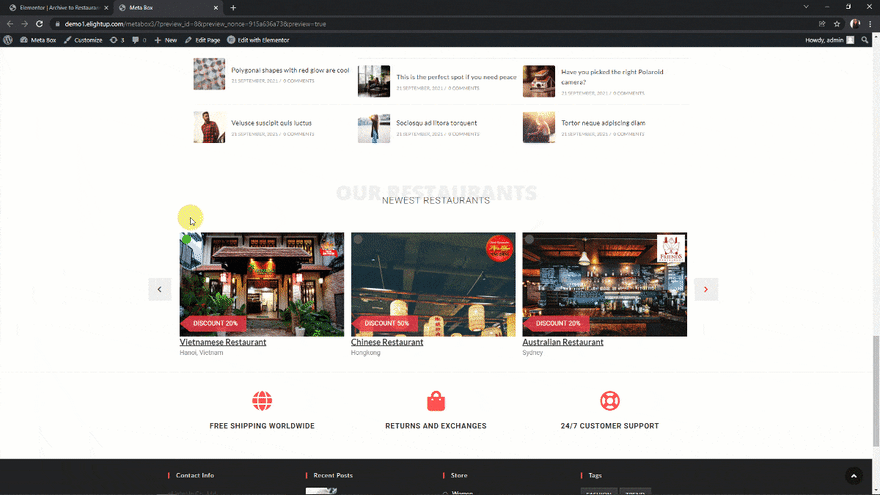
Now, the preview shows the posts with exactly the information we want. And the products are in the time order: the latest post first, then the older one without any further configuration.

We will style this section in the next step.
Step 5: Set CSS Classes for the Elements
Before styling my latest restaurants section on the homepage, I set CSS classes for each element in the Advanced tab.

This step is so easy, but it will help in the next steps.
Step 6: Create Slider for The Latest Products Section
As you’ve seen at the beginning, my latest restaurant section is in a slider. To have it, I use some JS and CSS. But instead of adding them directly to the theme, I’m using the My Custom Functionality plugin, so when I change the theme, the slider won’t be affected. You can download this plugin from GitHub and install it on your website.
Download the JS and CSS Library
For the JS and CSS, I use the Slick library. It is also available on GitHub. It includes several files as you can see here. But, we just need three of them.
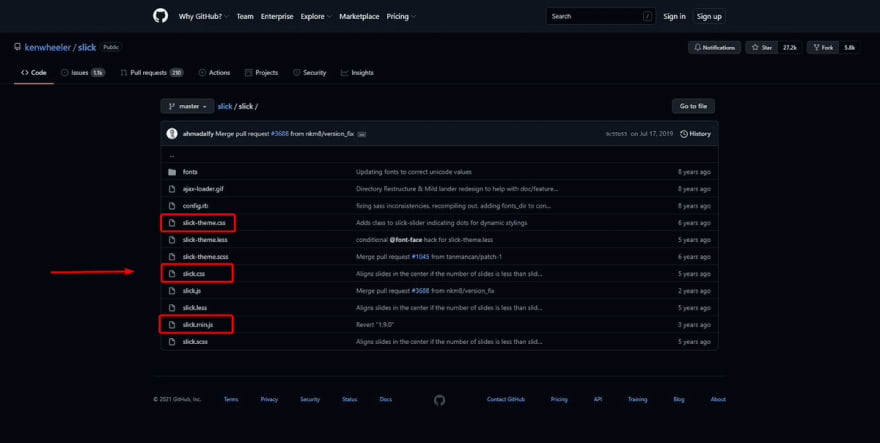
Go to the folder of the My Custom Functionality plugin, and upload them into the corresponding JS and CSS folders.

Set Up The Slider Effect
Next, to set up the slider effect of Slick Slider, I’ll create a custom.js file in the JS folder, and add this code to it.

jQuery(document).ready(function ($) {
    jQuery(".list-restaurant .ecs-posts").slick({
        infinite: false,
        dots: false,
        autoplay: false,
        speed: 800,
        autoplaySpeed: 4000,
        slidesToShow: 3,
        slidesToScroll: 3,
        nextArrow: '<button class="next-btn">Next</button>',
        prevArrow: '<button class="prev-btn">Previous</button>'
    });
    jQuery('.status-res .elementor-text-editor').each(function () {
        if (jQuery.trim(jQuery(this).html()) == 'Open') {
            jQuery(this).parents('.status-res').addClass('open');
        } else {
            jQuery(this).parents('.status-res').addClass('close');
        }
    });
})
Explanation:
-
jQuery(".list-restaurant .ecs-posts").slick({}): We use it to create a slider with the Slick Slider’s style for the elements in the.list-restaurant .ecs-postsclass; -
jQuery('.status-res .elementor-text-editor').each(function () {}): It will create a dynamic class depending on the returned values of the restaurant’s status in the section that I put in thestatus-resclass. If the returned value isopen, the class will beopen. In return, the value isclose, the class will beclose.
Declare the JS and CSS Files
Go to the plugin.php file and add this code into the custom_enqueue_files() function:
wp_enqueue_style('slick', plugin_dir_url( __FILE__ ).'/assets/css/slick.css');
wp_enqueue_style('slick-theme', plugin_dir_url( __FILE__ ).'/assets/css/slick-theme.css');
wp_enqueue_script('custom', plugin_dir_url( __FILE__ ).'/assets/js/custom.js', ['jquery']);
wp_enqueue_script('slick-min', plugin_dir_url( __FILE__ ).'/assets/js/slick.min.js', ['jquery']);
Now, go to the homepage, my latest restaurants section has already turned into a slider.

But it hasn’t looked good yet. So, it’s time to add some additional CSS.
Step 7: Add CSS to Style The Latest Products Section
Back to the Template we’ve just created. In the Navigator, choose the Section element that includes all the elements of the posts we show on the Latest Products section. And move to the Advanced tab > Custom CSS and add code to the box.

I uploaded the code to GitHub, so you can try it.
Now, back to the homepage, the slider turned to a beautiful one.
Last Words
As you see, displaying the Latest Products section on the front end in time order with Meta Box and Elementor is so intuitive. You just need to drag and drop without much coding and can preview the page easily.
Besides, if you want to try other plugins or compare which way is better, don’t forget to read other articles in this series.

Top comments (0)