
Cover image by Benjamin Voros on Unsplash
The main purpose of enormous popularity of Docker nowadays is that it’s really easy to use and it allows developers to create a portable application that could be run on every machine in a nick of time. With this blog post I would like to present how simple is to create your own Docker image with your own Java app inside.
Haven’t you heard of Docker yet? Or maybe you’re not comfortable with what exactly it is? Don’t worry, you can check my previous article in which I elaborate on that.
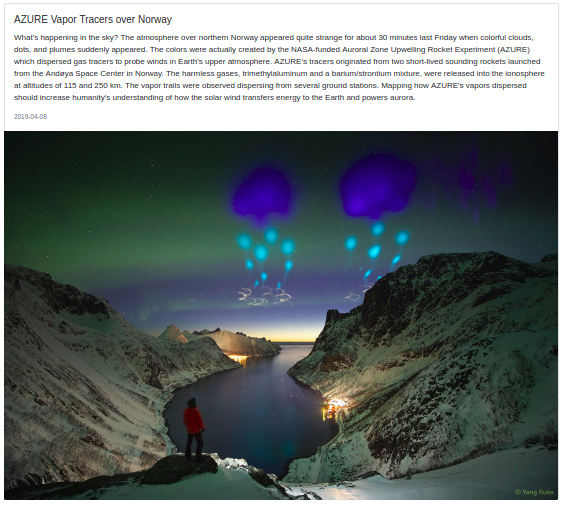
For demonstration purposes for this blog post I’ve created a simple Java project. It’s a Spring Boot app that connects to the NASA Astronomy Picture of the Day API, gets the picture of the current day with description and then prints it on a main page (HTML).

The source code of the application could be found on my GitHub account. And if you’re not familiar with Spring Boot, don’t worry. I won’t focus on its implementation, only Docker 🐋.
Creating and running the container
To start with that go to the root folder of your project (in my case ~/nasa-picture) and create a new text file called Dockerfile. It’ll contain all steps necessary to create an image (like steps in a food reciepe). For my application it looks like this:
FROM java:8-jdk-alpine
COPY ./build/libs/nasapicture-0.0.1-SNAPSHOT.war /usr/app/
WORKDIR /usr/app
EXPOSE 8080
ENTRYPOINT ["java", "-jar", "nasapicture-0.0.1-SNAPSHOT.war"]
Wow, what’s that even mean?! Some steps might be self-explanatory but let’s break all of them into smaller pieces.
FROM java:8-jdk-alpine— with this line we tell Docker that our image will be based on another image that is available on public repository (Docker Hub). This image was prepared by someone else and contains all necessary dependencies that we would need to run any Java application.COPY ./build/libs/nasapicture-0.0.1-SNAPSHOT.war /usr/app/— as you might already guess with this step we copy-paste something from one directory to another. But what and where? First argument afterCOPYis a path of an application that we want to put into container. I’m using .war file because my project is a web application, but you if yours is a standard .jar app go with that. The second parameter,/usr/app/, is a directory in a container where we put the app.WORKDIR /usr/app— here we instruct Docker to use /usr/app folder as a root, otherwise in each following command we would need to provide the full path to the resource.EXPOSE 8080— with it we inform Docker that a container will listen to specific port, the same as our app is using.ENTRYPOINT ["java", “-jar", “nasapicture-0.0.1-SNAPSHOT.war"]— in the last command we tell Docker to run the application, where first value is a command and the last two are parameters.
Once we’ve got it we can go to the terminal, to a folder where Dockerfile is located and when you’re in there build an image with following command (the argument after -t flag is a name of an image, you can choose whatever you’d like; also notice that there is a dot . at the end of the command):
> docker build -t nasa-picture .

Sending build context to Docker daemon  35.54MB
Step 1/5 : FROM java:8-jdk-alpine
 ---> 3fd9dd82815c
Step 2/5 : COPY ./build/libs/nasapicture-0.0.1-SNAPSHOT.war /usr/app/
 ---> 6c90658d9558
Step 3/5 : WORKDIR /usr/app
 ---> Running in 3d453fe48248
Removing intermediate container 3d453fe48248
 ---> 27f352fbbb15
Step 4/5 : EXPOSE 8080
 ---> Running in 0c656ae718e7
Removing intermediate container 0c656ae718e7
 ---> b3bd82c446b6
Step 5/5 : ENTRYPOINT ["java", "-jar", "nasapicture-0.0.1-SNAPSHOT.war"]
 ---> Running in b09c6788d305
Removing intermediate container b09c6788d305
 ---> 08ee9123cd58
Successfully built 08ee9123cd58
Successfully tagged nasa-picture:latest
As you can see from above output, Docker is building the image by executing command step-by-step as they were defined in the Dockerfile.
Now we can check whether it was really built with following command:
> docker images

    REPOSITORY    TAG          IMAGE ID        CREATED             SIZE
    nasa-picture  latest       08ee9123cd58    8 minutes ago       167MB
    java          8-jdk-alpine 3fd9dd82815c    2 years ago         145MB
Great an image is available, so let’s run it:
> docker run -p 3333:8080 nasa-picture
. ____ _ __ _ _
/\\ / ___'_ __ _ _(_)_ __ __ _ \ \ \ \
( ( )\___ | '_ | '_| | '_ \/ _` | \ \ \ \
\\/ ___)| |_)| | | | | || (_| | ) ) ) )
' |____| .__|_| |_|_| |_\__, | / / / /
=========|_|==============|___/=/_/_/_/
:: Spring Boot :: (v2.1.3.RELEASE)
2019-04-08 05:01:33.617 INFO 1 --- [ main] c.w.m.n.NasapictureApplication : Starting NasapictureApplication on 523080401cdd with PID 1 (/usr/app/nasapicture-0.0.1-SNAPSHOT.war started by root in /usr/app)
2019-04-08 05:01:33.621 INFO 1 --- [ main] c.w.m.n.NasapictureApplication : No active profile set, falling back to default profiles: default
2019-04-08 05:01:36.054 INFO 1 --- [ main] o.s.b.w.embedded.tomcat.TomcatWebServer : Tomcat initialized with port(s): 8080 (http)
2019-04-08 05:01:36.112 INFO 1 --- [ main] o.apache.catalina.core.StandardService : Starting service [Tomcat]
2019-04-08 05:01:36.113 INFO 1 --- [ main] org.apache.catalina.core.StandardEngine : Starting Servlet engine: [Apache Tomcat/9.0.16]
2019-04-08 05:01:36.132 INFO 1 --- [ main] o.a.catalina.core.AprLifecycleListener : The APR based Apache Tomcat Native library which allows optimal performance in production environments was not found on the java.library.path: [/usr/lib/jvm/java-1.8-openjdk/jre/lib/amd64/server:/usr/lib/jvm/java-1.8-openjdk/jre/lib/amd64:/usr/lib/jvm/java-1.8-openjdk/jre/../lib/amd64:/usr/java/packages/lib/amd64:/usr/lib64:/lib64:/lib:/usr/lib]
2019-04-08 05:01:37.451 INFO 1 --- [ main] org.apache.jasper.servlet.TldScanner : At least one JAR was scanned for TLDs yet contained no TLDs. Enable debug logging for this logger for a complete list of JARs that were scanned but no TLDs were found in them. Skipping unneeded JARs during scanning can improve startup time and JSP compilation time.
2019-04-08 05:01:37.853 INFO 1 --- [ main] o.a.c.c.C.[Tomcat].[localhost].[/] : Initializing Spring embedded WebApplicationContext
2019-04-08 05:01:37.853 INFO 1 --- [ main] o.s.web.context.ContextLoader : Root WebApplicationContext: initialization completed in 4143 ms
2019-04-08 05:01:38.685 INFO 1 --- [ main] o.s.s.concurrent.ThreadPoolTaskExecutor : Initializing ExecutorService 'applicationTaskExecutor'
2019-04-08 05:01:39.031 INFO 1 --- [ main] o.s.b.a.e.web.EndpointLinksResolver : Exposing 2 endpoint(s) beneath base path '/actuator'
2019-04-08 05:01:39.221 INFO 1 --- [ main] o.s.b.w.embedded.tomcat.TomcatWebServer : Tomcat started on port(s): 8080 (http) with context path ''
2019-04-08 05:01:39.226 INFO 1 --- [ main] c.w.m.n.NasapictureApplication : Started NasapictureApplication in 6.2 seconds (JVM running for 7.479)
```
Yeah! Container has been created and it’s running, and to test it enter following URL in your browser — [http://localhost:3333/](http://localhost:3333/)
Now if you want to stop the application just use **Ctrl + C** combination on your keyboard. To inspect if it really is not running type the following:
```bash
> docker container ls -a
... IMAGE COMMAND STATUS
... nasa-picture "java -jar nasapictu…" Exited (130) 7 seconds ago
```
### Export Docker image to a file
Until this point everything was done on a single PC, but usually we would like to share our work with others and this would require to generate a file that could be sent via email, copied to Dopbox, fttp or so on. Docker allows to save an image as .tar file and to do so just type following command:
```bash
> docker save --output nasa-picture-export.tar nasa-picture
```
First argument, with `--output` flag, is a name of an exported file and the latter is an image name that we put to a file.
As we now have an exported image you can share it and then to open it use following instruction:
```bash
> docker load --input nasa-picture-export.tar
```
After that new image will be extracted and available to run (the same way as it was done previously).
### Publishing image on Docker Hub
Previous method works fine, but let be honest. It’s not 21st century approach. We get used to be able to download everything from the Internet in the matter of seconds. Therefore exchanging files with Docker images might not to be the so convenient.
Instead we can push our image to the central repository, [Docker Hub](https://hub.docker.com/), and then be able to type it’s name in the console to fetch it wherever we are.
To do so first you need to have an account in [Docker Hub](https://hub.docker.com/). If you don’t have it create one, it’s free.
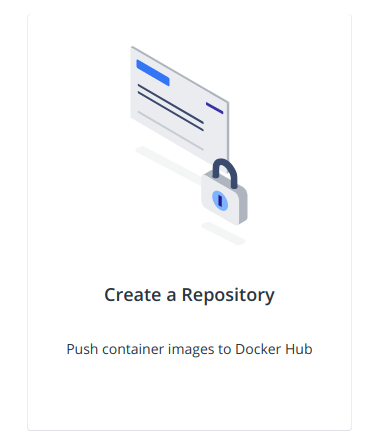
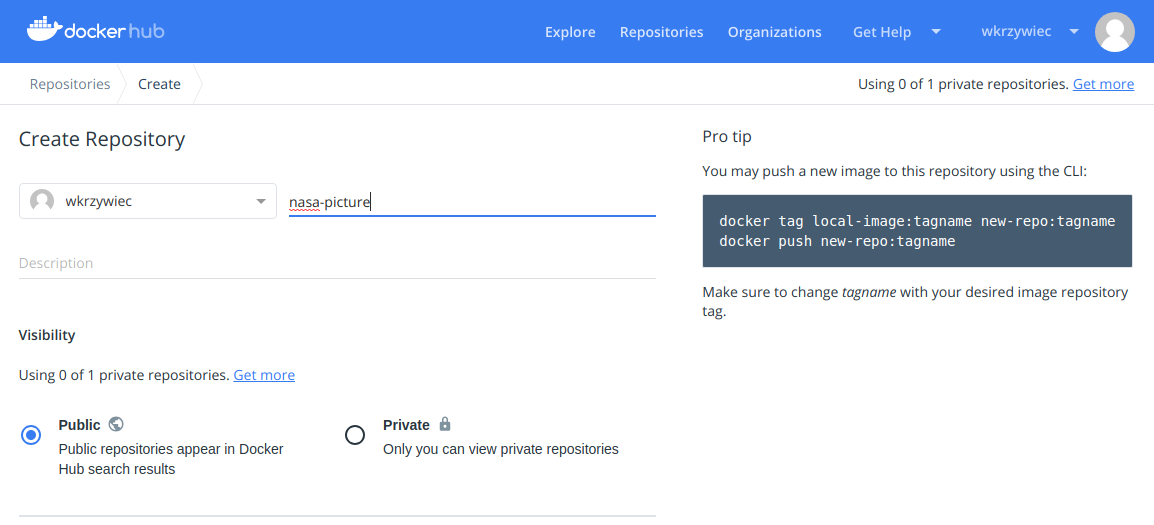
Then, after logging to your account, on a main page there will be an icon to *Create arepository* (see picture on the left). Click on it.
Next, a new page will show up where you can provide the name of the repository, its description and decide whether it will be a public (open to the world) or private (only you would see it) repository.
When everything is set up, just click *Create* button at the bottom of the page.
Now let’s back to the console on our PC and in it type following command in order to login to Docker Hub (during it it will prompt to provide the password):
```bash
> docker login --username=wkrzywiec
Password:
WARNING! Your password will be stored unencrypted in /home/....
Configure a credential helper to remove this warning. See https://docs.docker.com/engine/reference/commandline/login/#credentials-store
Login Succeeded
```
Ok, so we’re connected. Now let’s prepare an image that will be pushed. I assume that you still have your image and to check it type:
```bash
> docker images
REPOSITORY TAG IMAGE ID
nasa-picture latest 430e1de8c0d4
```
We need add tag to an image. The tag usually contains useful information about a version of an image and it’s indicated with semi-columns after the image name, for example `:latest`.
```bahs
> docker tag 430e1de8c0d4 wkrzywiec/nasa-picture:firsttry
```
* `430e1de8c0d4` — it’s an id of an image that we would like to tag,
* `wkrzywiec/nasa-picture:firsttry` — here we provide the full name of an image that will be sent to the Docker Hub. It matches certain patter — `docker-hub-username/image-name:image-tag`. It’s important to name it the same as it’s a Docker Hub repository. The tag can be whatever we want.
Everything is set up, so now let’s push it to the repository:
```bash
> docker push wkrzywiec/nasa-picture
The push refers to repository [docker.io/wkrzywiec/nasa-picture]
e2fd04bd79f3: Pushed
a1e7033f082e: Mounted from library/java
78075328e0da: Mounted from library/java
9f8566ee5135: Mounted from library/java
firsttry: digest: sha256:a2c24d7e0abea09be2520e6bbf41b61f4be1da3f372a98fecc16ebb4db20fd07size: 1159
```
It’s now in Docker Hub! To check it go to the website or you can pull the image in command line. If you go with second option first make sure that you don’t have this image locally with `docker image prune -a`. The you’ll be able to perform this:
```bash
> docker pull wkrzywiec/nasa-picture:firsttry
firsttry: Pulling from wkrzywiec/nasa-picture
709515475419: Pull complete
38a1c0aaa6fd: Pull complete
5b58c996e33e: Pull complete
4eb443a91b8c: Pull complete
Digest: sha256:a2c24d7e0abea09be2520e6bbf41b61f4be1da3f372a98fecc16ebb4db20fd07
Status: Downloaded newer image for wkrzywiec/nasa-picture:firsttr
```
All right! It’s working! But what if you don’t want to provide the `:firsttry` tag whenever you need to pull an image? There’s nothing simpler, when you tag an image, [as it was done in previous step](https://medium.com/p/5e0a02acdd6b#aacd), you need to tag it with `:latest` and then push it to Docker Hub. From now on to pull an image you can use `docker pull wkrzywiec/nasa-picture` .
If you would like to see the source of code of an application go check my GitHub project:
 wkrzywiec
/
Nasa-Picture
wkrzywiec
/
Nasa-Picture
Single-page application which display NASA's Astronomy Picture of the Day
Or you can pull it’s Docker image:
Docker Hub on hub.docker.com
References
- Spring Boot with Docker on spring.io
- Dockerizing a Spring Boot Application on stackabuse.com
- A Start to Finish Guide to Docker with Java on stackify.com
- How to copy Docker images from one host to another without using a repository on stackoverflow.com
- docker build on docs.docker.com
- Pushing and Pulling to and from Docker Hub on ropenscilabs.github.io
-
A quick introduction to Docker tags on medium.freecodecamp.org

Top comments (9)
I get this when I run the command "docker build -t nasa-picture .":
I'm sorry, I forgot to mention that before building a Docker image you need to build an application with Gradle. To do that just run
gradle build(assuming that you already has it installed) and than follow this blog post. Again sorry for inconvenienceIs it possible to include this step in the Dockerfile?
Sure, it is. I don't want to complicate my original blog post and I think introducing a multistage concept right now is not that good (I'll do it in upcoming article) but here is an example of such Dockerfile.
Please let me know if you have any questions
Awesome. Thanks a lot.
I was just trying to get a containerized Java app running on DigitalOcean App Platform. Here it is:
Single-page application which display NASA's Astronomy Picture of the Day
This sample demonstrates how to run a Dockerized Java application on DigitalOcean App Platform. Since App Platform doesn't yet support Java, this sample shows how to accomplish this using Dockerfile.
This sample has been adapted from github.com/wkrzywiec/Nasa-Picture
Getting Started
These steps will get this sample application running for you using DigitalOcean.
Note: Following these steps will result in charges for the use of DigitalOcean services
Requirements
Forking the Sample App Source Code
To use all the features of App Platform, you need to be running against your own copy of this application. To make a copy, click the Fork button above and follow the on-screen instructions. In this case, you'll be forking this repo as a starting point for your own app (see Github documentation to learn more about forking repos.
After forking…
And here is the deployed app: nasa-picture-2-bdhmn.ondigitalocea...
Great! 🙂 Again thanks for pointing this out in the post.
And also I'm really impressed that you have adapted this project to deploy it on Digital Ocean
For a Java application in a Docker container, just use Jib.
That's true, if you want to build production-ready Docker image (or just not care how to built one) Jib, Cloud Native Buildpack or any other of such tools should be used.
But I think it's worth to know how it works and get familiar with Docker API, do not treat those building tools some kind of a magic 😉