The code for this tutorial is available on GitHub.
With the start of the new year, I have had quite a few friends complain how difficult it is to find remote developer job openings. Not only that, but due to the location flexibility offered by these roles, it can be fiercely competitive to land a job due to the candidate pool being much larger than a comparable job opening in a defined geographic area. If only there was another way to surface these kinds of job postings and give candidates a leg up by being among the first to apply the moment a job opening is known…This is where I thought the Twitter API would be great for meeting this need!
With the recent release of the filtered stream endpoints and Tweet Annotations in Twitter Developer Labs, you can use these new capabilities to build an app that delivers you Tweets containing remote developer job openings the moment they are posted on Twitter.
Even if you are not interested in finding a job, this could be the beginning of a prototype for the remote developer job listing board you have always wanted to get going.
On the other hand, if you already have a developer job listings board, this can be another source of real time data to augment your job listings feed.
Before getting into building the app, here’s some terminology out of the way.
What is Twitter Developer Labs?
Twitter Developer Labs is where developers can go for early access to new API endpoints, features and versions. Labs is used to test out new ideas, and invite the developer community to share their feedback to help shape Twitter’s roadmap.
What are the filtered stream endpoints?
The filtered stream endpoints are endpoints released within Twitter Developer Labs that allow developers to filter the real-time stream of public Tweets. Developers can filter the real-time stream by applying a set of rules (specified using a combination of operators).
What are Tweet annotations?
Tweet annotations are metadata fields added to the Tweet object last December, currently on the filtered stream endpoint. Tweet annotations can help you explore new topics, and find out more information about the Tweets you care about. These two new fields, entity and context, each offer contextual information about the Tweet text itself. Tweets are analyzed and annotated based on the content of the Tweet. These newly added fields are referred to as "annotations".
Setup
To get started, here’s what you will need
- Twitter Developer account: if you don’t have one already, you can apply for one.
- Once you have an account, head over to the Labs section of the Twitter developer portal and click "Join Labs"
- Select "Activate" next to Filtered Stream, then select a Twitter developer app
- Consumer API keys from the details page of the app you created in the step above found in the Twitter developer portal.
- Node.js
- Npm (This is automatically installed with Node. Make sure you have npm 5.2+ or higher.)
- Npx (Included with npm 5.2+ or higher)
First, install Node.js. Check out the Downloads section from Node’s website and download the source code or installer of your choice. Alternatively, if you are running on a Mac you can install the Node package using the Brew package manager.
You are going to be using the npm package, create-react-app, to create the scaffolding for a single-page React app. Open a terminal window and bootstrap your React app using create-react-app by using npx. Npx is a binary included with npm versions 5.2+ or higher, by default, that allows you to run executables from the npm registry, a database of JavaScript packages.
npx create-react-app remote-developer-jobs-streamer
After create-react-app has setup an initial directory structure for you, change to the newly created remote-developer-jobs-streamer directory and create a new subdirectory called “client”. Next, move all of the files and folders under the project root directory to this new client directory
cd remote-developer-jobs-streamer
mkdir client
mv * client
Going forward, your project root directory will contain all source code and files relevant to your Node server. The client directory, as you guessed it, will contain all source code files for your React code base.
The next step is to proxy requests from your client to your Node backend server. To do this, from within your client/ directory, add the following line to your package.json file.
“proxy”: “http://localhost:5000”
Credentials
Connecting to the filtered stream endpoints requires your app to authenticate using application-only authentication using a bearer token. The Node server you will be building shortly will include generating a bearer token using your app’s consumer API keys. To make that happen, you will need to have the following environment variables set. You can do so by issuing the following commands in your terminal window assuming you are using bash as your shell.
export TWITTER_CONSUMER_KEY=<YOUR API KEY HERE>
export TWITTER_CONSUMER_SECRET=<YOUR API SECRET KEY HERE>
Server Side Code
First, you will need to get started with implementing the Node server, which will be responsible for making the actual requests to the Twitter API. This Node server will serve as a proxy between your browser based React client and the Twitter API. On your Node server, you will need to create API endpoints that connect to the Filtered Stream endpoints. In turn, requests from your React client will be proxied through to your local Node server.
Before you go any any further, cd to the project root directory and install the following npm packages
npm install express body-parser util request http socket-io path
Next, while still within the project root directory, create a new file called “server.js”. This source code file will contain all of your backend logic for connecting to and receiving Tweets from the Filtered Stream endpoint. The contents of your server.js file will be as follows.
const express = require("express");
const bodyParser = require("body-parser");
const util = require("util");
const request = require("request");
const path = require("path");
const socketIo = require("socket.io");
const http = require("http");

const app = express();
const port = process.env.PORT || 5000;
const post = util.promisify(request.post);
const get = util.promisify(request.get);

app.use(bodyParser.json());
app.use(bodyParser.urlencoded({ extended: true }));

const server = http.createServer(app);
const io = socketIo(server);

const CONSUMER_KEY = process.env.TWITTER_CONSUMER_KEY;
const CONSUMER_SECRET = process.env.TWITTER_CONSUMER_SECRET;

let timeout = 0;

const bearerTokenURL = new URL("https://api.twitter.com/oauth2/token");

const streamURL = new URL(
  "https://api.twitter.com/labs/1/tweets/stream/filter?format=detailed&expansions=author_id"
);

const rulesURL = new URL(
  "https://api.twitter.com/labs/1/tweets/stream/filter/rules"
);

const errorMessage = {
  title: "Please Wait",
  detail: "Waiting for new jobs to be posted..."
};

const sleep = async delay => {
  return new Promise(resolve => setTimeout(() => resolve(true), delay));
};

async function bearerToken(auth) {
  const requestConfig = {
    url: bearerTokenURL,
    auth: {
      user: CONSUMER_KEY,
      pass: CONSUMER_SECRET
    },
    form: {
      grant_type: "client_credentials"
    }
  };

  const response = await post(requestConfig);
  return JSON.parse(response.body).access_token;
}

app.get("/rules", async (req, res) => {
  const token = await bearerToken({ CONSUMER_KEY, CONSUMER_SECRET });
  const requestConfig = {
    url: rulesURL,
    auth: {
      bearer: token
    },
    json: true
  };

  try {
    const response = await get(requestConfig);

    if (response.statusCode !== 200) {
      throw new Error(response.body.error.message);
    }

    res.send(response);
  } catch (e) {
    res.send(e);
  }
});

app.post("/rules", async (req, res) => {
  const token = await bearerToken({ CONSUMER_KEY, CONSUMER_SECRET });
  const requestConfig = {
    url: rulesURL,
    auth: {
      bearer: token
    },
    json: req.body
  };

  try {
    const response = await post(requestConfig);

    if (response.statusCode === 200 || response.statusCode === 201) {
      res.send(response);
    } else {
      throw new Error(response);
    }
  } catch (e) {
    res.send(e);
  }
});

const streamTweets = (socket, token) => {
  const config = {
    url: streamURL,
    auth: {
      bearer: token
    },
    timeout: 31000
  };

  const stream = request.get(config);

  stream
    .on("data", data => {
      try {
        const json = JSON.parse(data);
        if (json.connection_issue) {
          socket.emit("error", json);
          reconnect(stream, socket, token);
        } else {
          socket.emit("tweet", json);
        }
      } catch (e) {
        socket.emit("heartbeat");
      }
    })
    .on("error", error => {
      // Connection timed out
      socket.emit("error", errorMessage);
      reconnect(stream, socket, token);
    });
};

const reconnect = async (stream, socket, token) => {
  timeout++;
  stream.abort();
  await sleep(2 ** timeout * 1000);
  streamTweets(socket, token);
};

io.on("connection", async socket => {
  try {
    const token = await bearerToken({ CONSUMER_KEY, CONSUMER_SECRET });
    io.emit("connect", "Client connected");
    const stream = streamTweets(io, token);
  } catch (e) {}
});

if (process.env.NODE_ENV === "production") {
  app.use(express.static(path.join(__dirname, "client/build")));

  app.get("*", function(req, res) {
    res.sendFile(path.join(__dirname, "client/build", "index.html"));
  });
}

server.listen(port, () => console.log(`Listening on port ${port}`));
Filtering Tweets on the filtered stream endpoint using rules
Filtered Stream has two endpoints, a streaming endpoint and a rules and operators endpoint. The rules endpoint is used to create and delete rules, comprised of a series of one or more operators, that determine the criteria to match Tweets. For this app, based on referencing the Filtered Stream operators documentation, you will be using the following rule.
(developer OR engineer) remote (context:66.961961812492148736 OR context:66.850073441055133696)
To understand what this rule is doing, you can break it down into two parts. The keywords part and the Tweet annotations part.
Using keyword operators
(developer OR engineer) remote
The keywords part of the rule will match Tweets containing the keywords “developer” or “engineer” and the keyword “remote”. These keywords alone will certainly match Tweets containing remote developer job postings, but it will also match on irrelevant Tweets. For example, the Tweet below will match this rule.
https://twitter.com/EraserFarm/status/1220013392766947332
Since this is not the desired Tweet, you need to take this rule a step further. Though this rule matches irrelevant Tweets, it is also successful in matching Tweets with actual job postings. For example, the rule you have so far will also result in matching the Tweet below.
https://twitter.com/plataformatec/status/1225460423761317888
Tweet annotations: Using context operators
The challenge you have now is, though you are receiving Tweets containing job postings you will still have to go through irrelevant Tweets. If only there was a way to only match on Tweets that contain job postings as best as possible. Are there operators you can use in your rule that only match these relevant Tweets? Fortunately, this is where the power of Tweet annotations comes in. Take a closer look at an example Tweet object payload that was sent for this Tweet on your filtered stream endpoint. Within the payload, the nested “context_annotations” field is present. Context annotations are delivered as a “context_annotations” field in the payload. These annotations are inferred based on the Tweet text and result in domain and/or entity labels, which can be used to discover Tweets on topics that may have been previously difficult to surface. Note, that these fields will only be included if data is present since not all Tweets will contain this data.
      "context_annotations": [
        {
          "domain": {
            "id": "66",
            "name": "Interests and Hobbies Category",
            "description": "A grouping of interests and hobbies entities, like Novelty Food or Destinations"
          },
          "entity": {
            "id": 961961812492148736,
            "name": "Recruitment",
            "description": "Recruitment"
          }
        },
        {
          "domain": {
            "id": "66",
            "name": "Interests and Hobbies Category",
            "description": "A grouping of interests and hobbies entities, like Novelty Food or Destinations"
          },
          "entity": {
            "id": 850073441055133696,
            "name": "Job search",
            "description": "Job search"
          }
        }
      ],
To match on the domain and entity ids within the context_annotations field, you can use the “context” operator. The “context” operator can be used to instruct your filtered stream endpoint to match on Tweets containing specific domain and entity names. Here’s what that would look like.
(context:66.961961812492148736 OR context:66.850073441055133696)
The operators above follow the format context:<domain id>.<entity id>. As seen in the example payload above, the domain id 66 represents the “Interests and Hobbies Category”. The entity ID 961961812492148736 represents the “Recruitment” entity and the entity ID 850073441055133696 represents the “Job search” entity. For a complete list of domains, the Tweet Annotations docs contains a table with 50+ domain names.
With the operator explanation out of the way, this 2nd part of the rule matches Tweets containing the entity names “Recruitment” or “Jobs search”.
In summary, taking both parts of this rule together, it will match on Tweets that contain the keywords “developer” or “engineer” and the keyword “remote”, but only if those Tweets also contain the entity names “Recruitment” or “Jobs search”.
The other filtered stream endpoint is the streaming endpoint, which uses a simple GET connection. Once a connection is established, Tweets are delivered in JSON format through a persistent HTTP streaming connection. You will only receive content matching your rules while connected to the stream. In this case, you will only receive content matching the rule above. You will come back to this rule later as you build out the client side of our app.
Client Side Code
The first thing you will need to do is add a script line to your package.json file within the project root directory. These lines will provide a command shortcut to concurrently run your client and server backend code.
~/remote-dev-jobs-streamer/package.json
  "scripts": {
    "client": "cd client && yarn start",
    "server": "nodemon server.js",
    "dev": "concurrently --kill-others-on-fail \"yarn server\" \"yarn client\""
  }
Next, you will need to install some npm packages. You will need the “request” and “axios” modules to make http requests to your backend server and “react-moment” to reformat the the timestamp provided in a Tweet object into a human readable format for display in your app. You will also need the “react-router-dom” package to navigate between components. Again, make sure you are in the client/ subdirectory and not the project root directory.
npm install request react-moment react-router-dom axios socket.io-client
Following installation of those packages, install the rest of the packages. From the client/ subdirectory type the following
npm install
The next step is to work on the client source code. To display all the UI goodness in your web browser, you will be creating the following React components.
App.js - The parent component that be will in turn render all other components
NavBar.js - Displays the navigation bar on the left hand side for navigating between the jobs feed and managing rules
Job.js - Does the heavy lifting of extracting the relevant fields from a Tweet and turning it into a job posting
JobList.js - Renders multiple Job components at once in a “feed” like fashion
Rule.js - Renders an individual rule on your stream
RuleList.js - Renders multiple Rule components and displays an input field to add a rule
ErrorMessage.js - Renders any status or error messages to the screen
Spinner.js - Renders a loading indicator for any pending API calls
To style all of your components, you will be using Semantic UI. Include the CSS for Semantic UI in your project by adding the line between the <head> tags in your index.html file located in the ~/remote-dev-jobs-streamer/client/public directory.
<link rel="stylesheet" href="https://cdnjs.cloudflare.com/ajax/libs/semantic-ui/2.4.1/semantic.min.css" />
Now you will need to get started with creating the React components. Under your remote-dev-jobs-streamer/client/src directory, create a directory called “components”. The source code files above will be stored in this new directory. First, create the parent most component of our application. This component will be responsible for rendering all other components.
import React from "react";
import { BrowserRouter, Route } from "react-router-dom";

import Navbar from "./Navbar";
import JobList from "./JobList";
import RuleList from "./RuleList";

class App extends React.Component {
  render() {
    return (
      <div className="ui container">
        <div className="introduction"></div>

        <h1 className="ui header">
          <img
            className="ui image"
            src="/Twitter_Logo_Blue.png"
            alt="Twitter Logo"
          />
          <div className="content">
            Remote Developer Jobs
            <div className="sub header">Powered by Twitter data</div>
          </div>
        </h1>

        <div className="ui grid">
          <BrowserRouter>
            <Navbar />
            <Route exact path="/" component={RuleList} />
            <Route exact path="/rules" component={RuleList} />
            <Route exact path="/jobs" component={JobList} />
          </BrowserRouter>
        </div>
      </div>
    );
  }
}

export default App;
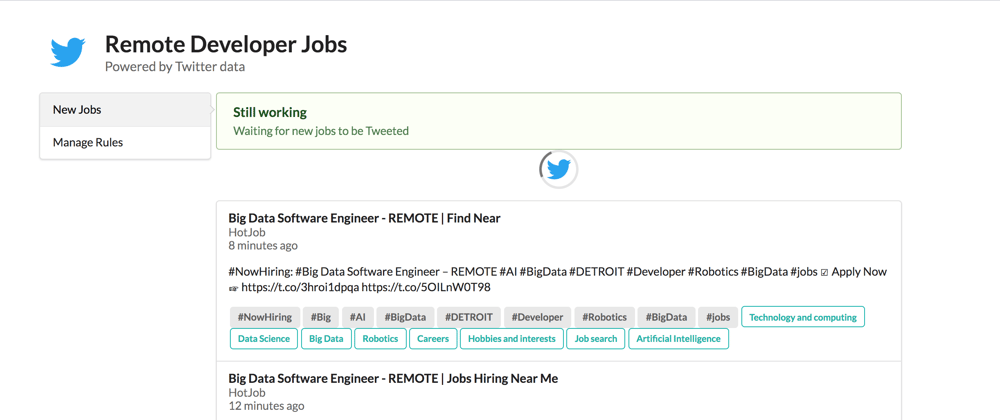
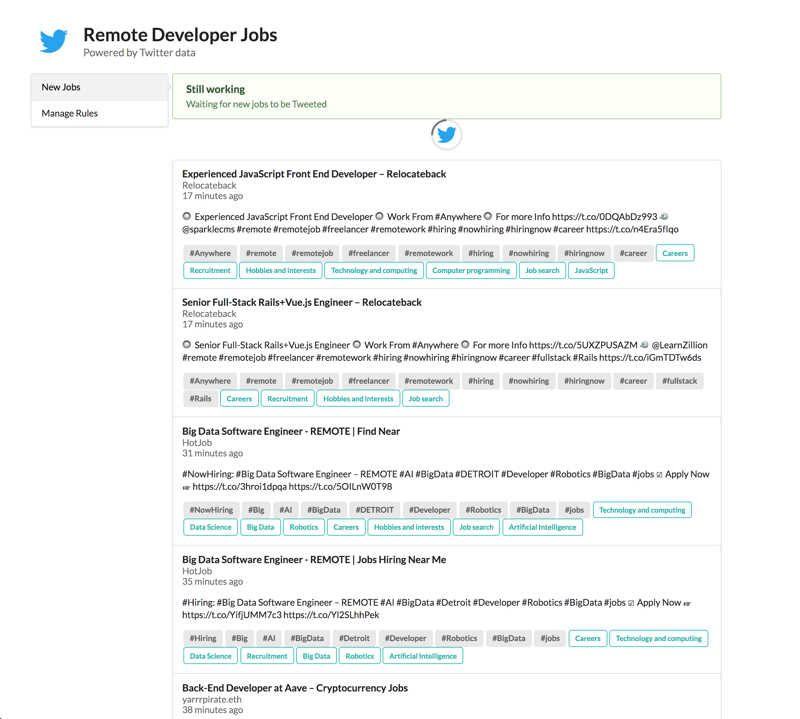
Next, create the component for the navigation bar you see on the left hand side in the screenshot at the top of this post.
import React from "react";
import { NavLink } from "react-router-dom";

const Navbar = () => {
  return (
    <div className="three wide column">
      <div className="ui vertical pointing menu">
        <NavLink to="/jobs" className="item">
          New Jobs
        </NavLink>
        <NavLink to="/rules" className="item">
          Manage Rules
        </NavLink>
      </div>
    </div>
  );
};

export default Navbar;
Next, create the parent component for rendering all job listings.
import React, { useEffect, useReducer } from "react";
import Job from "./Job";
import socketIOClient from "socket.io-client";
import ErrorMessage from "./ErrorMessage";
import Spinner from "./Spinner";

const reducer = (state, action) => {
  switch (action.type) {
    case "add_job":
      return {
        ...state,
        jobs: [action.payload, ...state.jobs],
        error: null,
        isWaiting: false
      };
    case "show_error":
      return { ...state, error: action.payload, isWaiting: false };
    case "update_waiting":
      return { ...state, error: null, isWaiting: true };
    default:
      return state;
  }
};

const JobList = () => {
  const initialState = {
    jobs: [],
    error: {},
    isWaiting: true
  };

  const [state, dispatch] = useReducer(reducer, initialState);
  const { jobs, error, isWaiting } = state;

  const streamTweets = () => {
    const socket = socketIOClient("/");
    socket.on("connect", () => {});
    socket.on("tweet", json => {
      if (json.data) {
        dispatch({ type: "add_job", payload: json });
      }
    });
    socket.on("heartbeat", data => {
      dispatch({ type: "update_waiting" });
    });
    socket.on("error", data => {
      dispatch({ type: "show_error", payload: data });
    });
  };

  const errorMessage = () => {
    const message = {
      title: "Reconnecting",
      detail: "Please wait while we reconnect to the stream."
    };

    if (error && error.detail) {
      return (
        <div className="twelve wide column">
          <ErrorMessage key={error.title} error={error} styleType="warning" />
          <ErrorMessage
            key={message.title}
            error={message}
            styleType="success"
          />
          <Spinner />
        </div>
      );
    }
  };

  const waitingMessage = () => {
    const message = {
      title: "Still working",
      detail: "Waiting for new jobs to be Tweeted"
    };

    if (isWaiting) {
      return (
        <React.Fragment>
          <div className="twelve wide column">
            <ErrorMessage
              key={message.title}
              error={message}
              styleType="success"
            />
          </div>
          <Spinner />
        </React.Fragment>
      );
    }
  };

  useEffect(() => {
    streamTweets();
  }, []);

  const showJobs = () => {
    if (jobs.length > 0) {
      return (
        <div className="ui segments">
          {jobs.map(job => (
            <Job key={job.data.id} json={job} />
          ))}
        </div>
      );
    }
  };

  return (
    <div className="twelve wide stretched column">
      {errorMessage()}
      {waitingMessage()}
      {showJobs()}
    </div>
  );
};

export default JobList;
Next, create the child component for the previous component that renders an individual job listing. This component extracts some JSON fields from a Tweet object and displays information about the job listing such as the listing title, date it was posted, description, hashtags, and entity names.
import React from "react";
import Moment from "react-moment";
import "../stylesheets/Job.css";

const Job = ({ json }) => {
  const { created_at, id } = json.data;
  const { name = "", username = "" } = json.includes.users[0];

  const hashtags = () => {
    if (json.data.entities && json.data.entities.hashtags) {
      return json.data.entities.hashtags.map(hashtag => (
        <span key={hashtag.tag} className="ui label">
          #{hashtag.tag}
        </span>
      ));
    }
  };

  const title = () => {
    const { entities } = json.data;

    if (
      entities &&
      entities.urls &&
      entities.urls[0] &&
      entities.urls[0].title
    ) {
      return entities.urls[0].title;
    } else {
      return json.data.text.substring(0, 32) + "...";
    }
  };

  const annotations = () => {
    if (json.data.context_annotations) {
      return json.data.context_annotations.map(context => (
        <span key={context.entity.id} className="ui small teal basic label">
          {context.entity.name}
        </span>
      ));
    }
  };

  return (
    <a
      href={`http://www.twitter.com/${username}/status/${id}`}
      target="_blank"
      rel="noopener noreferrer"
    >
      <div className="ui segment job">
        <h4 className="ui header">
          {title()}
          <div className="sub header">{name}</div>
          <Moment
            className="sub header"
            parse="YYYY-MM-DDTHH:mm:ss.ZZZZ"
            fromNow
          >
            {created_at}
          </Moment>
        </h4>
        <p>{json.data.text}</p>
        {hashtags()}
        {annotations()}
      </div>
    </a>
  );
};

export default Job;
Next, create the component responsible for rendering all the rules on our stream as well as displaying input controls for creating new rules. In this case, we will only be using one rule.
import React, { useEffect, useReducer } from "react";
import axios from "axios";
import Rule from "./Rule";
import ErrorMessage from "./ErrorMessage";
import Spinner from "./Spinner";

const reducer = (state, action) => {
  switch (action.type) {
    case "show_rules":
      return { ...state, rules: action.payload, newRule: "" };
    case "add_rule":
      return {
        ...state,
        rules: [...state.rules, ...action.payload],
        newRule: "",
        errors: []
      };
    case "add_errors":
      return { ...state, rules: state.rules, errors: action.payload };
    case "delete_rule":
      return {
        ...state,
        rules: [...state.rules.filter(rule => rule.id !== action.payload)]
      };
    case "rule_changed":
      return { ...state, newRule: action.payload };
    case "change_loading_status":
      return { ...state, isLoading: action.payload };
    default:
      return state;
  }
};

const RuleList = () => {
  const initialState = { rules: [], newRule: "", isLoading: false, errors: [] };
  const [state, dispatch] = useReducer(reducer, initialState);
  const exampleRule = `(developer OR engineer) remote (context:66.961961812492148736
                OR context:66.850073441055133696)`;
  const ruleMeaning = `This example rule will match Tweets containing the
     keywords "developer" or "engineer" and the keyword "remote", but only if
      they contain the context entity labels "Careers" or "Recruiting"`;
  const operatorsURL =
    "https://developer.twitter.com/en/docs/labs/filtered-stream/operators";
  const rulesURL = "/rules";

  const createRule = async e => {
    e.preventDefault();
    const payload = { add: [{ value: state.newRule }] };

    dispatch({ type: "change_loading_status", payload: true });
    try {
      const response = await axios.post(rulesURL, payload);
      if (response.data.body.errors)
        dispatch({ type: "add_errors", payload: response.data.body.errors });
      else {
        dispatch({ type: "add_rule", payload: response.data.body.data });
      }
      dispatch({ type: "change_loading_status", payload: false });
    } catch (e) {
      dispatch({
        type: "add_errors",
        payload: [{ detail: e.message }]
      });
      dispatch({ type: "change_loading_status", payload: false });
    }
  };

  const deleteRule = async id => {
    const payload = { delete: { ids: [id] } };
    dispatch({ type: "change_loading_status", payload: true });
    await axios.post(rulesURL, payload);
    dispatch({ type: "delete_rule", payload: id });
    dispatch({ type: "change_loading_status", payload: false });
  };

  const errors = () => {
    const { errors } = state;

    if (errors && errors.length > 0) {
      return errors.map(error => (
        <ErrorMessage key={error.title} error={error} styleType="negative" />
      ));
    }
  };

  const rules = () => {
    const { isLoading, rules } = state;

    const message = {
      title: "No rules present",
      details: [
        `There are currently no rules on this stream. Start by adding the rule
        below.`,
        exampleRule,
        ruleMeaning
      ],
      type: operatorsURL
    };

    if (!isLoading) {
      if (rules && rules.length > 0) {
        return rules.map(rule => (
          <Rule key={rule.id} data={rule} onRuleDelete={id => deleteRule(id)} />
        ));
      } else {
        return (
          <ErrorMessage
            key={message.title}
            error={message}
            styleType="warning"
          />
        );
      }
    } else {
      return <Spinner />;
    }
  };

  useEffect(() => {
    (async () => {
      dispatch({ type: "change_loading_status", payload: true });

      const response = await axios.get(rulesURL);
      const { data: payload = [] } = response.data.body;
      dispatch({
        type: "show_rules",
        payload
      });
      dispatch({ type: "change_loading_status", payload: false });
    })();
  }, []);

  return (
    <div className="twelve wide column">
      <form onSubmit={e => createRule(e)}>
        <div className="ui fluid action input">
          <input
            type="text"
            autoFocus={true}
            value={state.newRule}
            onChange={e =>
              dispatch({ type: "rule_changed", payload: e.target.value })
            }
          />
          <button type="submit" className="ui primary button">
            Add Rule
          </button>
        </div>
        {errors()}
        {rules()}
      </form>
    </div>
  );
};

export default RuleList;
Next, create the child component of RuleList.js responsible for displaying a single rule and deleting a rule.
import React from "react";

export const Rule = ({ data, onRuleDelete }) => {
  return (
    <div className="ui segment">
      <p>{data.value}</p>
      <div className="ui label">tag: {data.tag}</div>
      <button
        className="ui right floated negative button"
        onClick={() => onRuleDelete(data.id)}
      >
        Delete
      </button>
    </div>
  );
};

export default Rule;
Next, create a component for displaying any status or error messages.
import React from "react";

const ErrorMessage = ({ error, styleType }) => {
  const errorDetails = () => {
    if (error.details) {
      return error.details.map(detail => <p key={detail}>{detail}</p>);
    } else if (error.detail) {
      return <p key={error.detail}>{error.detail}</p>;
    }
  };

  const errorType = () => {
    if (error.type) {
      return (
        <em>
          See
          <a href={error.type} target="_blank" rel="noopener noreferrer">
            {" "}
            Twitter documentation{" "}
          </a>
          for further details.
        </em>
      );
    }
  };

  return (
    <div className={`ui message ${styleType}`}>
      <div className="header">{error.title}</div>
      {errorDetails()}
      {errorType()}
    </div>
  );
};

export default ErrorMessage;
Finally, create a component to display a loading indicator during any pending API calls.
import React from "react";

const Spinner = () => {
  return (
    <div className="twelve wide column">
      <div className="ui active centered large inline loader">
      </div>
    </div>
  );
};

export default Spinner;
After you have finished writing code for both the client side and server side, start up both the server and client by going to the project root directory and typing the following.
[mbp ~/remote-developer-jobs-streamer (master)]$ yarn dev
yarn run v1.15.2
warning package.json: No license field
$ concurrently --kill-others-on-fail "yarn server" "yarn client"
warning package.json: No license field
warning package.json: No license field
$ nodemon server.js
$ cd client && yarn start
warning ../package.json: No license field
$ react-scripts start
[0] [nodemon] 1.19.1
[0] [nodemon] to restart at any time, enter `rs`
[0] [nodemon] watching: *.*
[0] [nodemon] starting `node server.js`
[0] Listening on port 5000
...
After this command completes, your default web browser should automatically launch and navigate to http://localhost:3000. You will then be taken to the rules management section of the app. Simply add the rule below to filter Tweets containing remote developer job postings.
(developer OR engineer) remote (context:66.961961812492148736 OR context:66.850073441055133696)
Congratulations! You have successfully built your very own remote developer job listings app.
Conclusion
Using the filtered stream endpoint to stream publicly available Tweets to your server and Tweet annotations, you were able to surface remote developer job listings. This helped solve a problem that not only I had at one point in my life, but also my friends experienced too. The filtered stream endpoint gives you the haystack of data in the form of Tweets and the Tweet annotations help you find the needle in that haystack.
Thanks to the real-time stream of Tweets provided by filtered stream and Tweet annotations, you are able to take your use of Twitter to another level. Hope this inspires you to continue building other solutions using the Twitter API and better understand how annotations can be used in practice. I used several libraries beyond the Twitter API to make this tutorial, but you may have different needs and requirements and should evaluate whether those tools are right for you.


Top comments (2)
Has anyone receive data from twitter stream? I've defined #china, coca cola rules however haven't received any
Yes.