How to setup Git the proper way! — Part 2: Setting up SSH Key

Hi, welcome to the second part of this series. Here will go ahead and setup SSH keys on our system and add our public key to the Github account.
Before we start:
Please make sure that you have Git installed on your system. Open up the terminal, run the following and make sure you get the version of git utility:
$ git --version
If not, then please check part-1 of this series to get it installed on your system. Once that’s done, you are good to go!
Generating SSH Keys
Now, we will start by generating SSH keys on our system. Just open up the Git Bash or whatever terminal program you are using and do the following steps:
- Copy and paste the following command in your terminal. Change the your_email@example.com with your email address and press Enter. This will generate a new SSH key-pair.
$ ssh-keygen -t ed25519 -C "_your\_email@example.com_"
- When you’re prompted to Enter a file in which to save the key, just press Enter (without typing anything). This accepts the default file location.
> Enter a file in which to save the key (/c/Users/_you_/.ssh/id_ed25519):_[Press enter]_
- After that, type a secure passphrase for your keys. You can technically leave it empty, for not using any passphrase. But I would recommend that you choose a good passphrase to make sure nobody can use your keys, except for you.
> Enter passphrase (empty for no passphrase): _[Type a passphrase]_
> Enter the same passphrase again: _[Type passphrase again]_
Note: You might not see it getting typed into the terminal, but it is being typed, so make sure you remember what you are typing!
Adding the SSH key to Github
After generating the SSH keys, now it’s time to add your public key to your Github account. For that, just do the following steps:
- Open up your terminal (or Git Bash for Windows) and run the following command, to copy your public SSH key to the system clipboard:
For Windows:
$ clip < ~/.ssh/id_ed25519.pub
For Mac:
$ pbcopy < ~/.ssh/id_ed25519.pub
For Linux:
$ xclip -selection clipboard < ~/.ssh/id_ed25519.pub
- Then, go to your Github account, click on your profile icon in the upper-right corner and choose the Settings option.
- In settings, choose SSH and GPG keys option. It will display the keys that are currently added to your Github account (if any!).
- Click on the New SSH key button on the right to add a new SSH key. It will ask you for the Title and the Key itself.
- Just fill the Title field with whatever you want (e.g. My SSH key).
- In the Key text area, paste the content of the file, that we copied in the first step using the command-line.
- Once that’s done, click on the Add SSH key button, to complete the process.
Configuring username and email
Now we will configure our username and email address with git that will be used when we commit or push our code to the remote repository. So, open up your terminal and run the following two commands:
$ git config --global user.name "your_username"

$ git config --global user.email "email@example.com"
Be sure to replace your_username and email@example.com with your actual username and email address.
Note: This email address will be publicly visible with your commit history. If you want to keep it private, then go check part-3 of this series. There we will configure our public no-reply email address with the git utility.
Testing our SSH connection
That’s it! We have successfully added the SSH key to our Github account and configured our username and email in git utility. To make sure that it’s working, just run the following command:
$ ssh -T git@github.com
When you run this command for the first time, it may display a warning and ask for confirmation, like this:
> The authenticity of host 'github.com (IP ADDRESS)' can't be established.
> RSA key fingerprint is SHA256:nThbg6kXUpJWGl7E1IGOCspRomTxdCARLviKw6E5SY8.
> Are you sure you want to continue connecting (yes/no)?
Simply type yes and press Enter. You will see a message with your Github username, saying that authentication was successful, like this:
> Hi _username_! You've successfully authenticated, but GitHub does not provide shell access.
Hooray! Now you can have a secure SSH connection to Github and you can push your code directly into your remote repository.
Now, whenever you need to ** clone a repository** on your system, use SSH address like this:
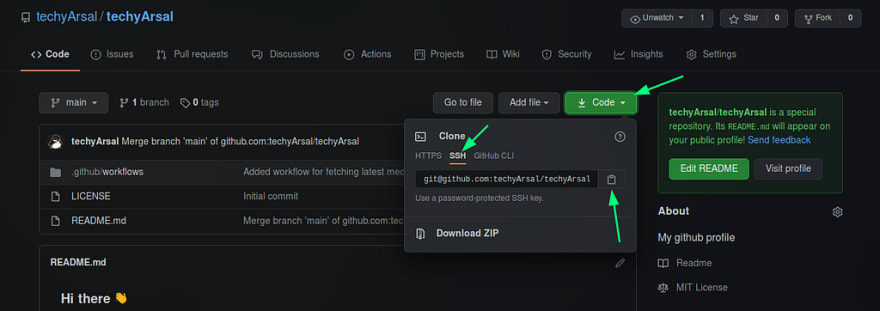
But:
There two things that you might notice:
- You will have to enter your SSH passphrase every time you try to reach your remote repository, where it is git pull or git push_._
- Your email address will be visible to everybody who can see your repositories and commits on Github.
I mean, it’s fine if you don’t care about these things. You can use your Git without any problems.
But If you do care, then there’s the next (and final) part of this series, where we will solve these two problems. So if you want to do that, then click on the following link to get to the part-3:

Top comments (0)