Summary:
This article describes one business use case integration where ‘New Issue’ in JIRA is synced to ‘Case’ in Salesforce CRM.
Prerequisites:
The user needs to have a working JIRA and Salesforce CRM account.
Working webMethods.io Integration cloud tenant.
Contents:
- When New Issue created in ‘ Jira ’, Search for matching Case in ‘ Salesforce CRM ’ by ‘ Jira ’ summary. If no matching case is found in ‘ Salesforce CRM ’, create New Case in ‘ Salesforce CRM ’. If matching case is found in ‘ Salesforce CRM ’, update a case in ‘ Salesforce CRM ’.
Steps:
Login to webMethods.io Integration.
Create a workflow.
Click on the ‘Settings’ button.
Select the ‘ JIRA ’ trigger from the available list of triggers.
Provide the necessary details for the trigger. Choose ‘New Issue’ as value for ‘Select Trigger’, click on ‘+’ next to ‘Connect to JIRA’ and provide the necessary details for authorization, select a ‘Project Name’ and add an ‘Issue Type’. Click on ‘ Save ’.
Note: This trigger will be executed whenever a new issue with the same issue type is created in JIRA.

Click on the ‘ Skip ’ button, followed by ‘ Done ’.
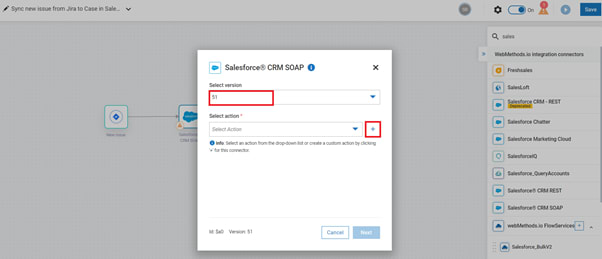
Drag and drop ‘ Salesforce CRM SOAP ’ connector from app menu, then click on the ‘Settings’ button.
Select ‘ Salesforce CRM ’ version, click on ‘+’ to create Custom Action. Select Authentication type and create ‘ Salesforce CRM ’ account by clicking ‘+’ next to ‘Connect to Salesforce CRM’ by providing necessary details. Name the Custom Action and click on ‘ Next ’.

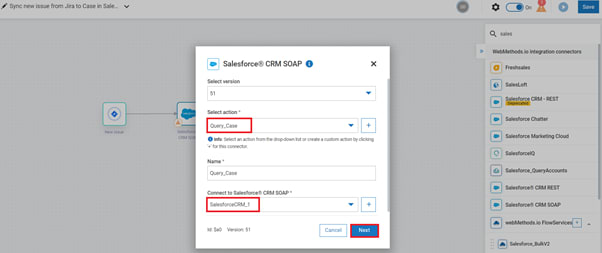
Select operation ‘ query ’, Business object ‘ Case ’ and fields. Then, click on ‘ Next ’ followed by ‘ Done ’.


After creating Custom Action, select created ‘ Action ’ and ‘ Account ’ then Click on ‘ Next ’.
Search Jira summary in ‘ Salesforce CRM ’ by mapping as shown in below screenshot, then click ‘ Next ’ and ‘ Done ’.

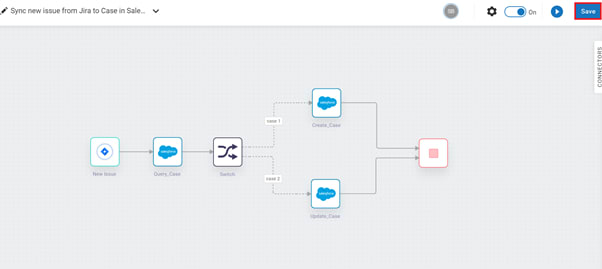
Drag and drop ‘ Switch ’ under ‘Developer Tools’ from the app menu.
Drag and drop ‘ Salesforce CRM SOAP ’ provider and add two cases to the ‘ Switch ’ as shown in the original article at the Software AG Tech Community.
Save the workflow.
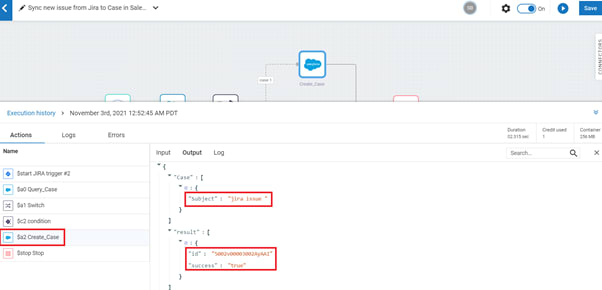
This workflow will execute whenever a ‘New Issue’ with the same ‘Issue Type’ (provided while configuring the JIRA trigger in step 5) is created in JIRA. Output can be seen in the actions output tab.


Top comments (0)