
What's next ?🤔
In the previous chapter Laravel Initial Setup: Preparing for AWS SES SMTP Integration We covered the setup of Laravel for integrating AWS SES email capabilities. In the current chapter, we'll shift our focus to the AWS side. Specifically, we'll explore the necessary configurations within AWS to complement our Laravel setup. By understanding this vital aspect, you'll gain insights into managing AWS resources and ensuring seamless, dependable email delivery. Let's dive into the AWS configuration details in this chapter.

It's important to note that these steps are based on the AWS configuration as of the update in August 2023.
Let's kick 🚀🦶
Things off with a simple guide to get started on the steps.
Before proceeding, it's essential to ensure that you've already logged into the AWS Management Console, use the search feature to find "Amazon SES (Simple Email Service)" Once you're logged in, follow these steps:

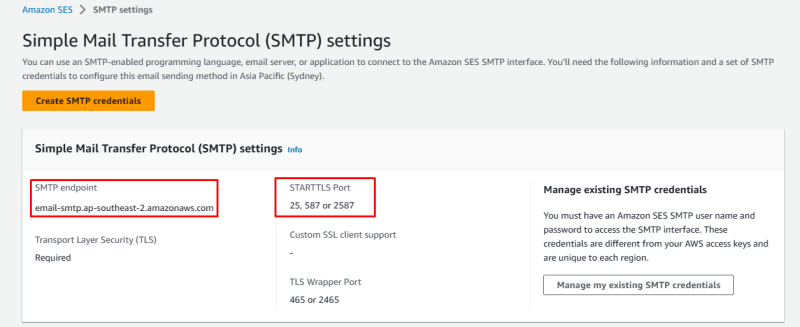
Access SMTP Settings Begin by navigating to the SMTP settings within the Amazon SES service, which you can conveniently locate on the left sidebar.

SMTP Credential Once you're on the SMTP settings dashboard, just click the Create SMTP Credential button to generate the credentials needed for setting up secure email delivery via Amazon SES.
Specify User Details

- Create SMTP User Set up an IAM user specifically for SMTP authentication with Amazon SES.
The author chooses to keep the username as default, without making any changes.
- Click on the Create User button below to proceed with setting up your SMTP user.
Retrieve SMTP Credentials

After Create User next step you'll Retrieve SMTP Credentials In this step, you'll get the essential details you need:
- IAM Username
- SMTP Username
- SMTP Password
You can choose to download a CSV file to keep this information stored securely for later use.
Back to Laravel
Update your .env to integrate the previously obtained SMTP Credentials, return to your Laravel's .env file, as we discussed in the previous chapter Laravel Initial Setup: Preparing for AWS SES SMTP Integration, fill in the following details :
MAIL_MAILER=smtp
MAIL_HOST=endpoint_SMTP
MAIL_PORT=587
MAIL_USERNAME=Username_SMTP
MAIL_PASSWORD=Password_SMTP
MAIL_ENCRYPTION=tls
MAIL_FROM_ADDRESS=Sender Mail
MAIL_FROM_NAME="${APP_NAME}"

Remember to enter the MAIL_USERNAME and MAIL_PASSWORD you obtained while creating the Specify User Details or from the downloaded CSV file. These credentials are vital for the successful integration of Amazon SES with your Laravel application.
For MAIL_HOST using SMTP endpoint example email-smtp.ap-southeast-2.amazonaws.com, MAIL_PORT using 587 and MAIL_ENCRYPTION using tls
After preparing the configuration in the .env file, the next step is to proceed with testing the email sending functionality.
Testing
Run your Laravel application on your computer with this simple command in the terminal:
php artisan serve

Your Laravel application is live on this URL and port: http://localhost:8000, you can access it using Postman or Insomnia for testing.
Before proceeding with email testing using AWS SES in Laravel, it's crucial to first register email verified identities within AWS SES.
This ensures smooth email delivery and ensures compliance with AWS SES Sandbox rules Moving out of the Amazon SES sandbox. By verifying identities in advance, you'll enable successful email communication in your Laravel application.
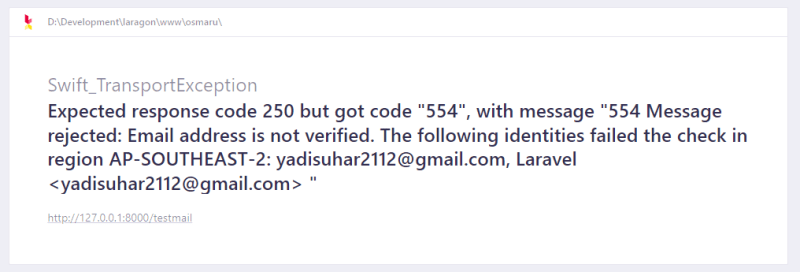
Not registering an email as a verified identity in AWS SES Sandbox mode may lead to error responses SMTP Response Code.
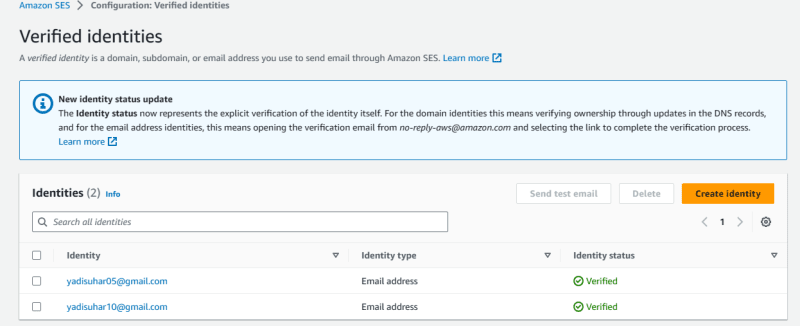
To Create Verfied Identity
- Access AWS SES dashboard.
- Configuration settings.
- Verified identities.
- Enter the Create Identity Button.
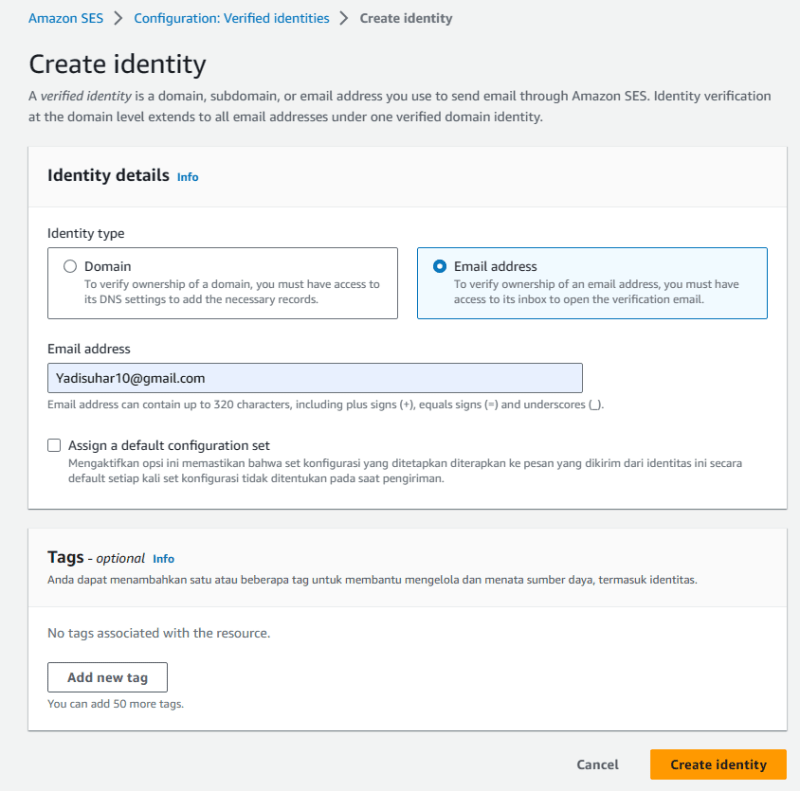
Once you've configured and verified your email identities, the next step is to send a verification email.
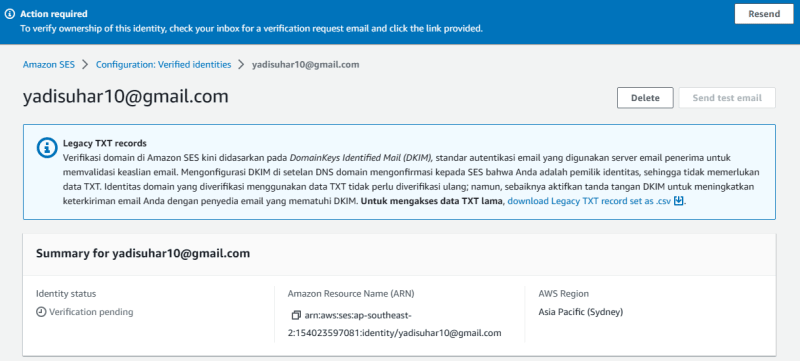
Verification email done

You've created the verified identity within the AWS SES Sandbox you can proceed with testing email delivery without any further obstacles.
Now, open your API testing tool, such as Insomnia Insomnia, and make a GET request to:

Please note that this route has been set up in a previous chapter Laravel Initial Setup: Preparing for AWS SES SMTP Integration during the Laravel project's initialization. It's specifically designed for testing email sending functionality within your Laravel application.
Success Send Mail

In AWS SES Sandbox mode, remember to verify both the sender and recipient email addresses. If not, you might face a 554 error, indicating email rejection. Moving out of the Amazon SES sandbox
Done
You're all set to start sending emails with AWS SES in Laravel. Don't forget to verify your email addresses in Sandbox mode for smooth delivery. If you need help, this guide is here. Thanks for reading, and enjoy email communication using AWS SES and Laravel.🚀🌞


Top comments (0)