
In the last post in this series, we built a Django app with some basic HTML and CSS and ran it on a local server.
In this post, we'll be giving the app the planned functionality, adding some more HTML/CSS and packaging the whole thing in a Docker container.
First up, we need to install Requests. This is a popular Python library used to make HTTP requests. It allows you to send HTTP/1.1 requests extremely easily, and comes with a number of useful features out of the box, including:
🌐 Support for HTTP/1.1 and HTTP/2
🔄 Automatic connection pooling and retries
🍪 Support for cookies and sessions
🧱 Built-in JSON support
🔑 Support for custom authentication schemes
💨 Automatic decompression of gzip and deflate responses
🔐 Support for SSL/TLS verification and client-side certificates
And loads of other useful stuff.
With requests, you can send HTTP requests to any web server and receive the response back in Python. This makes it a powerful tool for web scraping, testing, and building web applications.
To install requests, navigate to your root folder in your terminal and enter:
.\venv\Scripts\Activate
if your venv is not already active, and then:
pip install requests
to install Requests in your virtual environment.
Now navigate you your views.py file and replace the existing code with the following:
from django.http import (
    JsonResponse,
    HttpResponseBadRequest,
    HttpResponseServerError,
    HttpResponse,
)
from django.shortcuts import render
import requests


def check_wayback_availability(url, timestamp=None):
    api_url = "https://archive.org/wayback/available"
    payload = {"url": url}

    if timestamp:
        payload["timestamp"] = timestamp

    try:
        # Send GET request to Wayback Machine API with URL and (optional) timestamp
        response = requests.get(api_url, params=payload)
        response.raise_for_status()  # raise exception for 4xx or 5xx HTTP status codes
        data = response.json()  # parse JSON response
    except requests.exceptions.RequestException as e:
        # handle any exceptions that occurred during the request
        print(f"Error: {e}")
        return None

    return data

def index(request):
    if request.method == "POST":
        url = request.POST.get("url", "")
        timestamp = request.POST.get("timestamp", "")

        if not url:
            # Return HTTP 400 Bad Request if user did not provide a URL
            return HttpResponseBadRequest("Please provide a URL.")

        wayback_data = check_wayback_availability(url, timestamp)

        if not wayback_data:
            # Return HTTP 500 Internal Server Error if an error occurred while checking the URL
            return HttpResponseServerError(
                "An error occurred while checking the URL."
            )

        if wayback_data.get("archived_snapshots"):
            # Construct URL for closest snapshot
            snapshot_url = wayback_data["archived_snapshots"]["closest"]["url"]
            # Render template with URL
            return render(request, "snapshot.html", {"snapshot_url": snapshot_url})
        else:
            # Return regular HTTP response indicating that the URL
            # is not available in the Wayback Machine, with a button to refresh/start over
            return render(request, "not_found.html")
    else:
        # Render index.html template for GET requests
        return render(request, "index.html")
This code defines two functions and a view in Django for a web app that interacts with the Wayback Machine API. The first function, check_wayback_availability(), sends a GET request to the Wayback Machine API with a given URL and an optional timestamp. If the API returns a response with archived snapshots of the URL, the function returns the response data in JSON format. If an error occurs while making the request, the function returns None.
The second function, index(), is a view that handles both GET and POST requests. If it receives a POST request, it retrieves the URL and timestamp from the request, checks the Wayback Machine API for a snapshot, and renders the appropriate template based on the availability of the URL. If the URL is available in the Wayback Machine, the view renders a template with a link to the closest snapshot. Otherwise, it renders a template indicating that the URL is not available.
Ok, now navigate to your app's templates folder and replace the exisiting code in your index.html file with the following:
{% load static %}
<!DOCTYPE html>
<html lang="en">
<head>
    <meta charset="UTF-8">
    <meta name="viewport" content="width=device-width, initial-scale=1.0">
    <meta http-equiv="X-UA-Compatible" content="ie=edge">
    <title>Wayback Machine Checker</title>

    <!-- Bootstrap CSS -->
    <link rel="stylesheet" href="https://cdn.jsdelivr.net/npm/bootstrap@5.3.0/dist/css/bootstrap.min.css" integrity="sha384-BJTk5RbVdJvYtOrNQ2Fi0Ntq62V7AXu3C9An/7Fgj0aodH8pHHhjcfnLZjMDT76m" crossorigin="anonymous">

    <!-- Custom CSS -->
    <link rel="stylesheet" href="{% static 'wayback_app/css/styles.css' %}">
</head>
<body>
  <br>
    <div class="container py-5 mt-5">
        <div class="row justify-content-center mb-4">
            <div class="col-md-8 text-center">
                <h1 class="mb-4">Wayback Machine Checker</h1>
            </div>
        </div>
        <br><br>
        <div class="row justify-content-center">
            <div class="col-md-8">
                <form id="wayback-form" method="post" class="custom-form wayback-form">
                    {% csrf_token %}
                    <div class="form-floating mb-3">
                        <input type="text" class="form-control rounded-0" id="url" name="url" placeholder="Enter URL" required>
                        <label for="url" class="form-label"></label>
                    </div>

                    <div class="d-grid gap-2 col-4 mx-auto">
                      <br>
                        <button type="submit" class="btn btn-primary rounded-0">Check</button>
                    </div>
                </form>

                <div id="result" class="mt-5"></div>
            </div>
        </div>
    </div>

    <!-- Bootstrap JS -->
    <script src="https://cdn.jsdelivr.net/npm/bootstrap@5.3.0/dist/js/bootstrap.bundle.min.js" integrity="sha384-T2I4fj1nJWg9JwFVzL0sq0S7IxCjZryEGv+vJ20dbD8x4y4x4aKIFzYQWVuJ8Ipk" crossorigin="anonymous"></script>
</body>
</html>
Now add a new file in the same directory as index.html called not_found.html and paste the following code into it:
{% load static %}
<!DOCTYPE html>
<html lang="en">
<head>
    <meta charset="UTF-8">
    <meta name="viewport" content="width=device-width, initial-scale=1.0">
    <meta http-equiv="X-UA-Compatible" content="ie=edge">
    <title>Wayback Machine Checker</title>

    <!-- Bootstrap CSS -->
    <link rel="stylesheet" href="https://cdn.jsdelivr.net/npm/bootstrap@5.3.0/dist/css/bootstrap.min.css" integrity="sha384-BJTk5RbVdJvYtOrNQ2Fi0Ntq62V7AXu3C9An/7Fgj0aodH8pHHhjcfnLZjMDT76m" crossorigin="anonymous">

    <!-- Custom CSS -->
    <link rel="stylesheet" href="{% static 'wayback_app/css/styles.css' %}">
</head>
<body>
    <div class="container py-5">
        <h1 class="text-center">The URL is not available in the Wayback Machine</h1>
        <br><br>
        <div class="row justify-content-center mt-5">
            <div class="col-md-4">
                <div class="d-grid gap-2">
                    <button class="btn btn-primary rounded-0" onclick="window.location.href=''">Return</button>
                </div>
            </div>
        </div>
    </div>

    <!-- Bootstrap JS -->
    <script src="https://cdn.jsdelivr.net/npm/bootstrap@5.3.0/dist/js/bootstrap.bundle.min.js" integrity="sha384-T2I4fj1nJWg9JwFVzL0sq0S7IxCjZryEGv+vJ20dbD8x4y4x4aKIFzYQWVuJ8Ipk" crossorigin="anonymous"></script>
</body>
</html>
And now a second new file named snapshot.html with the following code:
{% load static %}
<!DOCTYPE html>
<html lang="en">
<head>
    <meta charset="UTF-8">
    <meta name="viewport" content="width=device-width, initial-scale=1.0">
    <meta http-equiv="X-UA-Compatible" content="ie=edge">
    <title>Wayback Machine Checker</title>

    <!-- Bootstrap CSS -->
    <link rel="stylesheet" href="https://cdn.jsdelivr.net/npm/bootstrap@5.3.0/dist/css/bootstrap.min.css" integrity="sha384-BJTk5RbVdJvYtOrNQ2Fi0Ntq62V7AXu3C9An/7Fgj0aodH8pHHhjcfnLZjMDT76m" crossorigin="anonymous">

    <!-- Custom CSS -->
    <link rel="stylesheet" href="{% static 'wayback_app/css/styles.css' %}">
</head>
<body>
    <div class="container py-5">
        <h1 class="text-center">Wayback Machine Snapshot</h1>

        <div class="row justify-content-center mt-5">
            <div class="col-md-6">
                <p class="text-center">The URL is available in the Wayback Machine at the following URL:</p>

                <div class="text-center">
                    <a href="{{ snapshot_url }}">{{ snapshot_url }}</a>
                </div>
            </div>
        </div>
    </div>

    <!-- Bootstrap JS -->
    <script src="https://cdn.jsdelivr.net/npm/bootstrap@5.3.0/dist/js/bootstrap.bundle.min.js" integrity="sha384-T2I4fj1nJWg9JwFVzL0sq0S7IxCjZryEGv+vJ20dbD8x4y4x4aKIFzYQWVuJ8Ipk" crossorigin="anonymous"></script>
</body>
</html>
Finally, in your static folder, update the styles.css file to the following:
body {
  display: flex;
  justify-content: center !important;
  height: 100vh;
}

.custom-form {
  padding: 20px;
  border-radius: 10px;
  box-shadow: 0 0 10px rgba(0, 0, 0, 0.2);
  background-color: #f8f9fa;
}

.wayback-form {
  max-width: 500px;
  margin: 0 auto;
}

h1 {
  text-align: center;
  margin: 0 auto;
}

.center {
  display: flex;
  justify-content: center;
}
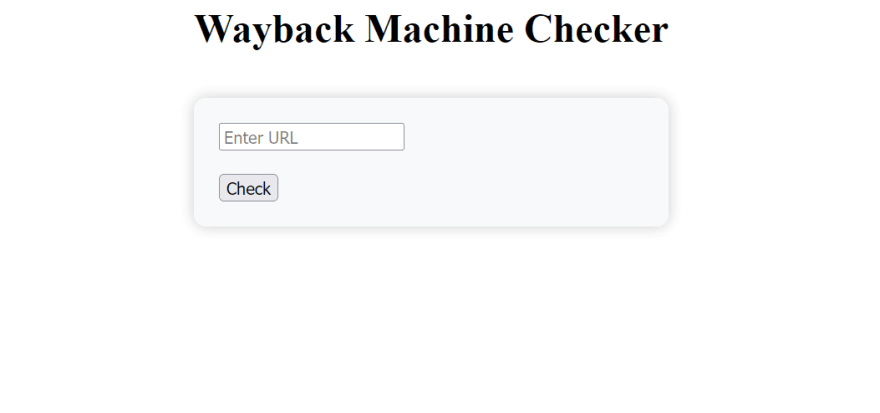
This is just some very basic CSS to make our app interface look a little nicer!
Ok, lets see if this works! Navigate to your root directory and run the following in your terminal:
python manage.py runserver
Now visit http://127.0.0.1:8000/wayback_app/ in your browser to see it in action - Feel free to grab any link you like and try it out!
Ok - now to package the whole thing up into a Docker container.
First run
pip freeze > requirements.txt
to grab any new dependencies, then follow these steps:
Install Docker on your system, if you haven't already. You can download Docker Desktop for Windows from https://www.docker.com/products/docker-desktop.
Open the app and make sure Docker is running. You can check this in your terminal with:
docker --version
Create a Dockerfile in the root of your Django project directory, you can do this in the VSCode terminal:
type nul > Dockerfile
Now open the Dockerfile and add the following:
# Use the official Python base image
FROM python:3.9-slim

# Set environment variables
ENV PYTHONDONTWRITEBYTECODE 1
ENV PYTHONUNBUFFERED 1

# Set the working directory
WORKDIR /app

# Install system dependencies
RUN apt-get update && apt-get install -y --no-install-recommends \
    gcc \
    python3-dev \
    && \
    apt-get clean && \
    rm -rf /var/lib/apt/lists/*

# Copy requirements.txt and install Python dependencies
COPY requirements.txt /app/requirements.txt
RUN pip install --no-cache-dir -r requirements.txt

# Copy the Django project
COPY . /app/

# Expose the port the app runs on
EXPOSE 8000

# Start the Django development server
CMD ["python", "manage.py", "runserver", "0.0.0.0:8000"]
This Dockerfile defines a new Docker image based on the official Python 3.9 slim image, sets environment variables, installs system dependencies, installs the Python packages from the requirements.txt file, and copies your Django project into the container.
Create a .dockerignore file in the root of your Django project directory to exclude unnecessary files and folders from the Docker build context. You can do this in the VSCode terminal:
type nul > .dockerignore
Open the .dockerignore file in VSCode and add the following content:
__pycache__
*.pyc
*.pyo
*.pyd
.Python
env/
venv/
ENV/
.vscode/
.git/
.gitignore
Dockerfile
*.sqlite3
*.log
media/
Now navigate to your root directory (if you aren't already there) and build the Docker image by entering the following into your terminal:
docker build -t wayback_project:latest .
After building the image, you can run the Docker container using the following command:
docker run -it -p 8000:8000 wayback_project:latest
Now your Django project is running in a Docker container. Open your browser and visit http://localhost:8000/wayback_app/ to see your Django web app in action!
That's it for this tutorial on setting up a Django app with optimized dependencies and packaging it in a Docker container! We've covered a lot of ground, from installing Requests to interacting with the Wayback Machine API, to building a Docker image and running our app in a container.
But this is just the beginning - there are many more ways to optimize and improve your Django app, and you may want to add more features or functionality in the future. For example, you could integrate a database, add user authentication and authorisation, or deploy your app to a cloud platform.
So keep this tutorial handy as a reference, and feel free to modify and extend it as you see fit. And if you have any feedback or suggestions for future topics, please let me know in the comments!
The full code can be viewed here
Thanks for reading! 👋

Top comments (0)
Some comments may only be visible to logged-in visitors. Sign in to view all comments.