This article is the first in a multi-part series to walk through the creation of a Twitch extension. For the first part, the goal is to host an EBS on Netlify.
To go directly to the project, the source code repository is available at github.com/shrmpy/pavlok
Requirements:
- Netlify account
- Fauna DB account
- Twitch extension registration
- Pavlok app registration
- Discord webhook (optional)
§ Steps
Technically, there is a step zero because you'll need a GitHub/GitLab account. So if you don't have one already, sign-up first AND you'll be able to use that account as your OAuth login to do step #1.
Sign-up for a free account at Netlify.
-
Sign-up for a free account at Fauna DB with Netlify account credentials using OAuth:

After your new account is opened, make the database keys as described in the example. Specifically (repeated here for convenience):
a. Create a database
In the Fauna Cloud Console:
- Click “New Database”
- Enter “Netlify” as the “Database Name”
- Click “Save”
b. Create a database access key
In the Fauna Cloud Console:
- Click “Security” in the left navigation
- Click “New Key”
- Make sure that the “Database” field is set to “Netlify”
- Make sure that the “Role” field is set to “Admin”
- Enter “Netlify” as the “Key Name”
- Click “Save”
c. Copy the database access key’s secret
Save the secret somewhere safe; you won’t get a second chance to see it.
-
Register your Twitch extension according to the dev guide. Specifically (repeated here for convenience):
Configure the Extension
Configuring an Extension requires a few steps:- Visit https://dev.twitch.tv/console/extensions, and click Create Extension.

- Type a unique name for your new Extension.

- Pick a type for your Extension. For this example, we’ll use a Panel Extension.

- Fill in any optional fields you choose.

- After filling in the optional fields, click Create Extension Version. You now have an extension!
Find the new extension secret as explained in Step 2: JWT Secret. Specifically (repeated here):
Concept: Each Extension maintains a shared secret that is used to sign tokens that validate the identity of users. Extension Secret is
base64encoded and is provided to you by the Extension Manager.To retrieve the secret, lets go to the Extension Manager. To get to the Manager, go to the console, select a version of the Extension and click Manage. Once on this page, you will see the default status page. On the top right of the manager, click the Extension Settings button. You will see the following page:

Under the Extension Client Configuration section, copy the key provided. We need to use this key to verify that the token provided is signed with the same secret. - Visit https://dev.twitch.tv/console/extensions, and click Create Extension.
-
a) Sign-up for a free account at Pavlok. With the account opened, register your Pavlok app. Similar to the previous steps, it's necessary to keep the client ID and client secret for use later during the deployment. Their docs explain in some detail about the OAuth process. For our purposes, the "redirect URI" entry can start as a placeholder value of
http://localhost:8080. the real value will be available after Netlify deploys successfully. Seen here, the field "Callback URL" example has the formathttps://randomized-phrase.netlify.app/api/pavlok/callback. The randomized-phrase is the hostname Netlify will create when done. So we will need to return to this Pavlok app page and enter the final URL.
b) (OPTIONAL) Create your Discord webhook as outlined in support doc. Specifically (repeated here for convenience):
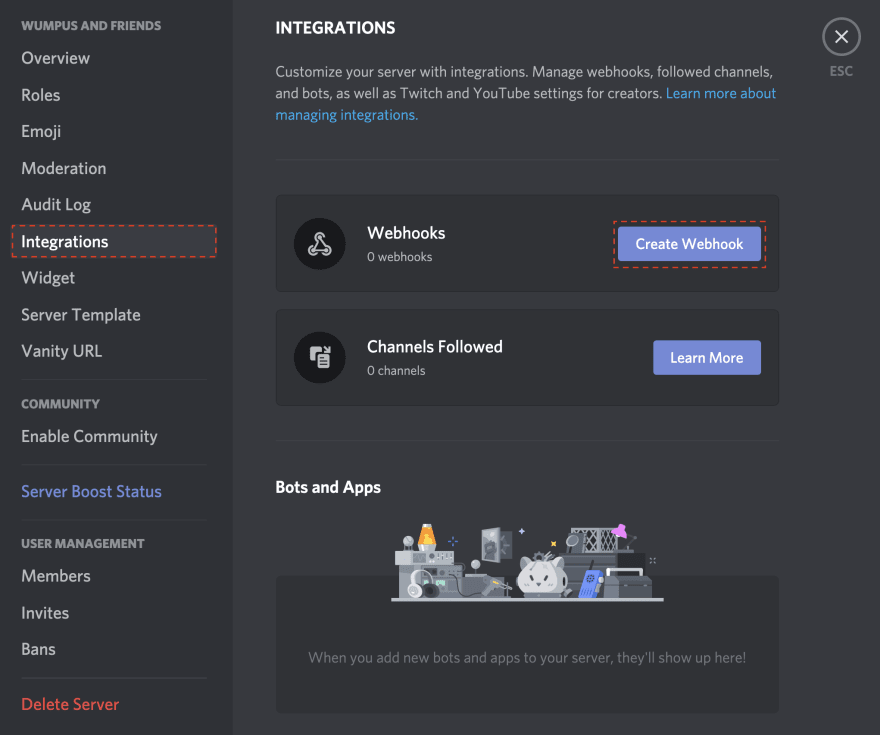
1) Open your Server Settings and head into the Integrations tab:
2) Click the "Create Webhook" button to create a new webhook!You'll have a few options here. You can:
- Edit the avatar: By clicking the avatar next to the Name in the top left
- Choose what channel the Webhook posts to: By selecting the desired text channel in the dropdown menu.
- Name your Webhook: Good for distinguishing multiple webhooks for multiple different services.
Run Quick Deploy to host on Netlify

Once you choose either GitHub or GitLab for your repository, the prompt will list the environment variable settings. Match the fields to the corresponding keys from previous steps.

- Secret phrase used to encrypt OAuth state field: Can be any random text that you choose. Used internally by the EBS and will never be displayed in UI.
- Discord webhook:
(OPTIONAL) Discord webhook URL
step #4b - Secret from the Twitch Extension Manager:
The secret from
step #3 - Secret from Fauna DB account:
The secret from
step #2 - Github avatar: (OPTIONAL) The profile icon of your GitHub account.
- Pavlok app client ID:
The client ID from
step #4a - Pavlok app secret:
The secret from
step #4a - Pavlok redirect:
Use
http://localhost:8080for now. After deployment is completed, change it inside the Netlify site Build environment variables page. It will then become the Netlify deploy URL concatenated with/api/pavlok/callback
§ Test
curl -H "Accept: application/json" netlify-deploy-url/api/pavlok/auth
Where netlify-deploy-url is the resulting Netlify URL from step #5. The test only validates the service responds because the Authorization header is missing. So to actually show more, we can try the frontend of the Twitch extension, next.
§ End-to-end
At this point, the EBS is live, but we don't have the UI. The front-end will demonstrate the full trip end-to-end. To continue work on the front-end, try part 2 in the series.
* Notes, Lessons, Monologue

Why a separate EBS? To help visualize where the EBS sits, the sequence diagram shows one flow. If we chop off the left side that contains Panel / Twitch, it leaves the subsystem that is not coupled to the Twitch iframe and related restrictions. This makes some testing easier especially in early experiments. This was also because I was not using the Twitch Developer Rig. Since Twitch introduces extensions as simply web pages with the helper imported, I wanted to pursue that and postpone learning "Twitch" until later.
Why three (auth/callback/shock) routes? To troubleshoot and learn and test. Concepts were more obvious when I could say, "first auth goes to /auth, then callback goes to /callback, etc". It became more obvious when understanding the state field, and asking how to verify continuity (when Pavlok sends the browser to the callback). Refactoring will clean up duplicated code.
Why doesn't the Panel link directly to Pavlok's Login page? This is primarily a convenience so that the Panel doesn't keep any of the Pavlok fields required to construct the hyperlink. The EBS does the heavy lifting to format the URL and returns it to the Panel for it to launch a pop-up window. The side effect is that the Panel can stay thin (and remains truer to a presentation layer module).
Why is a thin Panel good? This is another happy accident from the Twitch JWT token which contains claims meta data. It made it possible to avoid adding data to the request. The Authorization header is required for the EBS to make sure requests are from trusted users. Then the token from the header is leveraged for the channel ID. Maybe this overloads the token, but for now it keeps the Panel minimal and less complicated (until we learn more about Twitch).
Why Netlify? Serverless (our last workstation suffered battery failure). Golang support. Build times are quick with helpful log output for troubleshooting. Abstracts AWS Lambda (protects us from some of the complexities).
Why Fauna DB? when the Twitch Configuration Service is already available as a key/value store. Good support between Netlify and Fauna makes other alternatives lower preference, but the primary benefit is testing without Twitch dependency. We still use the Twitch Configuration Service to store the EBS base URL; even though this makes the extension installation a little unfriendly, it helps us avoid having to hard-code the URL into the frontend.
Why Pavlok? The Pavlok API is the functional piece of this Twitch extension, but it can be seen as a real world example of an integration. A different third party API with OAuth2 should have very similar interfaces.
Why Discord? The Discord webhook is optional, but it is very helpful to observe the API result. Since testing without a Pavlok device, means the API calls cannot deliver the electric shocks. So using a Discord webhook serves the dual purpose of logging the API call, as well as verifying that connections are established to external systems.


Top comments (0)