Premise
During our first hectic startup days at Geowox, we’ve been used to work "manually" and directly on AWS resources, such as EC2, leaving out all the services that could have made our life easier.
Luckily, we’ve now fully embraced the magic world of Docker and we’re trying to manage, as much as possible, our "infrastructure as a code".
This article assume you have some familiarity with the technologies we’re using such as AWS, Docker and Rails.
If you haven’t done it yet, here you can find a guide to install and set up Docker. And here, a guide to getting started with Rails.
1. What I will cover
In this article, I’d like to cover, on a high level:
- Containerize Ruby on Rails app and NGINX using Docker and Docker compose
- Use ECR as our Docker registry
- Use ECS to run and manage our containers
So, let’s begin.
Notes: I’m using Ruby on Rails but, this can of course be applied to any other framework or language.
2. Containerize app and NGINX
Let’s first create a simple Ruby on Rails app on your local machine by opening your terminal and typing the below command:
rails new ror-ecs
It will create a new rails project in your current directory.
Generate a new controller (welcome) and view (index):
rails g controller welcome index
Add root instruction in routes.rb:
Next, we need to add Docker and Docker Compose files in the project. Let’s first start with Dockerfile(s). I usually keep them and any related configuration in a separate folder inside the root folder of the app.
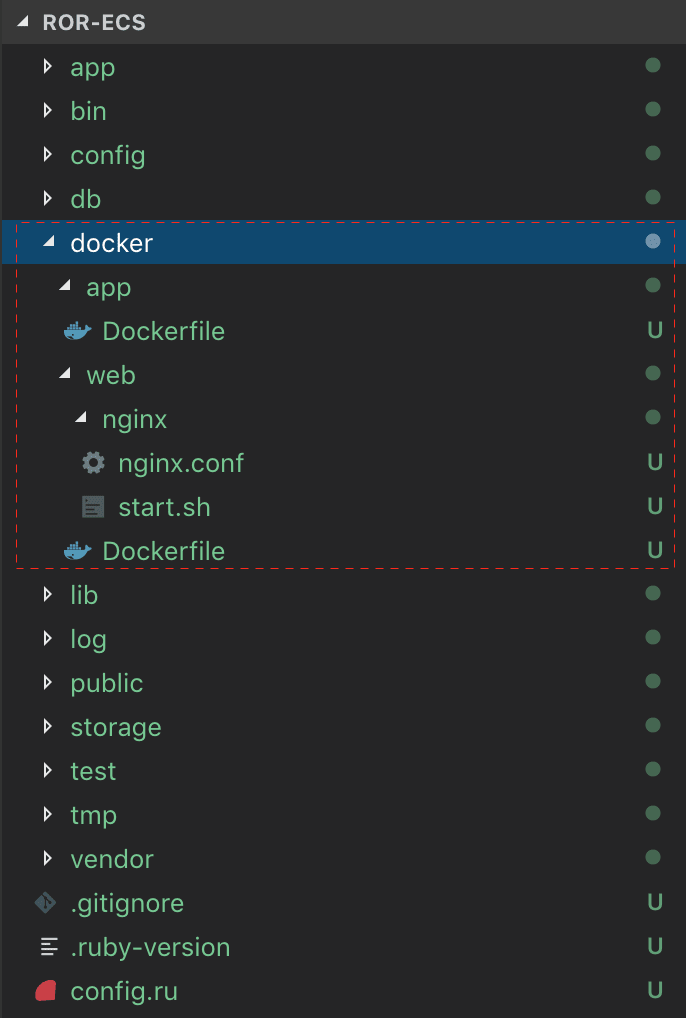
I’ve created 2 separate folders where each Dockerfile resides, one for the Ruby on Rails app and the other for the NGINX web server container (see Figure 1). Let’s have a look at them in detail.
2.1 Ruby on Rails (app) Dockerfile
Below, the content of the Dockerfile for the Rails app container.
This is all we need to start our Ruby on Rails container. The basic commands are pretty straightforward and I suppose do not require further explanation.
2.2 NGINX Dockerfile (web)
Below, the content of the Dockerfile for the NGINX web server container.
Even in this case, NGINX does execute pretty simple commands including copying our start.sh script and nginx.conf template into the right folders inside the container.
start.sh does not have much but, in my opinion, can be useful to keep clean our Dockerfile when we add more instructions such as, a simple auth or SSL (we can see that in a future part 2 of this tutorial). At the moment, the script runs 2 simple instructions inside the container:
- envsubst ‘$RAILS_ROOT’ < /tmp/app.conf > /etc/nginx/conf.d/default.conf replaces any occurrence of RAILS_ROOT environment variable in our temporary conf file and move it inside the NGINX configuration folder as default
- nginx -g “daemon off;” tells NGINX to stay in the foreground. As best practice, this is useful for Docker and means that there is one single process inside a single container.
Now, let’s have a look at our nginx.conf template:
Basically, it defines rules on how files can be accessed by the client and redirects (reverse proxy) requests to the container where the rails app runs on port 3000.
2.3 Docker compose
It’s now time to create our docker-compose file to manage our containers (Ruby on Rails and NGINX). Basically, Docker compose helps us to define and run multi-container Docker applications.
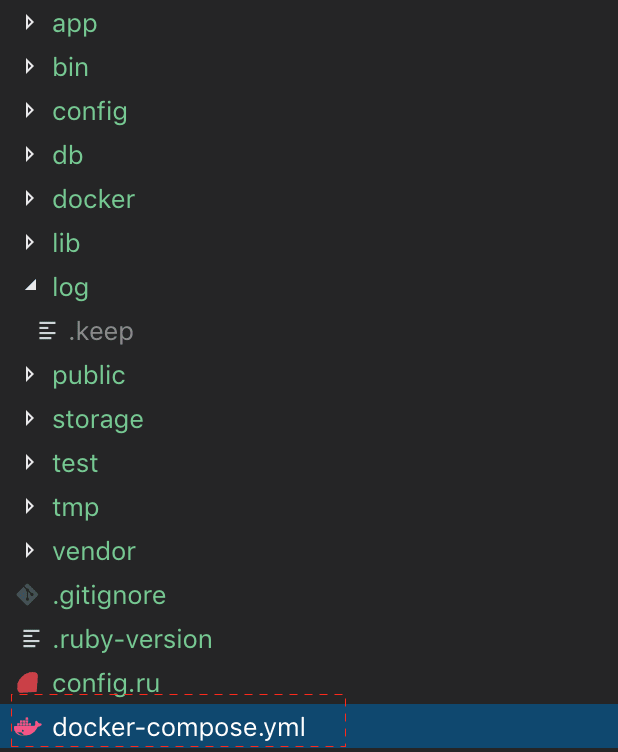
First, create a docker-compose.yml file in the main folder (see Figure 2).
Then, copy and paste the following:
2.3 Test locally
We can test on our machine that everything works as expected. In the terminal, navigate the root folder (where the docker-compose.yml resides) and type:
docker-compose up --build
As from the documentation, this command simply builds the images and then start the containers in the foreground.
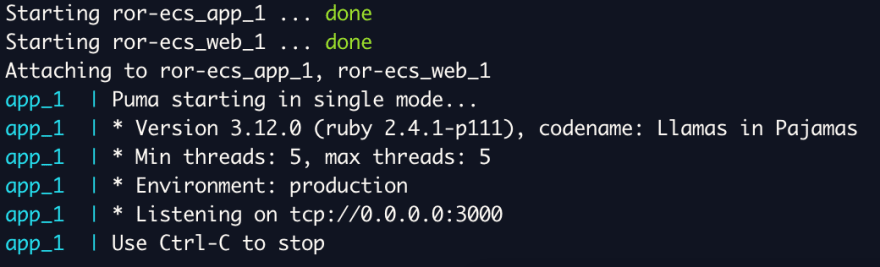
At the end of the process, the output is something similar to the one in Figure 3:
The web app should now up and running. Open your browser and navigate to http://localhost:3000.
To interrupt the process and stop the containers (with exit code 0), just press “ctrl + C”.
3. Deploy to ECS
We’re finally ready to deploy our web app to ECS. For the purpose of this tutorial, I prefer to use the command line interface but, you can replicate all the commands in the AWS console. In general, I believe that knowing the command line tools is pretty useful and can speed things up.
To recap, the AWS services we’re going to use:
Amazon Elastic Container Service (ECS) is a highly scalable, high-performance container orchestration service that supports Docker containers and allows you to easily run and scale containerized applications on AWS.
Amazon Elastic Container Registry (ECR) is a fully-managed Docker container registry that makes it easy for developers to store, manage, and deploy Docker container images.
3.1 Install aws-cli and ecs-cli
Before we start, we need to install aws-cli and ecs-cli.
Without going into further detail, you can just follow this to install aws-cli and this guide to configure it and set up a profile name. You can use the [default] one.
And, this guide to install ecs-cli.
3.2 Push Docker images to ECR
Before pushing our Docker images to Amazon ECR, we need to create a repository to store them.
We’re going to create 2 repositories, one for each image (Ruby on Rails/app and NGINX/web) with the following commands:
aws ecr create-repository --repository-name ror-ecs-app
and
aws ecr create-repository --repository-name ror-ecs-web
The terminal output should print something like the below:
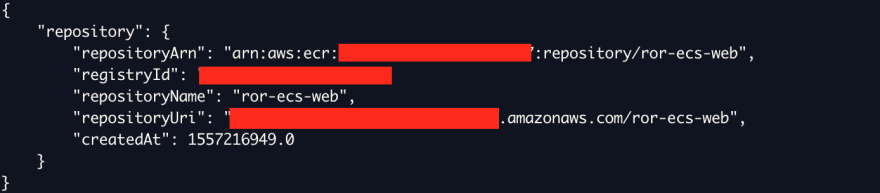
You can see some useful information related to our images here. Take note of the repository URIs as we need them later.
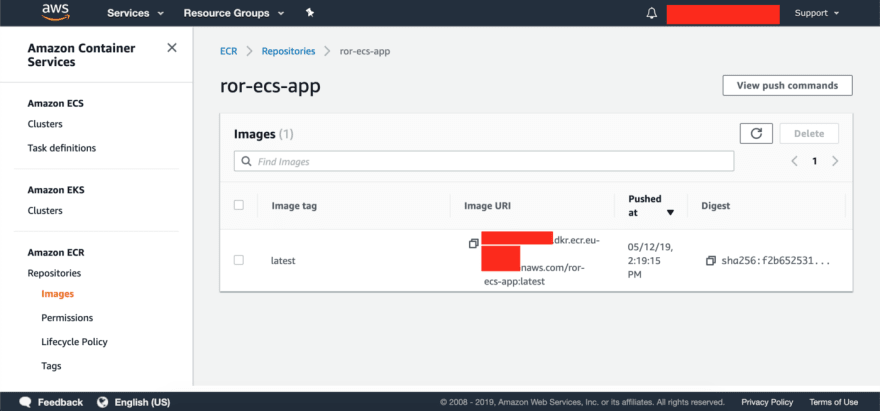
You can also review your newly created repositories in the AWS console under ECR service:

Ok, we’ve created repositories for our images, now it’s time to let docker-compose know where to push them. We just need to add the repository URIs (that you saved somewhere before, right?) as below:
Let’s build again the images:
docker-compose build
You can now check if they’re present in our docker images list:
docker image ls

As you can see, both images have been created and tagged automatically as latest. You can specify which image you’d like to push on the registry by its tag.
Push them to the respective repositories on ECR:
docker-compose push
If you’re not logged in to AWS yet, you should see something like the following error:
ERROR: denied: Your Authorization Token has expired. Please run ‘aws ecr get-login --no-include-email’ to fetch a new one.
As explicitly required, you need to run
aws ecr get-login --no-include-email
to retrieve the command (which includes a secret token) needed to login, which is something like the below:
docker login -u AWS -p <very_long_token> https://XXXXXXXX.dkr.ecr.eu-xxxx-1.amazonaws.com
Note: the is automatically generated and is shown in the output.
You can now login by copying the command and typing it in the terminal.
You should then see “Login succeeded” in the terminal.
Push again your images:
docker-compose push
It can take few minutes to complete.
Once completed, you can verify that the images have been uploaded by navigating to ECR Service in the AWS console.
Well done so far, we’re close to have our web app up and running in the cloud.
3.2 Publish your Ruby on Rails app with ECS
We’ve already described what Amazon ECS is but, let’s further explore some basic ECS components such as cluster and task definition.
A cluster is a logical grouping of running resources (e.g. tasks). In our case, considering that we’re running tasks that use the EC2 launch type, a cluster is also a grouping of container instances. You can create multiple clusters in an account to keep your resources separate.
Before running Docker containers on Amazon ECS, we must create a task definition.
A Task definition is a JSON file that describes one or more containers in your application. There are different parameters you can specify inside a task definition file, such as Docker images, CPU usage, IAM role, etc.
The ecs-cli compose command that we’re going to use, allows us to create task definitions and manage our Amazon ECS tasks using our Docker compose file. Basically, what happen is that ECS will “convert” docker-compose.yml into a single task definition where the 2 containers, defined as services, will run.
Without any further specification, the ecs-cli commands look for a Docker compose file in the current directory, named docker-compose.yml.
The first thing that we should do is to locally define a cluster configuration before creating it on ECS. This configuration can then be passed as a parameter to the ecs-cli commands. So, let’s define a cluster configuration by running the following command on terminal:
ecs-cli configure --cluster ror-ecs-cluster --region eu-west-1 --config-name ror-ecs-conf --cfn-stack-name ror-ecs-stack --default-launch-type ec2
- cluster Specifies the name of our cluster. In this case I’ve chosen ror-ecs-cluster but, feel free to use a different name. Required
- region Specifies the region where the cluster is created. In my case is eu-west-1 (Ireland) but, feel free to change it to the one you are using. Required
- config-name Specifies the configuration name that we’ll refer to when we’ll create the cluster. If it’s not present, the name is set to default
- cfn-stack-name Specifies the stack name in CloudFormation. If omitted, the name is defined as amazon-ecs-cli-setup-
- default-launch-type Specifies the default launch type to use between FARGATE and EC2. In our case we will be using EC2. If not defined, no launch type is used.
If everything works as expected, the output should be:
INFO[0000] Saved ECS CLI cluster configuration ror-ecs-conf.
Your configuration is saved locally in the ~/.ecs/config file:
version: 1
default: default
clusters:
  ror-ecs-conf:
    cluster: ror-ecs-cluster
    region: eu-west-1
    cfn-stack-name: ror-ecs-stack
    default_launch_type: EC2
The next step is to create our cluster using the configuration we’ve previously defined:
ecs-cli up --keypair id_rsa --capability-iam --size 1 --instance-type t2.medium --cluster-config ror-ecs-conf
- keypair Specifies the name of an existing Amazon EC2 key pair to enable SSH access to the EC2 instances in your cluster. It’s not required but useful if you want to have access to the EC2 instance(s) that will be created
- capability-iam Specifies the creation of IAM resources. In this case it is required
- size Specifies the number of instances to launch and register to the cluster. The default value is 1 so, in this case, it would not be required.
- instance-type Specifies the instance type. In our case, we’re creating a t2.medium instance
- cluster-config Specifies the name of our cluster. For our example, I’ve chosen ror-ecs-cluster but, feel free to use a different name
The output will be something like the following:
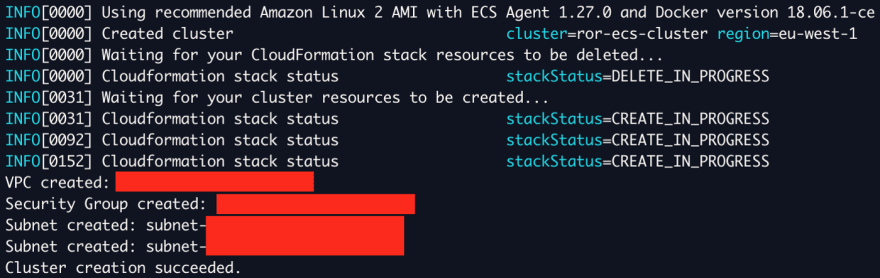
As you can see, CloudFormation took care of creating some resources for us such as VPC, Security Groups, Subnets, etc.
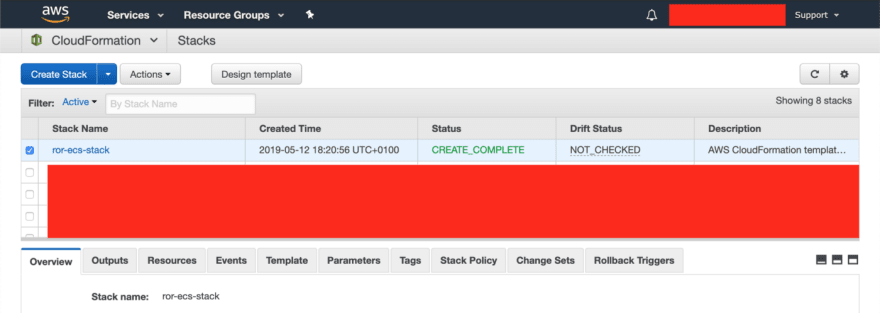
Log into the AWS console and you can have a look at the resources created by the CloudFormation stack:
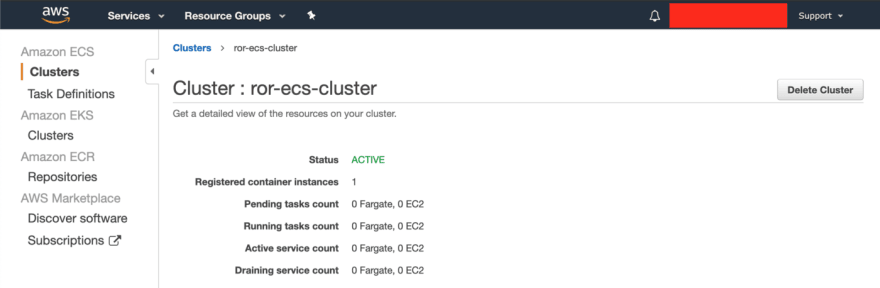
Also, you can see the newly created cluster:
If you scroll down, under the “ECS Instances” tab, you can also review the EC2 instance details that has been created and launched:

Ok, everything is set up for our final step: deploy our docker-compose file to our cluster; this will also create our task definition file for our containers.
ecs-cli compose up --cluster-config ror-ecs-conf
The output is the following:

In the AWS console, you will see the task definition and all the default parameters:

And now? How can we access our website?
We know that public access is managed by our NGINX conf file which, at the moment, has localhost as server_name. So, we need to change it and we can proceed in 2 ways:
If you want to use your own a domain (e.g. example.com), you can:
- create an A record in your DNS settings that points to the EC2 machine IP address
- use the EC2 machine IP address as server name
Let’s choose the second option and add the EC2 IP address to our NGINX config file. You can retrieve the public EC2 IP address in AWS console under the EC2 instance detail page:

Update the server_name inside our nginx.conf file:
Let’s build again the updated image with:
docker-compose build
Push it to the ECR repository:
docker-compose push
And update our cluster:
ecs-cli compose up --cluster-config ror-ecs-conf --force-update
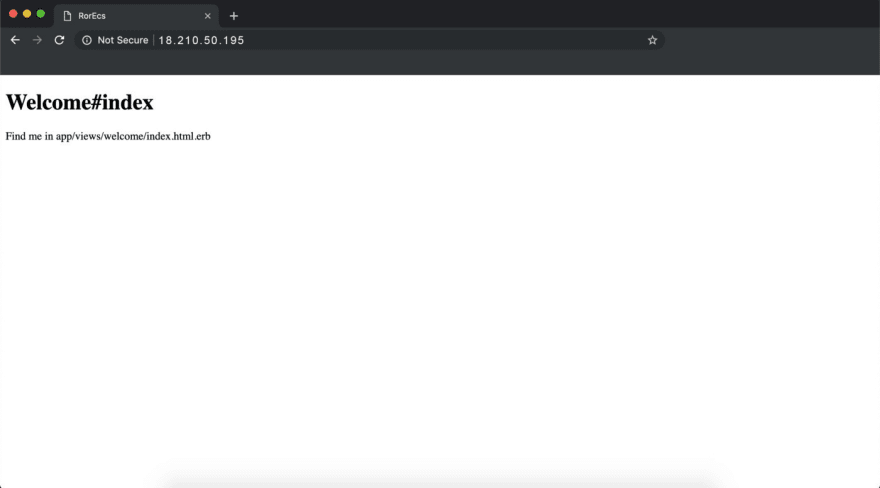
Aaaand that’s it! You should see your web app finally online 🎉🎉🎉!
4. Conclusion
Congratulations forgetting this far! Of course this project is just the beginning and there are a lot of improvements and customisation to be made with ECS (e.g. use an ALB). At the same time, I’ve tried to cover quite a good amount of concepts for you to start working with ECS.
In this tutorial I mainly wanted to be able to show different aspects I’ve been stuck while learning ECS and I really hope that you will find this useful. Here you can find the source code.
I greatly appreciate any feedback. Let me know if you enjoyed it 🙏 and let’s connect!
Special thanks to Donato Francavilla for reviewing the article!


Top comments (2)
Thank you for this: it got me up and running on an EC2 cluster after literally 3 months trying (and failing) with Fargate - appreciated!
thanks, I'm really glad to hear it helped :)!