//Note: Watch the video here
Dear Next.Js Aficionado,
Until now, we’ve talked about what your portfolio website should look like and that web developers aren’t web designers, so they need ready-to-use templates if they want to create something beautiful.
We analyzed some examples of good portfolio websites and chose an HTML template or UI kit.
Now, it’s time to set up our project.
Installing Next.Js Fast & Easily
Hopefully, the guys behind this framework have made it super easy for us to install it and get going.
We just open a new terminal, navigate to the parent folder where we would like to create our project, and we run the following command:
npx create-next-app@latest
Ok, let’s open the project in our favorite code editor.
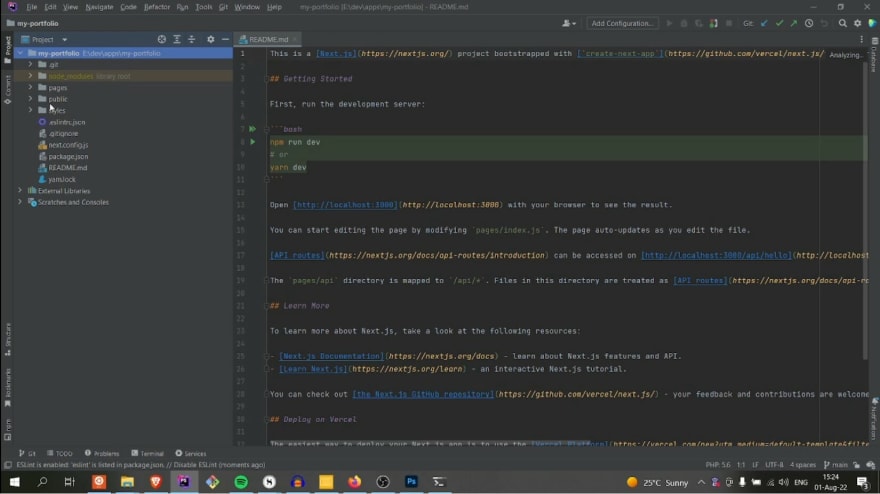
As you can see, we have several files and folders in the project folder.
I’m going to review them briefly…
First, we have a node_modules folder. It’s the home of all the third-party libraries we will install in the future. Every time you install something – let’s say caching library for optimizing the number of requests your app makes to external API – the library files will be downloaded and saved in their folder under node_modules.
Next, there’s a folder named public.
It’s the preferred place for all the files we want to be freely accessible.
For security reasons, we want most of our project files not to be freely accessible. But some static ones like images, SVG graphics, fonts, and others are meant to be public, so their proper place is in this folder.
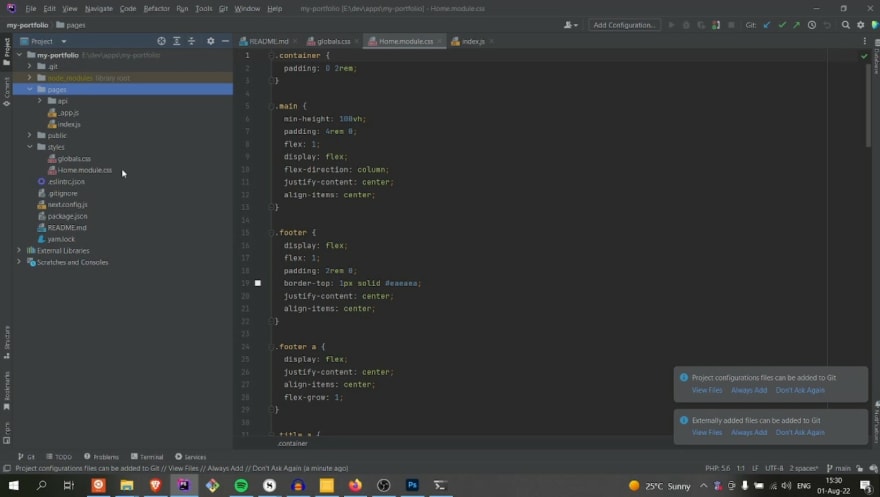
We also have a folder named styles…
Here is the home for all of our CSS files. There’s a globals.css in there. Here we put styles that apply to many components and the app. And, of course, we can create a CSS file for every component we make.
And finally, we have the pages folder…
Here we put all files that represent individual pages of our website. So our website’s index page is this one. If we open it, we’ll discover a standard react component named Home.
If we want to make an “about me” page, we can do it by creating a new javascript file named about-me.js.
Now, if we run the application for testing purposes with npm run dev…
We can open that page in our browser.
In a later video, we will talk more about how routing happens in Next.js, but it’s simple as that. You create files that represent pages, and they just start working in your browser.
Short Review Of The Project’s Files
Ok, we’ve talked about the available folders. Let’s review the available files for a minute.
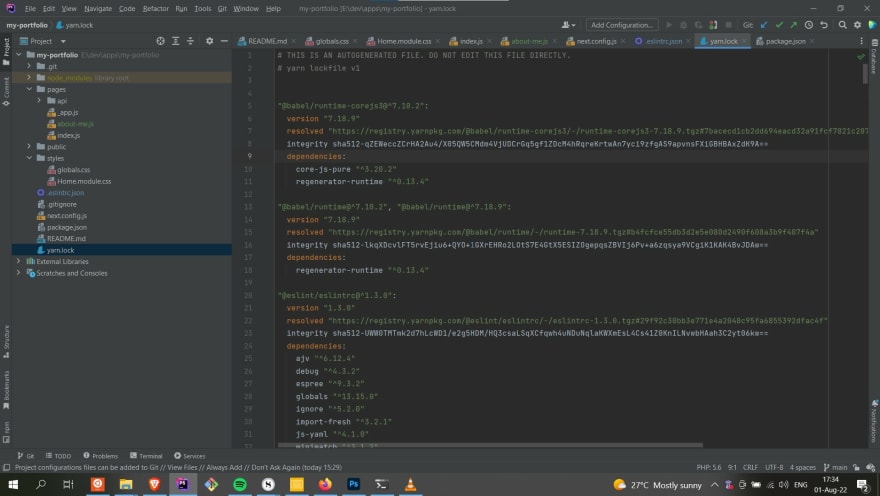
We have a yarn.lock file. It’s generated by the javascript package manager Yarn — obviously, this package manager is the preferred choice of the guys behind Next.js.
Let’s install it and start using it instead of npm.
We run the command: npm install -g yarn. I already have it installed, so nothing changed on my side. But if you didn’t have it on your computer, now it’s available.
We’ll use yarn from now on.
So the yarn.lock file is a special file that we never edit. It’s managed by the package manager, and it holds information about the third-party libraries we’ve installed, their dependencies, and their exact versions.
The idea is that if we want to run our app on a machine different than ours, let’s say on a server; then we’ll copy all app’s files and folders except node_modules.
Often this folder is huge. It is huge in size and the number of files, so if every project on a platform like GitHub has it around, it will need more storage space.
Because the files there don’t change from project to project, they don’t get uploaded.
Instead, every time we install our app on a new machine, they get downloaded anew.
To download the exact same files, we need a list of them; thus, we have a yarn.lock.
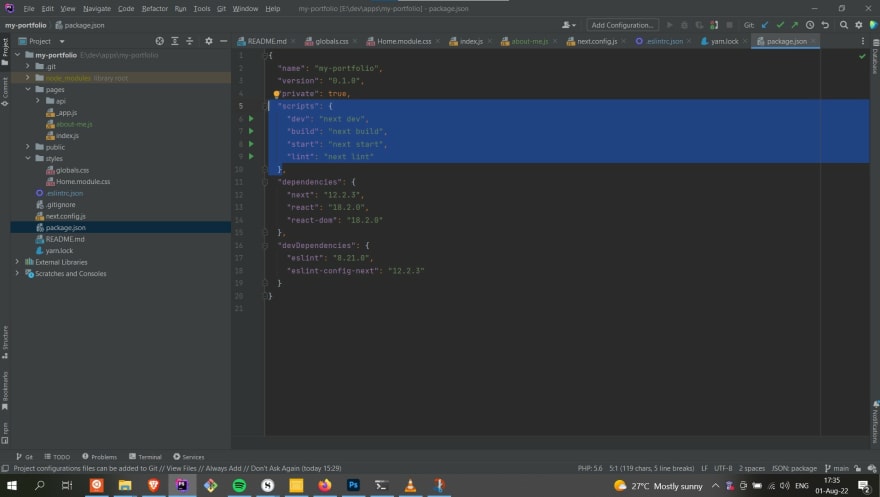
Besides it, we have a packge.json file. It’s something like a human-readable register of all project dependencies. Here we define the project’s name, version, and custom scripts, etc…
Let’s talk about them for a moment…
If our app is ready to go online, we need to build it, so we run the command:
yarn build
It starts to bundle the files, minify them, and do its other magic that makes Next.Js such a good React framework.
When it’s finished building, we can start the app just like it will be started in a production environment by running the command:
yarn start
But while we’re developing our app, we’ll not build it if we want it running.
We’ll use the command:
yarn dev
Now we can make changes, create new files and apply new CSS styles, and everything we do will be visible in the browser right away, thanks to the so-called “hot-reload” feature of Next.js.
And what about the script named “lint”?
It’s a really useful one. But what is it?
“Linting” your code is the automated process of analyzing it for obvious errors that can be detected without running it. Some errors happen only on run time, so no machine can notice them beforehand, but others can be caught just by mechanically applying the language’s rules.
So when you run the command yarn lint, your code gets analyzed for warnings and errors. Let’s see what happens if there is an error…
I will add an anchor, but I will miss on purpose to properly close the tag.
Then I will run the command…
As you can see, it successfully detected the missing closing tag.
If you’re curious about the rules, you can find them all on this documentation page.
Ok, enough discussing the package.json file.
What about next.config.js?
It’s a js file that holds configs related to Next.js.
I not gonna tell you what you can put here because you won’t remember it. I don’t remember myself.
Basically, if you need to configure the framework in some specific way, you read the official documentation.
Right now, we don’t need to change anything, so we’ll leave this file unchanged.
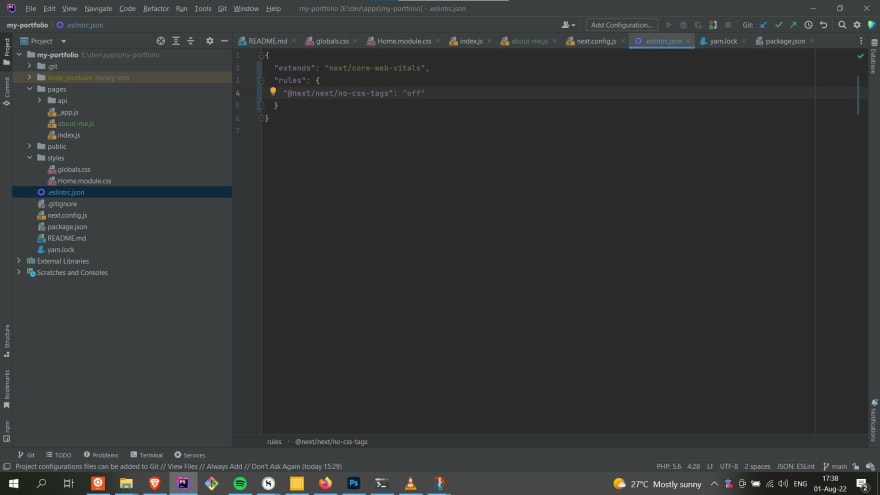
The .eslintrc.json file is the place to configure ESLint. For example, let’s say you want a style tag in your component. A rule states you can’t put it there, but you can turn it off by adding it right here with a value of “off.”
And finally, we have a README.md. It’s self explementary what we use it for, so I won’t waste time talking about it. If your repository is not public, perhaps you don’t need such a file.
Ok, that’s it…
It turns out it’s pretty easy to install Next.js and start coding. That’s why I love it and use it for almost every project. In the following video, we will finally begin coding. We’ll take the HTML template we chose earlier and turn it into a Next.Js template.
Let’s wrap up this section:
- We installed Next.Js and the package manager yarn
- We reviewed the project structure – its folders and files
- And we talked about the available scripts in package.json
Cheers,
Sashe Vuchkov
PS. This tutorial was originally published on buhalbu.com




Top comments (0)