
In this tutorial, we will learn how to integrate payment gateway in VueJs using Stripe in our demo e-commerce app

Introduction
We are building an e-commerce app from scratch using Vue.js in the frontend and Java with Springboot for the backend. You can check out the first front-end tutorial of this series here.
Let’s Create a Frontend for our eCommerce App with Vue.js
We are building a complete E-commerce application from scratch. Today we are going to add the Products feature.javascript.plainenglish.io
A payment gateway is an important feature for an e-commerce app. In the previous tutorial, we integrated a payment gateway using Spring Boot and Stripe. Now we will build the front-end part of it like accepting the cart items and card details.
If you want to refer to the backend part for the payment gateway use the below link.

Live Demo

You can find the complete code at Github.
Pre-requisites
Knowledge of Vuejs
Visual Studio Code —open-source (Recommended)
A good browser —(Chrome — recommended)
API we will be using

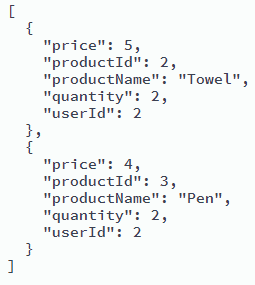
getCartItems:
This is a get method and we will use it for storing the cart items in an array so that we can pass it as a request body to our backend API using Axios.

checkoutList:
This is a post method to which as a response body we will pass the array of cart items. This method is responsible for generating the session id.

placeOrder:
This is a post method and if the payment is successful we will use it to add the order in the order table in our database. So as parameters to the Axios post method we will pass the token of the logged-in user and the session id generated.


Project Structure

Stripe
Stripe is one of the best ways to handle payments online and recently they released Stripe Elements. Stripe Elements is their pre-built library of UI components that help you easily create your own checkout flows. This now makes it easier than ever to set up a custom payment form for your app.
In this tutorial, we will be using Stripe.js for creating a payment gateway.
First of all, we need our own Stripe test API key. So go ahead and create an account on stripe and then from the dashboard get the API key for testing purposes. Store that key in the environment variable. To do this:
Create a file in the source directory with an extension .env
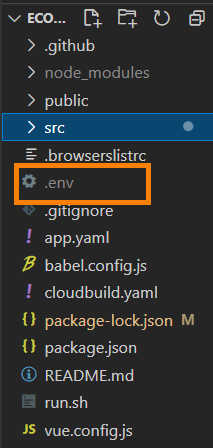
In this file create a variable that will store the API key.
Name the variable as VUE_APP_VARIABLENAME=YOURAPIKEY .
The flow of the tutorial
Declaration of required data variables
Installation of stripe
Initialization and configuration of Stripe element
Implement Fetching the cart items method
Implement Passing the cart items to the backend API method and receiving the session id as a response
Navigating the user to success or failure payment component according to the status of Stripe payment
Now let’s code
Create a folder named Checkout and in that folder create a vue file named Checkout which will hold the frontend logic for payment gateway.

1.Creation of data variables
stripeAPIToken : stores the API key
stripe : a stripe element
Stripe Element is a collection of components with a variety of elements you can use to create checkout forms like buttons and inputs for collecting information from the user. The one we’re going to focus on is the card element. The card element lets you collect card information all within one element. It includes a dynamically-updating card brand icon as well as inputs for email, expiry, CVV, country name, cardholder name.
token : stores token of the user
sessionId : stores the generated sessionId by the Stripe
checkoutBodyArray : the response body we will be sent to our backend API
2. Installation of Stripe
Stripe element is a part of Stripe.js so we need to include the script by using the includeStripe method (that we will implement further) to which we pass the script source URL and since includeStripe is a callback function we call the configureStripe method which we will implement ahead. So when do we call this includeStripe method? When the component is rendered at that time we initialize this method.
i.e. in mounted method we call this function.
We are binding this so we have access to the local component’s methods inside the callback and we are calling configureStripe once everything has been loaded. We have not implemented that yet, but that’s next! That’s our callback method that will set up Stripe locally within the component.
Also, this checkout page will be rendered when the user clicks confirm order from the cart page. If you want to have a look then you may refer to this. So when the user clicks confirm the order we call the checkout method in the cart component, in which we navigate the user to Checkout component using router method. And to this router method, we pass params id as the size of the cart (number of items in cart).
checkout(){
this.$router.push({ name: ‘Checkout’,params:{id:this.len}})
}
//from the Cart.vue
Now why do we pass the params id ?
We pass the id in order to check if the checkout page is being called if and only if the user clicks the confirm order button. Suppose the user is on some other page like the products page and from there he navigates to the checkout page by explicitly mentioning in the URL, the user won’t be able to because then the id by default will be passed as undefined. And in the mounted method of Checkout the component we first check that if the id is of the valid data type(in this case it should be string since we pass the id as params in the router method of Cart component) then only we render the Checkout component.
If the id is undefined i.e. user tries to navigate to checkout page without confirming the order he then will be redirected to Home page. Also if the cart is empty then the confirm order button is disabled but then also if the user tries to navigate to checkout page by explicitly mentioning in the URL, the user will be still navigated to Home page, because in that case also the id passed to the Checkout component will be undefined.
So the params id (size of cart) is passed from the Cart component to just confirm that whether or not the user is navigating to the Checkout component by confirming the order.
3.Initialization and configuration of Stripe element
Include Stripe.js dynamically
3.1 includeStripe:
It will create a script tag and load our Stripe javascript file and add it to the head of our application. This method accepts 2 parameters, the URL of the file we are loading dynamically which will be the Stripe JS file, and a callback function that will run when the file is loaded.
Now, when we have the file properly loaded, we will callback, and Stripe will be configured.
Configure Stripe Element
3.2 configureStripe:
Remember in the mounted method we called the includeStripe method and then as a callback function we called the configureStripe method which is responsible for creating the Stripe object for the particular payment session.
The stripe we declared earlier as data variable will house a local instance of the Stripe object that is in the Stripe JS API that we loaded.
4.Implement Fetching the cart items method
Firstly we need to store the cart items in an array and that we have declared as a data variable named checkoutBodyArray .
So how do we want to store the cart items in data variable?
Since the post API, we implemented in the previous tutorial requires the list of cart items as the request body we store the cart items in the checkoutBodyArray .
Fetching the cart items
We implement the getAllItems method which calls that get API /cart which returns the items in the cart as a response. So we store this response in checkoutBodyArray and pass this array as a request body to the checkout backend API.
We call the getAllItems method in the mounted method since we want to fetch the cart items when the Checkout component is rendered. So call this method in the mounted method we implemented earlier.
5.Implement Passing the cart items to the backend API method
Passing the cart items to the backend API
Now since we have cart items in checkoutBodyArray we need to pass this to the post method. So we implement the function goToCheckout which calls the Axios post. After passing the cart items array to the backend API we get the session id as a response.
So we store the session id in the local storage and then we call the redirectToCheckout method of Stripe in which we store the session id we received from the response data in our sessionId which will redirect the user to a Stripe-hosted page to securely collect payment information. When a user completes their purchase, they are redirected back to our website.
This is how Stripe Checkout Page looks like

6. Navigating the user to success or failure payment component according to the status of Stripe payment
Here we handle the result of payment i.e. If payment is successful then we add the order to the order table and if the payment fails then we don’t add that order and navigate the user to the order history page.
So where is the result of payment handled? We didn’t define it here in the frontend so if you remember, in the previous backend tutorial (more precisely in the OrderService class)we defined the had set the success URL and failure URL as below.
SessionCreateParams params = SessionCreateParams.*builder*()
        .addPaymentMethodType(SessionCreateParams.PaymentMethodType.*CARD*)
        .setMode(SessionCreateParams.Mode.*PAYMENT*)
        .setCancelUrl(failedURL)
        .addAllLineItem(sessionItemsList)
        .setSuccessUrl(successURL)
        .build();
And the failedURL and successURL were defined as
String successURL = baseURL + "payment/success";
String failedURL = baseURL + "payment/failed";
and the baseURL was the frontend Vuejs URL which we are working on.
Navigating the user to success or failure payment component according to the status of Stripe payment
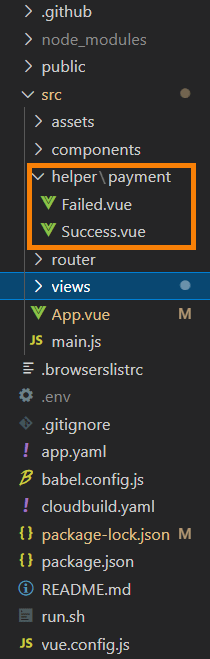
Firstly we need to create a folder in the source directory named helper and in that folder, we create another folder named payment . In this folder create two vue components Failed.vue and Success.vue .
Payment Success Component
So in the Success component, we create data variables token and session-id and define a method to save the current order to our database.
So in the saveOrder method we use the backend API /order/add
which we will discuss in the next tutorial.
To get an idea of what the API does refer to the API description above:
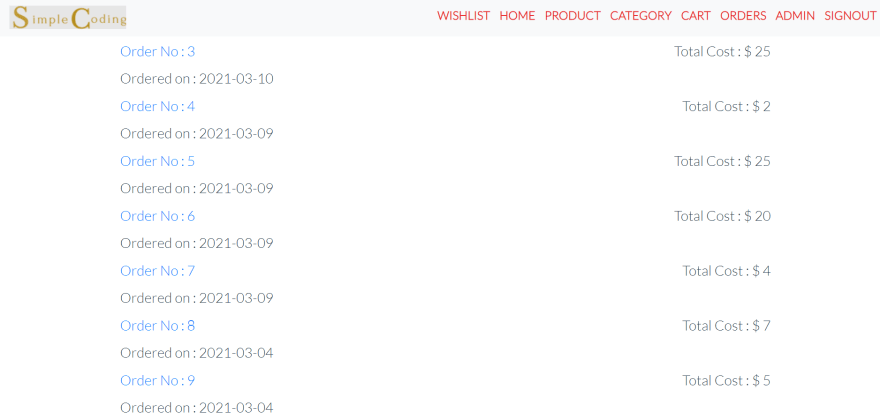
On success, we redirect the user to the order history component where the current and old orders are visible.
Payment Failure Component
In this component, we remove the session id from local storage and do not save that order in the order table. Finally, we still navigate the user to the order history page but here the current order won’t be visible but the previous orders will be available.
Congratulations!!!
You have successfully implemented the frontend part of the payment gateway using Vuejs and Stripe. You can find the complete code at Github.

Top comments (0)