As part of my journey in building my software-as-a-service, Dentaltrack.ar, I have dedicated time to learn how to integrate paid subscriptions into a Next.js project.
The tutorial utilizes the latest version of Next.js (v13.4) with the /app directory structure, NextAuth v4 for authentication, Prisma for database management, and Stripe for payment processing.
🎉 I hope it serves as a valuable resource for anyone looking to add paid subscriptions to their projects. If you have any further questions or need assistance, feel free to reach out. Best of luck with your software-as-a-service journey! 👨💻🚀
1. Run the following command to create a new Next.js app:
npx create-next-app@latest
2. Setup Prisma (documentation):
- Install Prisma as a dev dependency:
npm install prisma --save-dev - Initialize Prisma:
npx prisma init - Set up and connect to your database.
- Create your database schema in
schema.prisma. - Push the changes to the database:
npx prisma db push - Install the Prisma Client library:
npm install @prisma/client - Generate the Prisma Client:
npx prisma generate - Initiate a global PrismaClient instance in the
lib/prisma.tsfile. In this case, I placed it within the same Prisma folder,prisma/prisma.ts. (documentation)
3. Setup NextAuth (documentation):
- Install dependencies:
npm install next-auth @auth/prisma-adapter -
Create
/api/auth/[...nextauth]/route.tsAPI route:- NextAuth.js Route Handlers:
- Declare the options that go into
NextAuth()beforehandlerin a variable that is exported, so we can use it later. It should look like this:
export const authOptions: NextAuthOptions = {} // here go all the options.- Import
prismafromprisma.tsand add thePrismaAdapter(Prisma Adapter) - Import and add providers (in this case, it's
GoogleProvider) (Google Provider): - You'll need to create an OAuth Client ID to get the Client ID and secret (Google Cloud Console):
- Application type: set to "Web Application"
- Authorized JavaScript origins: add
http://localhost:YOUR_PORT&http://localhost(for deployed app, add the appropriate URL) - Authorized redirect URIs: add
http://localhost:YOUR_PORT/api/auth/callback/google(for deployed app, add the URL with the same route:/api/auth/callback/google).
Wrap
mainin a Provider component that containsSessionProvider(this component must be tagged with 'use client').Create a signin button component using
useSession,signIn,signOutfrom "next-auth/react" (this component must be tagged with 'use client').This setup should allow you to sign in and sign out successfully. The user should be saved in the database, and a session will be created when logged in.
4. Setup Stripe
- Create a Stripe account
- Copy "STRIPE_SECRET_KEY" and "STRIPE_PUBLISHABLE_KEY"
- Check the
.env.exampleto see how your.envshould end up
- Install Stripe and stripe-js
- Run
npm install stripe --save - Run
npm install @stripe/stripe-js
- Run
-
Modify
schema.prisma- Add the following fields to the
Usermodel:
stripeCustomerId String? @unique isActive Boolean @default(false)- Run
npx prisma db push - Run
npx prisma generate
- Add the following fields to the
-
Go to
/api/auth/[...nextauth]/route.ts- After
providers, addsecret: process.env.NEXTAUTH_SECRET, - Inside
callbacks:{}, set up a callback function to add necessary values to the session object. This ensures that when a session is checked (useSession,getSession,getServerSession), the required values are available. The callback should look like this:
callbacks: { async session({ session, user }) { session!.user!.id = user.id; session!.user!.stripeCustomerId = user.stripeCustomerId; session!.user!.isActive = user.isActive; return session; }, },- If you are using TypeScript, create a
types.d.tsfile at the same level as thesrc/folder with the following content:
import { DefaultUser } from 'next-auth'; declare module 'next-auth' { interface Session { user?: DefaultUser & { id: string; stripeCustomerId: string; isActive: boolean }; } interface User extends DefaultUser { stripeCustomerId: string; isActive: boolean; } }- Add
events:{}to automatically create an account in the Stripe dashboard when a user logs in for the first time. Later, thestripeCustomerIdwill be added to that user's account in our database. It should look like this:
events: { createUser: async ({ user }) => { const stripe = new Stripe(process.env.STRIPE_SECRET_KEY!, { apiVersion: "2022-11-15", }); await stripe.customers.create({ email: user.email!, name: user.name!, }) .then(async (customer) => { return prisma.user.update({ where: { id: user.id }, data: { stripeCustomerId: customer.id, }, }); }); }, }, - After
If you have data in your database, delete it (you can use
npx prisma studioto view and modify your database).At this point, you should be able to log in and see how a user is created in your database with the added values. In your Stripe dashboard, you should also see that a new customer was created.
-
Now we will work on the checkout:
- Create
/api/stripe/checkout-session/route.tsAPI route: - Create a
POSTfunction and importNextRequestandNextResponse. Declare abodyvariable and initialize Stripe andgetServerSession. It should look like this:
import { NextRequest, NextResponse } from "next/server"; import { authOptions } from "../../auth/[...nextauth]/route"; import { getServerSession } from "next-auth"; import Stripe from "stripe"; export async function POST(req: NextRequest) { const body = await req.json(); const stripe = new Stripe(process.env.STRIPE_SECRET_KEY!, { apiVersion: "2022-11-15", }); const session = await getServerSession(authOptions); }- Before creating a checkout session, let's validate that the session exists. Otherwise, throw an error:
if (!session?.user) { return NextResponse.json( { error: { code: "no-access", message: "You are not signed in.", }, }, { status: 401 } ); }- Create the Stripe checkout session (How Checkout Works):
const checkoutSession = await stripe.checkout.sessions.create({ mode: "subscription", customer: session.user.stripeCustomerId, line_items: [ { price: body, quantity: 1, }, ], success_url: process.env.NEXT_PUBLIC_WEBSITE_URL + `/success`, cancel_url: process.env.NEXT_PUBLIC_WEBSITE_URL + `/error`, subscription_data: { metadata: { payingUserId: session.user.id, }, }, });- Ensure that the checkout session returns a URL; otherwise, throw an error:
if (!checkoutSession.url) { return NextResponse.json( { error: { code: "stripe-error", message: "Could not create checkout session", }, }, { status: 500 } ); }- If everything goes well, return the checkout session:
return NextResponse.json({ session: checkoutSession }, { status: 200 });- Let's go to the front-end and add a checkout button on whatever page you want:
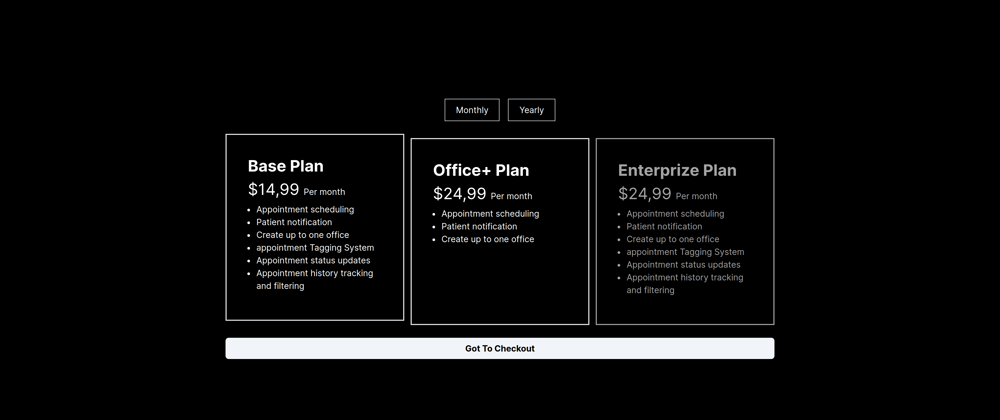
<button className='bg-slate-100 hover:bg-slate-200 text-black px-6 py-2 rounded-md capitalize font-bold mt-1' onClick={() => handleCreateCheckoutSession(plan)} > Go To Checkout </button>- Create the
handleCreateCheckoutSession(productId)async function that receivesproductId. I'll just declare a variableplanthat contains a product ID. - Create a product in your Stripe dashboard and copy its ID, then save it in a variable.
- Inside the function, perform a fetch to your checkout endpoint and add the product ID to the body:
const res = await fetch(`/api/stripe/checkout-session`, { method: "POST", body: JSON.stringify(productId), headers: { "Content-Type": "application/json", }, });- The response from the POST request, which should be a checkout session, needs to be parsed and assigned to a variable. Here's an example:
const checkoutSession = await res.json().then((value) => { return value.session; });- Now create a
/app/utils/getStripe.tsfile. Here, we'll declare a reusablestripePromise. IfstripePromisealready exists, we won't create a new one but use the already created instance (read more) . The code should look like this:
import { Stripe, loadStripe } from '@stripe/stripe-js'; let stripePromise: Promise<Stripe | null>; const getStripe = () => { if (!stripePromise) { stripePromise = loadStripe(process.env.NEXT_PUBLIC_STRIPE_PUBLISHABLE_KEY!); } return stripePromise; }; export default getStripe;- Going back to
handleCreateCheckoutSession(), we'll continue by declaring astripevariable and awaitgetStripe(). Then, we'll use it for the redirect. Here's an example:
const stripe = await getStripe(); const { error } = await stripe!.redirectToCheckout({ sessionId: checkoutSession.id, }); // If `redirectToCheckout` fails due to a browser or network // error, display the localized error message to your customer // using `error.message`. console.warn(error.message);- That should be all for the checkout to work. Now you should be able to log in, log out, and start a checkout. The next step is to handle Stripe webhooks to modify the
isActivevalue of theUserin the database if the user has paid or the subscription has been canceled.
- Create
-
Let's start with the Stripe webhook.
-
Create
/api/webhooks/route.ts.-
Initialize Stripe, the
webhookSecretvariable, and thewebhookHandlerasync arrow function, and export it as POST. It should look like this:
import Stripe from "stripe"; import prisma from "../../../../prisma/prisma"; import { NextRequest, NextResponse } from "next/server"; const stripe = new Stripe(process.env.STRIPE_SECRET_KEY!, { apiVersion: "2022-11-15", }); const webhookSecret: string = process.env.STRIPE_WEBHOOK_SECRET!; const webhookHandler = async (req: NextRequest) => { // We are going to add things here }; export { webhookHandler as POST }; -
Inside a
try{}catch{}block, initialize variables to save the request in text form, the "stripe-signature" header, and aletvariable that is initially undefined. This last variable is used to save the Stripe webhook event that will be created. The code should look like this:
try { const buf = await req.text(); const sig = req.headers.get("stripe-signature")!; let event: Stripe.Event; // Rest of the code goes here // Return a response to acknowledge receipt of the event. return NextResponse.json({ received: true }); } catch { // If an error occurs return NextResponse.json( { error: { message: `Method Not Allowed`, }, }, { status: 405 } ).headers.set("Allow", "POST"); } -
Inside a
try{}catch{}block, we will attempt to build the event (read more). If an error occurs, we catch it and handle it accordingly. The code should look like this:
try { event = stripe.webhooks.constructEvent(buf, sig, webhookSecret); } catch (err) { const errorMessage = err instanceof Error ? err.message : "Unknown error"; // On error, log and return the error message. if (!(err instanceof Error)) console.log(err); console.log(`❌ Error message: ${errorMessage}`); return NextResponse.json( { error: { message: `Webhook Error: ${errorMessage}`, }, }, { status: 400 } ); } -
After that, we add a
switchstatement to handle the event types sent by the Stripe webhook to this endpoint. We will handle "customer.subscription.created" and "customer.subscription.deleted" event types. In each case, we will look for the user in our database that has the same stripeCustomerId as the event and update the user's isActive value. The code should look like this:
// Getting the data we want from the event const subscription = event.data.object as Stripe.Subscription; switch (event.type) { case "customer.subscription.created": await prisma.user.update({ // Find the customer in our database with the Stripe customer ID linked to this purchase where: { stripeCustomerId: subscription.customer as string, }, // Update that customer so their status is now active data: { isActive: true, }, }); break; case "customer.subscription.deleted": await prisma.user.update({ // Find the customer in our database with the Stripe customer ID linked to this purchase where: { stripeCustomerId: subscription.customer as string, }, // Update that customer so their status is now active data: { isActive: false, }, }); break; default: console.warn(`🤷♀️ Unhandled event type: ${event.type}`); break; } -
To test this API endpoint locally, you'll have to install the Stripe CLI on your machine. Stripe CLI
- After following the steps to log in to the CLI, follow this guide. In this case, the URL would be
http://localhost:3000/api/webhooks. Copy the webhook secret key that it gives you and add it to your.envfile.
- After following the steps to log in to the CLI, follow this guide. In this case, the URL would be
-
-
Now you should be able to go through the login/logout, checkout, and, if successful, change the
isActivevalue to true and if the subscription gets canceled, change it to false.
5. Deploying it
- Checkout the
.env.examplefile in this repository. It should show you all the necessary environment variables needed for this project. If you are deploying to Vercel, you won't need "NEXTAUTH_URL". You can quickly generate theNEXTAUTH_SECRETby runningopenssl rand -base64 32in your terminal. - Connect to your GitHub repo and deploying the project.
- Now, for the webhook to work, you need to go to your Stripe Developer Dashboard > Webhooks and add an endpoint. The URL will be
https://YOUR_DEPLOYMENT_URL/api/webhooks, and it should listen forcustomer.subscription.createdandcustomer.subscription.deletedevents.- Once created, copy the "Signing secret" and assign it to
STRIPE_WEBHOOK_SECRET.
- Once created, copy the "Signing secret" and assign it to
- Make sure you have added the deployment URL to your Google OAuth Client.
- After all that, everything should work! 💯 🔥 🎆 🎉 🥳.
PROBLEMS
-
In the last stage, I encountered a problem with the webhook. The Stripe webhooks dashboard displayed the following error:
Webhook Error: Error: No signatures found matching the expected signature for the payload. Are you passing the raw request body you received from Stripe? Learn more about webhook signing and explore webhook integration examples for various frameworks at https://github.com/stripe/stripe-node#webhook-signing- I wasn't sure what the problem was with the payload because everything looked fine, it worked in the CLI but not with the Stripe Dashboard Webhook (probably a typo in the code or secret keys), but after rewriting the webhook code, it started working. So, yeah 😑. All night trying to fix that 😂.
NOTE
The project in this repository closely follows the tutorial in terms of the concepts explained, but it includes some modifications to its user interface. The project has been structured to include login, subscription, and dashboard pages. Additionally, the useSession hook is utilized to verify if the user has permission to access a specific page.
Feel free to give the project a ⭐️ emoji and contact me through any of the social media platforms shown in my profile.


Top comments (0)