

Welcome to part-3 of the series.
This series is based on the youtube series by Brad Traversy and you can find it here.
Now, let’s send the data from our Launches.js file to a new component LaunchItem.js. We are just lopping through the data using map and then passing it to a new LaunchItem component.
 Launches.js
Next, we will create the LaunchItem.js file in the same components folder. We are just de-structuring the props and showing it through some use of bootstrap classes.
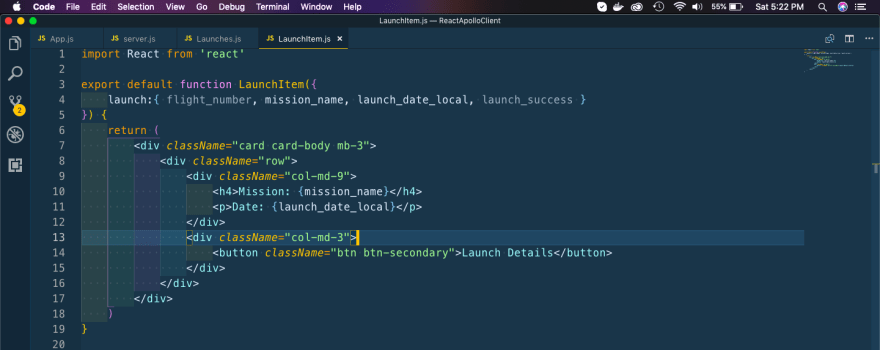 LaunchItem.js
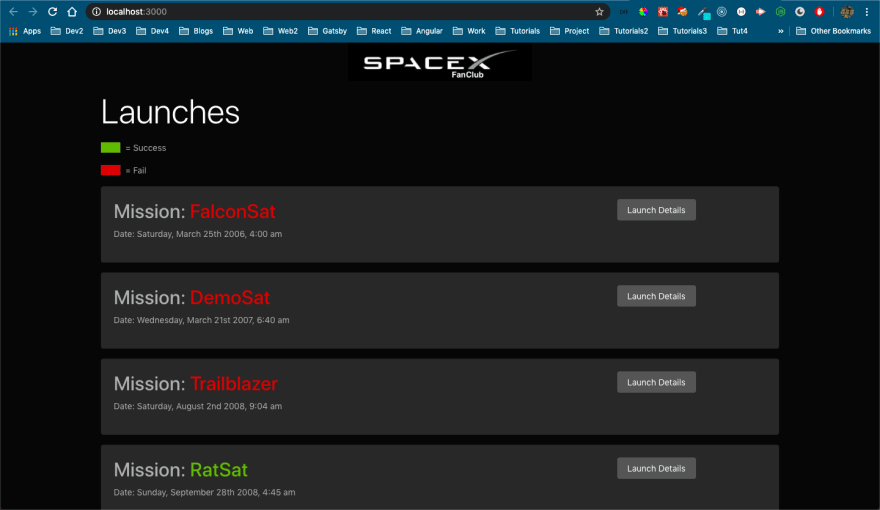
It will show all the launches in a nice list view in our web-page.
 All Launches
Next, we will install two packages in our client which will help us with showing different color for a failed or successful mission.
 classnames and moment
We also need to install one more package called react-moment, which i missed. So, npm install it in client folder.
 react-moment
Next, we will update our LaunchItem.js to use classNames and change the mission_name color to green or red, depending on whether launch_success is true or false.
 LaunchItem.js
Now, our web-app will show as below.
 Launches
Now, the user show know what red and green means. So, we put a color description in Launches.js
 Launches.js
It will show these in our web-page.
 Success or Fail
From the above image the date seems a bit difficult to read, so we will use moment to show it in a good format.
 Using Moment
It will now show the date format in our web-page.
 Nice date format
Now, when the user clicks on Launch Details it show open a different page, showing the details of the launch. We need to use react-router to navigate to different page. So, let’s npm install it in the client folder.
 react-router
Next, we will use routes in our App.js. We are first doing import of Router and the Launch component(yet to be created).
Then we are wrapping everything in Router and using two routes, one for Launches component an other for Launch component.
 Routes in App.js
Next, we will create Launch.js inside the components folder and put the basic code in it. We will change the content later.
 Launch.js
We also need to change the simple button in our LaunchItem.js to use Link from react-router-dom.
 LaunchItem.js
Now, once we click on the Launch Details link, it will show us the Launch Component. Also, notice the url as it got changed to the launch with flight_number.
 Web-page
This completes the part-3 of the series. You can find the code for the same in my github repo here.


Top comments (0)