It seems like a good place to start my first article would be the reason I'm even writing it, my portfolio. I'll spend the next few articles going through the how and why of the full tech stack of my new portfolio.
The full tech stack of this portfolio includes Sanity CMS, GraphQL API, Serverless functions, Netlify hosting, CloudFlare DNS, and Angular with RxJS. We'll go through every one of these services, in detail, so expect a few articles. We'll start with the first step I took when creating my portfolio.
What is Sanity CMS
I was asking myself the same question a few weeks ago, what is Sanity CMS? If you've ever used a CMS like WordPress, written an article on dev.to, or made an old Blogger blog before, it will seem pretty familiar.
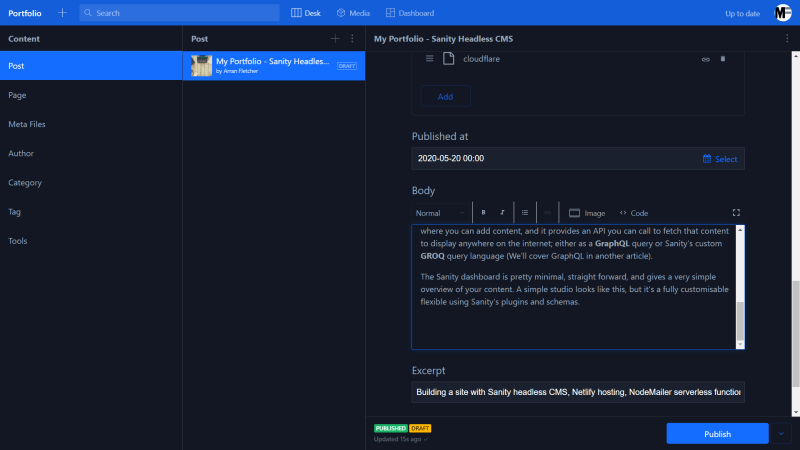
Sanity is a headless CMS, that means the place the content is displayed is up to you. Until you add one, it doesn't exist. Sanity gives you a dashboard called Sanity Studio where you can add content, and it provides an API you can call to fetch that content to display anywhere on the internet; either as a GraphQL **query or Sanity's custom **GROQ query language (We'll cover GraphQL in another article).
The Sanity dashboard is pretty minimal, straight forward, and gives a very simple overview of your content. A simple studio looks like this, but it's fully customisable aand flexible using Sanity's plugins and schemas. So how do we use these plugins and what's a schema?
Sanity Studio Plugins
Sanity has a fair few plugins (I counted over 50) available here, some are easy to setup, some require a little bit more for implementation, but they're all useful!
One of the simplest plugins available is dark theme (Like in the screenshot up there); it's as simple as using an install command and you're all set, just:
sanity install dark-mode
Some require a little more setup to use. One amazing plugin I've been using is Netlify Deploy, Netlify NodeJSNodeJS Servers, without having to deal with the actual server part of everything. Netlify Deploy allows you to check the status of, and redploy, any sites you're hosting with Netlify! (After some small configuration)
Begin by running the install command:
sanity install dashboard-widget-netlify
Netlify Deploy uses the sanity dashboard, an installable dashboard for plugins to display key info, installable with another simple command:
sanity install @sanity/dashboard
Now that everything's installed we can setup the plugin in 2 easy steps.
Sanity uses a JSON file, sanity.json, to configure everything included in the studio. It uses a field called "parts" to state the literal parts, of the studio. So here we just need a few lines to say we want to include this new plugin.
{
  "implements": "part:@sanity/dashboard/config",
  "path": "./config/dashboard/dashboard.js"
}
We're asking Sanity to "implement" the dashboard, and giving a "path" to our configuration.
Sanity gives us a directory called config when we create a project, so we're just creating a file inside config called dashboard.js and filling it in like this:
export default {
  widgets: [
    {
      name: 'netlify',
      options: {
        title: 'Netlify Sites',
        sites: [
          {
            title: 'Portfolio Frontend',
            apiId: 'aaaaaaaa-bbbb-cccc-dddd-eeeeeeeeeee',
            buildHookId: 'abcdef1234567',
            name: 'awesome-frontend-1234'
          },
          {
            title: "Portfolio Sanity CMS",
            apiId: "aaaaaaaa-bbbb-cccc-dddd-eeeeeeeeeee",
            buildHookId: "abcdef1234567",
            name: "sanity-cms-1337"
          }
        ]
      }
    }
  ]
}
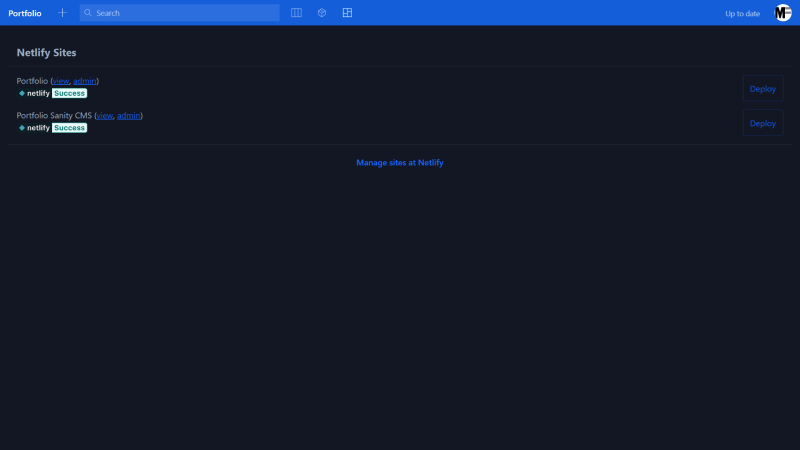
Here we create a list of widgets (In case you want to keep adding more later) and set them up. For the netlify plugin, we give it a title to show in the dashboard, and a list of sites from Netlify to display. That's it! We'll need to grab the name, apiId, and buildHookId from Netlify to prove we own them, but that's all there is, almost all the plugins are just as simple!
After all that we'll have a nice looking dashboard to control our websites deployment like this!
What About Customising the Content? Like Blog Posts?
Sanity makes it super easy to customise the content you display. Setting up my portfolio took about 30 minutes total to fully setup and customise, including the types for Posts, Authors, Categories, Files, and more.
Sanity keeps our "schema" (The list of stuff we want to show) in a directory called schema, in a file called... schema.js. Nothing exciting in the naming of everything, but the ease and flexibility we have when creating schemas is definitly something exciting!
A default schema looks something like this:
// First, we must import the schema creator
import createSchema from 'part:@sanity/base/schema-creator'

// Then import schema types from any plugins that might expose them
import schemaTypes from 'all:part:@sanity/base/schema-type'

// We import object and document schemas
import blockContent from './blockContent'
import category from './category'
import post from './post'
import author from './author'

// Then we give our schema to the builder and provide the result to Sanity
export default createSchema({
  // We name our schema
  name: 'default',
  // Then proceed to concatenate our document type
  // to the ones provided by any plugins that are installed
  types: schemaTypes.concat([
    // The following are document types which will appear
    // in the studio.
    post,
    author,
    category,
    // When added to this list, object types can be used as
    // { type: 'typename' } in other document schemas
    blockContent
  ])
})
The schema, called "default", includes Post, Author, and Category, by default. As well as a special type called blockContent. If we take a look inside a schema like Post, it looks something like this:
export default {
  name: 'post',
  title: 'Post',
  type: 'document',
  fields: [
    {
      name: 'title',
      title: 'Title',
      type: 'string'
    },
    {
      name: 'slug',
      title: 'Slug',
      type: 'slug',
      options: {
        source: 'title',
        maxLength: 96
      }
    },
    {
      name: 'author',
      title: 'Author',
      type: 'reference',
      to: {type: 'author'}
    },
    {
      name: 'mainImage',
      title: 'Main image',
      type: 'image',
      options: {
        hotspot: true
      }
    },
    {
      name: 'categories',
      title: 'Categories',
      type: 'array',
      of: [{type: 'reference', to: {type: 'category'}}]
    },
    {
      name: 'publishedAt',
      title: 'Published at',
      type: 'datetime'
    },
    {
      name: 'body',
      title: 'Body',
      type: 'blockContent'
    },
    {
      name: 'excerpt',
      title: 'Excerpt',
      type: 'string'
    }
  ]
}
So every piece of content we want to show has a type of document, this is a piece of content that's meant to be shown and used in its own way, like a post, or an author, or a category.
A document is made of a list of fields, and these are just your basic types, or you can use other custom types inside. Above we have the Author, which references the type Author. Simple types like string and datetime can be used to display simple bits of information like names and dates, and the special type **blockContent **is shown as the type for the body, this is Sanity's special way of displaying rich text, text with headings and images and lists inside it. That's all there is to it.
Let's try adding a new type, Tags. First we create a new file called tags.js and fill in the info for a tag. A title and a slug should be enough for a simple tag, so we create the schema like this:
export default {
  name: 'tags',
  title: 'Tag',
  type: 'document',
  fields: [
    {
      name: 'title',
      title: 'Title',
      type: 'string'
    },
    {
      name: 'slug',
      title: 'Slug',
      type: 'slug',
      options: {
        source: 'name',
        maxLength: 96
      }
    }
  ]
}
A tag, with a title and a slug. Simple. Now we can add it to the post like this:
export default {
  name: 'post',
  title: 'Post',
  type: 'document',
  fields: [
    ...
    {
      name: 'tags',
      title: 'Tags',
      type: 'array',
      of: [{type: 'reference', to: {type: 'tags'}}]
    },
    {
      name: 'publishedAt',
      title: 'Published at',
      type: 'datetime'
    },
    ...
  ]
}
We just add a field with the name tags, a type of array so we can add a few, and a reference using of to tell Sanity we want this to be of the type Tag. That's it! Well almost...
We do need to add this new type to our schema so Sanity knows it exists. We open our schema.js file again and add the following:
// We import object and document schemas
...
import tags from './tags'

export default createSchema({
  ...
  types: schemaTypes.concat([
    ...
    tags,
    ...
  ])
})
Now we're done. We import the tags.js file, and add it to our lists of types. And we're done! We have a blog that has posts with tags to keep all our topics linked together!
Creating a New Sanity Project
So after hearing how easy and flexible the Sanity CMS is, you probably want to install it and set up your own projects, it just takes a few steps.
If you haven't already tabbed away from this article and installed Sanity for yourself, you can do that with a simple command, after setting up NodeJS just install the Sanity CLI:
npm install -g @sanity/cli
After we have the Sanity CLI installed you can create a new project using the Sanity CLI with:
sanity init
You'll answer a few questions about the project name, and it even has some premade types like a blog, a movie project, or even an e-commerce CMS to start selling products online! You can customise Sanity to be an easy, simple CMS for any project you can think of.
What are the Main Sanity CLI Commands?
The main commands you'll use (Or I used) for Sanity Studio are a few simple commands to manage everthing.
sanity start
Start the Sanity Studio and start publishing content straight away.
sanity build
Build the Sanity Studio as a minimal web-app that can be deployed anywhere as an admin interface for your project.
sanity graphql deploy
If you want to use GraphQL (Like my portfolio does) then this command will build the GraphQL backend for you to start querying. Sanity GraphQL has its standard querying format available here.
Conclusion
That's it! That's an overview of Sanity CMS and how easy it was to get set up. You could fully setup and customise a complex project within a few hours, seperate datasets for different environments, and create custom multi-level workflows for large-scale team projects.
In the next article we'll be covering Netlify and CloudFlare; hosting a website, PWA, and even a full NodeJS web server with serverless hosting.
This article is cross-posted from my personal site over here. If you enjoyed this article, learned something, or you just want to help out someone; buy me a coffee! It will be much appreciated.


Top comments (0)