
Utilizing the Vault UI make up the seventh objective in the Vault certification journey. This objective covers the following sub-objectives:
- Authenticate to Vault
- Configure authentication methods
- Configure Vault policies
- Enable Secret engines
- Access Vault secrets
When you start a Vault development server (vault server -dev) the UI is enabled by default. However, this is not the case for real Vault servers. We'll discuss this further in part nine of the series, for this part we'll stick to the development server. By default you can reach the UI on your development instance on http://127.0.0.1:8200/ui/.
Authenticate to Vault
When you first enter the Vault UI you meet the following sign-in page:

In the drop-down you select the authentication method you would like to use to sign in. Note that the values in the drop-down might show more auth methods than what have been enabled on your Vault server.
Unless you first enable a few auth methods using the CLI your only option right now is to use the root token to sign in. Copy the root token from the terminal window where you started your Vault development server and paste it into the token input field, then click Sign in:

Now you have successfully authenticated to Vault using the UI! The process is more or less the same for any of the other auth methods. You select the auth method you want to use, and you provide the required information to sign in. For some auth methods you will be re-directed to the auth methods own page and then re-directed back to Vault after successful authentication.
Configure authentication methods
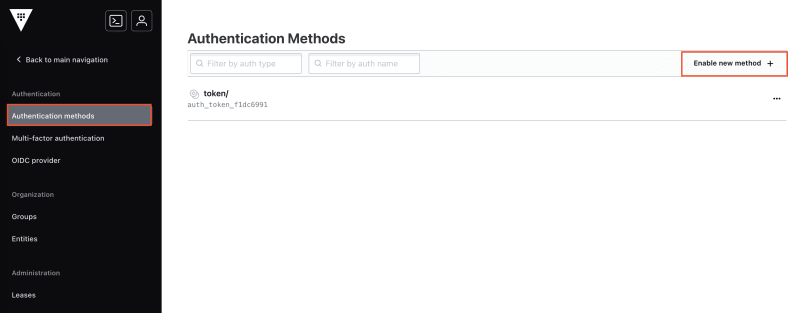
To configure a new auth method click on Access in the main menu on the left. You come to a page showing all the currently enabled auth methods. If you are using a brand new development server you will only see the token auth method in the list. To enable a new auth method click on Enable new method:
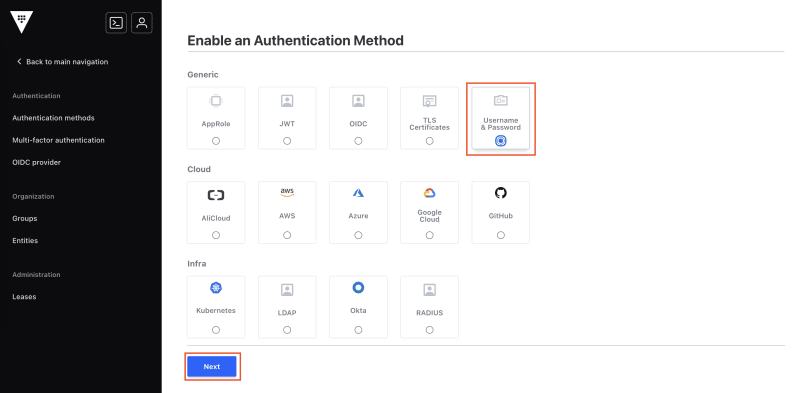
You come to a page showing all the available auth methods that you can enable. For the purpose of this post we will enable the userpass auth method. Select userpass and then click Next:
Now you have the option to specify which path the auth method should be enabled on. If you expand the Method Options section you can also do advanced configuration of the auth method, this includes things such as specifying the default lease TTL, the max TTL, and more. We'll ignore the advanced configurations for now. Accept the default path and click on Enable Method:

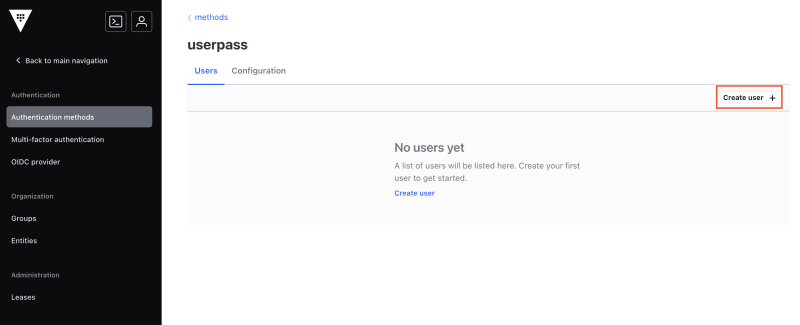
Once the method is enabled, click on Go to method. You come to a page listing all the users that are configured in the userpass auth method. Currently we have no user. To add a new user, click on Create user:
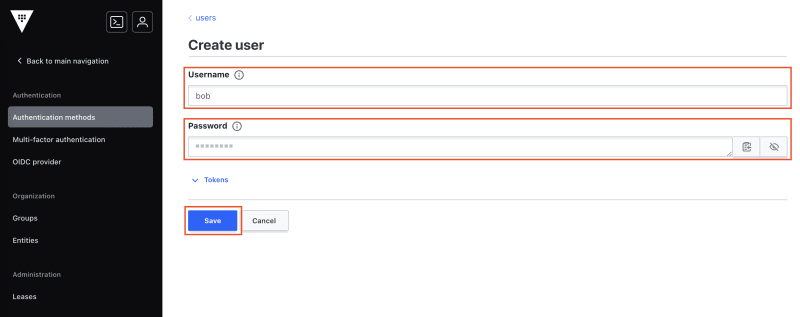
Specify a username (I specify bob) and a password. Expand the Tokens section to specify advanced settings for this user, such as which policies to attach to the tokens for this user. For now, let's ignore the advanced settings and click on Save:
You can sign out of Vault and sign back in using the userpass method and your new user to verify that it works.
Configuring other auth methods follow the same basic steps, but the configuration for each method will differ. The best approach is to read the documentation for the auth method you want to enable to know what configuration options to provide.
Configure Vault policies
To configure a new policy click on Policies in the main menu on the left. You come to a page listing all the policies on the Vault server. If you are using a brand new development server this list will only contain the default and root policies. Note that you can't view the root policy, but you can view and even edit the default policy. Click on Create ACL policy to create a new policy:

On the Create ACL policy page enter a name for your policy (I use my-policy) and enter the policy itself, then click on Create policy:

Notice that you could upload a file instead of entering the policy directly on the page.
Now the policy is available for use in the rest of the Vault UI. If you need to edit or delete a policy go back to the policy page and open the policy you want to update/delete.
Enable Secret engines
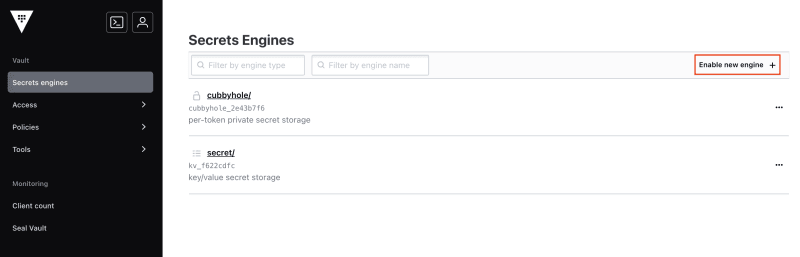
To configure a new secrets engine click on Secrets engines in the main menu on the left. You come to a page listing all the currently enabled secrets engines. My list contains two secrets engines, cubbyhole mounted on cubbyhole/ and key/value mounted on secret/. To add a new secrets engine click on Enable new engine:
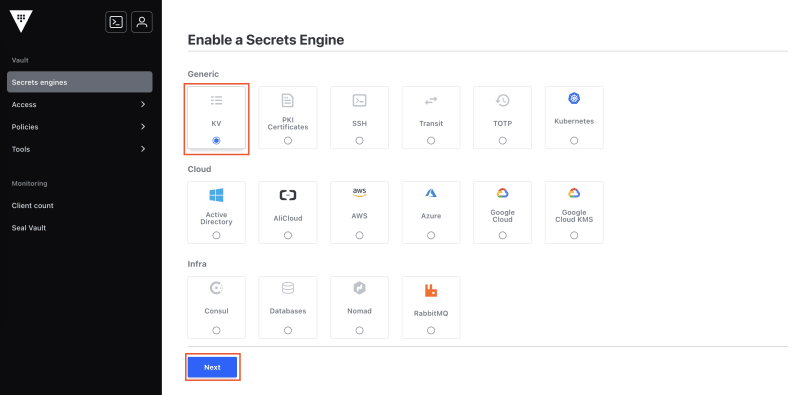
Select the secrets engine you want to enable. For this demonstration I will use the key/value secrets engine. Select the engine and then click on Next:
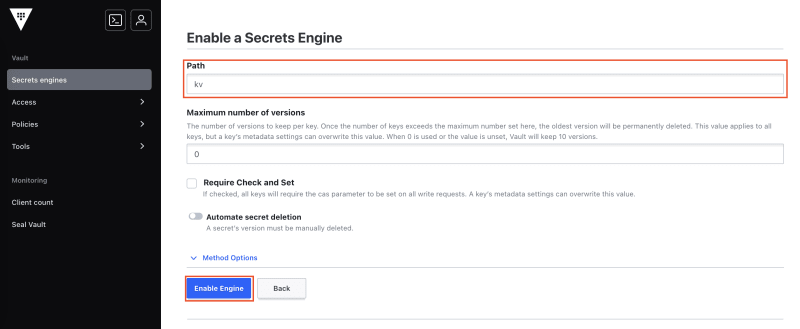
Specify the path where you want to enable the secrets engine and then click Enable engine:
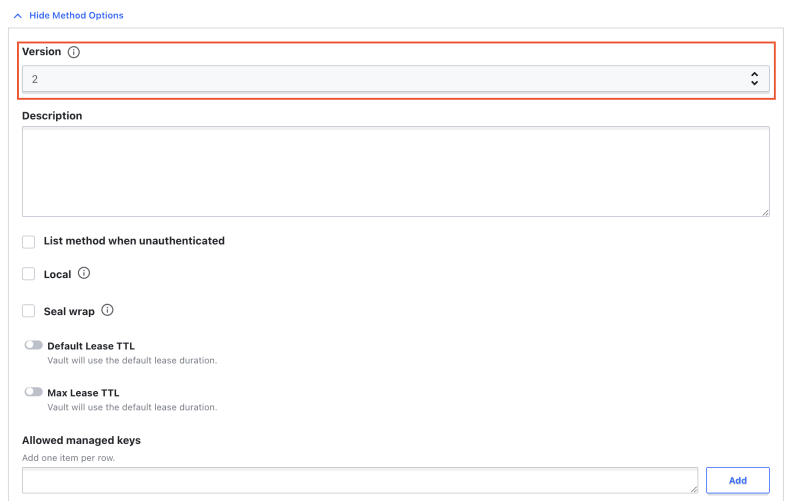
Note that you can expand the Method Options section to reveal advanced settings for the secrets engine. For the key/value secrets engine part of these advanced settings look like the following image. This is where you could specify that you want version 1 of the key/value secrets engine instead of the (default) version 2:
Adding other secrets engines will follow the same pattern, but the various settings might differ between the different secrets engines.
Access Vault secrets
Now let's continue the last section by adding secrets to our secrets engine. Go to the secrets engine page by clicking on Secrets engines in the main menu on the left, then select the kv/ secrets engine in the list. Click on Create secret to add a new secret:
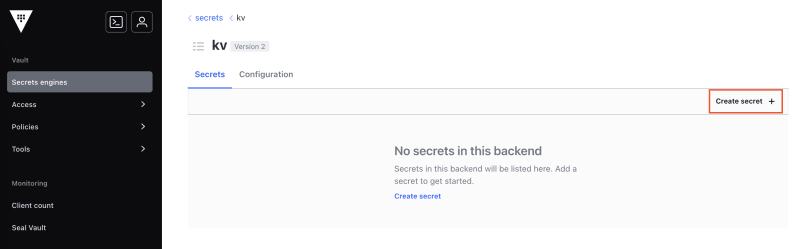
Provide a path for the secret and enter the secret data. I add my secret at the path of database/password and the secret data consists of password=<my secret password>. To create the secret click on Save:

Note that there was an option to add the secret data as JSON instead of adding them as key/value pairs in the UI.
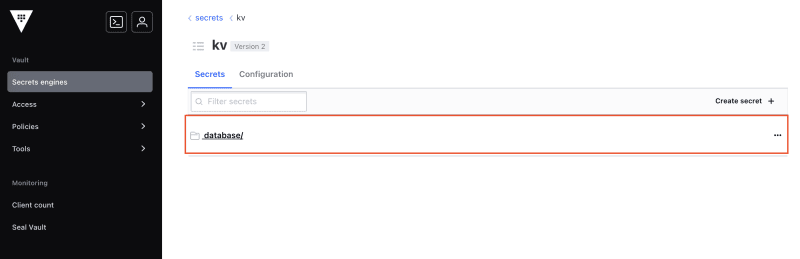
If we want to read or update our secret we can find it by going back to the secrets engine page and click on database/:
Then click on password:

Finally we arrive at the page showing the secret:
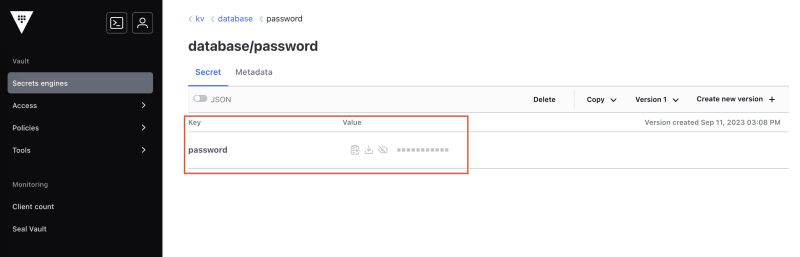
We also see that we can create a new version of the secret, we can delete it, make a copy, view different versions, and more. Also note that there is a separate tab for Metadata.
Working with secrets using the other secrets engines follows similar patterns but will vary depending on the type of secrets engine.

Top comments (0)