Welcome to the first article of an exciting series! The DevOps Series with Buddy is where I will be debunking common myths around DevOps such as:
- DevOps is only for engineers
- DevOps is difficult for beginners
- DevOps is for large and complex projects
- DevOps is not that important for a developer
By introducing you to the core concept of DevOps and how to automate it easily with the Buddy CI/CD tool, I hope this series will help you get started and be less intimidated by these words:
DevOps, CI/CD, Pipelines, Automation
What is DevOps?

Source: https://www.bccourier.com/wp-content/uploads/2020/02/DevOps-Market.jpg
DevOps is derived from Development and Operations. It is the practice of streamlining the planning, developing, delivering and operating processes to ensure quality and coordination among software developers and IT operations.
Why is it Important?
DevOps focuses on standardizing development environments and automating delivery processes to improve efficiency, maintainability and quality.
What is a CI/CD?
Development teams often implement practices of DevOps to automate and improve certain phases of development. One such practice is CI/CD, or Continuous Integration/Continuous Delivery.

Source: https://miro.medium.com/max/2800/0TH1nBsXNDB5Njynk.PNG
Continuous Integration is the practice of merging code into the main branch as frequently as possible. It involves automated testing to ensure the main branch of the code is always stable and error-free. This saves development teams plenty of time when it is time to release the code.
Continuous Delivery is the practice of automating deploy-ready code to a production environment with little to no human intervention. It speeds up the delivery process by automating deployment steps and reducing errors that may frequently show up during the deployment phase.
The CI/CD Pipeline
The synergy between CI and CD results in a fully automated and efficient pipeline that allows faster and higher quality delivery to the user.
A pipeline refers to the entire assembly line of processes, a deployable unit path that can be deployed if all unit tests are passed and error-free.
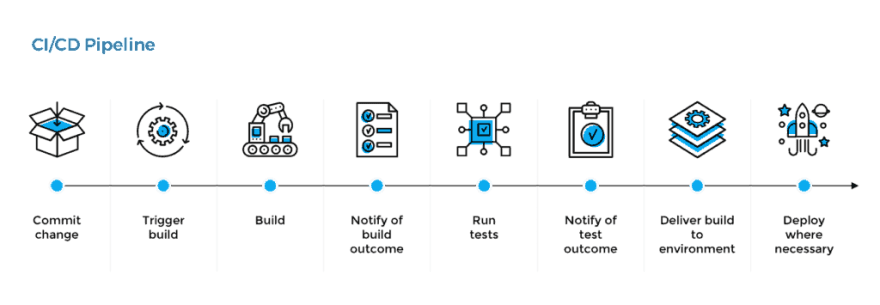
Source: https://hackernoon.com/drafts/uu14j32lz.png
Buddy CI/CD
Now that we have a good understanding for DevOps and CI/CD, let's discuss a tool we can use today to help us implement DevOps in our project and teams.
A CI/CD tool that streamlines automation and delivery with a simple and intuitive UI.
Using Docker containers, fully integrated languages and frameworks and ready-to-use actions for fast deployment, Buddy is a free-to-start commercial tool that can help implement the best practices of DevOps in the easiest way possible.
Getting Started with Buddy
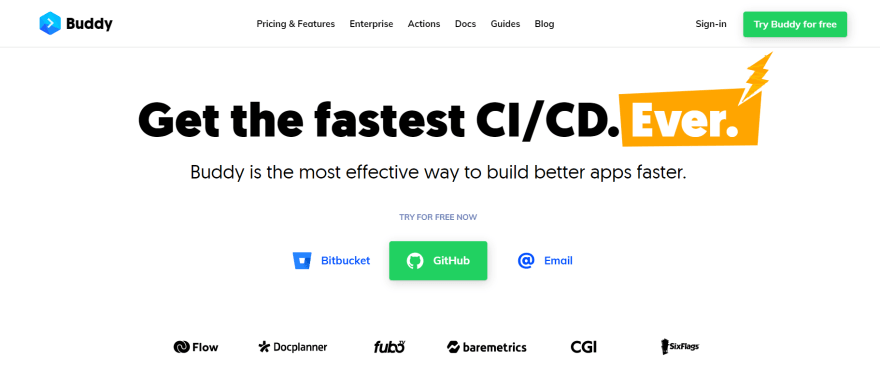
Step 1: Sign up for a free account at https://buddy.works/
You can easily sign up with your Github, Bitbucket or email.
Step 2: Import or create a new project
On your dashboard, simply click 'Add new project' and you can either create a new one or import one from your Github repository.
Step 3: Add a new pipeline
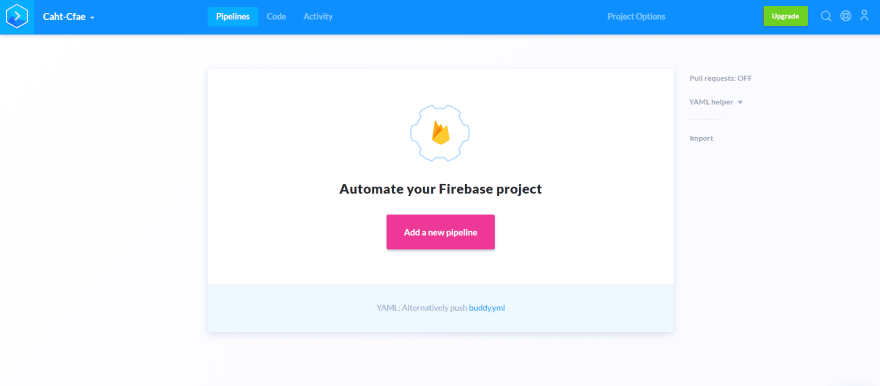
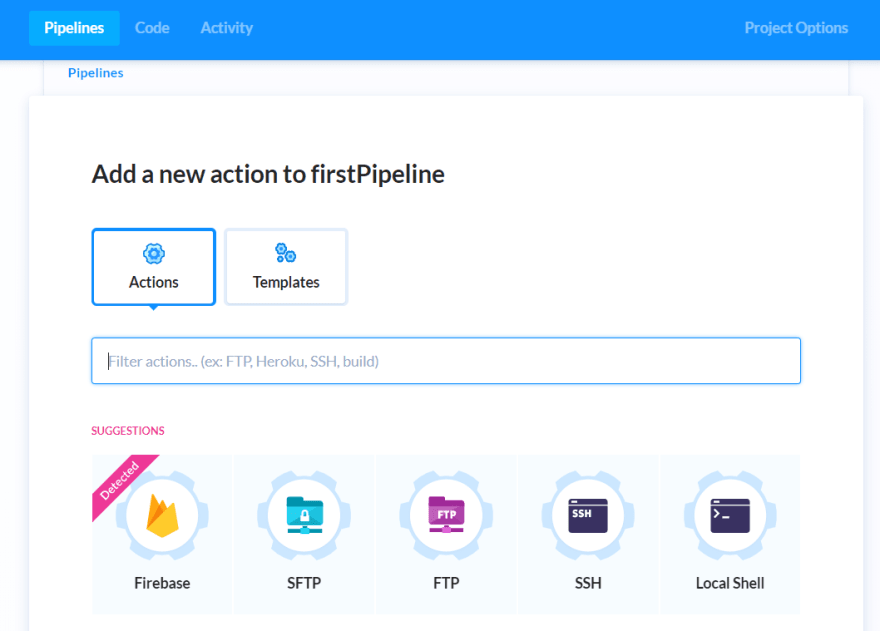
One of the great aspects of Buddy is that it can detect what frameworks or libraries in your code and recommend the types of pipelines that would be useful for your project. In my case, I imported my 'Caht Cfae' app, from my Let's Build a Firebase Chat App using Vanilla JavaScript tutorial. Buddy immediately detects that I use Firebase in this app and recommends to set up a Firebase pipeline!
With that, I can easily set up my pipeline by clicking 'Add a new pipeline' as shown in the picture above.
Step 4: Configure pipeline
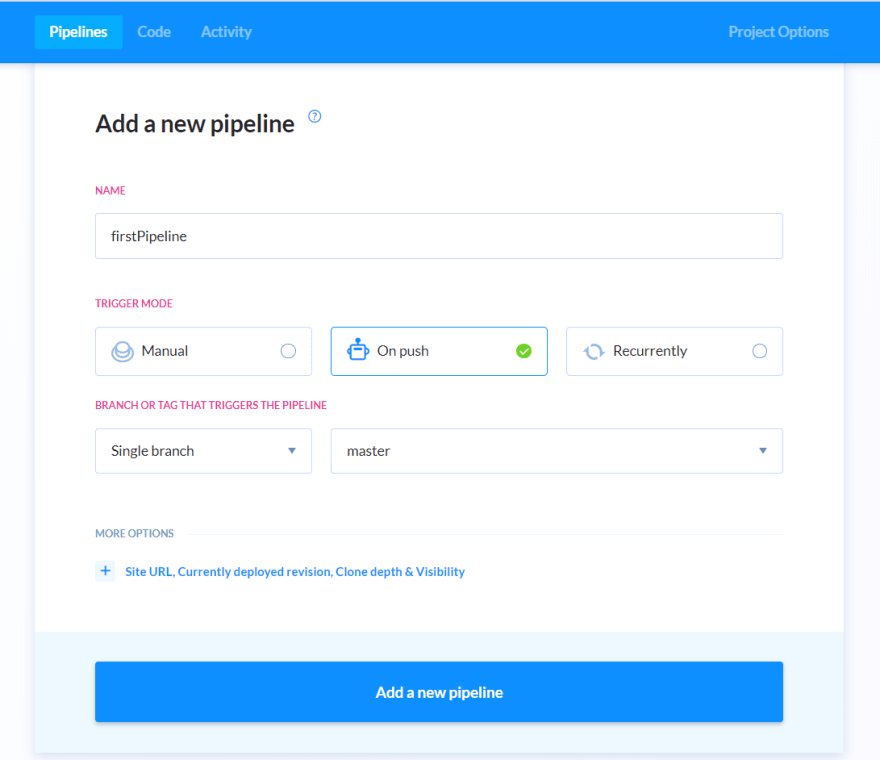
This is what I will see next. I can enter my pipeline name (i.e. firstPipeline) then select which trigger mode and the branch for Continuous Integration.
In my case, I selected the 'On Push' trigger mode and the master branch of my repository which means that the pipeline will automatically run certain actions every time I push my code to the master branch of my 'Caht Cfae' app.
The 'Manual' trigger mode allows you to run the pipeline whenever you want and the 'Recurrent' mode allows to run the pipeline at a specified interval.
It will depend on you to select which trigger mode is best and most optimal for your project's needs.
Step 5: Create a Deploy action
Once you have set up and configure the pipeline, it's time to deploy your app by simply creating a deploy action. In my case, I decided on deploy on Firebase since my app uses Firebase Authentication and Real-Time Data.
So select the Firebase action and then head over to your project's root folder to set up Firebase CLI.
npm install -g firebase-tools
Then run:
firebase login:ci
A token should be generated in your project's command line like in the image below:
Now head back to Buddy to add the token to the Firebase configuration.
'Name of Integration' can be your project's name or anything equivalent. 'Token' is where you paste the token generated from the previous step.
'Scope' can be customized or leave it as default like I do.
Next, click 'Add Integration' and you should see the following page:
Under the 'Run Commands' terminal, type in
firebase deploy --token "YOUR_TOKEN"
And click 'Save this action'. There, your Deploy action is set up and the pipeline is good to run!
Step 6: Run Pipeline
The final step is to run the pipeline. Simply click 'Run Pipeline' on the right panel.
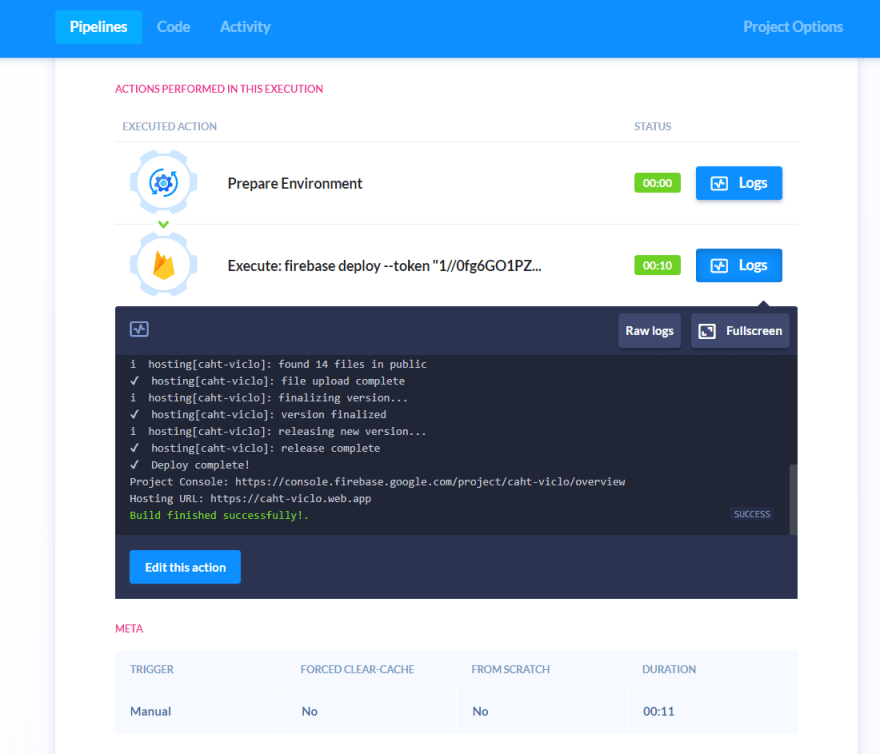
And check the results of your first CI/CD pipeline run!
As seen from the image, my build was successful and I have deployed my app to the url provided. And it all takes less than 1 minute to do so!
For additional information on Firebase CLI, check their documentation here.
For further details on Firebase Integration with Buddy, please visit here.
Next Steps
Congratulations! You have made your first pipeline and deploy action with Buddy. I hope this has been a helpful article which introduces the concept of DevOps and implementing it using the Buddy CI/CD tool.
I highly recommend getting started with this tool as it's very intuitive to use for both beginners and professionals in automating their CI/CD pipelines. For more details, visit https://buddy.works/ or read its documentation here.
Thanks for reading! Stay tuned for the next part of this series where I will explain how you can easily add more complex actions such as automated testing, managing team members and integrating team notifications for easy monitoring. Cheers!







Top comments (0)