This React Native Plant App UI clone tutorial series was inspired by the React Native Templates that provides a wide variety of mobile application templates written in React Native and powered by universal features and design. These app templates allow us to implement our own apps and even start our own startups. Some of the examples of apps that we can build using these templates are real estate properties, restaurants, bars, cars, dealerships, e-commerce products, marketplace used products, hotels, travel locations, etc.
This tutorial series replicates the coding implementations and designs from the Youtube video tutorial by React UI Kit for the Plant App UI Clone. The video tutorial delivers the coding implementation of the overall app very thoroughly. This tutorial series is the implementation of the same coding style and designs in the form of the article. Through this written article tutorial series, the learners can look into the code and implementation of different UI sections of the app more clearly. It negates one of the disadvantages of learning from a video tutorial that is having to pause the video in different sections to understand the implementation. In the written tutorial series, the learners can go through each step and take their time understanding the implementations.
Overview
In this first part of this tutorial series, we are going to set up the starter project for the upcoming tutorial parts. This first part will form the base for the overall tutorial by organizing different files and folders required in this tutorial series. Here, the idea is to start with a new React Native starter project using expo. After that, we will establish a basic project directory structure for the overall project including navigator configuration. Then, we will also set up the different theme constants and configure the App.js file to cache the assets.
So, let us begin!!
Note that, in this tutorial, we are going to use the EXPO as the React Native project development tool. So first, we are going to create a boilerplate React Native application using expo client.
Creating Starter React Native project
First and foremost, since we are going to use the expo as a development engine, we need to install it into our system. To install expo globally into our system, we need to have Node Package Manager(NPM) installed first. Then, we need to run the following command:
npm install -g expo
Now, we need to create a boilerplate react native application using expo. In order to do this, we need to run following command in the desired project directory:
expo init <project\_name> // project name==> Plant
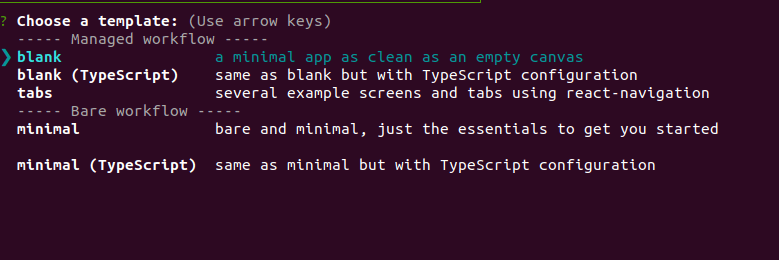
After running the above command, we will be asked to choose the template for the boilerplate app. Here, we are going to choose the blank template. The blank template provides a very minimal app template as clean as an empty canvas. The selection screenshot is provided below:
As we can see, we choose the blank template and hit enter. Then, we need to enter the project name and after that, the boilerplate react native app is configured into our directory.
Now in the App.js file, we are going to use the template from the following code snippet:
import React from 'react';
import { StyleSheet, Text, View } from 'react-native';

export default class App extends React.Component {

  render(){
    return (
      <View style={styles.container}>
        <Text>Plant App</Text>
      </View>
    );
  }

}

const styles = StyleSheet.create({
  container: {
    flex: 1,
    backgroundColor: '#fff',
    alignItems: 'center',
    justifyContent: 'center',
  },
});
Now, we need to enter the project directory and then run the command:
expo start
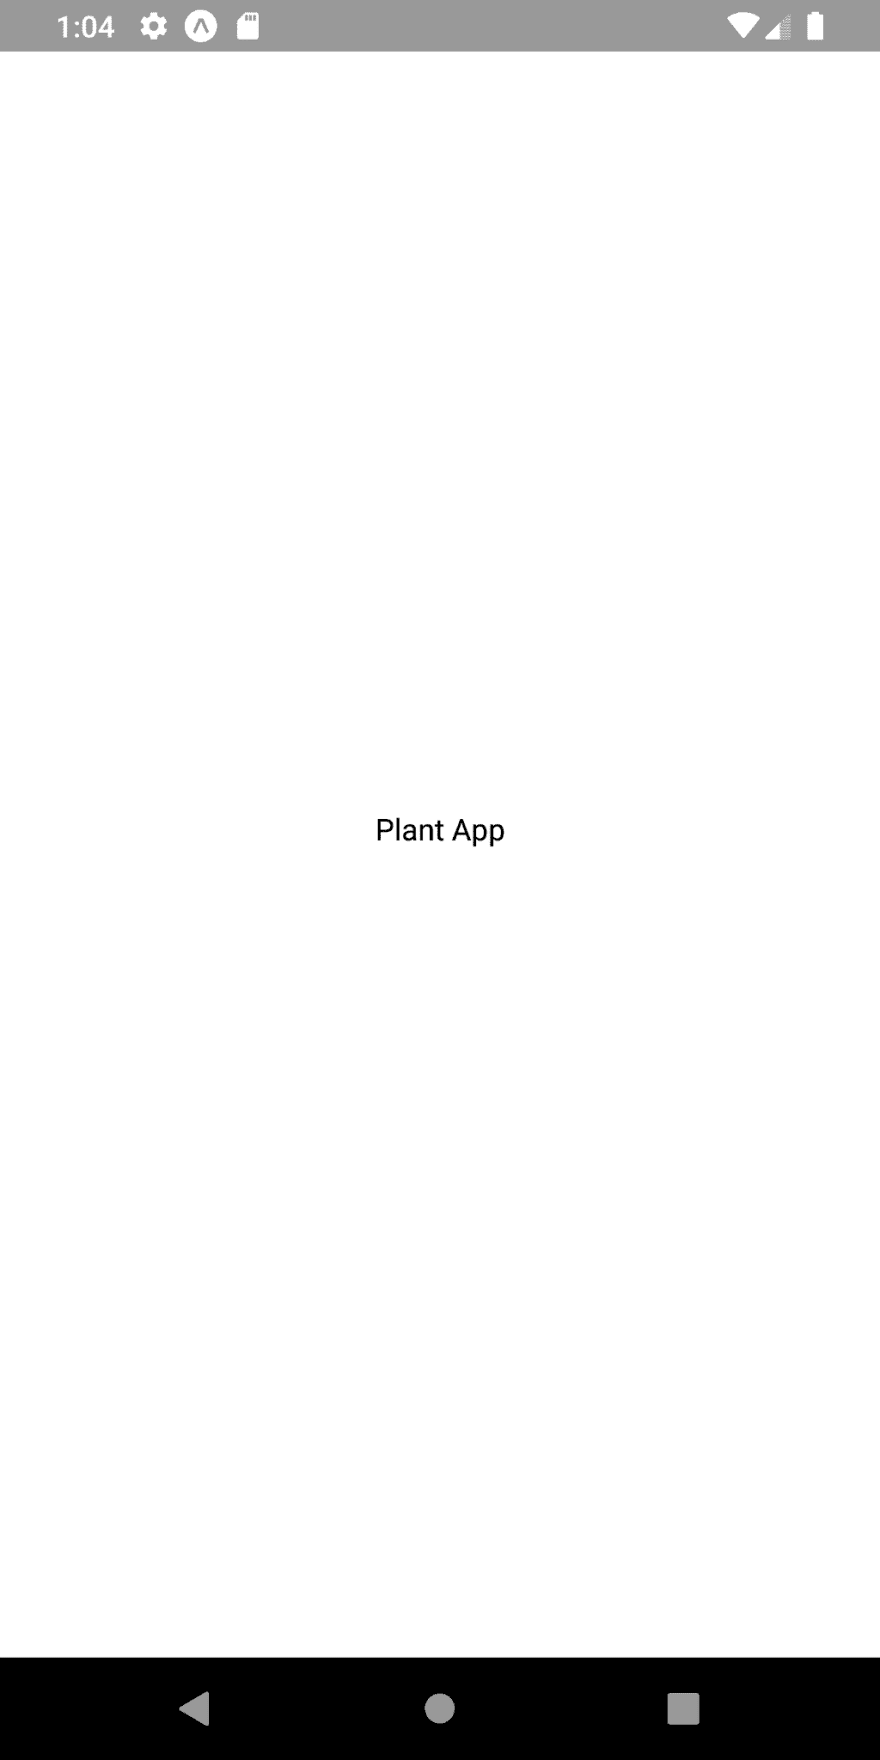
Then, we will get the following boilerplate app in our emulator screen:
As we can see, we have got the starter template running in the emulator. The screen is not configured with too many styles and layout designs. Just a simple white screen with text in the middle.
Configuring project files and folders
Now, in the project folder, we need to create four new directories named ‘screens’, ‘navigation’, ‘components’, and ‘constants’. For the ‘./screens/’ directory, we need to create eight JavaScript files. In the ‘/navigation/’ directory, we need to create a JavaScript file called ‘index.js’ which will hold our navigator configurations. In the ‘./constants/’ folder, we are going to keep the default constants that we are going to use in this app. The overall project folder structure is provided in the screenshot below:
Here, we need to set up all the files in the required folders as shown in the screenshot above.
Component files
Now, we also need to add ten component files in the ‘./components/’ folder as shown in the screenshot below:
Here, we have just created the files for the components that we are going to use in this tutorial series. We are going to implement these components in our next tutorial.
But, we can see that we have ‘index.js’ file in the ‘./components/’ folder. In this index.js file, we are going to import all the components and return them as a whole. The configuration in the index.js file is provided in the code snippet below:
import Block from "./Block";
import Badge from "./Badge";
import Button from "./Button";
import Card from "./Card";
import Input from "./Input";
import Text from "./Text";
import Progress from "./Progress";
import Divider from "./Divider";
import Switch from "./Switch";

export { Block, Badge, Button, Card, Input, Text, Progress, Divider, Switch };
Setting up React Navigation
Here, we are going to set up our navigation configurations so that we will be able to navigate from screen to screen in our app. For that, we need to install the react-navigation package along with its supporting dependent packages as shown in the code snippet below:
>>>expo install react-navigation
>>>expo install react-native-gesture-handler
>>>expo install react-navigation-stack
Now, that we have installed the required packages, we can now set up our navigator in the index.js file of ‘./navigation’ folder. In index.js file, we will set up a stack navigator with all the screen as shown in the code snippet below:
import { Image } from 'react-native';
import { createAppContainer } from 'react-navigation';
import { createStackNavigator } from 'react-navigation-stack';

import Welcome from '../screens/Welcome';
import Login from '../screens/Login';
import SignUp from '../screens/SignUp';
import Forgot from '../screens/Forgot';
import Explore from '../screens/Explore';
import Browse from '../screens/Browse';
import Product from '../screens/Product';
import Settings from '../screens/Settings';

const screens = createStackNavigator({
  Welcome,
  Login,
  SignUp,
  Forgot,
  Explore,
  Browse,
  Product,
  Settings,
}, {
  defaultNavigationOptions: {
    headerStyle: {},
    headerBackImage: <Image/>,
    headerBackTitle: null,
    headerLeftContainerStyle: {},
    headerRightContainerStyle: {},
  }
});

export default createAppContainer(screens);
Here, we have imported the createStackNavigator function from the react-navigation-stack package. This createStackNavigator function enables us to stack our screens in other to configure an app container with screens to navigate. Then, we have also imported the screens from the './screens/' directory. Then, all the screens are included in the createStackNavigator function as the 1st parameter. In the 2nd parameter, we have configured the defaultNavigationOptions. The navigation options configured to this defaultNavigationOptions object are applied by default to all the screens. Here, in the defaultNavigationOptions object we have initialized different options for the header which are not configured yet.
Lastly, we have made use of the createAppContainer function from the react-navigation package. In this function, we have passed the screens navigator constant that we have defined as a stack navigator. This function will create a container for our app binding all the screens stacked together.
Download Necessary Assets
Here, we need to download the necessary assets which include images and icons for our project. The icons and images are kept in separate folders inside the assets folder. The idea is to download the assets folder and then copy the images and icons folder to the ‘./assets/’ folder of our project.
The link to download the required assets is provided here.
Configuring the constants
Now, we are going to configure our constants in the ‘./constants/’ folder. In the constants folder, we have three files which are mock.js, theme.js and index.js. The mock.js will contain the mock data that is required in the different UI sections of the app. So, if we require the use of any mock data for any screens, we are just going to import it from the mock.js file and use it in the screen UI. The theme.js file will contain the default style properties that we are going to use throughout this app.
The required mock data to be added to mock.js file are provided in the code snippet below:
const categories = [
    {
      id: 'plants',
      name: 'Plants',
      tags: ['products', 'inspirations'],
      count: 147,
      image: require('../assets/icons/plants.png')
    },
    {
      id: 'seeds',
      name: 'Seeds',
      tags: ['products', 'shop'],
      count: 16,
      image: require('../assets/icons/seeds.png')
    },
    {
      id: 'flowers',
      name: 'Flowers',
      tags: ['products', 'inspirations'],
      count: 68,
      image: require('../assets/icons/flowers.png')
    },
    {
      id: 'sprayers',
      name: 'Sprayers',
      tags: ['products', 'shop'],
      count: 17,
      image: require('../assets/icons/sprayers.png')
    },
    {
      id: 'pots',
      name: 'Pots',
      tags: ['products', 'shop'],
      count: 47,
      image: require('../assets/icons/pots.png')
    },
    {
      id: 'fertilizers',
      name: 'fertilizers',
      tags: ['products', 'shop'],
      count: 47,
      image: require('../assets/icons/fertilizers.png')
    },
  ];

  const products = [
    {
      id: 1,
      name: '16 Best Plants That Thrive In Your Bedroom',
      description: 'Bedrooms deserve to be decorated with lush greenery just like every other room in the house – but it can be tricky to find a plant that thrives here. Low light, high humidity and warm temperatures mean only certain houseplants will flourish.',
      tags: ['Interior', '27 m²', 'Ideas'],
      images: [
        require('../assets/images/plants\_1.png'),
        require('../assets/images/plants\_2.png'),
        require('../assets/images/plants\_3.png'),
        // showing only 3 images, show +6 for the rest
        require('../assets/images/plants\_1.png'),
        require('../assets/images/plants\_2.png'),
        require('../assets/images/plants\_3.png'),
        require('../assets/images/plants\_1.png'),
        require('../assets/images/plants\_2.png'),
        require('../assets/images/plants\_3.png'),
      ]
    }
  ];

  const explore = [
    // images
    require('../assets/images/explore\_1.png'),
    require('../assets/images/explore\_2.png'),
    require('../assets/images/explore\_3.png'),
    require('../assets/images/explore\_4.png'),
    require('../assets/images/explore\_5.png'),
    require('../assets/images/explore\_6.png'),
  ];

  const profile = {
    username: 'Kriss',
    location: 'Asia',
    email: 'kriss@kriss.com',
    avatar: require('../assets/images/avatar.png'),
    budget: 5000,
    monthly\_cap: 7000,
    notifications: true,
    newsletter: false,
  };

  export {
    categories,
    explore,
    products,
    profile,
  }
Here, we have got the mock data for each screen which includes profile, explore, products and categories.
Now, the required default style configurations to be added in the theme.js file are provided in the code snippet below:
const colors = {
  accent: "#F3534A",
  primary: "#0AC4BA",
  secondary: "#2BDA8E",
  tertiary: "#FFE358",
  black: "#323643",
  white: "#FFFFFF",
  gray: "#9DA3B4",
  gray2: "#C5CCD6",
};

const sizes = {
  // global sizes
  base: 16,
  font: 14,
  radius: 6,
  padding: 25,

  // font sizes
  h1: 26,
  h2: 20,
  h3: 18,
  title: 18,
  header: 16,
  body: 14,
  caption: 12,
};

const fonts = {
  h1: {
    fontSize: sizes.h1
  },
  h2: {
    fontSize: sizes.h2
  },
  h3: {
    fontSize: sizes.h3
  },
  header: {
    fontSize: sizes.header
  },
  title: {
    fontSize: sizes.title
  },
  body: {
    fontSize: sizes.body
  },
  caption: {
    fontSize: sizes.caption
  },
};

export { colors, sizes, fonts };
Here, we have predefined the color, size and font style properties that we are going to use in this project.
Now, we are going to export the constants from both mock.js and theme.js file through index.js file of the ‘./constants’ folder. For that, we need to import the mock.js and theme.js files into the index.js file and export theme as shown in the code snippet below:
import \* as theme from './theme';
import \* as mocks from './mocks';

export {
  theme,
  mocks,
};
Here we have exported all the exports from both theme.js and mock.js file through a single file i.e. index.js. Now, we can simply import the index.js file into our screens and components to use the theme and mock data.
Configuring App.js
Here, we are going to configure the App.js file so that we can cache our assets. Since we have too many images and icons files in this project, caching these files would make the app run faster. For that, we need to install a new package called expo-asset. This package provides an Expo universal module to download assets and pass them into other APIs. In order to install this package, we need to run the following command:
>>>expo install expo-asset
Now, we need to import this package along with some other package in the App.js file as shown in the code snippet below:
import { AppLoading } from 'expo';
import { Asset } from 'expo-asset';

import Navigation from './navigation/index';
Here, we have imported the expo-asset package as Asset module. We have also imported AppLoading which tells Expo to keep the app loading screen open if it is the first and only component rendered in your app. And, we have also imported the index.js file of './navigation/' folder as Navigation. This Navigation component holds the app container that we created in the index.js file.
Now, we need to import all the images that are required in this project so that we can cache them:
// import all used images
const images = [
  require('./assets/icons/back.png'),
  require('./assets/icons/plants.png'),
  require('./assets/icons/seeds.png'),
  require('./assets/icons/flowers.png'),
  require('./assets/icons/sprayers.png'),
  require('./assets/icons/pots.png'),
  require('./assets/icons/fertilizers.png'),
  require('./assets/images/plants\_1.png'),
  require('./assets/images/plants\_2.png'),
  require('./assets/images/plants\_3.png'),
  require('./assets/images/explore\_1.png'),
  require('./assets/images/explore\_2.png'),
  require('./assets/images/explore\_3.png'),
  require('./assets/images/explore\_4.png'),
  require('./assets/images/explore\_5.png'),
  require('./assets/images/explore\_6.png'),
  require('./assets/images/illustration\_1.png'),
  require('./assets/images/illustration\_2.png'),
  require('./assets/images/illustration\_3.png'),
  require('./assets/images/avatar.png'),
];
Here, we have imported all the images from the assets folder and stored them in images constant as an array.
Handling the Caching of Images
Here, we are going to configure a function called handleResourcesAsync(). In this function, we are going to configure the code necessary for caching the images. The overall coding implementation of this function is provided in the code snippet below:
handleResourcesAsync = async () => {
    // we're caching all the images
    // for better performance on the app

    const cacheImages = images.map(image => {
      return Asset.fromModule(image).downloadAsync();
    });

    return Promise.all(cacheImages);
  }
Here, we have defined a constant called cacheImages which is initialized to the map() array function of images constant. This map() array function iterates through each item in the images array and then returns each image synced to cache download. Lastly, this function returns the cacheImages constant as a Promise.
Now, the overall configuration of the App.js file is provided in the code snippet below:
export default class App extends React.Component {
  state = {
    isLoadingComplete: false,
  }

  handleResourcesAsync = async () => {
    // we're caching all the images
    // for better performance on the app

    const cacheImages = images.map(image => {
      return Asset.fromModule(image).downloadAsync();
    });

    return Promise.all(cacheImages);
  }

  render() {
    if (!this.state.isLoadingComplete && !this.props.skipLoadingScreen) {
      return (
        <AppLoading
          startAsync={this.handleResourcesAsync}
          onError={error => console.warn(error)}
          onFinish={() => this.setState({ isLoadingComplete: true })}
        />
      )
    }

    return (
        <Navigation />
    );
  }
}

const styles = StyleSheet.create({
});
Here, in the render() function, we have returned the AppLoading component on the basis of isLoadingComplete state. The isLoadingComplete state is defined to handle the loading state of the app. If this state is false then AppLoading component is returned else the Navigation component is returned.
Implementing a Simple Welcome Screen
In this last step, we are going to implement a simple template in the Welcome.js screen in order to show that our app runs perfectly in the emulator with all the configurations.
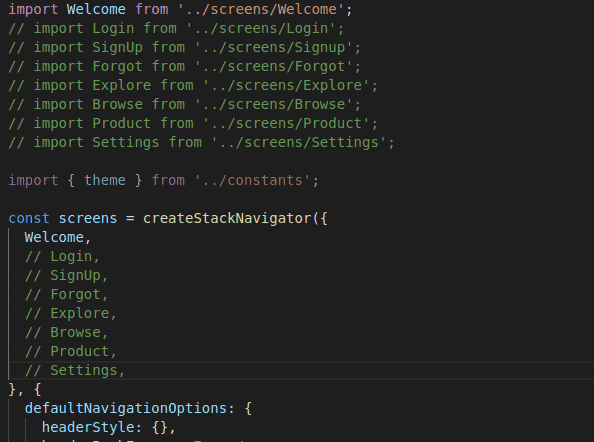
Since we have just created the files in the screen folders and have not implemented any templates to them, the app may throw the error. Here, we are just going to create a template for Welcome.js screen, so we need to comment out all the other imports in the index.js file of our ‘./navigation/’ folder as shown in the screenshot below:
Now, our navigator has only a Welcome screen.
Templating Welcome screen
Here, we are going to add the React Native template to the Welcome.js file. The overall coding implementation of the Welcome screen is provided in the code snippet below:
import React from 'react';
import { StyleSheet, Text, View } from 'react-native';

export default class Welcome extends React.Component {

  render(){
    return (
      <View style={styles.container}>
        <Text>Welcome</Text>
      </View>
    );
  }

}

const styles = StyleSheet.create({
  container: {
    flex: 1,
    backgroundColor: '#fff',
    alignItems: 'center',
    justifyContent: 'center',
  },
});
Hence, we will get the following result in our emulator screen:
Hence, we have got the Welcome screen on our emulator screen. With this, we have come to the end of this part of our tutorial.
Finally, we have successfully set up and configured all the files and folders necessary for the implementation of the React Native Plant App UI clone.
Conclusion
This is the first part of our tutorial series to clone the React Native Plant App UI. In this part of the tutorial, we first learned how to set up a stater react native app project by using expo. Then, we learned how to configure different directories and files in order to form the base of our overall project. After that, we got step by step guide on how to set up the navigator for our app screens.
We also set up default constants in our ‘/constants’ folder which we will use in our screens and components in upcoming tutorials. Then, we configured the App.js in order to cache the image assets and also display the app loading state and app Welcome screen. Lastly, we implemented a simple template for the Welcome screen and run the app in an Android emulator to show that the app runs fine with all the configurations.
Well, this tutorial just paves the foundation for upcoming tutorials. In the next part, we are going to set the predefined components by implementing all the components in the ‘./components’ folder.
So, Stay Tuned folks!!!
Originally published at [_Kriss](https://kriss.io/react-native-plant-app-ui-1-getting-started/)._


Top comments (0)