Intro
How to make React a stateless view with Storybook?
In the previous articles, we arrived at the conclusion that in order for code to not become legacy we would need to separate our view from business logic in a different way than Redux and Elm are doing it as both approaches not allowing to disentangle view from the business logic completely.
Let’s see how this could be achieved.
React view as a pure function of state
React has changed how we approach UI — its philosophy is based on the simple yet powerful concepts of using components as well as unidirectional data flow.
It is also believed that React introduced reactivity into UI, but this is not the case as MVVM patterns, as well as frameworks, that rely heavily on reactivity were introduced long before React.
Not only are these concepts very natural ways of thinking about UIs, but they also bring design and development onto the same page.
Elm relies on similar concepts and uses pure composable view functions (stateless components).
However, React falls short as soon as it introduces statefulness and inverse data flow to the picture thus opening the door for high coupling between business logic and presentation logic.
Redux, despite being designed to mimic Elm in part, still tightly couples with the view via the concept of containers.
To make React take full advantage of patterns that Elm follows, we would need to remove inverse data flow from it as well as enforce top-down data flow (as opposed to Redux container components).
I will try to demonstrate that this approach allows for what we’re looking for — decoupled view and less boilerplate.
Regarding concerns of prop-drilling, props are not going to be drilled in a traditional sense, but just like we describe a view as a declarative tree, the props would just match that pattern.
Building a static version of the application using Storybook
To remove the inverse data flow and to enforce top-down data flow, we would need to compose our state using props without any callback functions following the first two steps of the React documentation (https://react.dev/learn/thinking-in-react#start-with-the-mockup).
Here is an example of static version of the app we want to build in storybook.

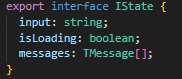
The props for the entire view are easily composable as a structure that matches exactly the component structure and is statically typed.
This way allows us to easily generate various substates that we would need to check various states of the UI.
Thus helping us to quickly gauge the correctness of our UI using Storybook.
One thing to note, however, is that now as our UI is closely matching Figma designs, it seems a bit tedious to convert the designs to components, and this ideally should be automated.
This is one of the reasons why UI development is so hard — there is a lot of labor that goes into making a high-fidelity transfer of designs to code.
At one of my previous jobs a manager asked why, despite the fact that all we do day and night is making UIs, it still takes us so very long to make a page with React and other fancy tooling we are using.
It really got me thinking, as I myself didn’t quite understand why that was the case, but now, as I look back, I see that aside from quick feedback and design pattern, the transfer of designs to code is also a big part of the problem.
We would return to this point in a future article.
Event Wrapper
We made our static view and it works as a pure function from state.
However, to make this UI interactive, similar to Elm’s MVU, we still need to produce some actions, however, we need to be mindful to not tightly-couple to business logic as we do this.
An approach that we could follow is to introduce declarative wrappers that take metadata: ids and event information and send it to an observable subject, that we could then subscribe to as needed. We shouldn’t however send any data about what action we want to perform as it would tightly couple us to the business logic. (This is often done both in Elm and Redux)
It is important to note that the point of having this wrapper is that it could be added declaratively (ideally without even touching the code and instead relying on code generation tooling to generate code from designs, which we will return in future articles).
As an example, this is what such a declarative pattern might look like.
Note that this is just a demonstration of the concept. To be fully usable, it will need to be optimized for a variety of use cases.
export const EventWrapper: React.FC<
  React.PropsWithChildren<{
    id: { controlId: string; uniqueId?: string };
  }>
> = (props) => {
  const { children, id } = props;
  const childrenWithProps = React.Children.map<
    React.ReactNode,
    React.ReactNode
  >(children, (child) => {
    if (React.isValidElement(child)) {
      return React.cloneElement(child, {
        id: [Object(id).values].join("-"),
        onClick: (e: React.MouseEvent) => {
          e.preventDefault();
          EventSubject.next({ type: "click", id });
        },
        onChange: (e: React.ChangeEvent<HTMLInputElement>) => {
          e.preventDefault();
          EventSubject.next({ type: "change", id, payload: e?.target?.value });
        },
        onKeyDown: (e: React.KeyboardEvent<HTMLInputElement>) => {
          if (e.key === "Enter") {
            e.preventDefault();
            EventSubject.next({ type: "enter", id, payload: e?.target?.value });
          }
        },
        // NOTE: This should be extensible for various handlers
      });
    }
    return child;
  });
  return <>{childrenWithProps}</>;
};
Now we can wrap our interactive components with this wrapper like so:
<EventWrapper id={{ id: "input" }}>
    <input disabled={disabled} className="input" value={input} />
</EventWrapper>
It would probably make more sense to declaratively select what handlers we would need like so:
    <EventWrapper id={{ id: "input" }} handlers={["onClick", "onChange", "onFocus"]}>
      <input disabled={disabled} className="input" value={input} />
    </EventWrapper>
Or if cloning the children subtree is too much for us, it might make sense to use it more imperatively, although this should still be easy to generate such code with code generation tooling.
    <input
      disabled={disabled}
      className="input"
      value={input}
      onClick={EventWrapper.onClick(IdObject)}
      onChange={onClick={EventWrapper.onChange(IdObject)}}
    />
Here EventWrapper methods return handlers that pass the necessary information to the subject and work exactly like the initial wrapper does.
Note that for list elements we would need to provide extra metadata about them to be able to differentiate between them. A ‘controlId’ helps us identify which control element is being referred to, while a ‘uniqueId’ allows us to distinguish between various elements in a list.
    <ul>
      {items.map(({ name, id }) => {
        return (
          <EventWrapper id={{ controlId: id.controlId, uniqueId: id.uniqueId }}>
            <li>{name}</li>
          </EventWrapper>
        )
      })}
    </ul>
Side-notes
It is still possible to use Storybook for gauging quick feedback about how correct the application functions even when the view layer is not completely decoupled from logic.
However, because of this coupling, there will be a need for mocking and it can become very complicated, or it might cause you to rely on the actual communication with the integrated parts of the application.
It might work for a while, but over time will become complex to manage, unreliable, and potentially unusable.
Keeping the view layer pure, will allow us to reliably check the view layer in necessary states, be able to reason about it, and rely on automation.
Conclusion
In this article, we considered a practical example of how to make the view layer completely disjoint from the rest of the application and used Storybook to be able to check quickly the various states this view can be in.
The ability to separate the view layer completely and make a pure function offers many advantages.
Among the advantages that we will consider in future articles is the ability to automate the conversion of designs to code, where the view layer no longer has to be tied to a particular technology.
Also, now that we made our stateless view produce actions, we can finally connect in the unidirectional data-flow loop to make it interactive.
We will explore the rest of the MVU pattern in the next article.
Part 5 — MVU architecture in a React application: Example of how to make a completely stateless view interactive
Useful links
Thinking in React: This is a guide provided by the official React documentation that walks you through the mindset you need to effectively use React in your projects.
Storybook Documentation: Storybook is a powerful tool for UI development, and this documentation will get you up to speed on using it.
Elm Architecture: This link explains the architecture of Elm apps, which heavily inspired the creation of Redux.
React Components and Props: This page in the official React documentation explains how to use components and props in React.
Understanding React’s Unidirectional Data Flow: This article gives a detailed understanding of the unidirectional data flow in React.
React Container Components: This article discusses the concept of container components in React and Redux.
React Observable Subject: This guide explains how to use observable subjects in React.
Figma Design Tool: Figma is a web-based UI design and prototyping tool. The link leads to the official website where you can learn more about the tool.
Example of a Static Version of an App: This is an example of a static version of an app built with Storybook.

Top comments (3)
Hey Kirill! I'm one of the maintainers at Storybook. Just wanted to say we love this article. Thank you for sharing Storybook with the dev community!
P.s. regarding transferring code and designs – this is something we're really interested in. We'd love to hear your thoughts on how Storybook fits into that process, if you're interested in writing about it!
Hi Joe, thanks for such positive feedback!
Regarding the code transfer from designs and how Storybook is helpful in this regard, I definitely intend on writing more about it. Automation of this process seems to be a bit of uncharted territory, so I will make sure to share my discoveries as they come
Hey Kirill! I'm so sorry for my slow reply, hadn't been on dev.to in a hot minute. That's really exciting to hear. If you do write more about it, please let me know -- would love to see and share it with the community!