
I have been learning web development for a year and I have just delivered my very first MVP for a client, this is a huge step forward in my journey to become a real world developer.
In this article, I will write about the building process and design thinking in general. This is not a tutorial by any means, I will simply share my experience with anyone interested.
Table of contents
- Project Introduction
- Tech Stack
- Wireframe & Design
- Data modeling
- Project Organization
- Sprint 01: Frontend
- Sprint 02: Backend
- Sprint 03: Implementing features
- Sprint 04: Fix & Deploy
- Conclusion
Project Introduction 👋
Let me introduce the project first. We have to build an MVP for a mobile app that works on both Android and IOS. This app's name is Allergio and aims to make people with food allergies' life easier.
Thanks to Allergio, you can create a profile for your relatives, register their allergies and share their profiles with your contacts.
The core feature is the scanner. Open up your phone's front camera, point it towards any food product and a list of the potential allergens will be displayed.
In order to complete this mission, I teamed up with my friend Walid. He is a talented growing JavaScript developer, and it is a pleasure to share this experience with him.
Tech Stack ⚛️
To build this app, we decided to rely on the very popular MERN stack which includes:
➡️ MongoDB
➡️ Express
➡️ React Native
➡️ Node
Although these are technologies I am familiar with, I never worked with React Native and I don't know much about Mobile development concepts.
We are considering AWS and Heroku to host the Backend part and for file management but I will provide more details in the Fix & Deploy section.
It already sounds like a great and exciting challenge 🤩
Here is a list of tools I usually work with to enhance my programming experience:
➡️ OS: MacOS
➡️ Terminal: iterm2
➡️ IDE:VSCode
➡️ Versioning: Git
➡️ Package Manager: NPM
➡️ iOS Emulator: Xcode
➡️ Andorid Emulator: Android studio
➡️ Communication: Slack
➡️ Project Organization: Trello
Wireframe & Design 🎨
Our client Xavier provided simple wireframes and we reworked them a little to make it look "modern" and improve UI/UX.
We mainly worked with Figma which is a great tool that I 100% recommend. Let me show you a few examples.
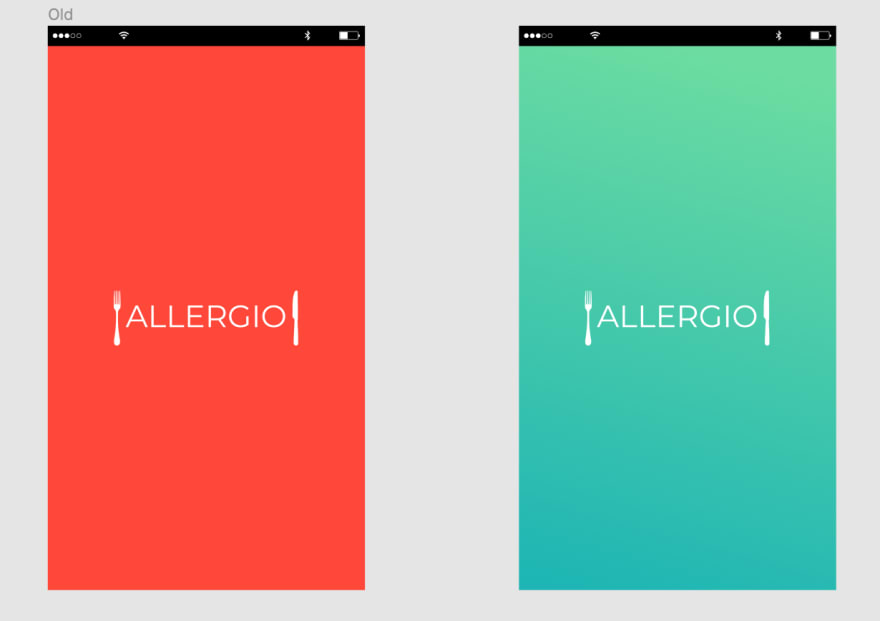
Splash Screen:
Login Screen:
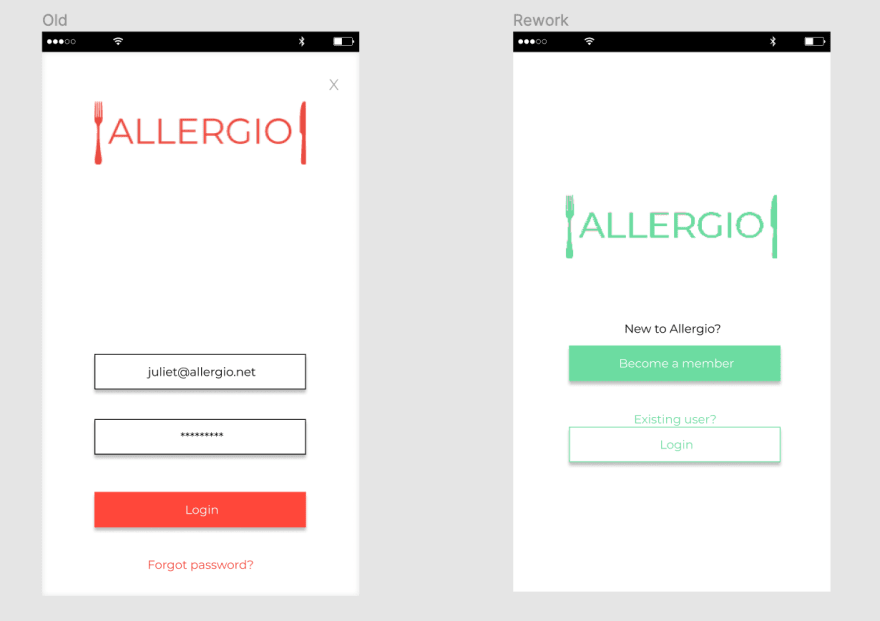
Of course, we redesigned the app following 2020's mobile development conventions, and we took inspiration from famous applications such as Yuka, Shazam, Spotify, ...
Data modeling 💾
Since we are building a Full-Stack application, we must store and manage data. It would be crazy to jump into the coding process without a clear and well-designed action plan.
What kind of data are we playing with:
Users 👤
{
  email: { type: String, required: true, unique: true },
  password: { type: String, required: true },
  name: { type: String, required: true },
  lastName: { type: String, required: true },
  image: { type: String },
  profiles: [{ type: mongoose.Types.ObjectId, ref: 'Profile' }],
  allergens: [{ type: mongoose.Types.ObjectId, ref: 'Allergen' }],
  contacts: [{ type: mongoose.Types.ObjectId, ref: 'User' }],
}
Profiles 👨👩👧👦 (Created by the user for his relatives)
{
  name: { type: String, required: true },
  image: { type: String, required: true },
  allergens: [{ type: mongoose.Types.ObjectId, ref: 'Allergen' }],
  readers: [{ type: mongoose.Types.ObjectId, ref: 'User' }],
  owner: { type: mongoose.Types.ObjectId, ref: 'User', required: true }
}
➡️ Allergens 🥜
{
  name: { type: String, required: true },
  image: { type: String, required: true },
  description: { type: String, required: true },
  reaction: { type: String, required: true }
}
PS: Unique IDs are provided by MongoDB by default.
Awesome, we now know what our data looks like but this is not enough. To make our app able to create, read, delete and update data, we must give it the chance to communicate with our server.
You might already know it, Express makes it really easy to build Rest API and that is exactly what we are about to do!
If you are not familiar with API architecture, I recommend you skip this section.
API routes:
Users 👤 ⏩ /api/users/
➡️ (GET /:uid ) Get user by ID.
➡️ (POST /signup ) Create user account.
➡️ (POST /login ) Log user in.
➡️ (PUT / ) Edit user information.
Profiles 👨👩👧👦 ⏩ /api/profiles/
➡️ (GET /:uid/all ) Get all profiles of user.
➡️ (GET /:pid ) Get profile by ID.
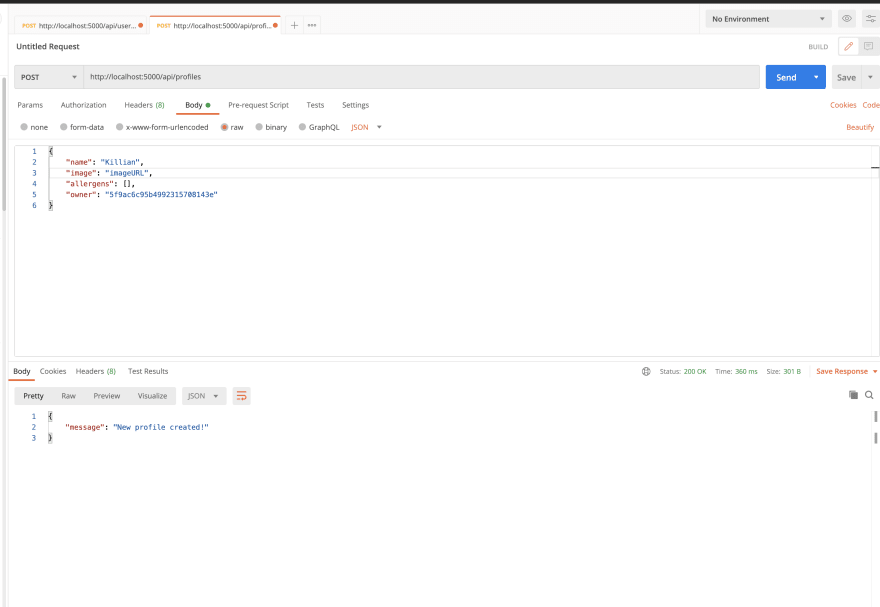
➡️ (POST / ) Create a new profile.
➡️ (PUT /:pid ) Edit profile information.
Contacts 👥 ⏩ /api/contacts/
➡️ (GET /:uid ) Get user's contacts.
➡️ (POST /search ) Search new contacts.
➡️ (POST /share ) Share profiles with contact.
➡️ (POST / ) Add a contact.
➡️ (DELETE / ) Delete a contact.
➡️ (POST /unshare ) Unshare profiles with contact.
Allergens 🥜 ⏩ /api/allergens/
➡️ (GET /:aid ) Get allergen by ID.
➡️ (GET / ) Get all allergens.
➡️ (GET /name/:name ) Get allergen by name.
We are almost good to go, before you head to the next section, I want to have a quick word about file management.
This is one of the trickiest topic we came across when building Allergio and I thought it would be interesting to share the solution we came up with.
Here is the problem: how to store images ?
Uploading images directly to the database would slow it down and most image hosting services require you to pay monthly fees.
We decided to build a very simple custom image uploader service that stores images on the server itself and provides a URL to fetch them. This simple server is hosted on an Ubuntu instance running in the cloud.
This is definitely not the best solution but considering the huge amount of work we have to achieve in a relatively short period of time, it does the job.
Project Organization 🗂️
I will never tell this enough: Organization is the key! 🔑
The organization relies mostly on the Agile Methodology because we were introduced to it during our coding bootcamp.
The building process is split in 4 sprints of 5 days (each sprint has its own section) and every one of them must have clearly defined tasks.
On Monday morning, we used to group up to establish an exhaustive list of tasks for the whole week. We used Trello to create little cards for every task.

Every Friday, there was a meeting with our client. He was always happy to have a little demo and thanks to his weekly feedback we could finally deliver a product close to his initial expectations.
Moreover, we tried to stick to daily stand-up in the morning and day retrospective around 5.30 pm.
There is another organization key point whenever you start a brand-new project and it is workflow setup.
We are working with GitHub following Git flow's recommendations as much as possible.
➡️ Not familiar with Git flow ? No worries, have a look to my article! 🧐

Finally, let me show you the folder structure we worked with:
Allergio 📂
Backend/
--- controllers/
--- models/
--- routes/
--- utils/
--- middlewares/Frontend/
--- app/
------ assets/
------ components/
------ screens/
------ context/
------ utils/
------ navigation/
Sprint 01: Frontend 📲
Time has finally come to start coding! 🔥

Shout out to Expo that litteraly made this project possible. Expo is a framework for React applications, it provides a set of tools to start building your application in a matter of minutes and hides most of the complexity when setting up a new project.
It was very scary at first to work with React Native because we never used it before but Expo's documentation is well-written and I felt like doing mobile development forever in a couple days only.
After we initialized the project, setting up in-app navigation is a great starting point. Very similar to React Router for Web, React Navigation is a great library that is easy to get started with and provides a good solution for every use cases.
We decided to implement a bottom tab navigation for optimal user experience:

Another important step is to setup a global context. Every React developer knows how tidious it might be to lift state up through props when you project is growing bigger.
To answer that need of a global state, we went for React Context mainly to store user information such as name, last name, image and wether he is logged or not.
Everything seems to work fine so far, let's build our screens and components. We have about 10 screens to build (There is inner navigation for each tab) and around twice as much components like buttons, cards, inputs, bottom sheets and much more.
At this point, we are working with dummy hard coded data. Our components are mostly function components and their state is managed with React Hooks.
Hopefully, we have enough time to implement camera features and request to an external API to gather information about food products before the end of the first sprint.
Sprint 02: Backend 📊
As I mentionned before, this project's backend is a Node/Express Rest API linked to a cloud MongoDB database.
In order to make it work, we start by installing dependencies such as cors, body-parser, mongoose, nodemon, ...
When working with MongoDB, I highly recommend you work with mongoose as well. It makes your life so much easier. Define mongoose models for your data, connect to the database and you are good to go ✅

Then, we register routes just like I already explained here and connect each route to a dedicated controller.
Every controller's behavior must be tested and for that you can give Postman a try.
Finally, we improve our server's robustness with proper error handling middleware and enhance development experience with nodemon and environement variables.
Sprint 03: Implementing features ⭐
This is by far the most exciting week, when we finally see the result of everything we did before.
We spend this entire week connecting Frontend user interface to Backend controllers via HTTP requests and update the database in real time.
HTTP request are done using Axios which is a personnal preference.
There are many features to implement this week:
➡️ Login/Signup with Email and password.
➡️ Create and update profiles.
➡️ Edit user information.
➡️ Add/remove contacts.
➡️ Share profiles with contacts.
➡️ Upload images from phone's gallery.
➡️ Send SMS to invite friends.
➡️ ...
Native functionnalities such as SMS, camera and photo gallery could be implemented thanks to Expo's incredible doc 🌟

Sprint 04: Fix & Deploy ☁️
Last week of this incredibly enriching adventure. I already learned a lot and spent so much time and energy. We are getting tired but there is still work to do before we send our project to the client.
Thousands of lines are waiting to be refactored and plenty of little bugs still remain. Let's start by cleaning this up and fixing as many style issues as possible.
AWS has a cloud service called EC2. We create an Ubuntu instance and connect via SSH. After a bit of setting things up, our server and image manager are running in the cloud.
Right now, the app is only available through Expo's hosting but we are looking to deploy it on App store and play store soon.
Conclusion ✅
Four intensive weeks have passed, we are tired, the project is still a little buggy but the client is happy and that is what matters the most.
In my opinion, my friend Walid and I did a great job here, working on a real project for the first time and facing obstacles made us better developers.
I wanted to provide a link to the app's demo or source code with this article but since this project is in the alpha phase, the client would like to keep some information confidential.
Thank you very much for reading!
I would love to have a feedback from you, any tips to improve as a developer or as a blogger is very appreciated 😇

Top comments (48)
Wonderful article.
But I am missing something.
You didn't tell us how did you go for the actual requirements process?
And last but not least, at which point did you gather the requirements? Before UI/UX Design and Data Modeling?
How did you model the data and design the UI? Based on features?
Please share, or write a new article about this since this is the first step where new comers stumble upon.
Thanks
Hello Cyan,
It is a very interesting point you raises here! I should have explained in the introduction, we had a long meeting with the client before we officialy start the project where we discussed together what features to build and how the app should look in the end.
Moreover, we had a weekly meeting to check that the project is going in the right direction.
Lastly, we organized our work and filter requirements according to what we are able to do as junior developers.
Thank you for reading, I hope this answered your question! 😇
This articler worked one year.
Can I collaborate doing the landing page? I really think I can give you some help on the landing page, adding illustrations and some good design. This is great, I like to see when projects turn out to be practical examples. This is my github: github.com/Alejogb1 and one of the websites I currently run: iosaprovall.com/
Hello Alejo,
Thanks a lot for your enthusiasm!
I am not responsible of the landing page at all, it has been made by my client before I took part in the project.
I can let him know about your offer if you want.
Have a great day!
This is an awesome write-up, and kudos to you for building a real-world project as an aspiring dev. That's huge! Most people stick with building little toy apps or apps built following courses or tutorials, building something on your own that solves a real problem is a huge step, congrats!
I know what you are speaking about! There are dozens of dummy app on my GitHub 😂 You can imagine how satisfying it is to finally build something worthwile!
I really enjoyed this read! I am working to become a full stack developer and I really like the organization of this project. I think it is important to get most of the planning and design done before making a project, great work! I look forward to seeing what else you do!
I really appreciate your comment Megan! In my opinion organization is more important than the code itself. Thank you for reading and I wish you best of luck.
Great information loved your content, I have also started writing post about Opensource, Github, Android dev, Webdev, IoT, Cloud etc.
you can check it out here
Codewithgauri
Thanks :)
Thank you!
Your blog looks great, keep up the good work 🔥
thank you :)
Do you know constate ? It's a great library to lift state up easily at any time.
github.com/diegohaz/constate
I have never heard of this package before, thank you for sharing I will have a look ✅
I’m thinking about developing an app that just came to mind recently and your article is amazing! Thank you for taking so much time to walk through the logistics of working on such a project! So many people glaze over what technologies are used or how thework gets managed. Great job!
I could not be happier if my article somehow helped you get started with your app! Thank you for your feedback Bill😇
This post have given me an overview about how things work in real life. Thanks !
I am glad that my article helped you anyhow 😁
Hello Killian,
What an amazing journey. I want to thank you and Walid for reaching the objectives in only a few weeks: validating the MVP and changing it to a working prototype. There is still a lot of work to do to turn in into an app in production but I am now sure that Allergio (allergio.net) will help a lot of families when its final version will be released. Thanks a lot for your work!
Hello Xavier,
Thank you for trusting us, it was a great challenge, we learned a lot and we could not dream of a better project to work on.
As you said, there is still a lot of work to do before production and I wish you the best.
I really enjoyed read this article , you learned a lot with this project in every aspect since planning , development and implementation, big congratulations for you.
If you need help with future projects,I would like to have the chance of working with you.
Best regards