Welcome to the second part of A-Frame Virtual Reality Framework for web tutorial series. In the first part, we learned basic A-Frame syntax, created a scene, added a box in it and set up the environment/skybox in it.
Now we’ll continue working on our file index.html. which we create in the first part and toggle camera settings, see how lighting affects the scene and animate our object.
Camera
A-Frame by default creates a camera element automatically with default settings if you don’t create it like in Part 1 we didn’t create the camera entity but A-Frame created it for us and we could see the elements in the scene.
But if you want a camera with custom settings then you can create a camera element with desired properties.
<a-entity><a-camera></a-camera></a-entity>
Add the above tag just before the closing tag of <a-scene>. The reason I encapsulate the <a-camera> tag inside <a-entity> is that if we want to change the position of the camera we will define property attributes of <a-entity> because if we directly set the property attributes on <a-camera>, controls will override them.
See camera attributes here: https://aframe.io/docs/0.8.0/primitives/a-camera.html#attributes
Changing Camera Position
To change the camera simply set the position attribute in ‘<a-entity>’ primitive.
<a-entity position = “0 0 5”><a-camera></a-camera></a-entity>
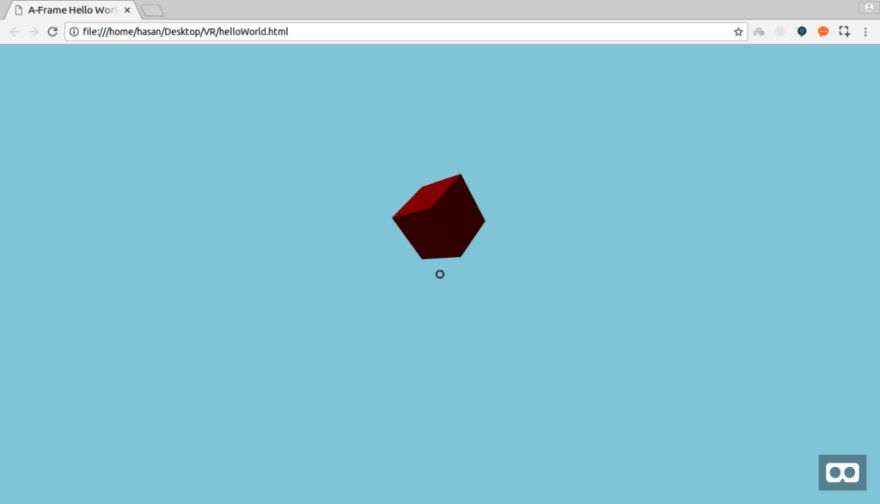
Adding Cursor to the Camera
One of the most crucial elements in any virtual reality environment is the cursor, it is the main element which allows interaction in the virtual reality world if there is no hand controller. Google Cardboard games used the cursor to interact with the virtual environment.
To add cursor to the camera simply put the <a-cursor> tag inside the <a-camera> tag
<a-entity position = “0 0 5”><a-camera><a-cursor></a-cursor></a-camera></a-entity>
Now you will see a circle at the center of the screen.

In the future tutorials when we’ll create fully interactive Virtual Reality environments, I’ll show you how to make cursor gaze effect and interacting with the objects.
Adding Lights
Lights make a 3d environment more realistic.
Add the <a-light> primitive inside the <a-scene>. The light we’re adding is directional, its color is white (#FFF), its intensity is 0.5 and it is at the position of -1 1 2 .
<a-light
type=”directional”
color=”#FFF”
intensity=”0.5″
position=”-1 1 2″>
</a-light>
You will see how box’s color changed.
Animating Objects
To animate an object on the screen put the <a-animation> tag inside that object tag. An <a-animation> tag has different attributes from which you can configure the animation. Let’s animate our box. Replace the <a-box> tag with the following code.
<a-box position=”0 2 -5″ rotation=”0 45 45″ scale=”2 2 2″ color=”red”>
<a-animation
attribute=”rotation”
from=”0 45 45″ to=”0 410 410″
direction=”alternative” dur=”4000″
repeat=”indefinite” easing=”ease”>
</a-animation>
</a-box>

Not just rotation you can also animate the position and size/scale of the object. Check out animation attributes and play around with it https://aframe.io/docs/0.8.0/core/animations.html#attributes
We’ve covered the basics of A-Frame framework. Now from the next tutorial we will start making virtual reality projects, in which we’ll learn advanced concepts and look into the WebVR Development in-depth.

Top comments (0)