
There’s been a recent surge of interest in serverless cloud products due to scalability, high transparency, faster performance, cost-effectiveness, instant availability, and operating infrastructure support.
Serverless doesn’t mean “no servers”. It means developers don’t have to manage the servers. The server is managed by a service provider, and the necessary resources are automatically assigned to developers. This means, as a developer, you can focus more on developing your website or service without worrying about underlying infrastructure and servers.
JAMStack compliments serverless technology, and in this article, you will learn how to build a full-stack JAMStack application using Xata, Cloudinary, and Next.js. Check out the live demo and source code of the Image gallery application you’ll build at the end of this tutorial.
Tech Stack
Jamstack is unique because it encourages you to combine various technologies to build a full-stack application. The following technologies will be used to build an Image gallery:
- Next.js is a React framework for building single-page Javascript applications. With Next.js, you can utilize serverless functions to build your application's front end and backend without the need for a backend framework.
- Xata is a serverless database with a built-in search and analytics engine. It has an excellent developer experience as it provides an easy-to-navigate dashboard, well-written documentation, a playground, and code snippets.
- Cloudinary is an end-to-end solution for digital media, Cloudinary offers a complete and safe API for quickly uploading media assets.
- Netlify is a web hosting platform.
Prerequisites
Before getting started with this tutorial, you should have the following:
- Knowledge of React and React hooks
- Basic understanding of ES6 Javascript features
-
yarnornpminstalled as a package manager
Getting Started
Clone the starter project in your preferred directory with the git command below:
git clone --branch starter https://github.com/Giftea/image-hub.git
Run yarn or npm install to install all dependencies, and yarn dev or npm run dev to start the project on http://localhost:3000
Setting Up Xata
To use Xata, you have to create an account and set up your development environment. Kindly visit Xata and create an account.
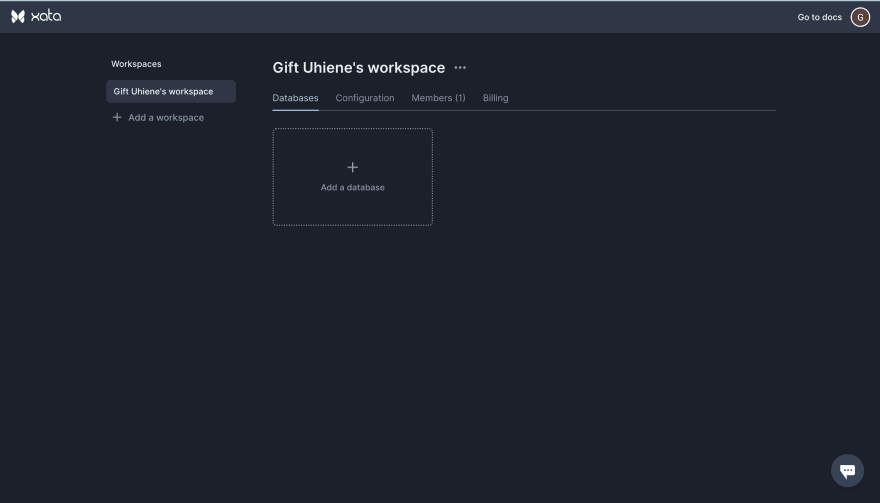
Automatically, a workspace is created for you. A workspace is similar to a GitHub organization; it’s a grouping of databases, where you can also invite collaborators and work together on those databases.
Let’s create your first database. Click the “Add a database” button to create a database in your new workspace.
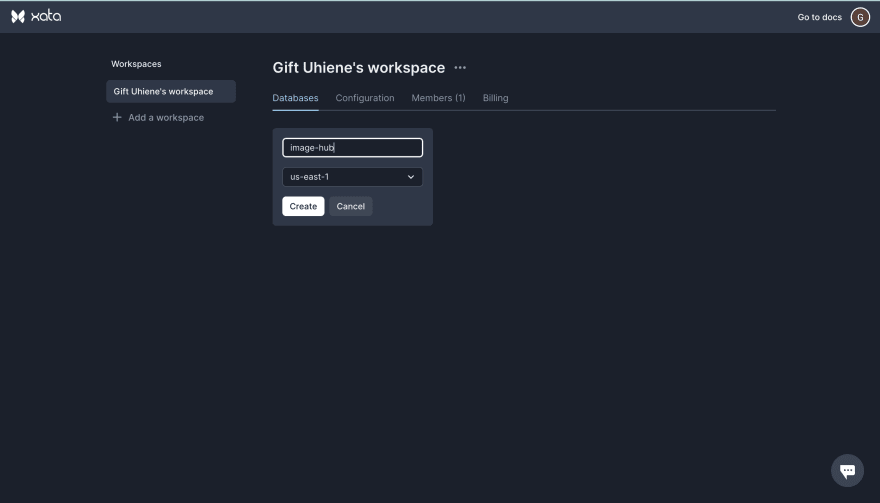
With the click of a button, a full-featured database was created. The database schema is made up of tables, which you will use to design the business model of your website.
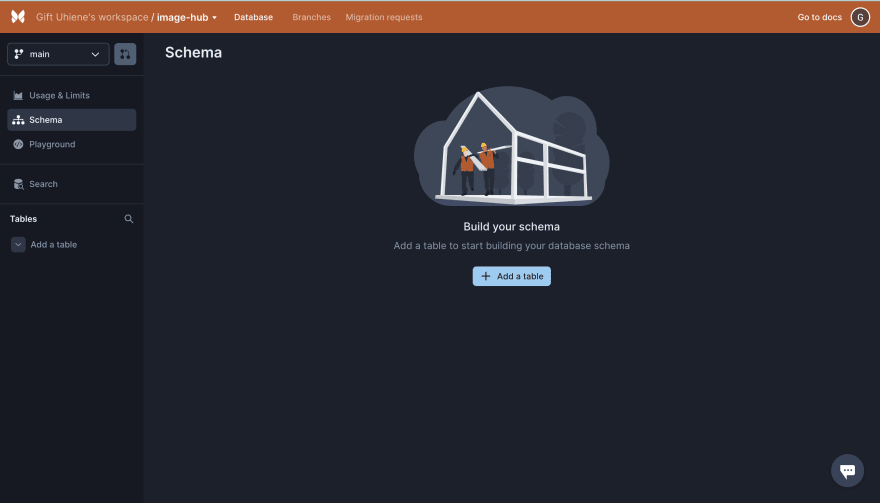
Let’s add a table. Click the “Add a table” button to add a table with the name “images”. Automatically, the new table has a column id, a unique id is generated for every record on a table.
Each image should have an image URL and tags. Go ahead and add two new columns to the images table:
-
img_url: String -
tags: Multiple Select
The image gallery will have users, and each user can create an image, so let’s create a new “users” table and link it to our images table. Add the following columns to the new users table:
-
firstname: String -
lastname: String -
password: String -
email: Xata provides an “Email” type for emails. Also, mark email as “Unique”
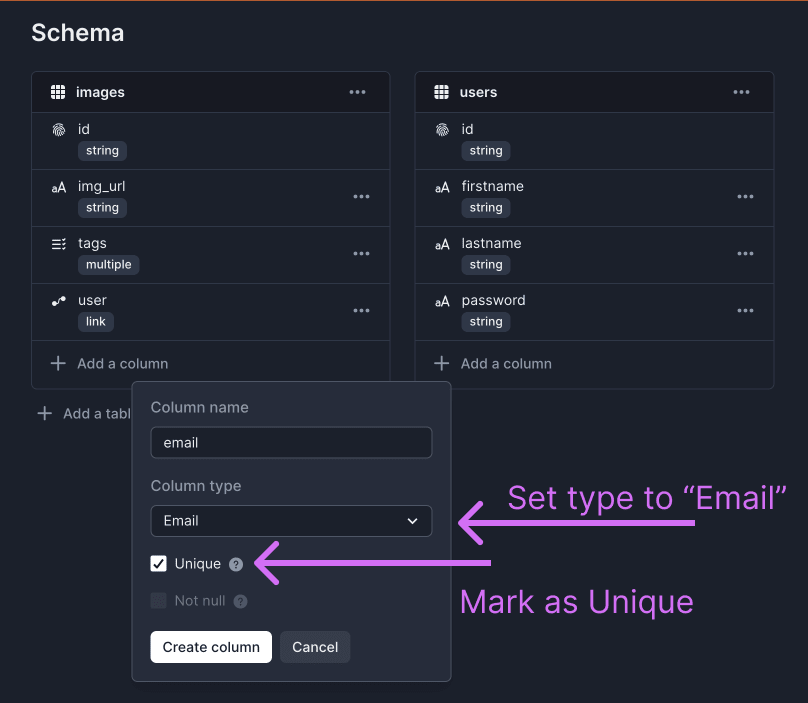
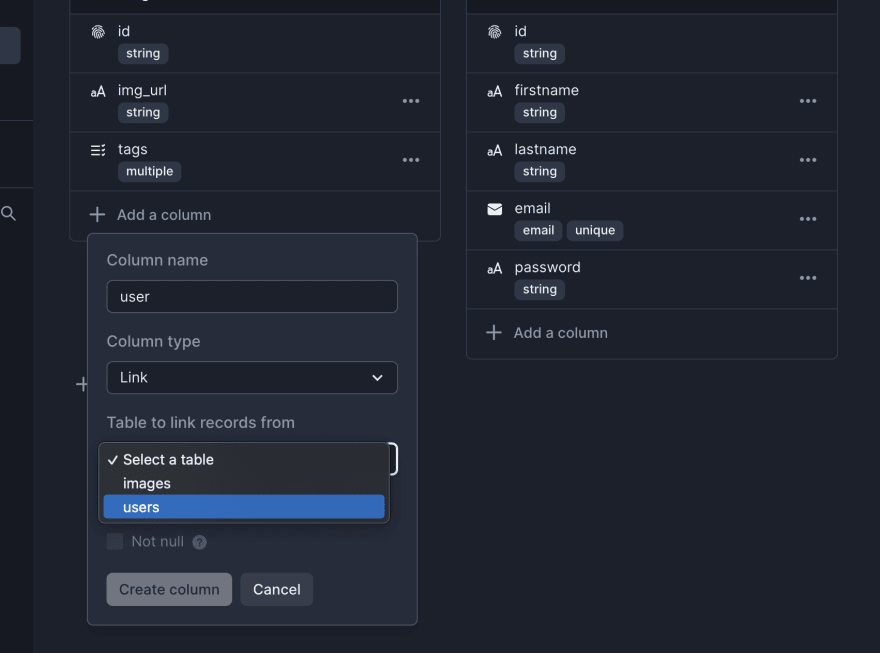
Now, let’s link the users table to the images table. To do this, add a new column to the images table, give it a type of “Link”, name it user, and select the users table to link both tables.
The database schema for the project is all set; database management has never been simpler. The following steps will be taken to set up the Xata development environment on our local machine:
- Run
npm install @xata.io/cli -gto install the CLI globally - Next run
xata auth loginin your terminal- Select “Create new API key in browser”
- Give your API key a name to create an API key
- Now Xata CLI is installed and you’re authorized, navigate back to your Xata dashboard
- On the left sidebar, click on the images table
- Click the “</> Get code snippet” button at the top right corner
- You should see some commands to setup dev environment
- We’ve installed the CLI already so copy the second command
- Back in your terminal run the command in your project folder
- Select the following options for the prompts:
    ✔ Do you want to use code generation in your project? › Generate JavaScript code with ES modules
    ✔ Choose the output file for the code generator … src/xata.js
    ✔ Do you want to generate the TypeScript declarations? … no
    ✔ Choose a default development branch (fallback branch). › <None>
     ›   Warning: Your .env file already contains an API key. The old API key will be ignored after updating the file.
    ✔ Your XataClient is generated at ./src/xata.js
    ✔ Project configured successfully.
In the root of your project, you should see an env file with your XATA_API_KEY and your XataClient in /src/xata.js.
All Xata configurations are done. Let’s start writing some code!
Create User
Add a new file to the /pages/api/ directory, name it register.js and add the code block below:
    // pages/api/register.js
    import { getXataClient } from "../../src/xata"; // import XataClient func
    import { promisify } from "util";
    import bcrypt from "bcryptjs"; // bcrypt to hash user password

    const hash = promisify(bcrypt.hash); // hash password
    const xata = getXataClient(); // initialize XataClient

    export default async function register(req, res) {
      const { firstname, lastname, email, password } = req.body; // destructure user input from req.body
      const userExist = await xata.db.users.filter({ email }).getFirst(); // fetch user from database using email address

      if (userExist) {
        res.status(400);
        throw new Error("User already exists"); // throw error if user with email already exists
      }

      // CREATE A NEW USER IF NO USER WITH THE EMAIL ADDRESS EXISTS
      const user = await xata.db.users.create({
        firstname,
        lastname,
        email,
        password: await hash(password, 10),
      });

      res.json({ message: "Success" });
      if (!user) {
        res.status(400);
        throw new Error("Invalid user data");
      }
    }
In the code block above, getXataClient is used to initialize xata and bcrypt is used to create a hash for the user’s password.
In the register function, the user’s details are destructured from req.body, and the user email is used to check if the user already exists. If the user exists, an error is returned, otherwise, a new user account is created and added to the database.
Navigate to /pages/register.js and update the handleOnSubmit function as shown below:
  const handleOnSubmit = async (e) => {
   e.preventDefault();
   setLoading(true)
   try {
    await fetch("/api/register", {
      method: "POST",
      headers: {
        "Content-Type": "application/json",
      },
   body: JSON.stringify({ firstname, lastname, email, password }),
     }).then((t) => t.json());
     router.push('/login')
     setLoading(false)
   } catch (error) {
     console.log(error);
   }
};
Click the “Join” button at the top-right corner of the web page to navigate to the register page. Fill in the input fields and register a user, if successful, you’d be redirected to the login page.
Go back to your Xata dashboard and check if the users table has been updated.
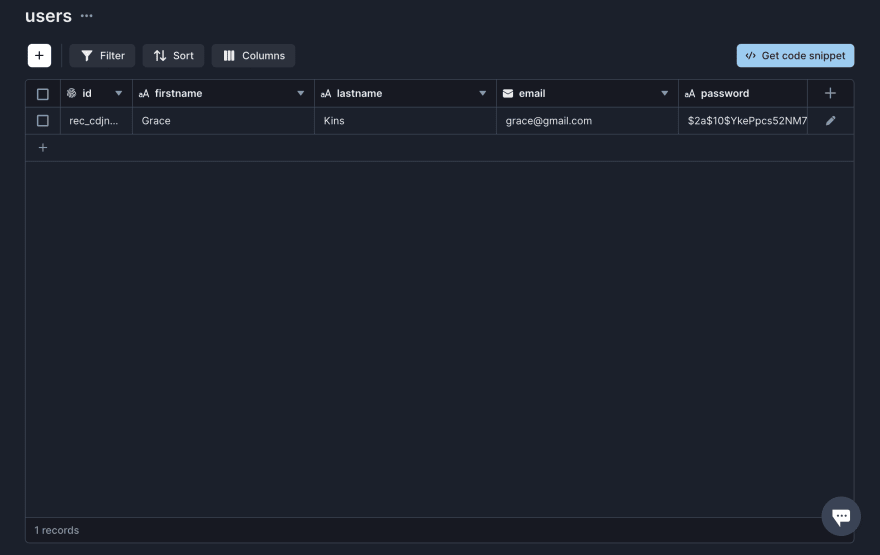
We’ve created our first user record! Let’s authenticate the new user to access other features of the application.
Authenticate User
Add a new file to /pages/api/ directory, name it login.js and add the code block below:
// /pages/api/login
    import cookie from "cookie"; // import cookie
    import { getXataClient } from "../../src/xata"; // import XataClient func
    import { promisify } from "util";
    import bcrypt from "bcryptjs";
    import jwt from 'jsonwebtoken'

    const compare = promisify(bcrypt.compare); // to compare password
    const xata = getXataClient(); // initialize XataClient
    const KEY = "i_love_xata_&_cloudinary"; // JWT secret

    const login = async (req, res) => {
      const { email, password } = req.body; // destructure user input from req.body
      const user = await xata.db.users.filter({ email }).getFirst(); // fetch user from database using email address

      const passwordsMatch = compare(password, user.password); // compare if passwords match

      if (passwordsMatch) {
        const token = jwt.sign({ email, password }, KEY); // create token
        // save the token as a cookie
        res.setHeader(
          "Set-Cookie",
          cookie.serialize("token", token, {
            httpOnly: true,
            secure: "development",
            sameSite: "strict",
            maxAge: 60 * 60 * 24 * 7, // 1 week
            path: "/",
          })
        );
        res.json({ userId: user.id }); // return user ID
      } else {
        res.status(401);
        throw new Error("Invalid email or password");
      }
    };
    export default login;
In the login function above, the user’s email and password are destructured from req.body. The email is used to fetch a user with a matching email from the database. And the passwords are compared using bcrypt.compare(), and if the passwords match, a token is signed using jwt and saved as a cookie in the browser. If the passwords don’t match, an error is returned.
Navigate to /pages/login.js and replace the handleOnSubmit function with the one below:
      const handleOnSubmit = async (e) => {
        e.preventDefault();
        setLoading(true);
        try {
          const res = await fetch("/api/login", {
            method: "POST",
            headers: {
              "Content-Type": "application/json",
            },
            body: JSON.stringify({ email, password }),
          }).then((t) => t.json());
          router.push({
            pathname: "/",
            query: {
              userId: res?.userId,
            },
          });
        } catch (error) {
          console.log(error);
        }
        setLoading(false);
      };
Go back to the browser and authenticate the user using the email and password that was used to create the account. If successful, you’d be redirected to the home page.
Before creating an image, let’s set an isAuthenticated prop in the home page, to make sure a user is authenticated. Navigate to /pages/index.js and add a getServerSideProps function below the Home component.
    export const getServerSideProps = async (context) => {
      let isAuthenticated;
      context.req.cookies["token"]
        ? (isAuthenticated = true)
        : (isAuthenticated = false);

        {/* FETCH IMAGES FROM IMAGES TABLE GOES HERE */}

      return { props: { isAuthenticated } };
    };
In the function above, we’re checking if the token exists as a cookie in the browser, if it exists, isAuthenticated is declared as true and it’s sent as a prop to the Home component.
Replace the Home component with the component below:
    export default function Home({ isAuthenticated }) {
      const router = useRouter();
      const userId = router.query.userId; // retrieve userId
      return (
        <div className="body">
          <Navbar isAuthenticated={isAuthenticated} userId={userId} />
          <Hero />
          <Images />
        </div>
      );
    }
Refresh the home page in your browser. The next feature we’d implement is to upload a new image as an authenticated user.
Upload Image
Cloudinary widget will be used for image upload, so go ahead and create a Cloudinary account if you don’t have one.
After creating an account, head on to your Cloudinary dashboard, copy and save your Cloud Name, API Key, and API Secret as environment variables.

Update .env file:
CLOUDINARY_CLOUD_NAME= '*********************'
CLOUDINARY_API_KEY='****************************'
CLOUDINARY_SECRET= "****************************"
In your terminal, stop the application from running and run yarn dev or npm run dev again. This is because we updated our .env file.
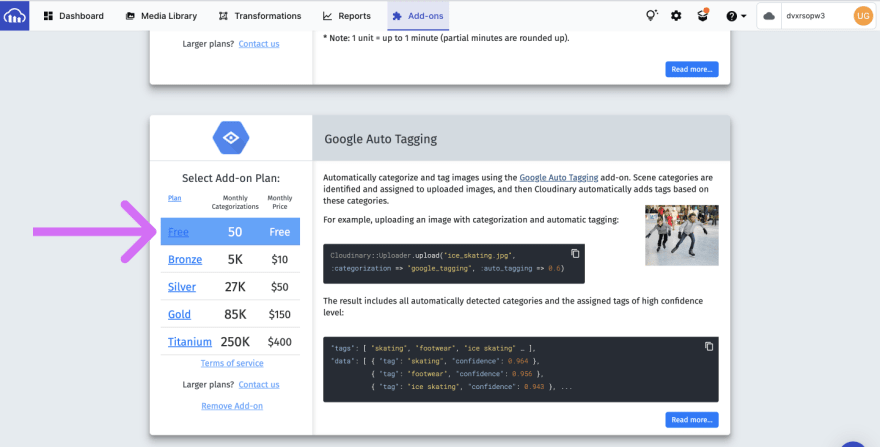
Now we can utilize the features of Cloudinary in our application. Apart from image upload, we’re going to use AI to automatically tag our images, to do so, follow the steps below:
- On your Cloudinary dashboard, click the Add-ons tab
- Select the Google Auto Tagging card
- Click the free plan to subscribe
Add a new file to the /pages/api/ directory, name it upload.js and add the code block below:
    // /pages/api/upload
    import { getXataClient } from "../../src/xata";
    import cookie from "cookie"; // import cookie
    import { v2 } from "cloudinary"; // import cloudinary

    // CONFIGURE CLOUDINARY
    v2.config({
      cloud_name: process.env.CLOUDINARY_CLOUD_NAME,
      api_key: process.env.CLOUDINARY_API_KEY,
      api_secret: process.env.CLOUDINARY_SECRET,
    });
    const xata = getXataClient();

    const handler = async (req, res) => {
      var cookies = cookie.parse(req.headers.cookie || "");
      const isAuthenticated = cookies.token; // check if user is authenticated
      if (!isAuthenticated) {
        res.status(401).end();
        return;
      }

      const { img, userId } = JSON.parse(req.body);
      const result = await v2.uploader.upload(img, { // UPLOAD IMAGE TO CLOUDINARY
        categorization: "google_tagging", // USE GOOGLE AUTO TAGGING AI
        auto_tagging: 0.6,
      });

      await xata.db.images.create({ // INSERT IMAGE INTO DATABASE
        img_url: result.secure_url,
        user: userId, // user uploading image
        tags: result.tags,
      });
      res.status(200).json(result);
    };
    export default handler;

    // CONFIG TO ALLOW IMAGES UPTO 10mb
    export const config = {
      api: {
        bodyParser: {
          sizeLimit: "10mb",
        },
      },
    };
In the code block above, we configure Cloudinary using our cloud name, API key, and secret. After checking if the user is authenticated, img and userId are destructured from req.body, and img is uploaded to Cloudinary. As img is being uploaded, we add the Goggle Auto Tagging AI config as a second parameter in v2.uploader.upload().
Finally, the image URL, user ID, and tags are inserted into our images table on the Xata database. Navigate to /components/Upload.jsx and replace the handleOnChange function with the code below:
      function handleOnChange(changeEvent) {
        const reader = new FileReader(); // create new reader to read image file as a daat URL
        reader.onload = function (onLoadEvent) {
          setImg(onLoadEvent.target.result); // save base64 encoded version of image
        };
        reader.readAsDataURL(changeEvent.target.files[0]);
      }
Replace the handleOnSubmit function with the code below:
      async function handleOnSubmit(event) {
        event.preventDefault();
        setLoading(true);

        await fetch("/api/upload", { //UPLOAD IMAGE
          method: "POST",
          body: JSON.stringify({
            img: img, // send base64 encoded version of image to Cloudinary
            userId: userId,
          }),
        }).then((r) => r.json());

        setLoading(false);
        onClose(); // close modal
        try {
        } catch (error) {
          console.log(error);
        }
      }
Go to the browser and click the “Upload” button at the top-right corner to upload an image. You can download free images from Unsplash or Pexels.

A new image record has been added to the images table!
Fetch Images
We’ve successfully written functions to create a user and create an image. Now let’s query the images table to fetch all images.
Navigate to /pages/index.js and import getXataClient:
import { getXataClient } from "../src/xata";

Replace the `getServerSideProps` function with the code block below:


    export const getServerSideProps = async (context) => {
      let isAuthenticated;
      context.req.cookies["token"]
        ? (isAuthenticated = true)
        : (isAuthenticated = false);

      const xata = getXataClient(); // initialize XataClient
      // Fetch all images with the firstname and lastname of the user that uploads image
      const allImages = await xata.db.images
        .select(["*", "user.firstname", "user.lastname"])
        .getAll();
      return { props: { allImages, isAuthenticated } };
    };
In the code above, all images were fetched together with the firstname and lastname of the user that uploads each image.
Add allImages as a prop to the Home component and pass the prop to the Images component.
    export default function Home({ allImages, isAuthenticated }) {
      const router = useRouter();
      const userId = router.query.userId;
      return (
        <div className="body">
          <Navbar isAuthenticated={isAuthenticated} userId={userId} />
          <Hero />
          <Images allImages={allImages} /> {/*pass prop*/}
        </div>
      );
    }
Go to your browser and refresh to view the previously uploaded image.
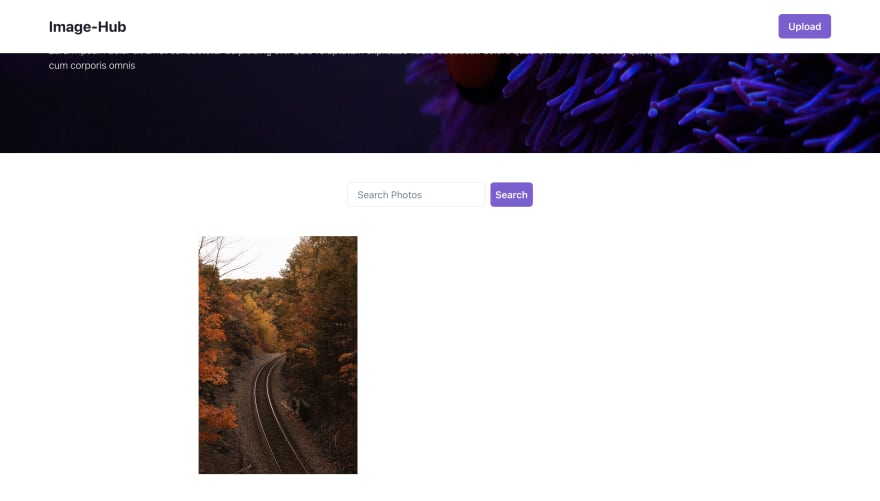
Download free images from Unsplash or Pexels to populate your project, because the next feature we’re implementing will be the search feature.
Search Images
In /pages/api/upload we utilized the Google Auto Tagging AI to generate tags for our images during upload, the reason for this is to make search easy for users. If you console.log the image you upload to Xata, you’d see a group of tags related to your image.
For example, the image below shows all the tags generated by the AI for the image I uploaded:
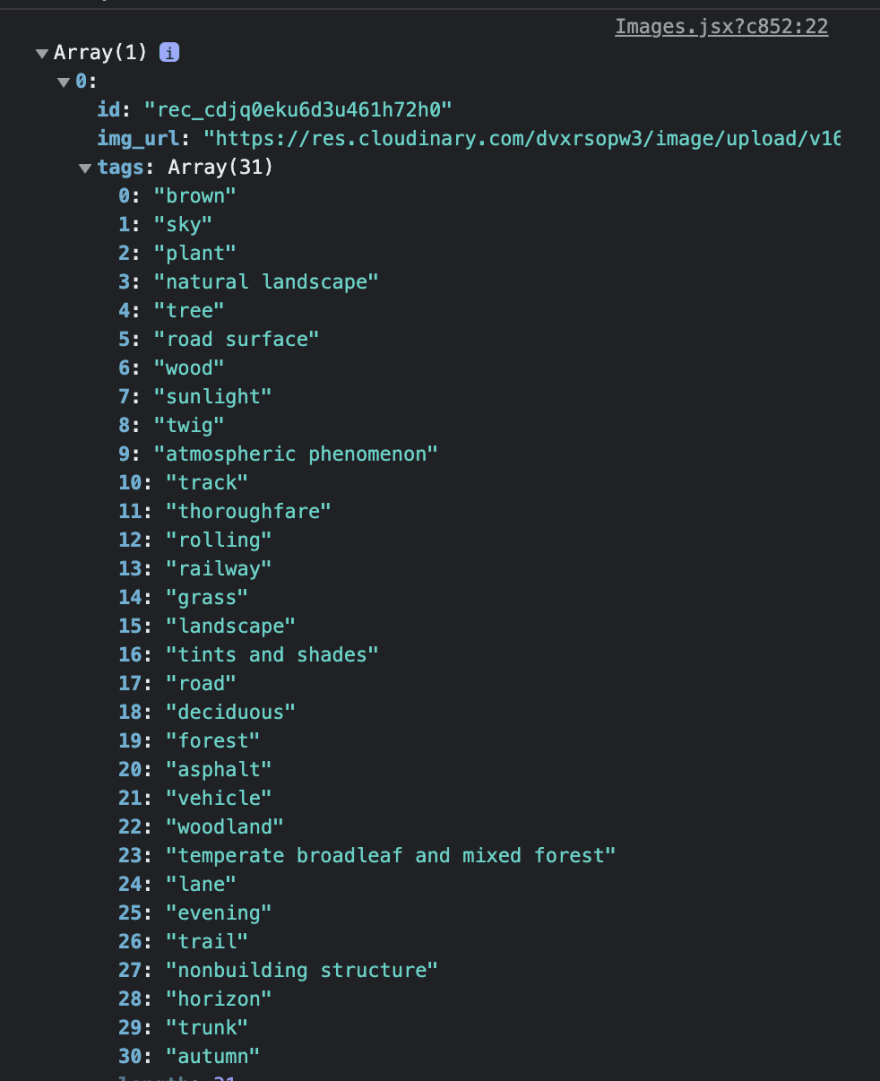
If a user searches for any of these words on the website, all images relating to the tag should be fetched. Let’s head on and implement the search functionality.
Add a new file to /pages/api/ , and name it search.js. For the search handler, we want to target the tags of each image specifically, Xata can help us generate the code snippet for this functionality. Follow the steps below:
- Go to your database dashboard
- Click the “Search” tab on the left sidebar
- At the top of the page, click on the “Target” button
- Uncheck the users table
Uncheck the img_url and user columns under the images table

Click the “</> Get code snippet” button
Click the Search by table tag and select “Javascript” from the dropdown
That’s the code snippet for our search functionality
Navigate back to /pages/api/search.js, we’ll modify the code snippet generated by Xata. Add the code block below to /pages/api/search.js:
// Generated with CLI
    import { getXataClient } from "../../src/xata";
    const xata = getXataClient();

    const handler = async (req, res) => {
      const { searchQuery } = req.body; // get search query

      const records = await xata.search.byTable(searchQuery, {
        tables: [
          { table: "users", target: [] },
          {
            table: "images",
            target: [{ column: "tags" }],
          },
        ],
        fuzziness: 0,
        prefix: "phrase",
      });
      res.status(200).json(records);
    };
    export default handler;
Now navigate to /components/Images.jsx and replace the handleSearch function with the one below:
      const handleSearch = async () => {
        const result = await fetch("/api/search", {
          method: "POST",
          headers: {
            "Content-Type": "application/json",
          },
          body: JSON.stringify({
            searchQuery,
          }),
        }).then((r) => r.json());
        setImages(result?.images);
      };
Refresh your browser and test the search feature. Go to your images table on your Xata dashboard and get a “tag” to use as a keyword to search.
In the gif above, you’ll notice I have two images with cups in them, when I type the keyword “cup” and click the “search” button, it returns the two images related to the keyword.
We’re done with the project, now let’s deploy to Netlify!
Deploy to Netlify
Follow the steps below to deploy your site on Netlify:
- Go to Netlify to create an account if you don’t have one
- Click Add new site and then click Import an existing project
- Select your Git provider and authorize Netlify
- Select your project repository
- Click “Show Advanced” button
- Add all four environment variables from your
.envfile- XATA_API_KEY
- CLOUDINARY_CLOUD_NAME
- CLOUDINARY_API_KEY
- CLOUDINARY_SECRET
- Click on “Deploy site” button
Conclusion and Next Steps
In this tutorial, you built a full-stack JAMStack application using Xata as a serverless database and Cloudinary for media management. Amazing features like the search functionality from Xata and Goggle Auto Tagging AI from Cloudinary were used to make the project more unique. You can learn more and make this project better by adding features like:
- A profile page to display a user’s details and images they’ve posted
- A settings page where a user can edit their profile details and delete their account
- Ability to like an image and display the number of likes per image
- Ability to delete an image you posted
- Ability to follow a user and display the number of followers
- Explore the Cloudinary Add-ons page and add new add-ons before the image upload

Top comments (1)
Good job