
In this post, you will learn how to implement a Facebook authentication in React native apps.
We will cook a sample app, where users can log in using their Facebook account. After login, the user can see their basic profile information on the home page.
Complete source code of this tutorial is available in the React-native-facebook-Login-Starter
Social logins — What and why
It’s helpful to use social sign-in with React Native for your users who would rather not create and remember another username/password combination. Instead, you can allow users to sign in with accounts they already own. You don’t need to store hashed passwords to compare, you don’t have to handle sending sign up emails, and you don’t need to reset passwords. The user’s chosen provider will handle all of this for you. Plus, in mobile apps, the Facebook login is automatically done with the pre-installed Facebook app.
Facebook login — What and why
There are several reasons why you should use a Facebook login in your app
- Ease of use — When a new user uses your app, only two buttons clicks are required to log in using Facebook. In another scenario, the user will have to type in an email/password and login
- No “forgot password” — When your app uses Facebook login, the user does not have to worry about forgetting the password for your app’s login
- No “verify email” — If you use a custom-email authentication of your own, you will have to verify the email if it is a valid one or not. Facebook login will always have a valid email/phone number associated.
- Single solution — Facebook log in can allow your users to use single login credentials across multiple devices
- Facebook integration — If your app uses Facebook authentication, you can use Facebook APIs inside your app as well. This can include fetching user tweets etc.
- Trust — Nowadays, people generally trust social logins moreover custom email logins. Social logins follow standard privacy protocols and hence are more reliable for information sharing
React Native Authentication
The React Native has been around for around 5 years and has been very popular among developers for its ease of usage over Swift / Java. Plus it requires you to have single source code for both an Android and an iOS app. What more can a developer ask for!
There are several ways of Authentication in React Native apps
- Social logins — Social logins are a popular and easy way of authentication in mobile apps. You must have seen Google, Facebook, Instagram logins in almost all the modern apps. Social logins are easy to use and more reliable for quick integrations.
- Back-end as a Service (BaaS) — You can use pre-built BaaS platforms which allows easy integration of authentication in your apps. Basically, these platforms provide you a ready-made back-end, so you don’t have to make one on your own. Firebase, Parse, Back4App are some BaaS platforms.Firebase is the most popular among these for mobile apps
- Create your own back-end — You can create your own back-end in Node.js, Go, Django or Ruby-on-rails, and connect your app authentication to your own back-end. This method is favored by developers who need full control over user authentication. But this method is the most time taking one as well.
Steps for Facebook authentication
We will follow these step-by-step instructions to create our React Native app with Facebook authentication
Step 1: Create a basic React Native app
Step 2: Facebook Developer Console — Create your app
Step 3: Add your Platforms to Facebook
Step 4: Install the React Native FBSDK to connect your app with Facebook
Step 5: Running Apps
Step 6: Authenticate Users using Facebook
Step 7: Test your app on Android
1. Create a basic React Native app
First, make sure you have all pre-requisites to create a react-native app as per the official documentation.
At the time of this post, I have React-Native version 0.60
Create a blank react-native app (Replace myApp with your own name)
$ react-native init myApp
This will create a basic React-native app which you can run in a device or simulator. (either Android or iOS)
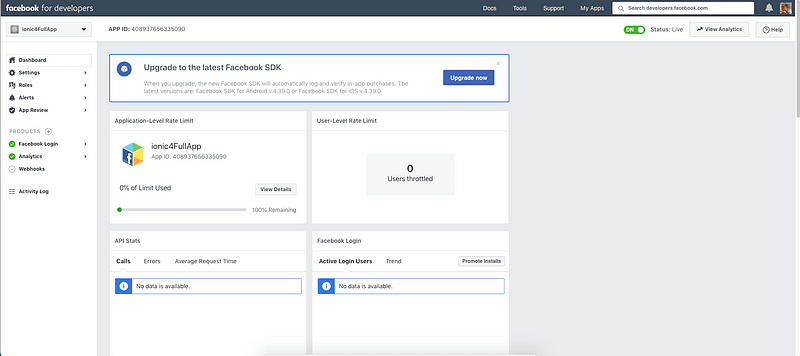
Step 2: Facebook Developer Console
The first thing we need to do is to create a new application in Facebook’s developer dashboard, and this app is the one that Facebook will use to ask our users for their permission when we try to log them into our React Native application.
For that, you’ll need to go to the Facebook developer console and create a new app.

Once we finish creating our app, we will go to the Facebook app dashboard and pick App Id from there. It will be required in installing the Facebook plugin in the app
Step 3: Add your Platforms to Facebook
We need to let Facebook know which platforms we’ll be using (if it’s just web, iOS, or Android).
In our case, we will add all platforms iOS and Android.
To add the platforms, go ahead inside your Facebook dashboard and click on Settings, then right below the app’s information you’ll see a button that says Add Platform, click it.
You’ll see several options for the platforms you’re creating
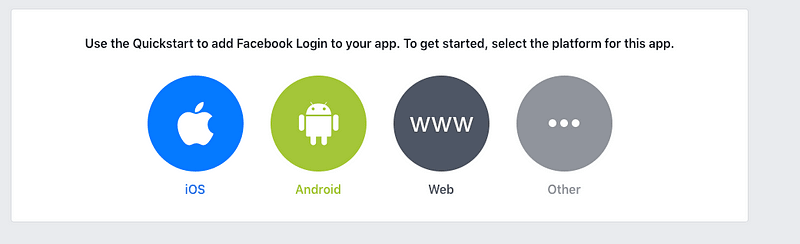
Add Platforms in Facebook dashboard
Let’s start with iOS:- You’ll see a form asking you for some information, right now we just need the Bundle ID.
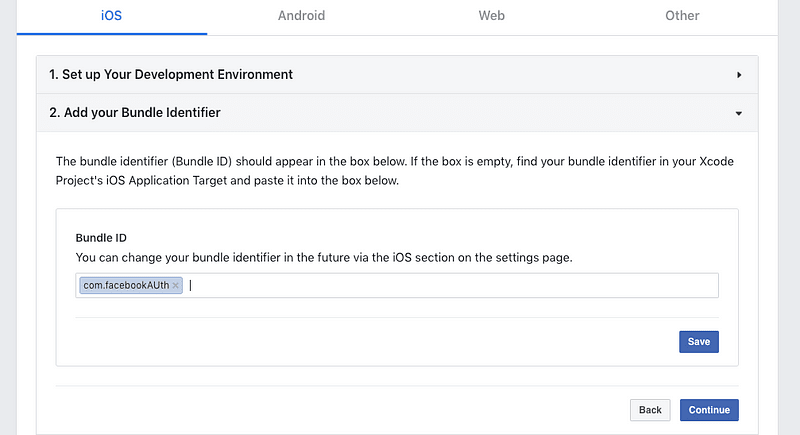
Once you add the Bundle ID, just follow the process to create the app.
Android:- The difference is that instead of Bundle ID, Android calls it “Google Play Package Name.”
Step 4: Install the React Native FBSDK to connect your app with Facebook
Installation
Install JavaScript packages
Install the react-native-fbsdk package:
yarn add react-native-fbsdk
Or, if using npm:
npm install react-native-fbsdk
Finally, link the SDK to configure the iOS and Android projects:
react-native link react-native-fbsdk
Configure projects
Android
Assuming you have Android Studio installed, open the project with Android Studio.
Go to MainApplication.java under app/src/main/java/com/<project name>/ to complete setup.
Register SDK package in method getPackages().
import com.facebook.reactnative.androidsdk.FBSDKPackage;
// ...
private final ReactNativeHost mReactNativeHost = new ReactNativeHost(this) {
    @Override
    public boolean getUseDeveloperSupport() {
      return BuildConfig.DEBUG;
    }
@Override
    protected List<ReactPackage> getPackages() {
      return Arrays.<ReactPackage>asList(
          new MainReactPackage(),
          new FBSDKPackage()
      );
    }
};
Also, you need to add in your settings.gradle:
include ':react-native-fbsdk'
project(':react-native-fbsdk').projectDir = new File(rootProject.projectDir, '../node_modules/react-native-fbsdk/android')
Before you can run the project, follow the Getting Started Guide for Facebook Android SDK to set up a Facebook app. You can skip the build.gradle changes since that’s taken care of by the rnpm link step above, but make sure you follow the rest of the steps such as updating strings.xml and AndroidManifest.xml.
iOS
The react-native-fbsdk has been linked by react-native link. The next step will be downloading and linking the native Facebook SDK for iOS.
Make sure you have the latest Xcode installed. Open the .xcodeproj in Xcode found in the ios subfolder from your project's root directory. Now, follow all the steps except the pod install (Step 2) in the Getting Started Guide for Facebook SDK for iOS. Along with FBSDKCoreKit.framework, don't forget to import FBSDKShareKit.framework and FBSDKLoginKit.frameworkinto your Xcode project.
If you’re using React Native’s RCTLinkingManager
The AppDelegate.m file can only have one method for openUrl. If you're also using RCTLinkingManager to handle deep links, you should handle both results in your openUrl method.
- (BOOL)application:(UIApplication *)app
            openURL:(NSURL *)url
            options:(NSDictionary<UIApplicationOpenURLOptionsKey,id> *)options
{
  if ([[FBSDKApplicationDelegate sharedInstance] application:app openURL:url options:options]) {
    return YES;
  }
if ([RCTLinkingManager application:app openURL:url options:options]) {
    return YES;
  }
return NO;
}
Troubleshooting
I cannot run the Android project.
- Make sure you added the code snippet in step 3.1.
- Make sure you set up a Facebook app and updated the
AndroidManifest.xmlandres/values/strings.xmlwith Facebook app settings.
I get a build error stating that one of the Facebook SDK files was not found — eg. FBSDKLoginKit/FBSDKLoginKit.h file not found.
- Make sure that the Facebook SDK frameworks are installed in
~/Documents/FacebookSDK. - Make sure that
FBSDK[Core, Login, Share]Kit.frameworkshow up in the Link Binary with Libraries section of your build target's Build Phases. - Make sure that
~/Documents/FacebookSDKis in the Framework Search Path of your build target's Build Settings. You may have to select theAlltab to see and search for the Framework Search Path.
I get build errors like Warning: Native component for "RCTFBLikeView" does not exist:
- Make sure that
libRCTFBSDK.ashows up in the Link Binary with Libraries section of your build target's Build Phases.
I get this build error: no type or protocol named UIApplicationOpenURLOptionsKey:
- Your Xcode version is too old. Upgrade to Xcode 10.0+.
Step 5: Running Apps
To run the iOS app, you should specify simulator
react-native run-ios — simulator=”iPhone X”
To run Android app, you should start emulator first, either via Android Studio or adb , then react-native run-android .
You’ll see the default start screen
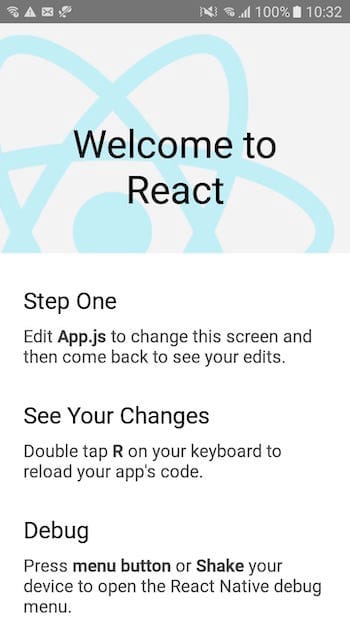
Change the UI of this front page by changing app.js and the page will look like this
Step 6: Authenticate Users using Facebook
Usage
Login
import React, { Component } from 'react';
import { View } from 'react-native';
import { LoginButton, AccessToken } from 'react-native-fbsdk';
export default class Login extends Component {
  render() {
    return (
      <View>
        <LoginButton
          onLoginFinished={
            (error, result) => {
              if (error) {
                console.log("login has error: " + result.error);
              } else if (result.isCancelled) {
                console.log("login is cancelled.");
              } else {
                AccessToken.getCurrentAccessToken().then(
                  (data) => {
                    console.log(data.accessToken.toString())
                  }
                )
              }
            }
          }
          onLogoutFinished={() => console.log("logout.")}/>
      </View>
    );
  }
};
Requesting additional permissions with Login Manager
// ...
import { LoginManager } from "react-native-fbsdk";
// ...
// Attempt a login using the Facebook login dialog asking for default permissions.
LoginManager.logInWithPermissions(["public_profile"]).then(
  function(result) {
    if (result.isCancelled) {
      console.log("Login cancelled");
    } else {
      console.log(
        "Login success with permissions: " +
          result.grantedPermissions.toString()
      );
    }
  },
  function(error) {
    console.log("Login fail with error: " + error);
  }
);
Now that the app is all connected to Facebook Auth, let’s write the actual code to call login/logout, etc functions.
First of all, I have created a separate file LoginController.js and imported it in App.js , just to maintain a good code structure.
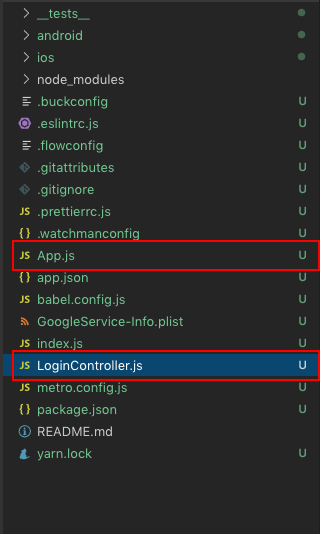
My App.js looks like following (nothing fancy, I’m not even gonna waste a gist here)
import React, { Fragment } from 'react';
import LoginController from './LoginController';
const App = () => {return (<LoginController/>);};
export default App;
Yes, that’s it 😆
5.1 Implement a Facebook login button
In the LoginController.js , I add the Facebook login button using the following code
import { LoginButton, AccessToken } from 'react-native-fbsdk';
.....(inside render)
 <LoginButton
          onLoginFinished={
            (error, result) => {
              if (error) {
                console.log("login has error: " + result.error);
              } else if (result.isCancelled) {
                console.log("login is cancelled.");
              } else {
                AccessToken.getCurrentAccessToken().then(
                  (data) => {
                    console.log(data.accessToken.toString())
                  }
                )
              }
            }
          }
          onLogoutFinished={() => console.log("logout.")}/>
....
This shows the beautiful Facebook-Button as per their marketing guidelines.
Overall, my LoginController.js file looks like this (a bit long, I know)


Step 7: Test your app on Android
Let’s now build the app for iOS. I am using a simulator, but you can always use a real device as well.
Run the app on Android simulator using
react-native run-android
Here’s how my Facebook Login app works
Conclusion
In this post, you learned how to implement Facebook login in your React Native app.
Complete source code of this tutorial is available in the React-native-facebook-Login-Starter
Next Steps
Now that you have learnt about setting up Push Notifications in React Native apps, here are some other topics you can look into
- Firebase — Integrate Firebase | Analytics | Push notifications | Firebase CRUD
- How To in React Native — Geolocation | Life cycle hooks | Image Picker | Redux implementation | Make API calls | Navigation | Translation | Barcode & QR code scan | Send & Read SMS | Google Vision
- Payments — Apple Pay | Stripe payments
- Authentication — Google Login| Facebook login | Phone Auth | Twitter login | Anonymous Login
- Create Instagram / Whatsapp Story Feature in React Native
- React Native life cycle hooks | Implement Redux | Async actions with Redux
- Create Awesome Apps in React Native using Full App
If you need a base to start your next React Native app, you can make your next awesome app using React Native Full App


Top comments (0)