
In this post, you will learn how to implement Facebook authentication in Ionic 5 apps using Firebase 🔥.
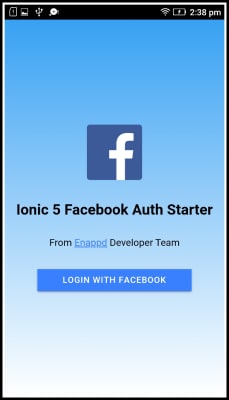
We’ll cook a sample app 👨🍳 , where users can login using their Facebook account. After login, users can see their basic profile information on the home page, and sessions are saved in Firebase. On repeat app start, users can auto-login using Firebase session.
Social logins — What and why
It’s helpful to use social sign-in with Ionic for your users who would rather not create and remember another username/password combination. Instead, you can allow users to sign in with accounts they already own. You don’t need to store hashed passwords to compare, you don’t have to handle sending sign up emails, and you don’t need to reset passwords. The user’s chosen provider will handle all of this for you. Plus, in mobile apps, the Facebook login is automatically done with the pre-installed Facebook app.
Facebook login — What and why
There are several reasons why you should use a Facebook login in your app
- Ease of use — When a new user uses your app, only two buttons clicks are required to login using Facebook. In other scenario, user will have to type in an email/password and login.
- No “forgot password” — When your app uses Facebook login, the user does not have to worry about forgetting password for your app’s login.
- No “verify email” — If you use a custom-email authentication of your own, you will have to verify the email if it is a valid one or not. Facebook login will always have a valid email/phone number associated.
- Single solution — Facebook login can allow your users to use single login credentials across multiple devices.
- Facebook integration — If your app uses Facebook authentication, you can use Facebook APIs inside your app as well. This can include fetching user tweets etc.
- Trust — Nowadays, people generally trust social logins moreover custom email logins. Social logins follow standard privacy protocols and hence are more reliable for information sharing.
Ionic Authentication
The ionic framework has been around for around 5 years and has been very popular among developers for its ease of usage over Swift / Java. Also in Ionic 5, you get to keep a single source code for both Android and iOS app.
What more can a developer ask for!
Ionic 5 is the latest version (at the time of writing this post) of Ionic and is much more reliable and robust than previous versions.
There are several ways of Authentication in Ionic 5 apps
- Social logins — Social logins are a popular and easy way of authentication in mobile apps. You must have seen Google, Facebook, Instagram logins in almost all the modern apps. Social logins are easy to use and more reliable for quick integrations.
- Create your own back-end — You can create your own back-end in Node.js, Go, Django or Ruby-on-rails, and connect your app authentication to your own back-end. This method is favored by developers who need full control over user authentication. But this method is the most time taking one as well.
- Back-end as a Service (BaaS) — You can use pre-built BaaS platforms which allows easy integration of authentication in your apps. Basically, these platforms provide you with a ready-made back-end, so you don’t have to make one on your own. Firebase, Parse, Back4App are some BaaS platforms.
- Firebase is the most popular among these for mobile apps, which we’ll study in the next section.
Firebase
Firebase is a Backend-as-a-Service (BaaS) platform. It started as a YC11 startup and grew up into a next-generation app-development platform on Google Cloud Platform. It is getting popular by the day because of the ease of integration and a variety of functionalities available on it.
A lot of quick integrations are available with Firebase. Some of these are listed below:
- Real-time database
- Email Authentication
- Social logins
- In-app messages
- Push notifications
- Analytics
- Crashlytics
- Remote config
Firebase is quickly growing to become the most popular mobile app back-end platform.
Firebase Authentication Options
Firebase not only provides ready-made email authentication but also provides authentication using a variety of social logins. You can see the authentication options available with Firebase.
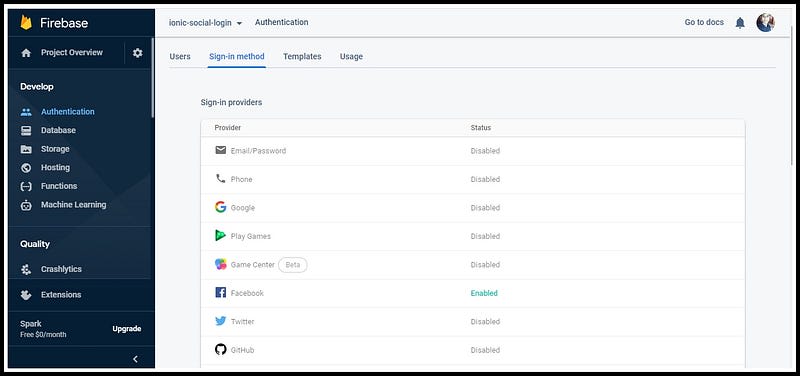
We will use Firebase to store user profile information once the Facebook login is done. This is the preferred method, as it is reliable for both apps and PWA.
Steps for Facebook authentication
We will follow these step-by-step instructions to create our Ionic 5 app with Facebook authentication
Step 1: Setting up a latest Ionic CLI
Step 2: Creating an Ionic 5 app
Step 3: Facebook Developer Console — Create your app
Step 4: Add your Platforms to Facebook
Step 5: Enable Facebook Sign-In in Firebase project
Step 6: Install the Cordova Facebook Plugin to connect your app with Firebase
Step 7: Authenticate Users using Facebook
Step 8: Store the Facebook auth tokens in Firebase
Step 9: Use Firebase to auto-login the user
Step 10: Test your app for Android
Step 1: Setting up a latest Ionic CLI
Make sure the latest version of the Ionic CLI is installed. Get the installed version by running ionic --version
My node version for this post is 12.13.1. See Node & npm environment setup.
(At the time of writing the blog, my node version is 12.13.1)
Step1.1: Installation
The Ionic CLI can be installed globally with npm:
$ npm install -g @ionic/cliAnd you are good to go. Check your environment information using
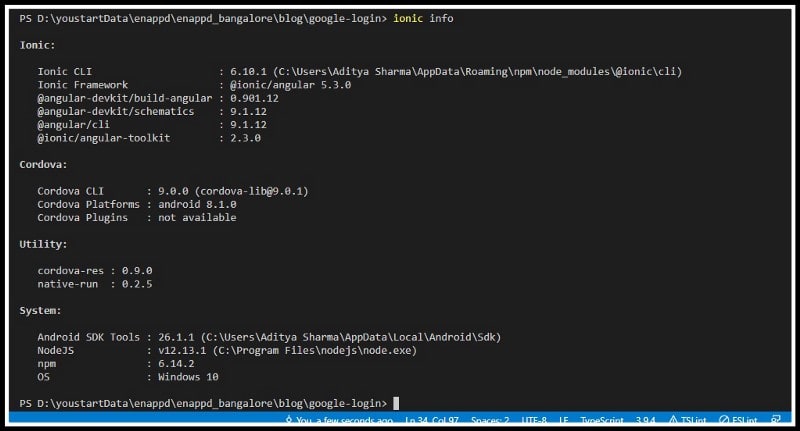
$ ionic info
This will display your runtime environment, something like following (Android SDK tools and XCode will require separate installations)
Step 2: Creating an Ionic 5 app
For the purposes of this post we’ll create an app using the below command:
$ ionic start facebook-login sidemenuFor now, we only need to know that this command creates a sidemnu layout app with the following structure.

Step 3: Facebook Developer Console
The first thing we need to do is to create a new application in Facebook’s developer dashboard, and this app is the one that Facebook will use to ask our users for their permission when we try to log them into our Ionic application.
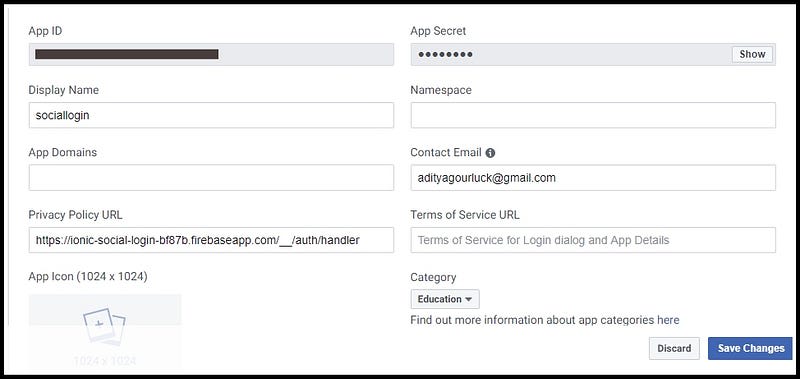
For that, you’ll need to go to Facebook developer console and create a new app.


Once we finish creating our app, we will go to Facebook app dashboard and pick App Id from there. It will be required in installing Facebook plugin in the app.
Step 4: Add your Platforms to Facebook
We need to let Facebook know which platforms we’ll be using (if it’s just web, iOS, or Android).
In our case, we will add all platforms iOS and Android.
To add the platforms, go ahead inside your Facebook dashboard and click on Settings, then right below the app’s information you’ll see a button that says Add Platform, click it.
You’ll see several options for the platforms you’re creating
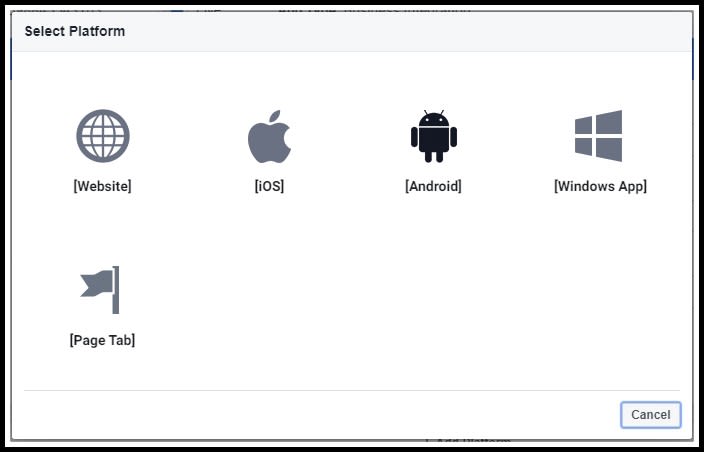
Add Platforms in Facebook dashboard
Let’s start with iOS:- You’ll see a form asking you for some information, right now we just need the Bundle ID.
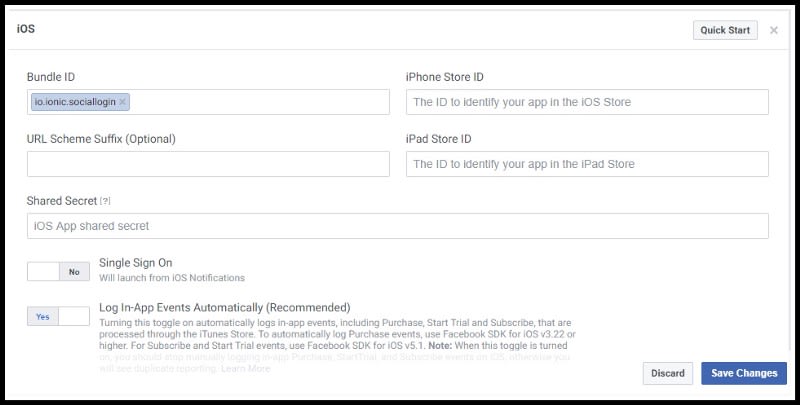
If you don’t know where to get the Bundle ID, it’s the same as the package name when you create an Ionic app, it’s inside your config.xml file:
<widget id="io.ionic.sociallogin" version="0.0.1" xmlns="http://www.w3.org/ns/widgets" xmlns:cdv="http://cordova.apache.org/ns/1.0">
Once you add the Bundle ID, just follow the process to create the app.
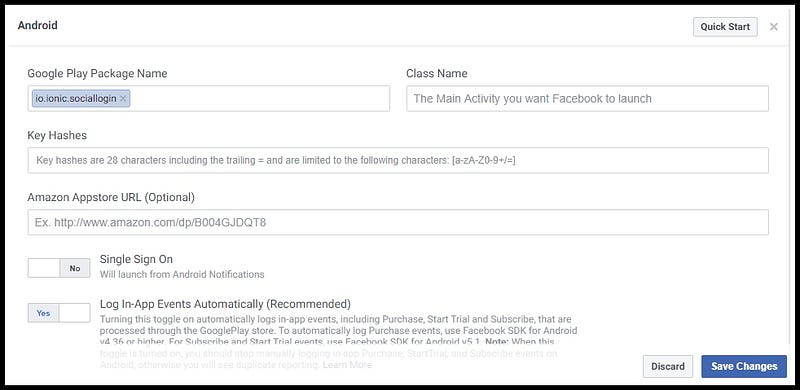
Android:- The difference is that instead of Bundle ID, Android calls it “Google Play Package Name”.
Step 5: Enable Facebook Login in Firebase.
Now that everything is set up on Facebook’s side, we need to go into our Firebase console and enable Facebook authentication for our app.
To enable Facebook, you’ll need to go to your Firebase Console and locate the app you’re using (or create a new Firebase project)
Once you’re inside the app’s dashboard, you’re going to go into Authentication > Sign-In Method > Facebook and are going to click the Enable toggle.
It will ask you App ID and App secret. Copy it from your Facebook console, under your app’s settings.
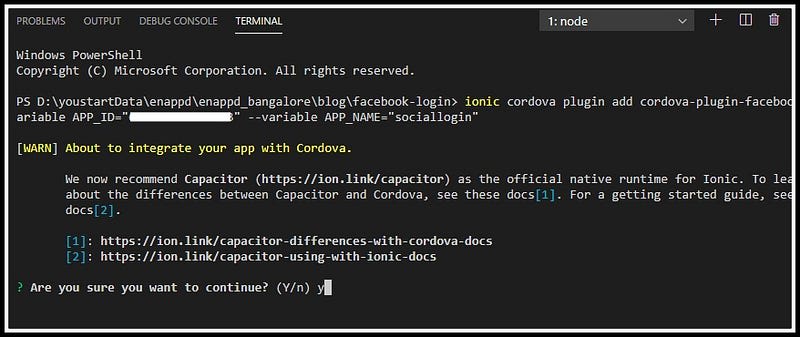
Step 6: Install the Facebook Cordova Plugin
Open your terminal and type
$ ionic cordova plugin add cordova-plugin-facebook4 --variable APP_ID="FACEBOOK_APP_ID" --variable APP_NAME="myApplication"
You’ll need to replace the values or FACEBOOK_APP_ID and APP_NAME with your real credentials. You can find both of these inside your Facebook Developers Dashboard.
You’ll see a warning from Ionic saying they prefer Capacitor over Cordova now. But that is ok, you can proceed with Cordova itself. If you want to implement Facebook login with Capacitor, check my other blog.
Open your terminal and run this command to install Facebook package from Ionic Native.
$ npm install --save @ionic-native/facebook
Also, we need to install AngularFire2 npm module and Firebase, which actually connects the Firebase functionality to Ionic app. To install the module, run
$ npm install firebase @angular/fire --save
Also, include environment ,AngularFireModule and AngularFireAuthModulein app.module.ts
Notice that Firebase is initialized in your app with
AngularFireModule.initializeApp(environment.firebaseConfig)
where environment.config is the Firebase config you picked from Firebase project.
Details of this step can be found in our blog How to connect Firebase with Ionic 5 App
To connect your app to Firebase, you first need a Firebase project. From the project, pick up your Firebase config parameters and include them in an environment.ts file at the root of your Ionic project. The environment file will look like following.

You can create two different environment files for development and production environments — environment.ts and environment.prod.ts
Step 7: Authenticate Users.
The first thing we need to do is to get the authorization token from Facebook. To do that, we need to import Facebook plugin from Ionic Native and ask our user to log in. The import and login functions will be as follows:
This function will give you Facebook Token and from this token, we will login user to Firebase app.
Step 8— Store the Facebook auth token in Firebase
In the previous step, the authentication is done via a Facebook app on your phone. Once logged in, you will receive a token response. This info will be used to connect to Firebase in the success of Facebook login.
So, in short, we have logged in via Facebook and created a Firebase user using the Facebook auth token. From now on, Firebase can handle your login/logout in the app. After we store the token in Firebase, we navigate to a Profile page.
Get user profile info
In the Profile page, we will get the profile information of the user using the Firebase Auth Module again.
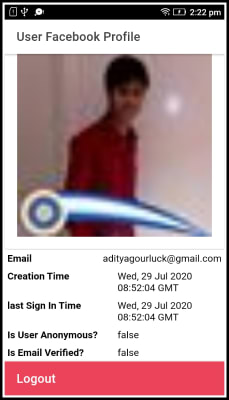
Note:- If you want profile image with better resolution you can check Facebook graph API
Logout function
Since Firebase is now handling the login/logout, the logout function in profile.page.ts the logout code will look like following.
Step 9— Use Firebase to auto-login the user
At this point, we have covered the following points
- Login with Cordova Facebook plugin
- Pass Facebook auth token to Firebase
- Fetch user profile info via the Facebook plugin
- Logout using Firebase
Now, if the user does not logout and leaves the app, we want the app to auto-login the next time user starts the app. For this, we will use Firebase’s onAuthStateChanged function at the start of the app. If there is a valid user logged in, it will return the user’s information. Our app.component.ts the file will look like following
Step 10: Test your app on Android
To test this app you’ll need to run in a real device. You can do it generating an APK using the command ionic cordova run android . Here we’ll use the first method.
So, run the below commando to generate your APK.
$ ionic cordova build android
Note: If your app still in Development Mode then it throws an error like below image.

Follow these steps to make it live:
- Login to Facebook developer account https://developers.facebook.com/
- Goto you app dashboard
- Switch on to change status live (before that you just need to fill privacy policy URL and etc. in basic setting).

Conclusion
In this post, you learnt how to implement Facebook login in your Ionic 5 app. You also learnt how to auto-login your user using info stored in Firebase. The Firebase integration done for Authentication, can be used for various purposes like Database CRUD operations, push notifications, analytics etc.
Next Steps
If you liked this blog, you will also find the following blogs interesting and helpful. Feel free to ask any questions in the comment section
- Ionic Payment Gateways — Stripe | PayPal | Apple Pay | RazorPay
- Ionic Charts with — Google Charts | HighCharts | d3.js | Chart.js
- Ionic Social Logins — Facebook | Google | Twitter
- Ionic Authentications — Via Email | Anonymous
- Ionic Features — Geolocation | QR Code reader | Pedometer| Signature Pad
- Media in Ionic — Audio | Video | Image Picker | Image Cropper
- Ionic Essentials — Native Storage | Translations | RTL
- Ionic messaging — Firebase Push | Reading SMS
- Ionic with Firebase — Basics | Hosting and DB | Cloud functions
Ionic React Full App with Capacitor
If you need a base to start your next Ionic 5 React Capacitor app, you can make your next awesome app using Ionic 5 React Full App in Capacitor
Ionic Capacitor Full App (Angular)
If you need a base to start your next Angular Capacitor app, you can make your next awesome app using Capacitor Full App

Ionic Full App (Angular and Cordova)
If you need a base to start your next Ionic 5 app, you can make your next awesome app using Ionic 5 Full App


Top comments (0)