
Introduction
Are you looking for a powerful, open-source backend for your web or mobile application? Look no further than Appwrite! Appwrite offers a suite of features such as authentication, database management, and storage solutions that make it easy to develop and deploy robust applications.
In this tutorial, we will walk you through the steps to install Appwrite on Ubuntu, a popular Linux operating system. With our step-by-step guide, you can have Appwrite up and running on your Ubuntu machine in no time.
Note: Original source of this article can be found on Axxellanceblog.
Whether you are a seasoned developer or just getting started, this tutorial will provide you with the tools and knowledge needed to get started with Appwrite. So, let's dive in and learn how to install Appwrite on Ubuntu!
What is Appwrite
Appwrite is an open-source platform that offers a range of backend solutions for web and mobile applications. With Appwrite, developers can easily add robust features to their applications such as authentication, database management, and storage solutions. This platform is designed to be developer-friendly and offers an intuitive interface that makes it easy to get started.
One of the unique features of Appwrite is its modular design. This platform is designed to be modular, meaning that developers can easily add or remove features as needed. This modular design allows developers to build custom solutions that meet the specific needs of their applications without having to rely on pre-built solutions that may not be a perfect fit.
Appwrite is also highly scalable, making it ideal for applications of all sizes. Whether you are building a small prototype or a large-scale application, Appwrite can help you manage your backend needs. Plus, since Appwrite is open-source, you can customize it to meet the specific needs of your application, making it a highly flexible and versatile solution.
If you are a developer looking for a robust backend solution for your application, Appwrite is definitely worth considering. With its modular design, scalability, and flexibility, Appwrite is a powerful platform that can help you bring your application to the next level.
What we will talk about
Now let’s talk about what we are going to do in this article in order to successfully install Appwrite on our Ubuntu server.
- Updating our ubuntu server #
- Installing Docker and Docker Compose Plugin #
- System requirement for Appwrite #
- Installing Appwrite #
- Accessing the Appwrite dashboard #
- Controlling Appwrite Services #
1. Updating our ubuntu server
Updating and upgrading an Ubuntu server is a straightforward process. To update the package list on your server, simply run the command sudo apt-get update in the terminal. This will download and refresh the package list from the Ubuntu repositories.
To upgrade the packages on your server to the latest available versions, run the command sudo apt-get upgrade. This will upgrade all installed packages to their latest available versions. It's recommended to perform these updates regularly to keep your Ubuntu server up to date with the latest security patches and bug fixes.
The below terminal command will update and upgrade your Ubuntu server simultaneously without having you copy and paste the command twice.
sudo apt-get update && sudo apt-get upgrade
2. Installing Docker and Docker Compose Plugin
Docker is a popular platform that allows developers to build, package, and deploy applications in a portable and scalable manner. If you are using an Ubuntu server, installing Docker is a simple process that can be completed in just a few steps.
- Install Docker: To install Docker, run the following command in the terminal:
sudo apt-get install docker.io
- Install Docker Compose plugin To install the Docker Compose plugin, run the following command in the terminal:
sudo apt install docker-compose-plugin
- Start and enable Docker Once Docker is installed, you can start the Docker service and enable it to start automatically on boot with the following commands:
sudo systemctl start docker
sudo systemctl enable docker
- Verify Docker installation To verify that Docker is installed correctly and running, you can run the following command to check the version:
docker --version
or
docker -v
This command should output the version of Docker installed on your server.
Congratulations! You have successfully installed Docker on your Ubuntu server. Now you can start building and deploying applications in a portable and scalable manner using Docker.
3. System requirement for Appwrite
Appwrite is made to function well on deployments of all sizes. Appwrite can be executed on systems with as low as 1 CPU core, 2GB of Memory, and a Docker-compatible operating system.
Version 2 of Docker Compos is necessary for Appwrite. Make sure your Docker installation has been upgraded to support Composer V2 before installing Appwrite.
4. Installing Appwrite
A single Docker command can be used to install Appwrite. In essence, this command causes Docker to download and launch the Appwrite services simultaneously.
In the current directory, the command creates a new Appwrite directory, which serves as the foundation for your Appwrite instance:
docker run -it --rm \\
    --volume /var/run/docker.sock:/var/run/docker.sock \\
    --volume "$(pwd)"/appwrite:/usr/src/code/appwrite:rw \\
    --entrypoint="install" \\
    appwrite/appwrite:1.2.1
Note: The latest version of Appwrite at the time of writing this article is 1.2.1, so please do remember to check the official Appwrite website for the latest version of Appwrite.
Proceed to the following prompt to configure your Appwrite instance's initial configuration choices. At each prompt, you can press Enter to get the default values.
After that, Docker executes the Docker compose command to finish the setup. Once this is complete, you should see:
Appwrite installed successfully
5. Accessing the Appwrite dashboard
Once the Appwrite container is running, you can access the Appwrite dashboard by opening a web browser and navigating to http://server-ip-address. This will take you to the Appwrite setup wizard, where you can create an account and configure Appwrite for your needs.
Note: Appwrite uses port (
80), so you need to ensure the server’s firewall provides external access to the HTTP port (80)
Once the port has been opened, go to the server's URL or IP address and you should see the Appwrite sign-up form there.

The root user, or administrator user, for your Appwrite instance, is created using the user information you supply during this first sign-up.
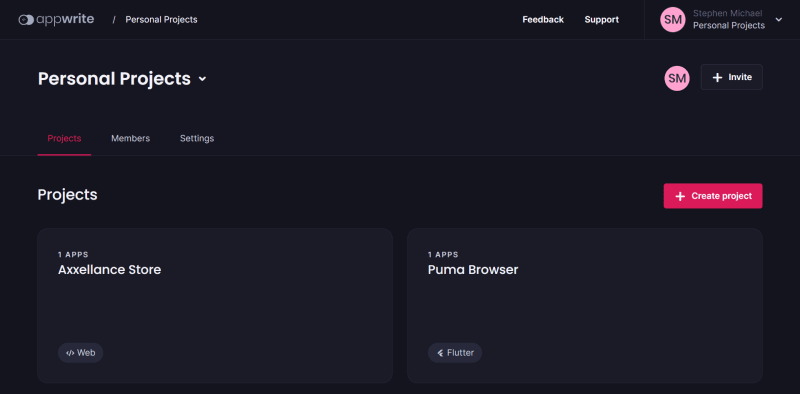
As soon as the administrator user has been created, you are sent to the main Appwrite dashboard, where you may begin building Appwrite projects.
6. Controlling Appwrite Services
You may manage Appwrite's state by using Docker Compose, which is used to run Appwrite. You must be in the Appwrite directory to accomplish this. The Appwrite services can then be managed using the Docker Compose instructions from there.
Below are a few illustrations of effective Docker Compose commands for using your Appwrite instance.
- To restart the Appwrite services:
sudo docker compose restart
- To stop the services:
sudo docker compose stop
- To stop and uninstall the services:
sudo docker compose down -v
This option leaves the Docker Compose files for Appwrite intact, so you can reinstall and restart Appwrite with the next command.
- To start the services back up:
sudo docker compose up -d
Conclusion
In conclusion, installing Appwrite on an Ubuntu server is a straightforward process that can be completed in just a few steps. With Appwrite, developers can easily build and deploy applications with powerful backend solutions, all while maintaining a high level of security and scalability.
To install Appwrite on your Ubuntu server, simply follow the steps outlined in this guide. First, ensure that Docker is installed on your server. Then, pull the latest Appwrite Docker image from the Docker Hub repository and start the container. Finally, access the Appwrite dashboard through your web browser and configure it to your needs.
By following these steps, you can unleash the full potential of Appwrite on your Ubuntu server and take advantage of its powerful features for building and deploying modern applications.
So what are you waiting for? Get started with Appwrite today and experience the future of application development.
More Information
If you're looking for more information on this subject, you might want to check out the following sources. Please be aware that while we have offered these in the hopes that they would be helpful, we are unable to guarantee their validity or timeliness.
- https://appwrite.io/docs/installation
- https://appwrite.io/docs/production
- https://appwrite.io/docs/environment-variables
- https://appwrite.io/docs/email-delivery
Follow ME
Hey there! If you're interested in tech or programming articles, you should definitely give me a follow on any of the social media platforms below. I regularly post articles related to tech and programming, and I share valuable resources and insights. Plus, by following me, you'll be able to stay up to date on all the latest and greatest in the world of tech and programming. So, what do you say? Will you give me a follow?
Follow me on Dev.to, Twitter, LinkedIn, GitHub, Medium, Facebook, and my blog's Facebook page.

Top comments (0)