
Hello everyone! In today's article, I'm going to show you two ways you can make a camera follow the player character in Godot!
The easy way
To make the camera follow the player is really easy, just create a camera node inside your player node and that's it!

Running the game in the current state, you'll notice that the player is now always in the center, that's because the camera is following the player!
Is that it? Is this really simple?

As this works for prototyping, you'll hit some problems later in your game dev cycle, by making the camera inside your character, the character will need to know things about the world, which it doesn't actually need to know, like the size of the world you're in.
To fix that, we're going the long hard way.
The long way
Deleting the camera
We need to delete the camera we created inside our player node, so we can start creating a new one.
Organizing the code
We're going to create a new folder inside the Player folder, called it camera! All the code and nodes related to the player camera will be stored here.
The project strucutre should look like this now:
res:///
├─ Characters/
│  ├─ Player/
│  │   ├─ Camera/
├─ Scenes/
RemoteTransform2D
Before we start developing our camera, we need to attach a RemoteTransform2D.
This is a very cool node! It pushes its position into another node that you tell it to, in our case, the player camera.
So click on your player node and add a new node of type RemoteTransform2D.
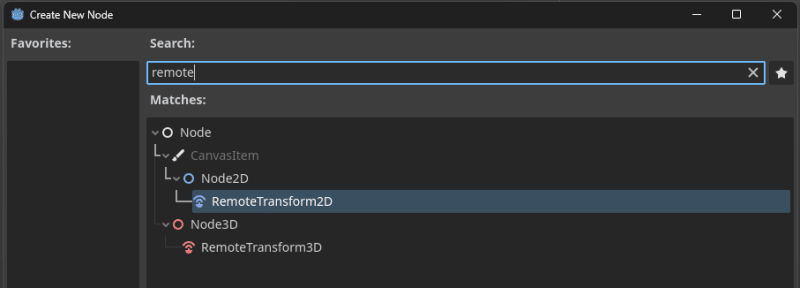
You'll notice that the node shows a warning, no need to worry, because we're going to set what this note will send signals to dynamically on our camera script!
Player camera
We're all set to start developing our camera, so lets get to it.
Create the scene
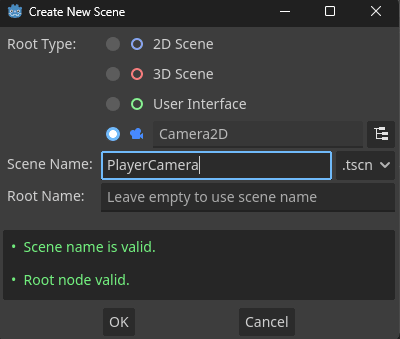
Now that our folders are nice and organized, let's go ahead and create our player camera, really simple!
Let's start by create a PlayerCamera scene into the Player/Camera folder! But this time, select other node and when prompted to select the node type, look for Camera2D.
Camera Script
Right click the PlayerCamera node and Attach a script to it!
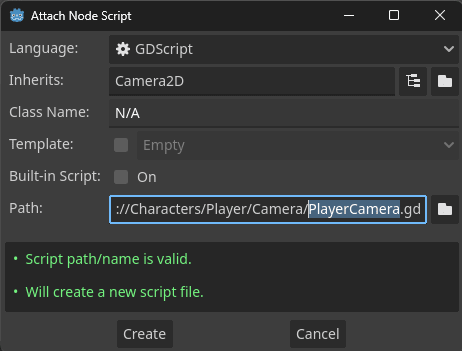
For now, the script will be really simple, but we're going to revisit it when we dynamically instantiate the player into the scene.
In the PlayerCamera.gd, start by create a func ready():, in there we're going to find the player in the current scene and attach to our camera.
func _ready():
    # This script is used to set the remote path of the player's RemoteTransform2D
    # so that the player's position is synced across the nodes.
    var playerRemoteTransform2d = get_tree().current_scene.get_node("Player/RemoteTransform2D");
    playerRemoteTransform2d.remote_path = get_path();
Let's analyze whats happening here.
Getting the player node in the scene
The first line we're getting the RemoteTransform2D inside our Player by using get_node(...), inside our current_scene that is in our tree of nodes get_tree().
It's somethig like this
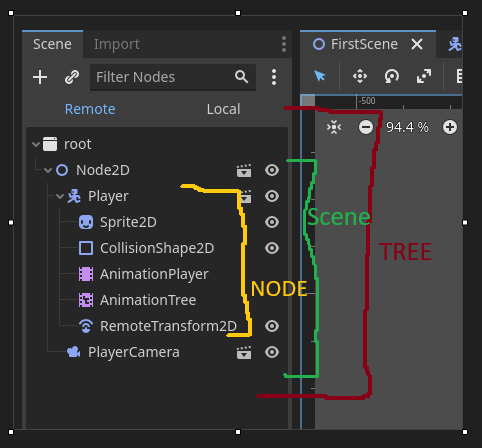
When you run your project, in the scene tab you can change to Remote and find all nodes that are currently running, when you have nodes that are singleton/auto loads, they'll show outside the scene and inside the tree.
Attaching the camera to the RemoteTransform2d
The second line, sets the remote_path of the Player/RemoteTransform2D to our player camera, to do that we use the get_path() method, which will return the path of the current node.
Updating our Scene!
We have everything we need for our camera to follow our player around!
Now, let's add our PlayerCamera scene into our FirstScene, you can do so by dragging in dropping the PlayerCamera into the scene main node.
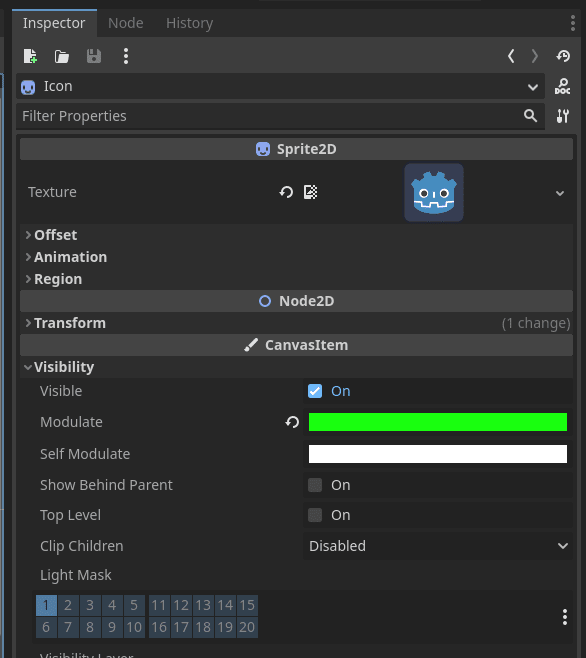
Also, to get a sense our player is moving, Drag and dro the icon.svg (the godot icon) and set the modulate to another color, this will make it easier to distinguish between this image and the player.
To do that, click on the icon node inside the scene, navigate to Canvas Item and then modulate, you can give the color you want here, I gave i a light green.
Your scene should look something like this.
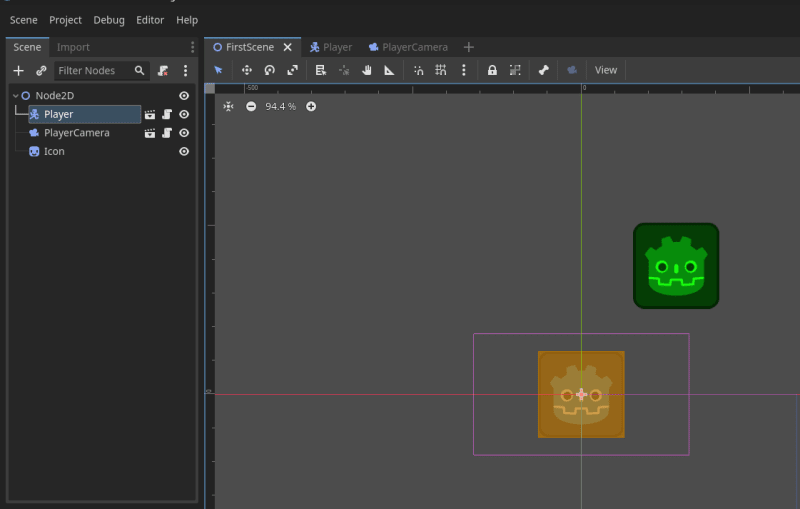
Now run your project and you can see the player moving and your camera following it! How cool is that?
Congratulations!
We learn a lot in this series and we can see our project taking shape! Now that we have a functional player and camera, we can start building the world around it!
Thank you
As always, thank you for reading and I hope you're enjoying it and learning from it!
I see you, in the next article 😄

Top comments (0)