Hugo Static Site Continuous Deployment to DigitalOcean
Introduction
TL;DR
This is my second progress update for the DigitalOcean ["DO"] Hackathon.
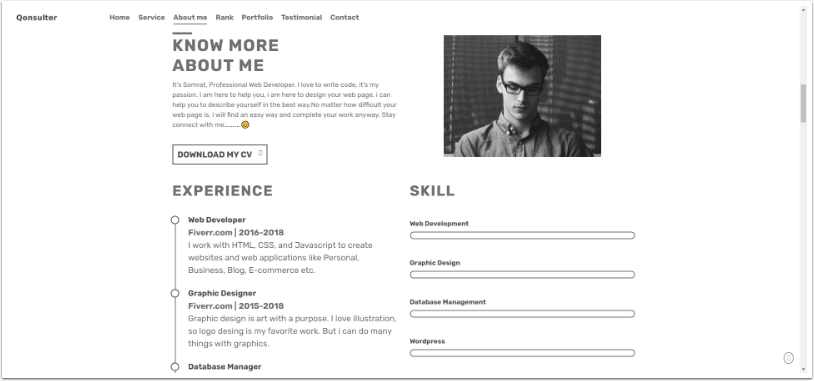
In this tutorial, you will fork a Hugo sample repository, add and configure a new Hugo theme, and deploy your portfolio site to DigitalOcean app platform. Furthermore, you can perform advanced configuration to the Hugo theme to customize the portfolio to your preference.
The advantage of continuous deployment ["CD"] is that any changes to your GitHub repository is continuously deployed to DO without any manual steps required. In other words, it is literally a one-push deployment from your computer to production.
View a demo of the portfolio app on DO.


Prerequisites
GitHub repository. This article "Create a repo" walks through creating your GitHub repository.
Hugo. The YouTube video "Build a free website with Hugo in 2 hours" walks through installing and setting up Hugo.
DigitalOcean account (new signup with $100 free credit).
Visual Studio Code editor (or any editor of your choice).
Step 1 - Fork the sample Hugo repository from DO
Getting Started
These steps will get the sample portfolio for you using DO.
- Fork the GitHub repo
- Clone the forked repo
Warning: Following these steps will result in charges for the use of DO services, which can be offset with free credit if you sign up with my affiliate link above.
1. Fork the GitHub repo
To follow along this article, you need to be running against your own copy of this application.
Open your web browser, navigate to the GitHub repo digitalocean/sample-hugo and click the Fork button above.
After forking the repo, you should be viewing the README in your own repo, i.e. https://github.com/{REPO-OWNER}/sample-hugo.
2. Clone the forked Repo
If you are using Windows, note that there are two bash shell executables in Windows:
WSL Bash - path C:\Windows\System32\bash.exe
Git Bash - path C:\Program Files\Git\bin\bash.exe
The default bash shell used in Visual Studio Code [" vscode"] is Git Bash. However, to execute Hugo commands, we need the WSL Bash.
All Unix commands are executed in Git Bash ["$"], except Hugo commands that are executed in the WSL Bash [">>"].
Execute the following command to clone the forked repo to your computer.
$ git clone ssh://git@github.com/{REPO-OWNER}/sample-hugo.git {LOCALDIR}
The above will clone the forked repository into your LOCALDIR, or project folder ["root"], with the following project structure:
 root/
   |- .gitignore
   |- .gitmodules
   |- config.black-and-light.toml
   |- config.toml
   |- configTaxo.toml
   |- LICENSE
   |- README.md
   +- .do/
   +- content/
   +- data/
   +- layouts/
   +- static/
   +- themes/
Step 2 - Deploy Site to DO
Getting Started
To deploy your site to DO.
- Configure DO
- Edit README
- Git Add, Commit and Push
- Deploy to DO
1. Configure DO
After cloning your repository, open and edit the file deploy.template.yaml under the .do folder.
 spec:
   name: sample-hugo
   static_sites:
   - build_command: rm -r ./public; hugo --minify --destination ./public
     environment_slug: hugo
     git:
       branch: main
       repo_clone_url: https://github.com/{REPO-OWNER}/sample-hugo.git
     name: sample-hugo
Find the repo_clone_url setting and change the REPO-OWNER to your GitHub username.
2. Edit README
Open and edit the file README.md under the root folder.
Search for '![Deploy to DO]' and change the username in the URL to your GitHub username:
 Old: https://cloud.digitalocean.com/apps/new?repo=https://github.com/digitalocean/sample-hugo/tree/main
 New: https://cloud.digitalocean.com/apps/new?repo=https://github.com/{REPO-OWNER}/sample-hugo/tree/main
3. Git Add, Commit and Push
Save and upload all local changes to your GitHub repo using git add, commit and push.
4. Deploy to DO
You are now ready to deploy your site to DO.
Open your web browser, navigate to your GitHub repo, and click on the Deploy to DO button.
If you had performed the above steps correctly, you will see the DO app setup with some steps.
Follow the instructions to complete your DO app setup, and you should see your live URL with the default theme black-and-light.
Copy and note down your live URL, as this will be required later.

Step 3 - Add a Theme
You can browse a complete list of free Hugo themes to consider.
In your root folder, add your theme by typing the following:
$ git submodule add https://github.com/Somrat37/somrat.git themes/somrat
Warning: Do not use git submodule add if you wish to make changes to the theme as you will not be able to push any changes to your GitHub repo. Use git clone instead.
The above will copy your theme to the subfolder themes, with the following directory structure:
 root/
 +- themes/
    +- black-and-light/
    +- somrat/
       |- netlify.toml
       |- README.md
       |- theme.toml
       +- archetypes/
       +- assets/
          +- css/
          +- js/
       +- exampleSite/
          |- config.toml
          +- .forestry/
          +- data/
          +- i18n/
          +- static/
       +- images/
       +- layouts/
          |- 404.html
          |- index.html
          +- partials/
             +- post_meta/
             +- svg/
             +- widgets/
          +- _default/
       +- static/
In a lot of ways, every theme structure is kind of a mirror image of the Hugo structure. If you want to customize your theme, you will have to add the same filename to the same folder in your root directory.

Step 4 - Enable New Theme
Getting Started
To customize the basic settings of the new theme.
- Rename existing config file
- Copy config file from themes
- Copy folders from themes
- Default Hugo version
- Running local Hugo server
1. Rename existing config file
Rename the default config.toml in your *_root *_folder to *config.black-and-light.toml, *or whatever name you want. This file configures the default theme that was used in the forked repository.
$ git mv config.toml config.black-and-light.toml
2. Copy config file from themes
Copy the file config.toml from the subfolder themes/somrat/exampleSite/ to your root folder.
$ cp themes/somrat/exampleSite/config.toml .
3. Copy folders from themes
Copy the following folders from subfolder themes/somrat/exampleSite/ to your root folder.
 $ cp -r themes/somrat/exampleSite/data .
 $ cp -r themes/somrat/exampleSite/static .
Each of the individual elements can be replaced within the folders data and static. Data contains the text elements, while static contains the image elements.
4. Default Hugo version
The default Hugo version for DO is 0.78.0 (non-extended). To change this, set an environment variable, named HUGO_VERSION, to the desired version. This is to ensure that the Hugo version >= Theme Hugo requirement.
For example, the somrat theme has a minimum Hugo version of 0.60.0.
5. Running local Hugo server
Build your Hugo static site by typing the following command in your WSL Bash shell:
>> hugo server -D
If successful, you should see some build output messages followed by this message:
Web Server is available at //localhost:1313/ (bind address 127.0.0.1)
Navigate to http://localhost:1313 to view your Hugo static site. Press Ctrl+C to stop the Hugo server.
Step 5 - Add a Section
To add a new section within the homepage requires advanced knowledge of Hugo and Html / Javascript / Css. The README file of my GitHub repository contains details on how to:
- Add a new section in homepage.yml
- Add a new section in index.html
- Add a new menu in config.toml
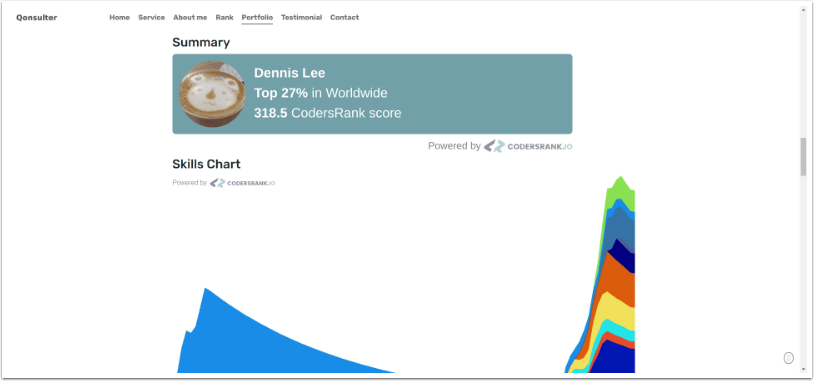
The new section GLOBAL RANK displays both Summary and Skill Chart widgets from Codersrank (signup required).
Conclusion
In this tutorial, you forked a Hugo sample repository, added and configured a new Hugo theme, and deployed your portfolio site to DigitalOcean app platform. Furthermore, you can perform advanced configuration to the Hugo theme to customize the portfolio to your preference.
Get the Source Code
You can download the above source code from GitHub repository dennislwm/portfolio-do-hackathon.
Python, R and Metatrader for Happi Traders
FREE $100 CREDIT
BUY A COFFEE
BE A HAPPI PATREON
REACH OUT
Dev.to: https://dev.to/dennislwm
GitHub: https://github.com/dennislwm
Twitter: https://twitter.com/hypowork
YouTube: https://youtube.com/leetradetitan

Top comments (0)